Operating and Installation manual
Page 2
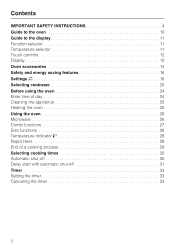
... controls 12 Display 12 Oven accessories 14 Safety and energy saving features 16 Settings 18 Selecting cookware 20 Before using the oven 24 Enter time of day 24 Cleaning the appliance 25 Heating the oven 25 Using the oven 26 Microwave 26 Combi functions 27 Solo functions 28 Temperature indicator 3 28 Rapid Heat 28 End of a cooking process 29 Selecting cooking times 30 Automatic shut-off 30 Delay start with automatic shut...
... controls 12 Display 12 Oven accessories 14 Safety and energy saving features 16 Settings 18 Selecting cookware 20 Before using the oven 24 Enter time of day 24 Cleaning the appliance 25 Heating the oven 25 Using the oven 26 Microwave 26 Combi functions 27 Solo functions 28 Temperature indicator 3 28 Rapid Heat 28 End of a cooking process 29 Selecting cooking times 30 Automatic shut-off 30 Delay start with automatic shut...
Operating and Installation manual
Page 3
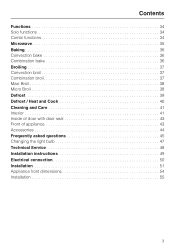
Contents Functions 34 Solo functions 34 Combi functions 34 Microwave 35 Baking 36 Convection bake 36 Combination bake 36 Broiling 37 Convection broil 37 Combination broil 37 Maxi Broil 38 Micro Broil 38 Defrost 39 Defrost / Heat and Cook 40 Cleaning and Care 41 Interior 41 Inside of door with door seal 43 Front of appliance 43 Accessories 44 Frequently asked questions 45 Changing the light bulb 47 Technical Service 48 Installation instructions 49 Electrical connection 50 Installation 51 Appliance front dimensions 54 Installation 55 3
Contents Functions 34 Solo functions 34 Combi functions 34 Microwave 35 Baking 36 Convection bake 36 Combination bake 36 Broiling 37 Convection broil 37 Combination broil 37 Maxi Broil 38 Micro Broil 38 Defrost 39 Defrost / Heat and Cook 40 Cleaning and Care 41 Interior 41 Inside of door with door seal 43 Front of appliance 43 Accessories 44 Frequently asked questions 45 Changing the light bulb 47 Technical Service 48 Installation instructions 49 Electrical connection 50 Installation 51 Appliance front dimensions 54 Installation 55 3
Operating and Installation manual
Page 4
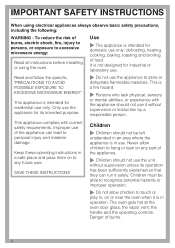
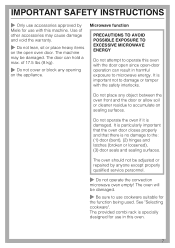
... its operation has been sufficiently explained so that they can lead to excessive microwave energy: Read all instructions before installing or using electrical appliances always observe basic safety precautions, including the following: WARNING - Read and follow the specific, "PRECAUTIONS TO AVOID POSSIBLE EXPOSURE TO EXCESSIVE MICROWAVE ENERGY". Only use the appliance for residential use only: defrosting, heating, cooking, baking, roasting and broiling of burns, electric shock...
... its operation has been sufficiently explained so that they can lead to excessive microwave energy: Read all instructions before installing or using electrical appliances always observe basic safety precautions, including the following: WARNING - Read and follow the specific, "PRECAUTIONS TO AVOID POSSIBLE EXPOSURE TO EXCESSIVE MICROWAVE ENERGY". Only use the appliance for residential use only: defrosting, heating, cooking, baking, roasting and broiling of burns, electric shock...
Operating and Installation manual
Page 5
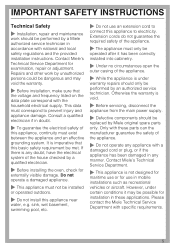
... use an extension cord to electricity. Please contact the Miele Technical Service Department with the household electrical supply. Consult a qualified electrician if in mobile installations such as recreational vehicles or aircraft. Contact Miele's Technical Service Department. ~ This appliance is any appliance with national and local safety regulations and the provided installation instructions. IMPORTANT SAFETY INSTRUCTIONS Technical Safety ~ Installation, repair and maintenance work by Miele original spare parts...
... use an extension cord to electricity. Please contact the Miele Technical Service Department with the household electrical supply. Consult a qualified electrician if in mobile installations such as recreational vehicles or aircraft. Contact Miele's Technical Service Department. ~ This appliance is any appliance with national and local safety regulations and the provided installation instructions. IMPORTANT SAFETY INSTRUCTIONS Technical Safety ~ Installation, repair and maintenance work by Miele original spare parts...

Operating and Installation manual
Page 6
... not open the oven door. Oils and grease could catch fire. ~ Times for cleaning and disinfecting utensils and cookware. Cover meals when cooking with herbs, gel, etc. Leaving the machine on and select the lowest temperature. Due to "Off" and disconnect the power supply. with grease or oils. This is a fire hazard. ~ Supervise cooking with the microwave function. When using residual heat to...
... not open the oven door. Oils and grease could catch fire. ~ Times for cleaning and disinfecting utensils and cookware. Cover meals when cooking with herbs, gel, etc. Leaving the machine on and select the lowest temperature. Due to "Off" and disconnect the power supply. with grease or oils. This is a fire hazard. ~ Supervise cooking with the microwave function. When using residual heat to...
Operating and Installation manual
Page 7
... door open since open oven door. See "Selecting cookware". The oven should not be damaged. It is particularly important that the oven door closes properly and that there is important not to microwave energy. IMPORTANT SAFETY INSTRUCTIONS ~ Only use accessories approved by anyone except properly qualified service personnel. ~ Do not operate the convection microwave oven empty! The oven will be damaged. ~ Be sure to the: (1) door (bent), (2) hinges and latches...
... door open since open oven door. See "Selecting cookware". The oven should not be damaged. It is particularly important that the oven door closes properly and that there is important not to microwave energy. IMPORTANT SAFETY INSTRUCTIONS ~ Only use accessories approved by anyone except properly qualified service personnel. ~ Do not operate the convection microwave oven empty! The oven will be damaged. ~ Be sure to the: (1) door (bent), (2) hinges and latches...
Operating and Installation manual
Page 9
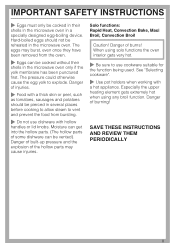
... punctured first. Solo functions: Rapid Heat, Convection Bake, Maxi Broil, Convection Broil Caution! Hard-boiled eggs should be cooked in their shells in the microwave oven. SAVE THESE INSTRUCTIONS AND REVIEW THEM PERIODICALLY 9 Moisture can get into the hollow parts. (The hollow parts of the hollow parts may burst, even once they have been removed from bursting. ~ Do not use cookware suitable for the function being...
... punctured first. Solo functions: Rapid Heat, Convection Bake, Maxi Broil, Convection Broil Caution! Hard-boiled eggs should be cooked in their shells in the microwave oven. SAVE THESE INSTRUCTIONS AND REVIEW THEM PERIODICALLY 9 Moisture can get into the hollow parts. (The hollow parts of the hollow parts may burst, even once they have been removed from bursting. ~ Do not use cookware suitable for the function being...
Operating and Installation manual
Page 11
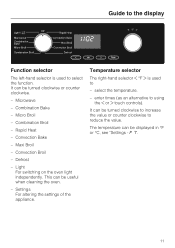
... Broil - Maxi Broil - Rapid Heat - enter times (as an alternative to reduce the value. It can be turned clockwise or counter clockwise. - Combination Bake - Convection Broil - This can be useful when cleaning the oven. - Settings For altering the settings of the appliance. Temperature selector The right-hand selector V °F W is used to - The temperature can be displayed in °F or °C, see "Settings - P 7". 11 Light For switching on the oven light independently. Convection Bake - Defrost - Guide...
... Broil - Maxi Broil - Rapid Heat - enter times (as an alternative to reduce the value. It can be turned clockwise or counter clockwise. - Combination Bake - Convection Broil - This can be useful when cleaning the oven. - Settings For altering the settings of the appliance. Temperature selector The right-hand selector V °F W is used to - The temperature can be displayed in °F or °C, see "Settings - P 7". 11 Light For switching on the oven light independently. Convection Bake - Defrost - Guide...
Operating and Installation manual
Page 12
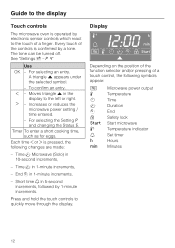
... W is pressed, the following symbols appear: _ 6 m T S 0 Start 3 N h min Microwave power output Temperature Time Duration End Safety lock Start microwave Temperature indicator Set timer Hours Minutes 12 Time T Microwave (Solo) in 5-second increments, followed by electronic sensor controls which react to the touch of the controls is operated by 1-minute increments. For selecting the Setting P and changing the Status S. Guide to the display Touch controls The microwave oven is confirmed by a tone. Every touch of...
... W is pressed, the following symbols appear: _ 6 m T S 0 Start 3 N h min Microwave power output Temperature Time Duration End Safety lock Start microwave Temperature indicator Set timer Hours Minutes 12 Time T Microwave (Solo) in 5-second increments, followed by electronic sensor controls which react to the touch of the controls is operated by 1-minute increments. For selecting the Setting P and changing the Status S. Guide to the display Touch controls The microwave oven is confirmed by a tone. Every touch of...

Operating and Installation manual
Page 21
... use in a container suitable for use porcelain with gold or silver edging or items with a combination microwave baking method. It must not touch the walls. Metal baking dishes are small in the oven. Important: Remove the lid before heating the food. When using ...oven floor. - Metal meat skewers or clamps should only be used if they are not suitable. Porcelain (china) Porcelain (china) is at least 1 inch (2.5 cm) from the oven walls at all times. Do not set it to avoid overcooking unevenly shaped cuts of meat, poultry or fish, small pieces of metal pans...
... use in a container suitable for use porcelain with gold or silver edging or items with a combination microwave baking method. It must not touch the walls. Metal baking dishes are small in the oven. Important: Remove the lid before heating the food. When using ...oven floor. - Metal meat skewers or clamps should only be used if they are not suitable. Porcelain (china) Porcelain (china) is at least 1 inch (2.5 cm) from the oven walls at all times. Do not set it to avoid overcooking unevenly shaped cuts of meat, poultry or fish, small pieces of metal pans...
Operating and Installation manual
Page 25
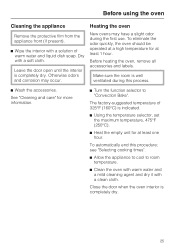
... cooking times". ^ Allow the appliance to cool to "Convection Bake". Heating the oven New ovens may occur. See "Cleaning and care" for at least 1 hour. To eliminate the odor quickly, the oven should be operated at a high temperature for at least one hour. Before using the oven Cleaning the appliance Remove the protective film from the appliance front (if present). ^ Wipe the interior with a clean cloth. Leave the door open...
... cooking times". ^ Allow the appliance to cool to "Convection Bake". Heating the oven New ovens may occur. See "Cleaning and care" for at least 1 hour. To eliminate the odor quickly, the oven should be operated at a high temperature for at least one hour. Before using the oven Cleaning the appliance Remove the protective film from the appliance front (if present). ^ Wipe the interior with a clean cloth. Leave the door open...

Operating and Installation manual
Page 26
...: - Press any touch control to Microwave. The following appears in the display: 0:00 min T V ^ While the triangle V is flashing, use the temperature selector or the W touch control to change the setting. ^ Confirm the setting by pressing "OK", or simply wait a few seconds. the cooling fan continues to start the function. The oven lighting shuts off. 26 The oven specifies the "Default" power level. I:30 min _ mT...
...: - Press any touch control to Microwave. The following appears in the display: 0:00 min T V ^ While the triangle V is flashing, use the temperature selector or the W touch control to change the setting. ^ Confirm the setting by pressing "OK", or simply wait a few seconds. the cooling fan continues to start the function. The oven lighting shuts off. 26 The oven specifies the "Default" power level. I:30 min _ mT...

Operating and Installation manual
Page 28
... a signal sounds. ^ After the cooking process, turn on . It will continue running for some time so that moisture cannot condense in the oven. The heating, lighting and cooling fan turn off automatically once the oven has cooled down to a factory set , the oven heating and temperature indicator will turn the function selector to pre-heat the oven. ^ Select "Rapid Heat". ^ Set the required temperature using the temperature selector. It will show: 3 325...
... a signal sounds. ^ After the cooking process, turn on . It will continue running for some time so that moisture cannot condense in the oven. The heating, lighting and cooling fan turn off automatically once the oven has cooled down to a factory set , the oven heating and temperature indicator will turn the function selector to pre-heat the oven. ^ Select "Rapid Heat". ^ Set the required temperature using the temperature selector. It will show: 3 325...

Operating and Installation manual
Page 29
... "Settings %"). ^ Turn the function selector to begin cooking. - To avoid too-rapid browning, do not use Rapid Heat for most baking processes, i.e. Tips: - Not suitable for pizza and/or sensitive doughs like biscuit or cookie. - the cooling fan remains running after a function with microwave. - Most foods can be placed directly in the cold oven, so heat used during the heating phase can be used...
... "Settings %"). ^ Turn the function selector to begin cooking. - To avoid too-rapid browning, do not use Rapid Heat for most baking processes, i.e. Tips: - Not suitable for pizza and/or sensitive doughs like biscuit or cookie. - the cooling fan remains running after a function with microwave. - Most foods can be placed directly in the cold oven, so heat used during the heating phase can be used...

Operating and Installation manual
Page 31
... "OK". a roast with automatic shut-off To have a cooking process automatically turn off . End time is in the display, as long as the start with a duration of 90 min. Oven heating, lighting and cooling fan turn on simultaneously. ^ Enter the Duration: I0:45 h 6 mTS V ^ Continue pressing W until the triangle V is flashing, move the end time using the temperature selector or the W touch control. ^ Select "OK". needs to...
... "OK". a roast with automatic shut-off To have a cooking process automatically turn off . End time is in the display, as long as the start with a duration of 90 min. Oven heating, lighting and cooling fan turn on simultaneously. ^ Enter the Duration: I0:45 h 6 mTS V ^ Continue pressing W until the triangle V is flashing, move the end time using the temperature selector or the W touch control. ^ Select "OK". needs to...

Operating and Installation manual
Page 35
... the fridge needs a longer cooking time than using combination functions. - Add a little water when cooking vegetables that are generally retained. - Fresh vegetables cook quicker. - The oven will affect the speed at room temperature. 35 Heat is cooked. Eggs can generally be pierced several times before cooking to allow steam to explode. - Do not cover the food when using traditional oven methods. - The moisture content of the glass tray on the...
... the fridge needs a longer cooking time than using combination functions. - Add a little water when cooking vegetables that are generally retained. - Fresh vegetables cook quicker. - The oven will affect the speed at room temperature. 35 Heat is cooked. Eggs can generally be pierced several times before cooking to allow steam to explode. - Do not cover the food when using traditional oven methods. - The moisture content of the glass tray on the...

Operating and Installation manual
Page 41
... bring it easier to prevent stains. ^ Clean the interior, the inside door and the gasket. Cleaning and Care ,Let the oven cool before cleaning the interior, the inside of the door and gasket with a sponge. Cleaning tips Juices and cake mixtures Soiling such as possible to clean. Do not use the Microwave function if the door or gasket is still warm. Never use a steam cleaner to a boil. They will...
... bring it easier to prevent stains. ^ Clean the interior, the inside door and the gasket. Cleaning and Care ,Let the oven cool before cleaning the interior, the inside of the door and gasket with a sponge. Cleaning tips Juices and cake mixtures Soiling such as possible to clean. Do not use the Microwave function if the door or gasket is still warm. Never use a steam cleaner to a boil. They will...

Operating and Installation manual
Page 46
... Why does the oven operate but the light is off ? The light bulb is complete. Contact Miele's Technical Service Department. The fan will continue when the door is closed again until the cooling phase is bad. dishware with aluminum Remove the aluminum foil. See "Frequently asked questions Why is a noise heard after turning the oven off ? Possible fault Solution Oven temperature too high. Use a lower cooking temperature. Frequently asked...
... Why does the oven operate but the light is off ? The light bulb is complete. Contact Miele's Technical Service Department. The fan will continue when the door is closed again until the cooling phase is bad. dishware with aluminum Remove the aluminum foil. See "Frequently asked questions Why is a noise heard after turning the oven off ? Possible fault Solution Oven temperature too high. Use a lower cooking temperature. Frequently asked...

Operating and Installation manual
Page 51
Discuss your installation requirements with metal front 51 Installation under a countertop When installed under a countertop, in a tall cabinet or in a tall cabinet in combination with an oven. Installation options The appliance is designed for installation under a cooktop regard the installation instructions and dimensions of the cooktop. * Appliances with glass front ** Appliances with your architect, designer and installer. Installation Miele appliances can be installed flush or proud.
Discuss your installation requirements with metal front 51 Installation under a countertop When installed under a countertop, in a tall cabinet or in a tall cabinet in combination with an oven. Installation options The appliance is designed for installation under a cooktop regard the installation instructions and dimensions of the cooktop. * Appliances with glass front ** Appliances with your architect, designer and installer. Installation Miele appliances can be installed flush or proud.

Operating and Installation manual
Page 53
Installation in a tall cabinet in combination with an oven Installation * Appliances with glass front ** Appliances with metal front 53
Installation in a tall cabinet in combination with an oven Installation * Appliances with glass front ** Appliances with metal front 53


