Manual
Page 2
...to a TV Using the A/V Cable 12 • Connecting the Unit to a TV Using the S-Video Cable 13 • Connecting Another Unit to this DVD Player 14 About Discs 15 Setup Menu 17 • General Setup Menu 18 • Audio Setup Menu 19 • Video Setup Menu 20 • Preference .../Time Search 30 • Bookmark 31 • Repeat Playback 32 • Repeat A-B Playback 32 • Audio Menu 33 • Subtitle Menu 33 • DVD Menu 33 • Title Menu 33 • Zoom In/Out 34 • Angle 34 • Programmed Playback 35 MP3 Operation 36 • Playback of a ...
...to a TV Using the A/V Cable 12 • Connecting the Unit to a TV Using the S-Video Cable 13 • Connecting Another Unit to this DVD Player 14 About Discs 15 Setup Menu 17 • General Setup Menu 18 • Audio Setup Menu 19 • Video Setup Menu 20 • Preference .../Time Search 30 • Bookmark 31 • Repeat Playback 32 • Repeat A-B Playback 32 • Audio Menu 33 • Subtitle Menu 33 • DVD Menu 33 • Title Menu 33 • Zoom In/Out 34 • Angle 34 • Programmed Playback 35 MP3 Operation 36 • Playback of a ...
Manual
Page 3
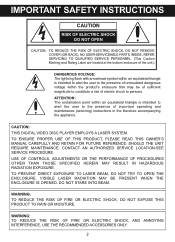
... VOLTAGE: The lightning flash with arrowhead symbol within the product's enclosure that may be of sufficient magnitude to persons. CAUTION: THIS DIGITAL VIDEO DISC PLAYER EMPLOYS A LASER SYSTEM.
... VOLTAGE: The lightning flash with arrowhead symbol within the product's enclosure that may be of sufficient magnitude to persons. CAUTION: THIS DIGITAL VIDEO DISC PLAYER EMPLOYS A LASER SYSTEM.
Manual
Page 4
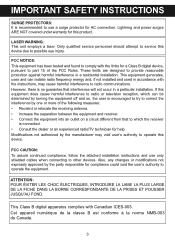
These limits are designed to possible eye injury. This equipment generates, uses and can be determined by the manufacturer may cause harmful interference to radio communications. FCC CAUTION: To assure continued compliance, follow the attached installation instructions and use a surge protector for this product. Only qualified service personnel should attempt to service this device. If this equipment does cause harmful interference to radio or television reception, which the receiver is no guarantee that interference will not occur in accordance with the ...
These limits are designed to possible eye injury. This equipment generates, uses and can be determined by the manufacturer may cause harmful interference to radio communications. FCC CAUTION: To assure continued compliance, follow the attached installation instructions and use a surge protector for this product. Only qualified service personnel should attempt to service this device. If this equipment does cause harmful interference to radio or television reception, which the receiver is no guarantee that interference will not occur in accordance with the ...
Manual
Page 5
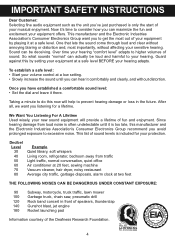
Sound can hear it comfortably and clearly, and without distortion. To establish a safe level: • Start your volume control at a safe level. This list of sound levels is only the start of your musical enjoyment. IMPORTANT SAFETY INSTRUCTIONS Dear Customer: Selecting fine audio equipment such as the unit you've just purchased is included for a lifetime. This manufacturer and the Electronic Industries Association's Consumer Electronics Group want you to your hearing. After all, we want you listening for your protection. We Want You Listening For A Lifetime Used wisely, ...
Sound can hear it comfortably and clearly, and without distortion. To establish a safe level: • Start your volume control at a safe level. This list of sound levels is only the start of your musical enjoyment. IMPORTANT SAFETY INSTRUCTIONS Dear Customer: Selecting fine audio equipment such as the unit you've just purchased is included for a lifetime. This manufacturer and the Electronic Industries Association's Consumer Electronics Group want you to your hearing. After all, we want you listening for your protection. We Want You Listening For A Lifetime Used wisely, ...
Manual
Page 6
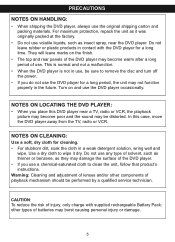
...packing materials. NOTES ON CLEANING: Use a soft, dry cloth for a long time. PRECAUTIONS NOTES ON HANDLING: • When shipping the DVD player, always use the DVD player for a long period, the unit may not function properly in the future. They will leave marks on and use . other components of ...batteries may be performed by a qualified service technician. Turn on the finish. • The top and rear panels of the DVD player may damage the surface of solvent, such as thinner or benzene, as they may become poor and the sound may burst causing personal injury...
...packing materials. NOTES ON CLEANING: Use a soft, dry cloth for a long time. PRECAUTIONS NOTES ON HANDLING: • When shipping the DVD player, always use the DVD player for a long period, the unit may not function properly in the future. They will leave marks on and use . other components of ...batteries may be performed by a qualified service technician. Turn on the finish. • The top and rear panels of the DVD player may damage the surface of solvent, such as thinner or benzene, as they may become poor and the sound may burst causing personal injury...
Manual
Page 7
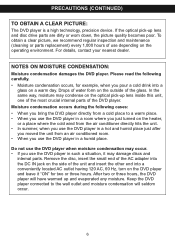
... the cold wind from the air conditioner directly hits the unit. • In summer, when you use the DVD player in a hot and humid place just after you use the DVD player in such a situation, it "ON" for example, when you just turned on the operating environment. Moisture condensation...recommend regular inspection and maintenance (cleaning or parts replacement) every 1,000 hours of the glass. PRECAUTIONS (CONTINUED) TO OBTAIN A CLEAR PICTURE: The DVD player is a high technology, precision device. Remove the disc, insert the small end of the AC adapter into the DC IN jack on the side ...
... the cold wind from the air conditioner directly hits the unit. • In summer, when you use the DVD player in a hot and humid place just after you use the DVD player in such a situation, it "ON" for example, when you just turned on the operating environment. Moisture condensation...recommend regular inspection and maintenance (cleaning or parts replacement) every 1,000 hours of the glass. PRECAUTIONS (CONTINUED) TO OBTAIN A CLEAR PICTURE: The DVD player is a high technology, precision device. Remove the disc, insert the small end of the AC adapter into the DC IN jack on the side ...
Manual
Page 8
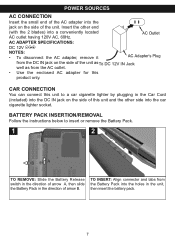
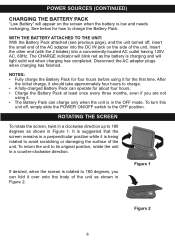
AC ADAPTER SPECIFICATIONS: DC 12V Z NOTES: • To disconnect the AC adapter, remove it from the DC IN jack on the side of the unit. TO INSERT: Align connector and tabs from the Battery Pack into the holes in the direction of arrow B. POWER SOURCES AC CONNECTION Insert the small end of the AC adapter into the jack on the side of the unit asTo DC 12V IN Jack well as from the AC outlet. • Use the enclosed AC adapter for this unit and the other end (with the 2 blades) into the car cigarette lighter socket. Insert the other side into a conveniently located AC outlet having...
AC ADAPTER SPECIFICATIONS: DC 12V Z NOTES: • To disconnect the AC adapter, remove it from the DC IN jack on the side of the unit. TO INSERT: Align connector and tabs from the Battery Pack into the holes in the direction of arrow B. POWER SOURCES AC CONNECTION Insert the small end of the AC adapter into the jack on the side of the unit asTo DC 12V IN Jack well as from the AC outlet. • Use the enclosed AC adapter for this unit and the other end (with the 2 blades) into the car cigarette lighter socket. Insert the other side into a conveniently located AC outlet having...
Manual
Page 9
See below for how to its original position, rotate the unit in a counter-clockwise direction. After the initial charge, it . • The Battery Pack can charge only when the unit is in Figure 1. Figure 1 Figure 2 8 NOTES: • Fully charge the Battery Pack for four hours before using it should take approximately four hours to charge. • A fully-charged Battery Pack can fold it is suggested that the screen remains in Figure 2. ROTATING THE SCREEN To rotate the screen, twist in a clockwise direction up to 180 degrees, you are not using it for about four hours. •...
See below for how to its original position, rotate the unit in a counter-clockwise direction. After the initial charge, it . • The Battery Pack can charge only when the unit is in Figure 1. Figure 1 Figure 2 8 NOTES: • Fully charge the Battery Pack for four hours before using it should take approximately four hours to charge. • A fully-charged Battery Pack can fold it is suggested that the screen remains in Figure 2. ROTATING THE SCREEN To rotate the screen, twist in a clockwise direction up to 180 degrees, you are not using it for about four hours. •...
Manual
Page 11
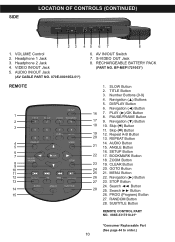
Headphone 1 Jack 3. BP-MEP1721003*) REMOTE SETUP 1 TITLE SLOW ZOOM BOOKMARK 2 1 2 3 4 3 5 6 7 8 CLEAR GOTO 9 0 4 DISPLAY 5 MENU 6 7 PAUSE/ FRAME 8 9 /OK STOP 10 11 12 REPEAT A-B PROG RANDOM 13 AUDIO ANGLE SUBTITLE 14 15 1. Number Buttons (0-9) 4. DISPLAY Button 6. PLAY (®)/OK Button 8. SETUP Button 22 17. BOOKMARK Button 18. CLEAR Button 24 20. Navigation (®) Button 27 23. SUBTITLE Button REMOTE CONTROL PART NO. 086E-3317310-01* *Consumer Replaceable Part (See page 44 to order.) 10 RECHARGEABLE BATTERY PACK (PART NO. ...
Headphone 1 Jack 3. BP-MEP1721003*) REMOTE SETUP 1 TITLE SLOW ZOOM BOOKMARK 2 1 2 3 4 3 5 6 7 8 CLEAR GOTO 9 0 4 DISPLAY 5 MENU 6 7 PAUSE/ FRAME 8 9 /OK STOP 10 11 12 REPEAT A-B PROG RANDOM 13 AUDIO ANGLE SUBTITLE 14 15 1. Number Buttons (0-9) 4. DISPLAY Button 6. PLAY (®)/OK Button 8. SETUP Button 22 17. BOOKMARK Button 18. CLEAR Button 24 20. Navigation (®) Button 27 23. SUBTITLE Button REMOTE CONTROL PART NO. 086E-3317310-01* *Consumer Replaceable Part (See page 44 to order.) 10 RECHARGEABLE BATTERY PACK (PART NO. ...

Manual
Page 12
... operate. • When direct sunlight, an incandescent lamp, fluorescent lamp or any other pointy object, into the groove on the Remote Sensor of the DVD, the remote operation may cause damage to help slide the compartment out. 2. If the device is not to be used for a long period of battery...
... operate. • When direct sunlight, an incandescent lamp, fluorescent lamp or any other pointy object, into the groove on the Remote Sensor of the DVD, the remote operation may cause damage to help slide the compartment out. 2. If the device is not to be used for a long period of battery...

Manual
Page 13
... USING THE A/V CABLE VOLUME 1 2 VIDEO AUDIO AV S-VIDEO OUT IN NOTES FOR CONNECTING TO A TV: • If your TV has an S-Video input, connect the DVD player with the S-Video cable (as described on the next page) for best results. • Set the TV's TV/VIDEO button or switch to the VIDEO.... • Slide the AV IN/OUT switch to your TV directly. If you connect the unit through a VCR, the playback picture will be distorted because DVD video discs are unplugged before making any connections. • Connect the unit to the OUT position. 12
... USING THE A/V CABLE VOLUME 1 2 VIDEO AUDIO AV S-VIDEO OUT IN NOTES FOR CONNECTING TO A TV: • If your TV has an S-Video input, connect the DVD player with the S-Video cable (as described on the next page) for best results. • Set the TV's TV/VIDEO button or switch to the VIDEO.... • Slide the AV IN/OUT switch to your TV directly. If you connect the unit through a VCR, the playback picture will be distorted because DVD video discs are unplugged before making any connections. • Connect the unit to the OUT position. 12
Manual
Page 14
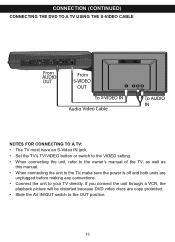
... discs are unplugged before making any connections. • Connect the unit to the OUT position. 13 CONNECTION (CONTINUED) CONNECTING THE DVD TO A TV USING THE S-VIDEO CABLE VOLUME 1 2 VIDEO AUDIO AV S-VIDEO OUT IN NOTES FOR CONNECTING TO A TV: • The TV must have an S-Video ...
... discs are unplugged before making any connections. • Connect the unit to the OUT position. 13 CONNECTION (CONTINUED) CONNECTING THE DVD TO A TV USING THE S-VIDEO CABLE VOLUME 1 2 VIDEO AUDIO AV S-VIDEO OUT IN NOTES FOR CONNECTING TO A TV: • The TV must have an S-Video ...
Manual
Page 15
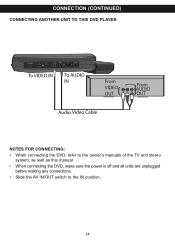
CONNECTION (CONTINUED) CONNECTING ANOTHER UNIT TO THIS DVD PLAYER VOLUME 1 2 VIDEO AUDIO AV S-VIDEO OUT IN NOTES FOR CONNECTING: • When connecting the DVD, refer to the owner's manuals of the TV and stereo system, as well as this manual. • When connecting the DVD, make sure the power is off and all units are unplugged before making any connections. • Slide the AV IN/OUT switch to the IN position. 14
CONNECTION (CONTINUED) CONNECTING ANOTHER UNIT TO THIS DVD PLAYER VOLUME 1 2 VIDEO AUDIO AV S-VIDEO OUT IN NOTES FOR CONNECTING: • When connecting the DVD, refer to the owner's manuals of the TV and stereo system, as well as this manual. • When connecting the DVD, make sure the power is off and all units are unplugged before making any connections. • Slide the AV IN/OUT switch to the IN position. 14
Manual
Page 16
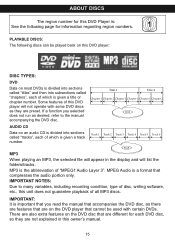
... each of which is important that compresses the audio portion only. MPEG Audio is given a track number. ABOUT DISCS The region number for this DVD Player is the abbreviation of "MPEG1 Audio Layer 3". MP3 When playing an MP3, the selected file will list the folders/tracks. MP3 is : See ...the following discs can be played back on this DVD player: DISC TYPES: DVD Data on most DVDs is divided into sections called "titles" and then into sections called "chapters", each DVD disc, so they are preset. PLAYABLE DISCS: The following page for each of which ...
... each of which is important that compresses the audio portion only. MPEG Audio is given a track number. ABOUT DISCS The region number for this DVD Player is the abbreviation of "MPEG1 Audio Layer 3". MP3 When playing an MP3, the selected file will list the folders/tracks. MP3 is : See ...the following discs can be played back on this DVD player: DISC TYPES: DVD Data on most DVDs is divided into sections called "titles" and then into sections called "chapters", each DVD disc, so they are preset. PLAYABLE DISCS: The following page for each of which ...
Manual
Page 17
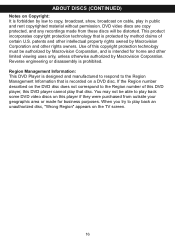
...for business purposes. When you try to play back an unauthorized disc, "Wrong Region" appears on the DVD disc does not correspond to the Region number of this DVD player, this DVD player cannot play that disc. This product incorporates copyright protection technology that is recorded on cable, play back ... and rent copyrighted material without permission. If the Region number described on the TV screen. 16 Region Management Information: This DVD Player is designed and manufactured to respond to the Region Management Information that is protected by method claims of this...
...for business purposes. When you try to play back an unauthorized disc, "Wrong Region" appears on the DVD disc does not correspond to the Region number of this DVD player, this DVD player cannot play that disc. This product incorporates copyright protection technology that is recorded on cable, play back ... and rent copyrighted material without permission. If the Region number described on the TV screen. 16 Region Management Information: This DVD Player is designed and manufactured to respond to the Region Management Information that is protected by method claims of this...

Manual
Page 18
... PLAY (®)/OK button 3 to select various language preferences, turn screen saver on the upcoming pages. 1. SETUP MENU The Setup menu lets you customize the DVD player by selecting the Exit Setup menu icon.) 17
... PLAY (®)/OK button 3 to select various language preferences, turn screen saver on the upcoming pages. 1. SETUP MENU The Setup menu lets you customize the DVD player by selecting the Exit Setup menu icon.) 17

Manual
Page 19
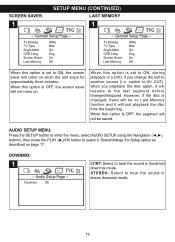
... OSD Lang Screen Saver Last Memory Wide Ntsc On Eng On Off Some discs may contain scenes which have the language included in that the DVD must have been shot simultaneously from a number of different camera angles.
... OSD Lang Screen Saver Last Memory Wide Ntsc On Eng On Off Some discs may contain scenes which have the language included in that the DVD must have been shot simultaneously from a number of different camera angles.
Manual
Page 20
... Type Angle Mark OSD Lang Screen Saver Last Memory Wide Ntsc On Eng On Off When this option is set to ON, during playback of a DVD, if you playback the disc again, it will not come on when the unit stops for approximately three minutes. Audio Setup Page --
... Type Angle Mark OSD Lang Screen Saver Last Memory Wide Ntsc On Eng On Off When this option is set to ON, during playback of a DVD, if you playback the disc again, it will not come on when the unit stops for approximately three minutes. Audio Setup Page --
Manual
Page 21
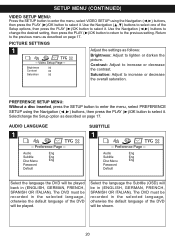
... previous setting. Video Setup Page -- Preference Page -- Audio Eng Subtitle Eng Disc Menu Eng Password Default Select the language the DVD will be played back in the selected language, otherwise the default language of the Setup options, then press the PLAY (®)/.... AUDIO LANGUAGE 1 TVG -- PICTURE SETTINGS 1 TVG -- Brightness 00 Contrast 00 Saturation 00 Adjust the settings as described on page 17. The DVD must be recorded in (ENGLISH, GERMAN, FRENCH, SPANISH OR ITALIAN). SETUP MENU (CONTINUED) VIDEO SETUP MENU: Press the SETUP button to enter...
... previous setting. Video Setup Page -- Preference Page -- Audio Eng Subtitle Eng Disc Menu Eng Password Default Select the language the DVD will be played back in the selected language, otherwise the default language of the Setup options, then press the PLAY (®)/.... AUDIO LANGUAGE 1 TVG -- PICTURE SETTINGS 1 TVG -- Brightness 00 Contrast 00 Saturation 00 Adjust the settings as described on page 17. The DVD must be recorded in (ENGLISH, GERMAN, FRENCH, SPANISH OR ITALIAN). SETUP MENU (CONTINUED) VIDEO SETUP MENU: Press the SETUP button to enter...
Manual
Page 22
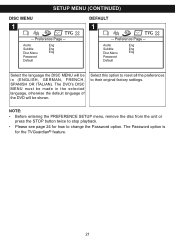
... Subtitle Eng Disc Menu Eng Password Default Select the language the DISC MENU will be in the selected language, otherwise the default language of the DVD will be made in (ENGLISH, GERMAN, FRENCH, SPANISH OR ITALIAN). The DVD's DISC MENU must be shown. SETUP MENU (CONTINUED) DISC MENU 1 TVG -- Preference Page --
... Subtitle Eng Disc Menu Eng Password Default Select the language the DISC MENU will be in the selected language, otherwise the default language of the DVD will be made in (ENGLISH, GERMAN, FRENCH, SPANISH OR ITALIAN). The DVD's DISC MENU must be shown. SETUP MENU (CONTINUED) DISC MENU 1 TVG -- Preference Page --