Manual
Page 1
MB2059B User's Guide 28 Hours Digital Voice Recorder Before operating this product, please read these instructions completely.
MB2059B User's Guide 28 Hours Digital Voice Recorder Before operating this product, please read these instructions completely.

Manual
Page 2
...this information is no guarantee that you for a Class B digital device, pursuant to radio communications. However, there is ever ... record the serial number in the space provided below in accordance with the limits for purchasing this Memorex ...audio system. These limits are designed to correct the interference by one or more of the following measures: • Reorient or relocate the receiving antenna. • Increase the separation between the equipment and receiver. • Consult the dealer or an experienced radio/TV technician for help. 1 Model Number: MB2059B...
...this information is no guarantee that you for a Class B digital device, pursuant to radio communications. However, there is ever ... record the serial number in the space provided below in accordance with the limits for purchasing this Memorex ...audio system. These limits are designed to correct the interference by one or more of the following measures: • Reorient or relocate the receiving antenna. • Increase the separation between the equipment and receiver. • Consult the dealer or an experienced radio/TV technician for help. 1 Model Number: MB2059B...

Manual
Page 3
Play Indicator B. REPEAT 1/ALL Indicators E. LOCATION OF INDICATORS AB C A LP MP LB C HP REPEAT ALL D E D F K J R DATE REMAIN I . Record Indicator F. Battery Indicator G. Date/Volume Indicators H. Minute/Second (Timer) Indicators I Y M DG AM PM H A. VOX Indicator L. Message/Year Indicators D. R (Record) DATE Indicator K. REMAIN Indicator J. Message File Folder Indicator 2 Recording Quality Indicators C.
Play Indicator B. REPEAT 1/ALL Indicators E. LOCATION OF INDICATORS AB C A LP MP LB C HP REPEAT ALL D E D F K J R DATE REMAIN I . Record Indicator F. Battery Indicator G. Date/Volume Indicators H. Minute/Second (Timer) Indicators I Y M DG AM PM H A. VOX Indicator L. Message/Year Indicators D. R (Record) DATE Indicator K. REMAIN Indicator J. Message File Folder Indicator 2 Recording Quality Indicators C.

Manual
Page 6
Slide the battery compartment back in place. NOTE: When replacing the batteries, the recorded messages will be saved, but the time will have to be reset. 5 BATTERY INSTALLATION 1 Open the battery compartment by sliding it towards the bottom of the unit. 2 Insert two (2) "AAA" size batteries (not included) following the polarity diagram.
Slide the battery compartment back in place. NOTE: When replacing the batteries, the recorded messages will be saved, but the time will have to be reset. 5 BATTERY INSTALLATION 1 Open the battery compartment by sliding it towards the bottom of the unit. 2 Insert two (2) "AAA" size batteries (not included) following the polarity diagram.
Manual
Page 12
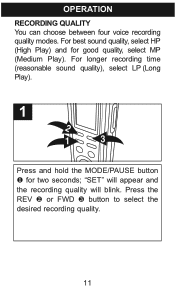
For best sound quality, select HP (High Play) and for two seconds; Press the REV 2 or FWD 3 button to select the desired recording quality. 11 For longer recording time (reasonable sound quality), select LP (Long Play). 1 2 1 3 Press and hold the MODE/PAUSE button 1 for good quality, select MP (Medium Play). "SET" will appear and the recording quality will blink. OPERATION RECORDING QUALITY You can choose between four voice recording quality modes.
For best sound quality, select HP (High Play) and for two seconds; Press the REV 2 or FWD 3 button to select the desired recording quality. 11 For longer recording time (reasonable sound quality), select LP (Long Play). 1 2 1 3 Press and hold the MODE/PAUSE button 1 for good quality, select MP (Medium Play). "SET" will appear and the recording quality will blink. OPERATION RECORDING QUALITY You can choose between four voice recording quality modes.
Manual
Page 13
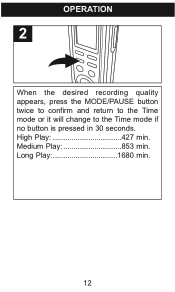
OPERATION 2 When the desired recording quality appears, press the MODE/PAUSE button twice to confirm and return to the Time mode or it will change to the Time mode if no button is pressed in 30 seconds. High Play 427 min. Medium Play 853 min. Long Play 1680 min. 12
OPERATION 2 When the desired recording quality appears, press the MODE/PAUSE button twice to confirm and return to the Time mode or it will change to the Time mode if no button is pressed in 30 seconds. High Play 427 min. Medium Play 853 min. Long Play 1680 min. 12
Manual
Page 14
..., which will appear in each dividual file folder, for the selected message. The number at the bottom of the display indicates the total messages recorded. If the unit is full, FULL will be shown on the display. in HP) in this case. 13 Delete messages in all the folders... areas (file folders) to select the desired file folder (A,B,C,D). The number at the top right of the display will indicate the total time recorded for four file folder you record a message, the unit will assign a number, counting up 1 from , labeled A, B, C and D. NOTE: Each time you can store a total of ...
..., which will appear in each dividual file folder, for the selected message. The number at the bottom of the display indicates the total messages recorded. If the unit is full, FULL will be shown on the display. in HP) in this case. 13 Delete messages in all the folders... areas (file folders) to select the desired file folder (A,B,C,D). The number at the top right of the display will indicate the total time recorded for four file folder you record a message, the unit will assign a number, counting up 1 from , labeled A, B, C and D. NOTE: Each time you can store a total of ...
Manual
Page 15
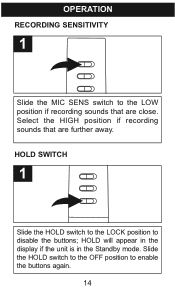
OPERATION RECORDING SENSITIVITY 1 Slide the MIC SENS switch to enable the buttons again. 14 Select the HIGH position if recording sounds that are further away. Slide the HOLD switch to the OFF position to the LOW position if recording sounds that are close. HOLD SWITCH 1 Slide the HOLD switch to the LOCK position to disable the buttons; HOLD will appear in the display if the unit is in the Standby mode.
OPERATION RECORDING SENSITIVITY 1 Slide the MIC SENS switch to enable the buttons again. 14 Select the HIGH position if recording sounds that are further away. Slide the HOLD switch to the OFF position to the LOW position if recording sounds that are close. HOLD SWITCH 1 Slide the HOLD switch to the LOCK position to disable the buttons; HOLD will appear in the display if the unit is in the Standby mode.
Manual
Page 16
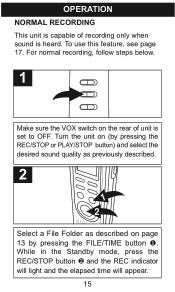
Turn the unit on (by pressing the FILE/TIME button 1. While in the Standby mode, press the REC/STOP button 2 and the REC indicator will light and the elapsed time will appear. 15 For normal recording, follow steps below. 1 Make sure the VOX switch on page 13 by pressing the REC/STOP or PLAY/STOP button) and select the desired sound quality as previously described. 2 1 2 Select a File Folder as described on the rear of recording only when sound is set to OFF. To use this feature, see page 17. OPERATION NORMAL RECORDING This unit is capable of unit is heard.
Turn the unit on (by pressing the FILE/TIME button 1. While in the Standby mode, press the REC/STOP button 2 and the REC indicator will light and the elapsed time will appear. 15 For normal recording, follow steps below. 1 Make sure the VOX switch on page 13 by pressing the REC/STOP or PLAY/STOP button) and select the desired sound quality as previously described. 2 1 2 Select a File Folder as described on the rear of recording only when sound is set to OFF. To use this feature, see page 17. OPERATION NORMAL RECORDING This unit is capable of unit is heard.
Manual
Page 17
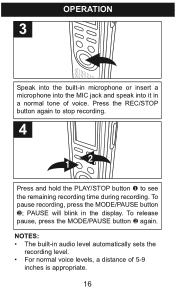
Press the REC/STOP button again to stop recording. 4 2 1 Press and hold the PLAY/STOP button 1 to see the remaining recording time during recording. OPERATION 3 Speak into the built-in microphone or insert a microphone into the MIC jack and speak into it in the display. To release pause, press the MODE/PAUSE button 2 again. PAUSE will blink in a normal tone of 5-9 inches is appropriate. 16 NOTES: • The built-in audio level automatically sets the recording level. • For normal voice levels, a distance of voice. To pause recording, press the MODE/PAUSE button 2;
Press the REC/STOP button again to stop recording. 4 2 1 Press and hold the PLAY/STOP button 1 to see the remaining recording time during recording. OPERATION 3 Speak into the built-in microphone or insert a microphone into the MIC jack and speak into it in the display. To release pause, press the MODE/PAUSE button 2 again. PAUSE will blink in a normal tone of 5-9 inches is appropriate. 16 NOTES: • The built-in audio level automatically sets the recording level. • For normal voice levels, a distance of voice. To pause recording, press the MODE/PAUSE button 2;

Manual
Page 18
When the unit detects a pause of a few seconds, it will allow dictation only when you speak. Turn the unit on (by pressing the REC/STOP or PLAY/STOP button), and select the desired sound quality as described on the rear of the unit to the ON position. OPERATION VOICE ACTIVATED (VOX) RECORDING Voice activated recording will temporarily stop recording until it detects sound again. 1 Slide the VOX switch on page 11. 2 Select a File Folder by pressing the FILE/TIME button (see page 13). 17
When the unit detects a pause of a few seconds, it will allow dictation only when you speak. Turn the unit on (by pressing the REC/STOP or PLAY/STOP button), and select the desired sound quality as described on the rear of the unit to the ON position. OPERATION VOICE ACTIVATED (VOX) RECORDING Voice activated recording will temporarily stop recording until it detects sound again. 1 Slide the VOX switch on page 11. 2 Select a File Folder by pressing the FILE/TIME button (see page 13). 17

Manual
Page 19
...will light and the elapsed time will not stop the unit, two seconds of silence is required to stop the recording. • For constant recording, see page 15. • To pause, press the MODE/PAUSE button. • The built-in audio level automatically sets... the recording level. • For normal voice levels, a distance of 5-9 inches is detected. NOTES: • The first few sounds activate the recorder and may not be recorded. • A variation in voice level during recording...
...will light and the elapsed time will not stop the unit, two seconds of silence is required to stop the recording. • For constant recording, see page 15. • To pause, press the MODE/PAUSE button. • The built-in audio level automatically sets... the recording level. • For normal voice levels, a distance of 5-9 inches is detected. NOTES: • The first few sounds activate the recorder and may not be recorded. • A variation in voice level during recording...
Manual
Page 21
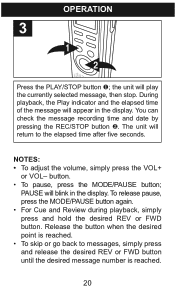
.... During playback, the Play indicator and the elapsed time of the message will play the currently selected message, then stop. You can check the message recording time and date by pressing the REC/STOP button 2. OPERATION 3 1 2 Press the PLAY/STOP button 1;
.... During playback, the Play indicator and the elapsed time of the message will play the currently selected message, then stop. You can check the message recording time and date by pressing the REC/STOP button 2. OPERATION 3 1 2 Press the PLAY/STOP button 1;

Manual
Page 23
TO PAUSE A MESSAGE 1 To pause Recording or Playback, press the MODE/PAUSE button; PAUSE will blink in the display. 2 Press the MODE/PAUSE button again to resume recording or playback. 22 OPERATION TO CANCEL REPEAT PLAYBACK: To cancel repeat playback, press the DEL/REPEAT button once or twice until the REPEAT indicator disappears from the display.
TO PAUSE A MESSAGE 1 To pause Recording or Playback, press the MODE/PAUSE button; PAUSE will blink in the display. 2 Press the MODE/PAUSE button again to resume recording or playback. 22 OPERATION TO CANCEL REPEAT PLAYBACK: To cancel repeat playback, press the DEL/REPEAT button once or twice until the REPEAT indicator disappears from the display.

Manual
Page 24
... been played. Press and hold the PLAY/STOP button 2 for 2 seconds; OPERATION SCAN PLAYBACK This unit can play back the first five seconds of each recorded message as follows: 1 2 1 While in the Standby mode, select the file folder (A,B,C,D) using the FILE/TIME button 1.
... been played. Press and hold the PLAY/STOP button 2 for 2 seconds; OPERATION SCAN PLAYBACK This unit can play back the first five seconds of each recorded message as follows: 1 2 1 While in the Standby mode, select the file folder (A,B,C,D) using the FILE/TIME button 1.

Manual
Page 26
... within five seconds. If the DEL/REPEAT button is full, FULL will blink in the display when you press the REC/STOP button to start recording. ALL and ERASE will appear in the display. 2 To erase all the messages, press the DEL/REPEAT button again within the five seconds, the messages...
... within five seconds. If the DEL/REPEAT button is full, FULL will blink in the display when you press the REC/STOP button to start recording. ALL and ERASE will appear in the display. 2 To erase all the messages, press the DEL/REPEAT button again within the five seconds, the messages...

Manual
Page 29
... T H E N CONTACT FOX INTERNATIONAL AT 1-800-321-6993. 28 For customers calling within US, call 001-866-580-8316. SPECIFICATIONS Recording System...........Built-in Flash Memory Recording Time.........1680 minutes in LP mode Speaker 0.2W (8 Ohm) Output Power 80mW Power Source 3V, "AAA" size x 2 batteries (not... Included) Battery Life Approx 15 hours at recording mode Approx 10 hours at play mode at medium volume level Dimensions...4.4 (H) x 1.4 (W) x 0.7 (D) inches Weight 46g (without batteries) ...
... T H E N CONTACT FOX INTERNATIONAL AT 1-800-321-6993. 28 For customers calling within US, call 001-866-580-8316. SPECIFICATIONS Recording System...........Built-in Flash Memory Recording Time.........1680 minutes in LP mode Speaker 0.2W (8 Ohm) Output Power 80mW Power Source 3V, "AAA" size x 2 batteries (not... Included) Battery Life Approx 15 hours at recording mode Approx 10 hours at play mode at medium volume level Dimensions...4.4 (H) x 1.4 (W) x 0.7 (D) inches Weight 46g (without batteries) ...
Info Sheet
Page 1
... to 28 hours of Memorex Products, Inc. 64MB digital voice recorder with your sales representative. 40' LOAD CONTAINER __ units Imation Electronics Products | t 954 660 7000 f 954 660 7085 www.memorexelectronics.com A Division of Imation Enterprises Corp. MP 7.1 hours (425 min at 10 kbps) - Please confirm package/shipping information with 3-mode recording MB2059B - Product Features •...
... to 28 hours of Memorex Products, Inc. 64MB digital voice recorder with your sales representative. 40' LOAD CONTAINER __ units Imation Electronics Products | t 954 660 7000 f 954 660 7085 www.memorexelectronics.com A Division of Imation Enterprises Corp. MP 7.1 hours (425 min at 10 kbps) - Please confirm package/shipping information with 3-mode recording MB2059B - Product Features •...


