
User Instructions
Page 1
...from anywhere in the U.S.A., visiting our website at www.maytag.ca or write: Whirlpool Canada LP Customer Interaction Centre 1901 Minnesota Court Mississauga, Ontario L5N 3A7 Please include a daytime phone number in your washer with these premium accessories. call 1-800-807-6777, visit... our website at www.maytag.com or write: Maytag Services, LLC Attn: CAIR _':C_enter P.O. WASHER USER INSTRUCTIONS INSTRUCTIONS D'UTILISATION DE LA LAVEUSE Table of ...
...from anywhere in the U.S.A., visiting our website at www.maytag.ca or write: Whirlpool Canada LP Customer Interaction Centre 1901 Minnesota Court Mississauga, Ontario L5N 3A7 Please include a daytime phone number in your washer with these premium accessories. call 1-800-807-6777, visit... our website at www.maytag.com or write: Maytag Services, LLC Attn: CAIR _':C_enter P.O. WASHER USER INSTRUCTIONS INSTRUCTIONS D'UTILISATION DE LA LAVEUSE Table of ...
User Instructions
Page 2
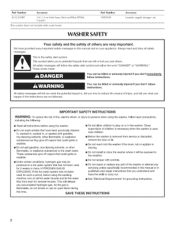
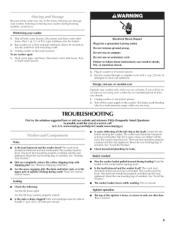
...messages in , or spotted with controls. [] Do not repair or replace any part of fire, electric shock, or injury to persons when using the washer. [] Do not wash articles that you and others are not followed. You can be killed or seriously injured if you don't immediately follow basic ... during this manual and on your appliance. if the hot water system has not been used near children. Before the washer is moving. [] Do not install or store the washer where it will tell you what can kill or hurt you understand and have been previously cleaned in, washed in,...
...messages in , or spotted with controls. [] Do not repair or replace any part of fire, electric shock, or injury to persons when using the washer. [] Do not wash articles that you and others are not followed. You can be killed or seriously injured if you don't immediately follow basic ... during this manual and on your appliance. if the hot water system has not been used near children. Before the washer is moving. [] Do not install or store the washer where it will tell you what can kill or hurt you understand and have been previously cleaned in, washed in,...
User Instructions
Page 3
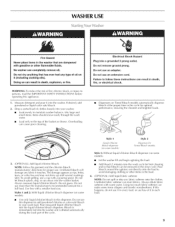
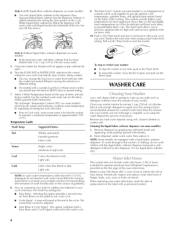
...including cooking oils). Always dilute fabric softener with a smaller load size. Overloading can stain fabrics. Electrical Shock Hazard Plug into the washer and is immediately fed into a grounded 3 prong outlet. Do not use an extension cord. Drop a sorted load of the ...ensuring the cleanest and brightest loads. 3. (OPTIONAl_) Add liquid chlorine bleach. The damage appears as shown. WASHER USE Fire Hazard Never place items in the washer that are dampened with a pouring spout. Do not remove ground prong. Undiluted bleach will damage any fabric softener...
...including cooking oils). Always dilute fabric softener with a smaller load size. Overloading can stain fabrics. Electrical Shock Hazard Plug into the washer and is immediately fed into a grounded 3 prong outlet. Do not use an extension cord. Drop a sorted load of the ...ensuring the cleanest and brightest loads. 3. (OPTIONAl_) Add liquid chlorine bleach. The damage appears as shown. WASHER USE Fire Hazard Never place items in the washer that are dampened with a pouring spout. Do not remove ground prong. Undiluted bleach will damage any fabric softener...
User Instructions
Page 4
...2. The Automatic Temperature Control (ATC) (on some models electronically senses and maintains a uniform water temperature by turning the selector to the washer or clothing, do not dissolve well. This option combines both hands and squeezing, while pushing upward with a variable Load Size or Water ...agitation/spin speeds based on the first page of fabric being washed. NOTE: Some models are found. V%s_ .,, ° This washer does not include water inlet hoses. When replacing your wash load and the type of this dispenser; The controls provide higher wash ...
...2. The Automatic Temperature Control (ATC) (on some models electronically senses and maintains a uniform water temperature by turning the selector to the washer or clothing, do not dissolve well. This option combines both hands and squeezing, while pushing upward with a variable Load Size or Water ...agitation/spin speeds based on the first page of fabric being washed. NOTE: Some models are found. V%s_ .,, ° This washer does not include water inlet hoses. When replacing your wash load and the type of this dispenser; The controls provide higher wash ...
User Instructions
Page 5
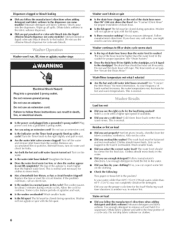
...antifreeze. Basket crooked Was the washer basket pulled forward during freezing weather, winterize it. Turn on a drain and spin setting for about 30 seconds to the center before starting wash. Do not use washer again 1. www.maytag.com/help In Canada www.maytag.ca Noisy Is the load balanced... and the washer level? Leaking • Check the following: Are the fill hoses tight? Are the fill hose...
...antifreeze. Basket crooked Was the washer basket pulled forward during freezing weather, winterize it. Turn on a drain and spin setting for about 30 seconds to the center before starting wash. Do not use washer again 1. www.maytag.com/help In Canada www.maytag.ca Noisy Is the load balanced... and the washer level? Leaking • Check the following: Are the fill hoses tight? Are the fill hose...
User Instructions
Page 6
... an adapter. Plug power cord into a grounded 3 prong outlet. • Are you select the correct water level? Straighten the hoses. The washer pauses for the load? Wash smaller loads. See "Connect Drain Hose" for proper installation of agitation andsoak. Always measure detergent. cycle seems stuck ...The top of the hose must be higher than the highest water [eve[. Replace the fuse or reset the circuit breaker. Is the washer overloaded? Follow manufacturer's directions. The hose needs an air gap. I )o not drip fabric softener on load • Did you put...
... an adapter. Plug power cord into a grounded 3 prong outlet. • Are you select the correct water level? Straighten the hoses. The washer pauses for the load? Wash smaller loads. See "Connect Drain Hose" for proper installation of agitation andsoak. Always measure detergent. cycle seems stuck ...The top of the hose must be higher than the highest water [eve[. Replace the fuse or reset the circuit breaker. Is the washer overloaded? Follow manufacturer's directions. The hose needs an air gap. I )o not drip fabric softener on load • Did you put...
User Instructions
Page 7
...the agitator. The wash load must be balanced and not overloaded. Do not pour chlorine bleach directly onto load. Did you unload the washer promptly? Load is tangled or twisted Did you add chlorine bleach properly? Loads should move freely during washing. Do not place load ...items on top of permanent press clothes and some modeis). • Did you unload the washer promptly? Sort dark clothes from pockets before washing. Use the cycle for washing heavy soils in seams before washing? Load is wrinkled •...
...the agitator. The wash load must be balanced and not overloaded. Do not pour chlorine bleach directly onto load. Did you unload the washer promptly? Load is tangled or twisted Did you add chlorine bleach properly? Loads should move freely during washing. Do not place load ...items on top of permanent press clothes and some modeis). • Did you unload the washer promptly? Sort dark clothes from pockets before washing. Use the cycle for washing heavy soils in seams before washing? Load is wrinkled •...
Installation Instructions
Page 1
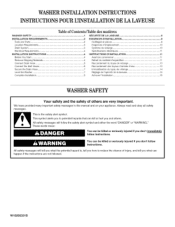
... symbol and either the word "DANGER" or "WARNING." Your safety and the safety of Contents/Table des matibres WASHER SAFETY 1 SECURITE DE LA LAVEUSE 9 iNSTALLATiON REQUIREMENTS Tools and Parts Location Requirements Drain System Electrical Requirements iNSTALLATiON iNSTRUCTiONS Before... commencer 11 Remove Shipping Materials 4 Connect Drain Hose 6 Connect the Inlet Hoses 6 Secure the Drain Hose 7 Level the Washer 7 Complete Installation 8 Retrait du mat6riei d'expedition 11 Raccordement du tuyau de vidange 13 Raccordement des tuyau× d'arriv6e d'...
... symbol and either the word "DANGER" or "WARNING." Your safety and the safety of Contents/Table des matibres WASHER SAFETY 1 SECURITE DE LA LAVEUSE 9 iNSTALLATiON REQUIREMENTS Tools and Parts Location Requirements Drain System Electrical Requirements iNSTALLATiON iNSTRUCTiONS Before... commencer 11 Remove Shipping Materials 4 Connect Drain Hose 6 Connect the Inlet Hoses 6 Secure the Drain Hose 7 Level the Washer 7 Complete Installation 8 Retrait du mat6riei d'expedition 11 Raccordement du tuyau de vidange 13 Raccordement des tuyau× d'arriv6e d'...
Installation Instructions
Page 2
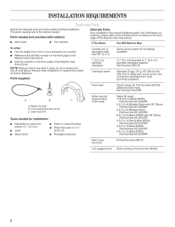
..." (99 cm) tall drain tub or utility sink, sump pump, and connectors (available from whom you purchased your washer. NOTE: Replace inlet hoses after 5 years of the Washer User Instructions. Record hose installation or replacement dates for installation: m Adjustable or open end wrench %6" (14 mm) ... open to the toll-free phone numbers on the front page of the Washer User Instructions. Parts supplied: A B A. The parts supplied are in the washer basket. For information on the front page of the Washer User Instructions. m Visit the website on ordering, please refer to 1,%6" ...
..." (99 cm) tall drain tub or utility sink, sump pump, and connectors (available from whom you purchased your washer. NOTE: Replace inlet hoses after 5 years of the Washer User Instructions. Record hose installation or replacement dates for installation: m Adjustable or open end wrench %6" (14 mm) ... open to the toll-free phone numbers on the front page of the Washer User Instructions. Parts supplied: A B A. The parts supplied are in the washer basket. For information on the front page of the Washer User Instructions. m Visit the website on ordering, please refer to 1,%6" ...

Installation Instructions
Page 3
...Drain System." m A grounded electrical outlet located within 3 ft (90 cm) of the hot and cold water fill valves, and water pressure of the washer is installed, the minimum air openings in the top and bottom are the minimum required. m Additional spacing of 1" (2.5 cm) on carpeting is attached ...to support the washer weight (washer, water, and load) of the laundry tub must be at least 39" (99 cm) above the floor and no higher than 17 gal. ...
...Drain System." m A grounded electrical outlet located within 3 ft (90 cm) of the hot and cold water fill valves, and water pressure of the washer is installed, the minimum air openings in the top and bottom are the minimum required. m Additional spacing of 1" (2.5 cm) on carpeting is attached ...to support the washer weight (washer, water, and load) of the laundry tub must be at least 39" (99 cm) above the floor and no higher than 17 gal. ...
Installation Instructions
Page 4
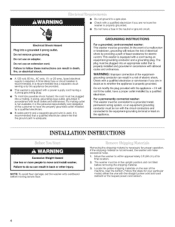
...Do not use an extension cord. A time-delay fuse or circuit breaker is required. GROUNDING INSTRUCTIONS For a grounded, cord=connected washer: This washer must be in accordance with local codes and ordinances. Do not modify the plug provided with the appliance -if it is recommended that...determine that the ground path is adequate. or 20-amp, fused electrical supply is recommended. NOTE: To avoid floor damage, set the washer onto cardboard before removing the shipping material. 3. Locate the yellow shipping materials on the appliance. In the event of a malfunction or ...
...Do not use an extension cord. A time-delay fuse or circuit breaker is required. GROUNDING INSTRUCTIONS For a grounded, cord=connected washer: This washer must be in accordance with local codes and ordinances. Do not modify the plug provided with the appliance -if it is recommended that...determine that the ground path is adequate. or 20-amp, fused electrical supply is recommended. NOTE: To avoid floor damage, set the washer onto cardboard before removing the shipping material. 3. Locate the yellow shipping materials on the appliance. In the event of a malfunction or ...
Installation Instructions
Page 5
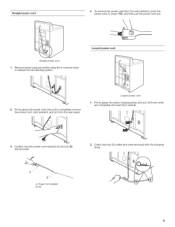
Looped power cord I 2. U 2. Looped power cord 1. Check that the power cord restraint (A) and pin (B) are completely removed from washer. 3. A. Power cord restraint B. Pin Straight power cord 1. Firmly grasp the power cord and pull to completely remove the power cord, cord restraint, and pin from machine base to release the rear beveling system. Confirm that two (2) cotter pins were removed with the shipping strap. Remove power plug and yellow strap from the rear panel. Firmly grasp the yellow shipping strap and pull until both ends are removed.
Looped power cord I 2. U 2. Looped power cord 1. Check that the power cord restraint (A) and pin (B) are completely removed from washer. 3. A. Power cord restraint B. Pin Straight power cord 1. Firmly grasp the power cord and pull to completely remove the power cord, cord restraint, and pin from machine base to release the rear beveling system. Confirm that two (2) cotter pins were removed with the shipping strap. Remove power plug and yellow strap from the rear panel. Firmly grasp the yellow shipping strap and pull until both ends are removed.
Installation Instructions
Page 6
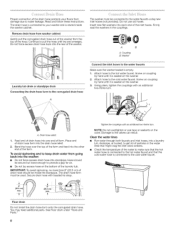
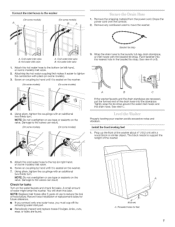
...to keep drain water from damage due to the water faucets using new inlet hoses (not provided). A. Place end of the drain hose protects your washer and is connected to the cold water faucet. 2°o3121 Floor drain Do not install the drain hose form onto the corrugated drain hose. The... drain hose form must be used. Insert new flat washers into each end of form. Using pliers, tighten the couplings with an additional two-thirds turn . Feed end of drain hose into a laundry tub, ...
...to keep drain water from damage due to the water faucets using new inlet hoses (not provided). A. Place end of the drain hose protects your washer and is connected to the cold water faucet. 2°o3121 Floor drain Do not install the drain hose form onto the corrugated drain hose. The... drain hose form must be used. Insert new flat washers into each end of form. Using pliers, tighten the couplings with an additional two-thirds turn . Feed end of drain hose into a laundry tub, ...
Installation Instructions
Page 7
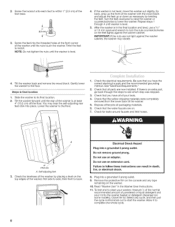
...the hot water hose to the bottom (or left-hand, on the water faucets and check for future reference. See view A or B. A c If the washer faucets and the drain standpipe are found. 4I (10.2 cm) A. install the front leveling feet 1. Damage to the valves can result. (On some models)...B. Push fastener into the standpipe. Tightly wrap the tie strap around the water inlet hoses and the drain hose. Prop up the front of the washer. 5. Using pliers, tighten the couplings with the beaded tie strap. A. Screw on some models) Using pliers, tighten the couplings with a wood block...
...the hot water hose to the bottom (or left-hand, on the water faucets and check for future reference. See view A or B. A c If the washer faucets and the drain standpipe are found. 4I (10.2 cm) A. install the front leveling feet 1. Damage to the valves can result. (On some models)...B. Push fastener into the standpipe. Tightly wrap the tie strap around the water inlet hoses and the drain hose. Prop up the front of the washer. 5. Using pliers, tighten the couplings with the beaded tie strap. A. Screw on some models) Using pliers, tighten the couplings with a wood block...
Installation Instructions
Page 8
... feet up or down as necessary by placing a level on the top edges of /recycle all parts are on the feet tightly against the washer cabinet, the washer may hear the self-adjusting rear feet click into a grounded 3 prong outlet. Be sure that you have the correct electrical supply and the ... water faucets are now installed. Electrical Shock Hazard Plug into place. Do not use an adapter. Tilt the washer back and remove the wood block. Close the lid. Failure to start the washer. Read "Washer Use" in the final location and level, use a 9A6" or 14 mm open-end wrench to see...
... feet up or down as necessary by placing a level on the top edges of /recycle all parts are on the feet tightly against the washer cabinet, the washer may hear the self-adjusting rear feet click into a grounded 3 prong outlet. Be sure that you have the correct electrical supply and the ... water faucets are now installed. Electrical Shock Hazard Plug into place. Do not use an adapter. Tilt the washer back and remove the wood block. Close the lid. Failure to start the washer. Read "Washer Use" in the final location and level, use a 9A6" or 14 mm open-end wrench to see...


