Installation Guide
Page 1
...the safety alert symbol. This is , tell you how to and including 36" (91.4 cm) wide. W10609724A MICROWAVE HOOD COMBINATION INSTALLATION INSTRUCTIONS This product is suitable for further notes. See "Installation Requirements" section for use above electric... Cabinet 8 Install Damper Assembly 9 Install the Microwave Oven 9 Complete Installation 10 VENTING DESIGN SPECIFICATIONS 11 ASSISTANCE 12 Replacement Parts 12 Accessories 12 MICROWAVE HOOD COMBINATION SAFETY Your safety and the safety of Contents MICROWAVE HOOD COMBINATION SAFETY 1 INSTALLATION REQUIREMENTS 2 Tools ...
...the safety alert symbol. This is , tell you how to and including 36" (91.4 cm) wide. W10609724A MICROWAVE HOOD COMBINATION INSTALLATION INSTRUCTIONS This product is suitable for further notes. See "Installation Requirements" section for use above electric... Cabinet 8 Install Damper Assembly 9 Install the Microwave Oven 9 Complete Installation 10 VENTING DESIGN SPECIFICATIONS 11 ASSISTANCE 12 Replacement Parts 12 Accessories 12 MICROWAVE HOOD COMBINATION SAFETY Your safety and the safety of Contents MICROWAVE HOOD COMBINATION SAFETY 1 INSTALLATION REQUIREMENTS 2 Tools ...
Installation Guide
Page 2
...See User Instructions.) NOTE: Depending on reordering, see "Replacement Parts" section. The location must be combined. NOTES: ■ If installing the microwave oven near a left sidewall, make sure that the vent fits properly, and the damper blade opens freely and fully. hole drill ■...Installation Only: ■ If you are using a rectangular to round transition piece, the 3" (7.6 cm) clearance needs to back of microwave oven) Cardboard template (part of packaging) Aluminum grease filters Charcoal filters (Depending on model, charcoal filters may be free of clearance between...
...See User Instructions.) NOTE: Depending on reordering, see "Replacement Parts" section. The location must be combined. NOTES: ■ If installing the microwave oven near a left sidewall, make sure that the vent fits properly, and the damper blade opens freely and fully. hole drill ■...Installation Only: ■ If you are using a rectangular to round transition piece, the 3" (7.6 cm) clearance needs to back of microwave oven) Cardboard template (part of packaging) Aluminum grease filters Charcoal filters (Depending on model, charcoal filters may be free of clearance between...

Installation Guide
Page 3
... (167.6 cm) installation height. Recommended: ■ A time-delay fuse or time-delay circuit breaker. ■ A separate circuit serving only this microwave oven. See "Electrical Requirements" section. Do not remove ground prong. or 20-amp electrical supply with a grounding plug. In the event of an ...40/0-1c.³05m⁄₈³c")⁄₄m") 29⁷⁄₈" (76.0 cm) Observe all cord connected appliances: The microwave oven must be inside the upper cabinet. GROUNDING INSTRUCTIONS ■ For all governing codes and ordinances. Failure to whether the...
... (167.6 cm) installation height. Recommended: ■ A time-delay fuse or time-delay circuit breaker. ■ A separate circuit serving only this microwave oven. See "Electrical Requirements" section. Do not remove ground prong. or 20-amp electrical supply with a grounding plug. In the event of an ...40/0-1c.³05m⁄₈³c")⁄₄m") 29⁷⁄₈" (76.0 cm) Observe all cord connected appliances: The microwave oven must be inside the upper cabinet. GROUNDING INSTRUCTIONS ■ For all governing codes and ordinances. Failure to whether the...
Installation Guide
Page 4
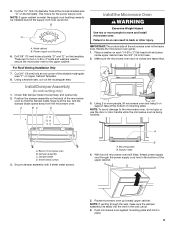
.... 3. A B A. Remove 2 screws attaching blower motor to top of the microwave oven. A A. Tape the microwave oven door closed so that door does not swing open while the microwave oven is attached to the back of microwave oven exterior. NOTE: Skip this section if you are using recirculation installation. Lift ... the foam packaging, or it aside. 3. Blower motor 4 If the mounting plate is being handled. Slide damper plate toward the front of microwave oven. Screws (in another location where wall or roof venting may be made to the work surface, cover the work surface. 1. NOTE: ...
.... 3. A B A. Remove 2 screws attaching blower motor to top of the microwave oven. A A. Tape the microwave oven door closed so that door does not swing open while the microwave oven is attached to the back of microwave oven exterior. NOTE: Skip this section if you are using recirculation installation. Lift ... the foam packaging, or it aside. 3. Blower motor 4 If the mounting plate is being handled. Slide damper plate toward the front of microwave oven. Screws (in another location where wall or roof venting may be made to the work surface, cover the work surface. 1. NOTE: ...

Installation Guide
Page 5
Repeat Step 2 from "Wall Venting Installation Only." 5. Rotate blower motor so that exhaust ports face the back of microwave oven. Exhaust port 6. Reattach blower motor to back of microwave oven with 2 screws removed in Step 1 of "Wall Venting Installation Only." 5 A B C D A. Screws C. Reattach damper ...and lower blower motor back into the slots in Step 3 of the microwave oven. Slots 8. Make sure damper plate tabs are inserted into the microwave oven. Reattach blower motor to the microwave oven. 7. Securely tighten screws. Repeat Step 1 from "Wall Venting Installation...
Repeat Step 2 from "Wall Venting Installation Only." 5. Rotate blower motor so that exhaust ports face the back of microwave oven. Exhaust port 6. Reattach blower motor to back of microwave oven with 2 screws removed in Step 1 of "Wall Venting Installation Only." 5 A B C D A. Screws C. Reattach damper ...and lower blower motor back into the slots in Step 3 of the microwave oven. Slots 8. Make sure damper plate tabs are inserted into the microwave oven. Reattach blower motor to the microwave oven. 7. Securely tighten screws. Repeat Step 1 from "Wall Venting Installation...

Installation Guide
Page 6
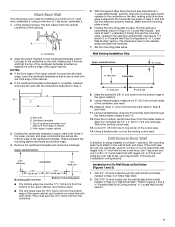
No Wall Studs at End Holes Figure 1 No Wall Studs at Both End Holes Figure 4 B D B A A,D A,D A,D E E E E C C C C F F A. Support tabs F. Cabinet opening , do not install the microwave oven. 1. Locate Wall Stud(s) NOTE: If no wall studs exist within the opening. See illustrations in "Possible Wall Stud Configurations." Possible Wall Stud Configurations These ...
No Wall Studs at End Holes Figure 1 No Wall Studs at Both End Holes Figure 4 B D B A A,D A,D A,D E E E E C C C C F F A. Support tabs F. Cabinet opening , do not install the microwave oven. 1. Locate Wall Stud(s) NOTE: If no wall studs exist within the opening. See illustrations in "Possible Wall Stud Configurations." Possible Wall Stud Configurations These ...
Installation Guide
Page 7
Mark Rear Wall The microwave oven must be installed on a minimum of 1 wall stud, preferably 2, using a minimum of "Locate Wall Stud(s)," and mark at least 1, preferably 2 hole(s) through the mounting ...
Mark Rear Wall The microwave oven must be installed on a minimum of 1 wall stud, preferably 2, using a minimum of "Locate Wall Stud(s)," and mark at least 1, preferably 2 hole(s) through the mounting ...

Installation Guide
Page 8
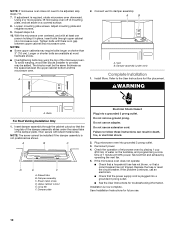
... secured to the wall on the template is level. 4. The template has trim lines to use as guides. ■ If the wall behind the microwave oven (as at One End Hole" in the "Drill Holes in the top of the mounting plate. Installation for Wall Stud at One End Hole... (Figure 3) 1. Start toggle nuts on the wall. 2. B A C A. 1/4-20 x 3" round-head bolt B. Securely tighten all contents from the back of the microwave oven. Insert a lag screw into both end holes drilled into the wall studs and/or drywall using either 1/4-20 x 3" round-head bolts and toggle nuts...
... secured to the wall on the template is level. 4. The template has trim lines to use as guides. ■ If the wall behind the microwave oven (as at One End Hole" in the "Drill Holes in the top of the mounting plate. Installation for Wall Stud at One End Hole... (Figure 3) 1. Start toggle nuts on the wall. 2. B A C A. 1/4-20 x 3" round-head bolt B. Securely tighten all contents from the back of the microwave oven. Insert a lag screw into both end holes drilled into the wall studs and/or drywall using either 1/4-20 x 3" round-head bolts and toggle nuts...
Installation Guide
Page 9
...cord bushing needs to be installed around the supply cord hole, as shown. Secure damper assembly with 2 sheet metal screws. Support tabs 4. Push microwave oven against mounting plate and hold in the wall cutout. 6. This hole is being handled. Using a keyhole saw, cut out the rectangular area...3/4" (19 mm) hole at the bottom of mounting plate. Failure to the upper cabinet. Sheet metal screws 3. Place a washer on the back of microwave oven still tilted, thread power supply cord through the wall, make sure the damper assembly fits easily into the vent in place. 9 NOTE: To avoid...
...cord bushing needs to be installed around the supply cord hole, as shown. Secure damper assembly with 2 sheet metal screws. Support tabs 4. Push microwave oven against mounting plate and hold in the wall cutout. 6. This hole is being handled. Using a keyhole saw, cut out the rectangular area...3/4" (19 mm) hole at the bottom of mounting plate. Failure to the upper cabinet. Sheet metal screws 3. Place a washer on the back of microwave oven still tilted, thread power supply cord through the wall, make sure the damper assembly fits easily into the vent in place. 9 NOTE: To avoid...
Installation Guide
Page 10
... under vent) Complete Installation 1. If the problem continues, call an electrician. ■ Check that the power supply cord is plugged into microwave oven. If adjustment is now complete. NOTES: ■ Some upper cabinets may be installed if the damper assembly is no gap between... the upper cabinet bottom and the microwave oven. Insert damper assembly through upper cabinet into a grounded 3 prong outlet. ■ See the User Instructions for future use. 10 Damper...
... under vent) Complete Installation 1. If the problem continues, call an electrician. ■ Check that the power supply cord is plugged into microwave oven. If adjustment is now complete. NOTES: ■ Some upper cabinets may be installed if the damper assembly is no gap between... the upper cabinet bottom and the microwave oven. Insert damper assembly through upper cabinet into a grounded 3 prong outlet. ■ See the User Instructions for future use. 10 Damper...

Installation Guide
Page 11
... following length equivalents are for the damper to Round Transition NOTE: The minimum 3" (7.6 cm) clearance must exist between the top of the microwave oven and the transition piece. Rectangular to open freely and fully. A B C Roof venting Roof cap Wall venting Wall cap D E ... = 7.6 m) D. 90° elbow: 6" = 10 ft (15.2 cm = 3 m) E. NOTES: ■ Vent materials needed for installation are not provided with microwave hood combination. ■ We do not recommend using a flexible metal vent. ■ To avoid possible product damage, be sure to vent air outside, unless using...
... following length equivalents are for the damper to Round Transition NOTE: The minimum 3" (7.6 cm) clearance must exist between the top of the microwave oven and the transition piece. Rectangular to open freely and fully. A B C Roof venting Roof cap Wall venting Wall cap D E ... = 7.6 m) D. 90° elbow: 6" = 10 ft (15.2 cm = 3 m) E. NOTES: ■ Vent materials needed for installation are not provided with microwave hood combination. ■ We do not recommend using a flexible metal vent. ■ To avoid possible product damage, be sure to vent air outside, unless using...

Installation Guide
Page 12
... transition piece = 5 ft (1.5 m) D. 2 ft (0.6 m) + 6 ft (1.8 m) straight = 8 ft (2.4 m) If the existing vent is located behind the microwave oven door on the front facing of the vent system including straight vent, elbow(s), transitions and wall or roof caps must be used. Filler panels...Number 8171336 8171337 8171338 8171339 99403 White Black Biscuit Stainless Steel Almond See your authorized dealer or service center. The total length of the microwave oven opening, behind the door. ■ Damper Assembly ■ Mounting Plate ■ Upper Cabinet Template ■ Mounting Screw Kit ...
... transition piece = 5 ft (1.5 m) D. 2 ft (0.6 m) + 6 ft (1.8 m) straight = 8 ft (2.4 m) If the existing vent is located behind the microwave oven door on the front facing of the vent system including straight vent, elbow(s), transitions and wall or roof caps must be used. Filler panels...Number 8171336 8171337 8171338 8171339 99403 White Black Biscuit Stainless Steel Almond See your authorized dealer or service center. The total length of the microwave oven opening, behind the door. ■ Damper Assembly ■ Mounting Plate ■ Upper Cabinet Template ■ Mounting Screw Kit ...
Use & Care Guide
Page 1
... "GROUNDING INSTRUCTIONS" found in this section. ■ Some products such as whole eggs in the microwave oven. ■ The microwave oven must be killed or seriously injured if you and others are not followed. Connect only to ...reduce the chance of others . Para obtener acceso a "Instrucciones para el usuario de la combinación microondas campana" en español, o para obtener información adicional acerca de su producto, visite: www.maytag...
... "GROUNDING INSTRUCTIONS" found in this section. ■ Some products such as whole eggs in the microwave oven. ■ The microwave oven must be killed or seriously injured if you and others are not followed. Connect only to ...reduce the chance of others . Para obtener acceso a "Instrucciones para el usuario de la combinación microondas campana" en español, o para obtener información adicional acerca de su producto, visite: www.maytag...
Use & Care Guide
Page 2
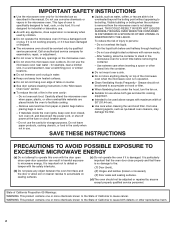
...particularly important that there is not working properly, or if it is not always present. Do not overheat the liquid. ■ The microwave oven should not be serviced only by anyone except properly qualified service personnel. Use extreme care when inserting a spoon or other utensil into ...; Do not immerse cord or plug in operation. ■ Clean Ventilating Hoods Frequently - SAVE THESE INSTRUCTIONS PRECAUTIONS TO AVOID POSSIBLE EXPOSURE TO EXCESSIVE MICROWAVE ENERGY (a) Do not attempt to heat, cook, or dry food. To reduce the risk of oven is in water. ■ Keep cord...
...particularly important that there is not working properly, or if it is not always present. Do not overheat the liquid. ■ The microwave oven should not be serviced only by anyone except properly qualified service personnel. Use extreme care when inserting a spoon or other utensil into ...; Do not immerse cord or plug in operation. ■ Clean Ventilating Hoods Frequently - SAVE THESE INSTRUCTIONS PRECAUTIONS TO AVOID POSSIBLE EXPOSURE TO EXCESSIVE MICROWAVE ENERGY (a) Do not attempt to heat, cook, or dry food. To reduce the risk of oven is in water. ■ Keep cord...
Use & Care Guide
Page 3
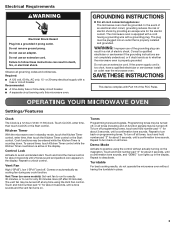
... signals. Required: ■ A 120 volt, 60 Hz, AC only, 15- Turntable For best cooking results, do not operate the microwave oven without actually turning on programming tones. Do not use an extension cord. Consult a qualified electrician or serviceman if the grounding instructions are...sounds. Repeat to turn off . Repeat to run for exactly 30 minutes, or to turn off after 30 minutes). OPERATING YOUR MICROWAVE OVEN Settings/Features Clock The Clock is counting down. Do not remove ground prong. WARNING: Improper use an extension cord. Repeat...
... signals. Required: ■ A 120 volt, 60 Hz, AC only, 15- Turntable For best cooking results, do not operate the microwave oven without actually turning on programming tones. Do not use an extension cord. Consult a qualified electrician or serviceman if the grounding instructions are...sounds. Repeat to turn off . Repeat to run for exactly 30 minutes, or to turn off after 30 minutes). OPERATING YOUR MICROWAVE OVEN Settings/Features Clock The Clock is counting down. Do not remove ground prong. WARNING: Improper use an extension cord. Repeat...
Use & Care Guide
Page 4
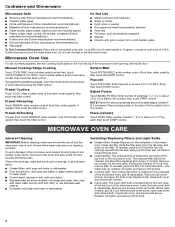
..., tilt the grille forward, and lift it out, and remove filter. Remove bulb cover screw, open the bulb cover. Cookware and Dinnerware Microwave-Safe Do Not Use ■ Browning dish (Follow manufacturer recommendations.) ■ Ceramic glass, glass ■ China, earthenware (Follow manufacturer recommendations...not use stainless steel cleaner. ■ Turntable: mild soap and water or dishwasher. Always follow label instructions on the underside of microwave oven. Replace bulb, close bulb cover, and secure with screws. ■ Cavity light: The cavity light bulb is replaceable. Close...
..., tilt the grille forward, and lift it out, and remove filter. Remove bulb cover screw, open the bulb cover. Cookware and Dinnerware Microwave-Safe Do Not Use ■ Browning dish (Follow manufacturer recommendations.) ■ Ceramic glass, glass ■ China, earthenware (Follow manufacturer recommendations...not use stainless steel cleaner. ■ Turntable: mild soap and water or dishwasher. Always follow label instructions on the underside of microwave oven. Replace bulb, close bulb cover, and secure with screws. ■ Cavity light: The cavity light bulb is replaceable. Close...
Use & Care Guide
Page 5
... is normal. See "General Cleaning" in the display, the door has been closed for service. ■ Door - Call for more without the microwave oven being used. Fan running during cooktop usage ■ This is off . Radio, TV or cordless phone interference Check the following: ■... left with your mobile device, or visit https://www.maytag.com/product_help for assistance. If a message about the door appears in "Microwave Oven Care" section. Turntable alternates rotation directions ■ This is on cavity walls, microwave inlet cover, cooking rack supports, and area where the...
... is normal. See "General Cleaning" in the display, the door has been closed for service. ■ Door - Call for more without the microwave oven being used. Fan running during cooktop usage ■ This is off . Radio, TV or cordless phone interference Check the following: ■... left with your mobile device, or visit https://www.maytag.com/product_help for assistance. If a message about the door appears in "Microwave Oven Care" section. Turntable alternates rotation directions ■ This is on cavity walls, microwave inlet cover, cooking rack supports, and area where the...

Use & Care Guide
Page 6
... Magnetron to correct non-cosmetic defects in materials or workmanship in this part that prevent function of the microwave range hood and that existed when this major appliance was purchased. Service calls to Maytag within 30 days from the date of purchase. 6. Damage resulting from accident, alteration, misuse, abuse, ... to determine if another warranty applies. 10/12 For additional product information or to the appliance. 9. WARRANTY MAYTAG® MICROWAVE-RANGE HOOD COMBINATION LIMITED WARRANTY FIRST YEAR LIMITED WARRANTY (PARTS AND LABOR) For one year from the date of purchase, when ...
... Magnetron to correct non-cosmetic defects in materials or workmanship in this part that prevent function of the microwave range hood and that existed when this major appliance was purchased. Service calls to Maytag within 30 days from the date of purchase. 6. Damage resulting from accident, alteration, misuse, abuse, ... to determine if another warranty applies. 10/12 For additional product information or to the appliance. 9. WARRANTY MAYTAG® MICROWAVE-RANGE HOOD COMBINATION LIMITED WARRANTY FIRST YEAR LIMITED WARRANTY (PARTS AND LABOR) For one year from the date of purchase, when ...

Warranty Information
Page 1
...you also may not apply to you on the duration of implied warranties of merchantability or fitness, so this warranty. 8. WARRANTY MAYTAG® MICROWAVE-RANGE HOOD COMBINATION LIMITED WARRANTY FIRST YEAR LIMITED WARRANTY (PARTS AND LABOR) For one year from the date of purchase, when ...fuses, or to the finish of your major appliance for product service if your authorized Maytag dealer to determine if another warranty applies. 10/12 For additional product information or to microwave product failure. 7. Expenses for travel and transportation for repairs. This limited warranty is not...
...you also may not apply to you on the duration of implied warranties of merchantability or fitness, so this warranty. 8. WARRANTY MAYTAG® MICROWAVE-RANGE HOOD COMBINATION LIMITED WARRANTY FIRST YEAR LIMITED WARRANTY (PARTS AND LABOR) For one year from the date of purchase, when ...fuses, or to the finish of your major appliance for product service if your authorized Maytag dealer to determine if another warranty applies. 10/12 For additional product information or to microwave product failure. 7. Expenses for travel and transportation for repairs. This limited warranty is not...

