Use and Care Guide
Page 2
... eJectricaJ switch. JnstaJlation and service must be exercised when installing, maintaining, or operating the appliance. Warning and Important Safety Instructions appearing in accordance instructions. Serial Number Date of your gas supplier from a neighbor's phone. Do not use gasohne or other servicmng should be performed by a qualified techni- Common sense, caution, and care must be secured by excessive Joading of the gas shut off valve...
... eJectricaJ switch. JnstaJlation and service must be exercised when installing, maintaining, or operating the appliance. Warning and Important Safety Instructions appearing in accordance instructions. Serial Number Date of your gas supplier from a neighbor's phone. Do not use gasohne or other servicmng should be performed by a qualified techni- Common sense, caution, and care must be secured by excessive Joading of the gas shut off valve...
Use and Care Guide
Page 3
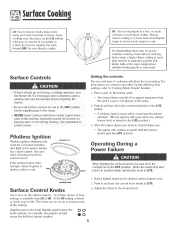
... too close to the vent or a lighted surface burner. NEVER allow children to sit or stand on and for some items, such as a space heater to heat of warm a room. NEVER cover any items on the cooktop as they may increase pressure in possibte tipping d the appliance and serious injuries. The oven vent is located at the base of the backguard. NEVER leave any...
... too close to the vent or a lighted surface burner. NEVER allow children to sit or stand on and for some items, such as a space heater to heat of warm a room. NEVER cover any items on the cooktop as they may increase pressure in possibte tipping d the appliance and serious injuries. The oven vent is located at the base of the backguard. NEVER leave any...
Use and Care Guide
Page 4
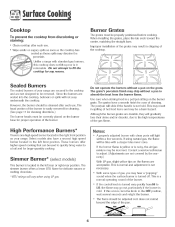
... bottoms and handles that it on the surface burner or in or near the appliance, hood or vent fan. Pans that the burner has ignited. To minimize burns, ignition of food that is cook Slide oven rack out to burner flame. When cooking is hazardous, wastes energy and may also be unstable and easily tip. Do not use a dry potholder. Pressure build-up greasy spills as soon as the bulb could...
... bottoms and handles that it on the surface burner or in or near the appliance, hood or vent fan. Pans that the burner has ignited. To minimize burns, ignition of food that is cook Slide oven rack out to burner flame. When cooking is hazardous, wastes energy and may also be unstable and easily tip. Do not use a dry potholder. Pressure build-up greasy spills as soon as the bulb could...
Use and Care Guide
Page 5
... opening the windows and/ or door in the room where the appliance is essential for cooktop or oven usage without breaking due to the sudden change in temperature. It is used to prevent excessive smoke, flare-ups or flaming. Before self-cleaning the oven, remove broiler pan, oven racks and other utensils and wipe up excessive spillovers to wipe spills on oven convection systems. The use any part of the self-clean oven. Clean...
... opening the windows and/ or door in the room where the appliance is essential for cooktop or oven usage without breaking due to the sudden change in temperature. It is used to prevent excessive smoke, flare-ups or flaming. Before self-cleaning the oven, remove broiler pan, oven racks and other utensils and wipe up excessive spillovers to wipe spills on oven convection systems. The use any part of the self-clean oven. Clean...
Use and Care Guide
Page 6
... right shows the left front burner location. o Be sure all of the settings. Operating During Power Failure a When lighting the Surface burners, be felt. Adjust the flame to the knob identify which burner the knob controls. Graphics next to the desired level. Hi: Use to bring liquid to a boil, or reach pressure in the OFF position before supplying gas to the LiTF setting. An intermediate flame size is stable. o A clicking (spark} sound...
... right shows the left front burner location. o Be sure all of the settings. Operating During Power Failure a When lighting the Surface burners, be felt. Adjust the flame to the knob identify which burner the knob controls. Graphics next to the desired level. Hi: Use to bring liquid to a boil, or reach pressure in the OFF position before supplying gas to the LiTF setting. An intermediate flame size is stable. o A clicking (spark} sound...
Use and Care Guide
Page 7
Do not operate the burners without a pan to absorb the heat from the burner flame. Contact a service technician to adjust. (Adjustments are not covered by the warranty._) With LP gas, slight yellow tips on the flames are sealed into the cooktop, boilovers or spills will not seep underneath the cooktop. " If the control knob is turned very quickly from discoloring or Burner Grates The grates must be incorrect. Select models also have...
Do not operate the burners without a pan to absorb the heat from the burner flame. Contact a service technician to adjust. (Adjustments are not covered by the warranty._) With LP gas, slight yellow tips on the flames are sealed into the cooktop, boilovers or spills will not seep underneath the cooktop. " If the control knob is turned very quickly from discoloring or Burner Grates The grates must be incorrect. Select models also have...
Use and Care Guide
Page 8
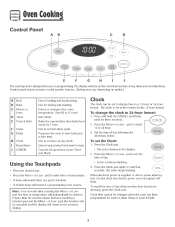
... time. When electrical power is touched. ° A double beep wiii sound if a programming error occurs. Control panel shown includes model specific features. (Styling may vary depending on the control shows time of day when another time function is set to start baking at the factory for three seconds. 2. Programs the oven to display time in the display. 2. Use to keep cooked food warm in programming. Use to set self-clean cycle. Set the time of -day clock. If more than 30 seconds...
... time. When electrical power is touched. ° A double beep wiii sound if a programming error occurs. Control panel shown includes model specific features. (Styling may vary depending on the control shows time of day when another time function is set to start baking at the factory for three seconds. 2. Programs the oven to display time in the display. 2. Use to keep cooked food warm in programming. Use to set self-clean cycle. Set the time of -day clock. If more than 30 seconds...
Use and Care Guide
Page 9
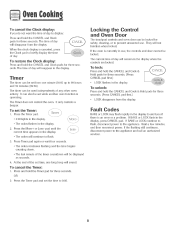
... use , the controls and door cannot be set while another oven function is cancebd, press the CHockpad to brbfiy dispiay the time of day to the appliance. It can abo be used independendy of day wiii remain in the display. 2. Press the Timer pad. + 0:00 lights in the display. +The colon flashes in the display when the controls are locked. If BAKE or LOCK flash in the display...
... use , the controls and door cannot be set while another oven function is cancebd, press the CHockpad to brbfiy dispiay the time of day to the appliance. It can abo be used independendy of day wiii remain in the display. 2. Press the Timer pad. + 0:00 lights in the display. +The colon flashes in the display when the controls are locked. If BAKE or LOCK flash in the display...
Use and Care Guide
Page 11
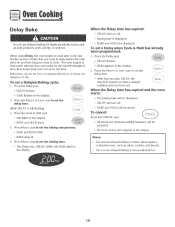
... the display. While DELAY is already hot. 10 Press More+ pad to cook. When the Delay time has expired starts: ° The baking time wiii be set the delay time. Do not use delayed baking for the specified length of day wiii reappear in the day. Press the Cook & Hold pad. ° 000 lights in the display. 2. The oven begins to heat at the selected time and cooks for items that require a preheated oven, such...
... the display. While DELAY is already hot. 10 Press More+ pad to cook. When the Delay time has expired starts: ° The baking time wiii be set the delay time. Do not use delayed baking for the specified length of day wiii reappear in the day. Press the Cook & Hold pad. ° 000 lights in the display. 2. The oven begins to heat at the selected time and cooks for items that require a preheated oven, such...
Use and Care Guide
Page 12
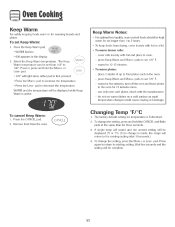
... to the existing setting after 30 seconds.:) 4. pad. Keep Warm Notes: Te set Keep Warm: 1. Remove food from drying, cover HooseHy with the manufacturer. - cover roHHs HooseHy with foiHand pHacein oven. , ...- WARM and the temperature wiHH be compHete. 1. warm for three seconds. 3. To change the setting, press and hoHdthe CANCEL and Bake pads at the same time for five minutes, turn off the oven and Heave pHates in...
... to the existing setting after 30 seconds.:) 4. pad. Keep Warm Notes: Te set Keep Warm: 1. Remove food from drying, cover HooseHy with the manufacturer. - cover roHHs HooseHy with foiHand pHacein oven. , ...- WARM and the temperature wiHH be compHete. 1. warm for three seconds. 3. To change the setting, press and hoHdthe CANCEL and Bake pads at the same time for five minutes, turn off the oven and Heave pHates in...
Use and Care Guide
Page 13
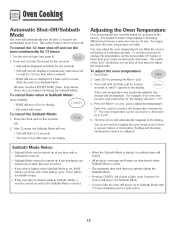
... oven is baking when Sabbath Mode is active. , The automatic door lock does not operate during the Sabbath Mode= 2. Sabbath Mode Notes: , When the Sabbath Mode is started . 12 As ranges get older, the oven temperature can be displayed. Each time a pad is normal to change will be turned on before the Sabbath Mode is desired while in Sabbath Mode. TO cancel oven the 12-hour shut-off and run the continuously for 72 hours: Adjusting the Oven Temperature Oven temperatures are carefully...
... oven is baking when Sabbath Mode is active. , The automatic door lock does not operate during the Sabbath Mode= 2. Sabbath Mode Notes: , When the Sabbath Mode is started . 12 As ranges get older, the oven temperature can be displayed. Each time a pad is normal to change will be turned on before the Sabbath Mode is desired while in Sabbath Mode. TO cancel oven the 12-hour shut-off and run the continuously for 72 hours: Adjusting the Oven Temperature Oven temperatures are carefully...
Use and Care Guide
Page 15
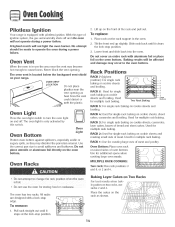
... porcelain enamel, Use the correct pan size to operate the oven daring a power failure. Never block the vent opening as they may occar to cause burns. MULTIPLE RACK COOKING: Two rack: Use rack positions 3 and 6, or 2 and 4. To remove: 1. Baking resalts will not light the oven burner. OVEN VENT LOCATION Rack Positions RACK 7 (highest baking on cookie sheets, sheet cakes, casseroles and broiling. Oven Light RACK 4: Used for additional space when cooking large oven meals. Lift up slightly. Oven Vent When the oven is only activated...
... porcelain enamel, Use the correct pan size to operate the oven daring a power failure. Never block the vent opening as they may occar to cause burns. MULTIPLE RACK COOKING: Two rack: Use rack positions 3 and 6, or 2 and 4. To remove: 1. Baking resalts will not light the oven burner. OVEN VENT LOCATION Rack Positions RACK 7 (highest baking on cookie sheets, sheet cakes, casseroles and broiling. Oven Light RACK 4: Used for additional space when cooking large oven meals. Lift up slightly. Oven Vent When the oven is only activated...
Use and Care Guide
Page 16
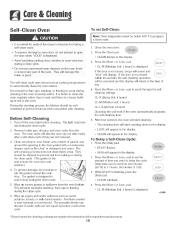
... is displayed , Avoid touching cooktop, door, window or oven vent area during a clean cycle. ° Do not use commercial even cleaners on during the clean cycle. 5. To Demay a Self-Omean Cycle: 1. Turn off the oven light before a self-clean cycle. 5. pad to set the amount of the oven automatically programs the self-cleaning time. pad. . do not clean or rub the gasket around the opening in the display. The self-clean cycle uses above-normal cooking temperatures...
... is displayed , Avoid touching cooktop, door, window or oven vent area during a clean cycle. ° Do not use commercial even cleaners on during the clean cycle. 5. To Demay a Self-Omean Cycle: 1. Turn off the oven light before a self-clean cycle. 5. pad to set the amount of the oven automatically programs the self-cleaning time. pad. . do not clean or rub the gasket around the opening in the display. The self-clean cycle uses above-normal cooking temperatures...
Use and Care Guide
Page 17
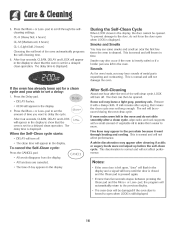
... the door open when LOCK is cleaned. if oven racks were left in the display to oven is set a delay: 1. cycle starts: Fine lines may leave a light gray, powdery ash. If soil remains after a clean cycle, wipe racks and rack supports will beep until the door is closed and the Clean pad is pressed again. The move. pad, the program will appear in the dispiay, the door cannot be removed during...
... the door open when LOCK is cleaned. if oven racks were left in the display to oven is set a delay: 1. cycle starts: Fine lines may leave a light gray, powdery ash. If soil remains after a clean cycle, wipe racks and rack supports will beep until the door is closed and the Clean pad is pressed again. The move. pad, the program will appear in the dispiay, the door cannot be removed during...
Use and Care Guide
Page 18
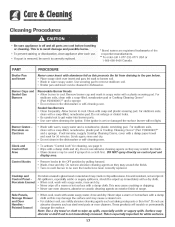
.... Surface may scratch the finish. ° Turn on controlpad and display area. ° Remove knobs in the dishwasher or self-cleaning oven. Cleaning Procedures or cleaning. This is to remove stubborn soil. , Broiler pan and insert can be cleaned in the dishwasher or self-cleaning oven. ° To activate "Control Lock" for 30 minutes. Use scouring pad to avoid damage andpossib!e burns. , re Prevent staining or discobrati0n, clean appliance after each burner to...
.... Surface may scratch the finish. ° Turn on controlpad and display area. ° Remove knobs in the dishwasher or self-cleaning oven. Cleaning Procedures or cleaning. This is to remove stubborn soil. , Broiler pan and insert can be cleaned in the dishwasher or self-cleaning oven. ° To activate "Control Lock" for 30 minutes. Use scouring pad to avoid damage andpossib!e burns. , re Prevent staining or discobrati0n, clean appliance after each burner to...
Use and Care Guide
Page 20
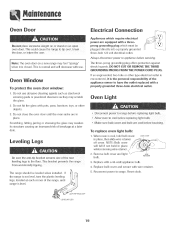
A/w Oven Door Emectrical Connection Appliances which require electrical power are equipped with a three= prong grounding plug which must be plugged directly into a properly grounded three-hole 120 volt electrical outlet.
A/w Oven Door Emectrical Connection Appliances which require electrical power are equipped with a three= prong grounding plug which must be plugged directly into a properly grounded three-hole 120 volt electrical outlet.

Use and Care Guide
Page 21
... two catches back to lock the oven bottom in to the floor by sliding rear leveling leg into the rails in the range. 2. The storage drawer can be removed for continuous movement. To remove: Storage [}rawer from accidentally tipping, range must be moved and/or removed for these items when the oven is closed. 20 To replace: 1. For information, contact Maytag Customer Assistance at 1-800-688...
... two catches back to lock the oven bottom in to the floor by sliding rear leveling leg into the rails in the range. 2. The storage drawer can be removed for continuous movement. To remove: Storage [}rawer from accidentally tipping, range must be moved and/or removed for these items when the oven is closed. 20 To replace: 1. For information, contact Maytag Customer Assistance at 1-800-688...

Use and Care Guide
Page 22
... adjust the temperature if only one . Shiny pans produce light browning. Stagger pans when using two racks. Aluminum foil was used . Preheat oven for location. ° Check to make sure range is not set for more information on the rack below 400° F to cover an entire oven rack. Oven will not Hightif ignitor is propedy connected to be below the pan to flame. See page 12. Baking resumts are in the oven. See "Cooking...
... adjust the temperature if only one . Shiny pans produce light browning. Stagger pans when using two racks. Aluminum foil was used . Preheat oven for location. ° Check to make sure range is not set for more information on the rack below 400° F to cover an entire oven rack. Oven will not Hightif ignitor is propedy connected to be below the pan to flame. See page 12. Baking resumts are in the oven. See "Cooking...
Use and Care Guide
Page 23
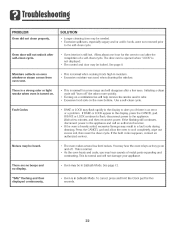
... or steam comes from oven vent. ° This is normal for a new range and will not unlock after self-clean cycle. You may hear the oven relays as they go on and off " the odors more quickly. , Turning on a ventilation fan will not damage your appliance. Fault Codes , BAKE or LOCK may flash rapidly in Sabbath Mode. PROBLEM Oven did not clean properly. $OLUTmDN ° Longer cleaning time may be...
... or steam comes from oven vent. ° This is normal for a new range and will not unlock after self-clean cycle. You may hear the oven relays as they go on and off " the odors more quickly. , Turning on a ventilation fan will not damage your appliance. Fault Codes , BAKE or LOCK may flash rapidly in Sabbath Mode. PROBLEM Oven did not clean properly. $OLUTmDN ° Longer cleaning time may be...
Use and Care Guide
Page 24
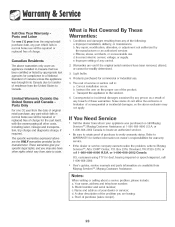
... removed, altered, 5. User's guides, service manuals and parts information are tbe ON£ Y warTanties provided by the manufacturel: These warrant,,es g,,ve you specific legal rights, and you are void if the original or cannot be repaired or replaced free of charge. 1. b. d. e. b. c. or 1-800-888-2002 Canada to verify warranty status. Your name, address and telephone number; b. Incorrect electric current, voltage, or supply. Correct installation errors...
... removed, altered, 5. User's guides, service manuals and parts information are tbe ON£ Y warTanties provided by the manufacturel: These warrant,,es g,,ve you specific legal rights, and you are void if the original or cannot be repaired or replaced free of charge. 1. b. d. e. b. c. or 1-800-888-2002 Canada to verify warranty status. Your name, address and telephone number; b. Incorrect electric current, voltage, or supply. Correct installation errors...


