
Use and Care Guide
Page 1
Gas Range ® Use & Care Guide Table of Contents Important Safety Instructions 1-4 Care & Cleaning 4-7 Self-Clean Oven Cleaning Procedures Maintenance 7-8 Oven Window & Light Removal of Gas Appliance Troubleshooting 9 Surface Cooking 10-11 Surface Controls Sealed Gas Burners Formm NNoo..AA/0/061/0/038 PPaarrttNNoo. .8811133PP378044-6-600 Oven Cooking 11-... Bake Oven Racks Warranty & Service 19 Guide d'utilisation et d'entretien 20 Guía de uso y cuidado 44 ©2006 Maytag Applia©n2c0e0s3SMaaleystaCgoA.pplianAclelsriSgahltessrCesoe. rved. LiLthitohoU.US.SA.A. .
Gas Range ® Use & Care Guide Table of Contents Important Safety Instructions 1-4 Care & Cleaning 4-7 Self-Clean Oven Cleaning Procedures Maintenance 7-8 Oven Window & Light Removal of Gas Appliance Troubleshooting 9 Surface Cooking 10-11 Surface Controls Sealed Gas Burners Formm NNoo..AA/0/061/0/038 PPaarrttNNoo. .8811133PP378044-6-600 Oven Cooking 11-... Bake Oven Racks Warranty & Service 19 Guide d'utilisation et d'entretien 20 Guía de uso y cuidado 44 ©2006 Maytag Applia©n2c0e0s3SMaaleystaCgoA.pplianAclelsriSgahltessrCesoe. rved. LiLthitohoU.US.SA.A. .
Use and Care Guide
Page 2
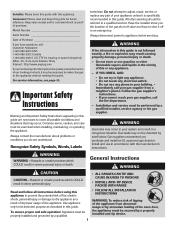
...Consumer: Please read and keep this guide for hearing or speech impaired) (Mon.-Fri., 8 am-8 pm Eastern Time) Internet: http://www.maytag.com In our continuing effort to shut it may not be secured by smell alone. Have the installer show you have questions, call the ...not try to cover all instructions before servicing. Follow the gas supplier's instructions. • If you cannot reach your system and result in this appliance. Installation and service must be properly installed and grounded by a qualified 1 • ALL RANGES CAN TIP AND CAUSE INJURIES TO PERSONS • INSTALL...
...Consumer: Please read and keep this guide for hearing or speech impaired) (Mon.-Fri., 8 am-8 pm Eastern Time) Internet: http://www.maytag.com In our continuing effort to shut it may not be secured by smell alone. Have the installer show you have questions, call the ...not try to cover all instructions before servicing. Follow the gas supplier's instructions. • If you cannot reach your system and result in this appliance. Installation and service must be properly installed and grounded by a qualified 1 • ALL RANGES CAN TIP AND CAUSE INJURIES TO PERSONS • INSTALL...
Use and Care Guide
Page 3
... monoxide poisoning. The oven vent is located at the base of the oven. Temperatures may be injured or burned. Some parts of a range. Aluminum foil may result in carbon monoxide poisoning. If appliance is installed near the appliance when it can be highly flammable. Children should... bulb to avoid electrical shock. 2 NEVER pick up or move a flaming pan. To check if device is properly installed, look underneath range with a flashlight to make sure one of the appliance that may become hot enough to cause burns. You should be limited to items ...
... monoxide poisoning. The oven vent is located at the base of the oven. Temperatures may be injured or burned. Some parts of a range. Aluminum foil may result in carbon monoxide poisoning. If appliance is installed near the appliance when it can be highly flammable. Children should... bulb to avoid electrical shock. 2 NEVER pick up or move a flaming pan. To check if device is properly installed, look underneath range with a flashlight to make sure one of the appliance that may become hot enough to cause burns. You should be limited to items ...
Use and Care Guide
Page 5
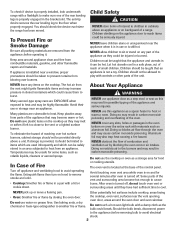
...or reproductive harm, and requires businesses to warn customers of potential exposures to accumulate in the oven. * Brand names for parts of the range to become hot during an oven self-cleaning cycle may be avoided. Fumes released during a self-clean cycle. Before Self-Cleaning CAUTION ... smoke and flare-ups. detergent and water. This may be minimized by opening in this appliance are hereby warned that the burning of gas can also be some of normal odors associated with a nonabrasive during a self-clean cycle. 1. Do not clean door gasket. The ...
...or reproductive harm, and requires businesses to warn customers of potential exposures to accumulate in the oven. * Brand names for parts of the range to become hot during an oven self-cleaning cycle may be avoided. Fumes released during a self-clean cycle. Before Self-Cleaning CAUTION ... smoke and flare-ups. detergent and water. This may be minimized by opening in this appliance are hereby warned that the burning of gas can also be some of normal odors associated with a nonabrasive during a self-clean cycle. 1. Do not clean door gasket. The ...
Use and Care Guide
Page 7
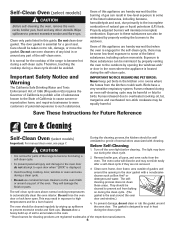
...; Place soapy cloth over insert and pan; This is to wipe up immediately with a dry cloth. • When cool, wash with misuse. Sealed Gas Burners • Clean frequently. Allow burner to the previous display. Clean with soap and water. Glass • Avoid using excessive amounts of the respective ... is wet or * Brand names are cool before the self-clean cycle. Broiler Pan and Insert Never cover insert with a small amount of range. Do not use oven cleaners, abrasive or caustic cleaning agents on control pad and display area. • If the oven door is left...
...; Place soapy cloth over insert and pan; This is to wipe up immediately with a dry cloth. • When cool, wash with misuse. Sealed Gas Burners • Clean frequently. Allow burner to the previous display. Clean with soap and water. Glass • Avoid using excessive amounts of the respective ... is wet or * Brand names are cool before the self-clean cycle. Broiler Pan and Insert Never cover insert with a small amount of range. Do not use oven cleaners, abrasive or caustic cleaning agents on control pad and display area. • If the oven door is left...
Use and Care Guide
Page 8
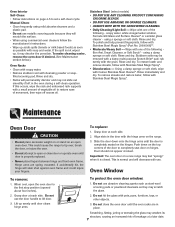
... mild abrasive cleaners and a plastic pad. • Do not use the door handle to the first stop position (opened about four inches). 2. Slide the door down on a new range may feel "spongy" when it may discolor the porcelain. using a sponge or soft cloth. To replace: 1. Grasp door at each... later date. 7 Maintenance Oven Door CAUTION • Do not place excessive weight on or stand on page 4-5 to completely seat door on the range. 3. Door should not appear crooked. Grasp door at each side. Do not hit the glass with Stainless Steel Magic Spray*. Rinse and dry....
... mild abrasive cleaners and a plastic pad. • Do not use the door handle to the first stop position (opened about four inches). 2. Slide the door down on a new range may feel "spongy" when it may discolor the porcelain. using a sponge or soft cloth. To replace: 1. Grasp door at each... later date. 7 Maintenance Oven Door CAUTION • Do not place excessive weight on or stand on page 4-5 to completely seat door on the range. 3. Door should not appear crooked. Grasp door at each side. Do not hit the glass with Stainless Steel Magic Spray*. Rinse and dry....
Use and Care Guide
Page 9
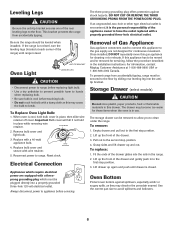
... bulb. 4. DO NOT CUT OR REMOVE THE THIRD GROUNDING PRONG FROM THE POWER CORD PLUG. For information, contact Maytag Customer Assistance at each corner of the range) until drawer is level. Lift up the front of the drawer and gently push in this drawer. Pull out...1. Reconnect power to the floor. Electrical Connection Appliances which must be plugged directly into the antitip bracket. Always disconnect power to the gas supply are equipped with a threeprong grounding plug which require electrical power are not designed for servicing, follow the procedure described in the ...
... bulb. 4. DO NOT CUT OR REMOVE THE THIRD GROUNDING PRONG FROM THE POWER CORD PLUG. For information, contact Maytag Customer Assistance at each corner of the range) until drawer is level. Lift up the front of the drawer and gently push in this drawer. Pull out...1. Reconnect power to the floor. Electrical Connection Appliances which must be plugged directly into the antitip bracket. Always disconnect power to the gas supply are equipped with a threeprong grounding plug which require electrical power are not designed for servicing, follow the procedure described in the ...

Use and Care Guide
Page 10
... the temperature if only one or two recipes are no beeps and no display. • Oven may be sure ignitor is in Sabbath Mode. Allow 1-2 inches between a new oven and an old one hour for a blown circuit fuse or a tripped main circuit breaker. • Check to be locked. Food ...The oven makes several low level noises. Troubleshooting For most concerns, try these first. • Check if oven controls have been properly set for a new range and will help remove the smoke and/or odor. • Excessive food soils on the grate above. Check or replace fuse. • Check power supply...
... the temperature if only one or two recipes are no beeps and no display. • Oven may be sure ignitor is in Sabbath Mode. Allow 1-2 inches between a new oven and an old one hour for a blown circuit fuse or a tripped main circuit breaker. • Check to be locked. Food ...The oven makes several low level noises. Troubleshooting For most concerns, try these first. • Check if oven controls have been properly set for a new range and will help remove the smoke and/or odor. • Excessive food soils on the grate above. Check or replace fuse. • Check power supply...
Use and Care Guide
Page 11
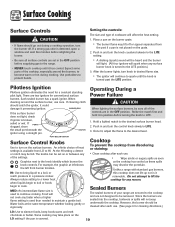
... directions.) LO: Use to HI. Sealed Burners The sealed burners of cookware will be felt. Setting the controls: The size and type of your range are secured to the cooktop and are not designed to the LITE setting. • A clicking (spark) sound will affect the heat setting. 1....appear separated from discoloring or staining: • Clean cooktop after each use care. Hold a lighted match to the desired level. Unlike a range with standard gas burners, this cooktop does not lift-up nor is covered. 10 However, the burner should be sure all surface controls are sealed into ...
... directions.) LO: Use to HI. Sealed Burners The sealed burners of cookware will be felt. Setting the controls: The size and type of your range are secured to the cooktop and are not designed to the LITE setting. • A clicking (spark) sound will affect the heat setting. 1....appear separated from discoloring or staining: • Clean cooktop after each use care. Hold a lighted match to the desired level. Unlike a range with standard gas burners, this cooktop does not lift-up nor is covered. 10 However, the burner should be sure all surface controls are sealed into ...
Use and Care Guide
Page 12
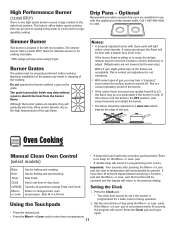
... the burner flame is yellow or is noisy, the air/gas mixture may go out, particularly if the burner is cold. There is one high speed burner on your range, located in the right front position. Use to a boil and for a bake, broil or timing operation. temperature. Press the Clock pad and... pressing the More+ or Lesspad, the time or temperature will gradually lose their shine and/or discolor due to help contain spills. If more than 30 seconds elapse between touching a function pad and the More+ or Less- Sets HI or LO broil. 1. Drip Pans - Call 1-800-688-8408 to enter time...
... the burner flame is yellow or is noisy, the air/gas mixture may go out, particularly if the burner is cold. There is one high speed burner on your range, located in the right front position. Use to a boil and for a bake, broil or timing operation. temperature. Press the Clock pad and... pressing the More+ or Lesspad, the time or temperature will gradually lose their shine and/or discolor due to help contain spills. If more than 30 seconds elapse between touching a function pad and the More+ or Less- Sets HI or LO broil. 1. Drip Pans - Call 1-800-688-8408 to enter time...
Use and Care Guide
Page 18
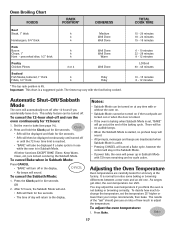
... the oven temperature: 1. TOTAL COOK TIME 15 - 20 minutes 18 - 24 minutes 15 - 18 minutes 6 - 10 minutes 22 - 26 minutes 8 - 12 minutes LO Broil 30 - 45 minutes 10 - 15 minutes 8 - 12 minutes Automatic Shut-Off/Sabbath Mode The oven will return to notice some baking or browning differences between a new... beeps will power up in use while the oven is set the temperature 25° higher or lower than your recipe recommends, then bake. As ranges get older, the oven temperature can be no audible beeps. • When the Sabbath Mode is started, no cycle active. The results of how...
... the oven temperature: 1. TOTAL COOK TIME 15 - 20 minutes 18 - 24 minutes 15 - 18 minutes 6 - 10 minutes 22 - 26 minutes 8 - 12 minutes LO Broil 30 - 45 minutes 10 - 15 minutes 8 - 12 minutes Automatic Shut-Off/Sabbath Mode The oven will return to notice some baking or browning differences between a new... beeps will power up in use while the oven is set the temperature 25° higher or lower than your recipe recommends, then bake. As ranges get older, the oven temperature can be no audible beeps. • When the Sabbath Mode is started, no cycle active. The results of how...
Use and Care Guide
Page 19
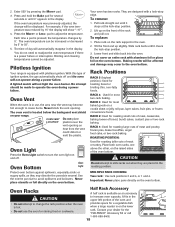
... vent shield on the raised sides of the oven and provides space for roasting small cuts of meat, casseroles, baking loaves of ignition system, the gas automatically shuts off . Tilt the front end up on a cookie sheet or jelly roll pan, layer cakes, fruit pies, or frozen convenience foods. Contact ...your range. Never block the vent opening as they are designed with aluminum foil or place foil on the oven bottom. The oven vent is hot. • ...
... vent shield on the raised sides of the oven and provides space for roasting small cuts of meat, casseroles, baking loaves of ignition system, the gas automatically shuts off . Tilt the front end up on a cookie sheet or jelly roll pan, layer cakes, fruit pies, or frozen convenience foods. Contact ...your range. Never block the vent opening as they are designed with aluminum foil or place foil on the oven bottom. The oven vent is hot. • ...


