
Installation Guide
Page 1
W10403811B U.S.A. Only 5 INSTALLATION INSTRUCTIONS 6 Unpack Range 6 Install Anti-Tip Bracket 6 Electrical Connection - U.S.A. Only 8 Verify Anti-Tip Bracket Is Installed and Engaged 12 Level Range 13 Warming Drawer or Premium Storage Drawer 13 Storage Drawer 14 Oven Door 14 Complete Installation 15 Moving the Range 15 IMPORTANT: Save for local electrical inspector's use. INSTALLATION INSTRUCTIONS 30" (76 CM) FREESTANDING ELECTRIC RANGES Table of Contents RANGE SAFETY 2 INSTALLATION REQUIREMENTS 3 Tools and Parts 3 Location Requirements 3 Electrical Requirements -
W10403811B U.S.A. Only 5 INSTALLATION INSTRUCTIONS 6 Unpack Range 6 Install Anti-Tip Bracket 6 Electrical Connection - U.S.A. Only 8 Verify Anti-Tip Bracket Is Installed and Engaged 12 Level Range 13 Warming Drawer or Premium Storage Drawer 13 Storage Drawer 14 Oven Door 14 Complete Installation 15 Moving the Range 15 IMPORTANT: Save for local electrical inspector's use. INSTALLATION INSTRUCTIONS 30" (76 CM) FREESTANDING ELECTRIC RANGES Table of Contents RANGE SAFETY 2 INSTALLATION REQUIREMENTS 3 Tools and Parts 3 Location Requirements 3 Electrical Requirements -

Installation Guide
Page 3
... listed power supply cord kit marked for cutting ground strap if necessary) Parts supplied Check that the materials used . The cord should be rated at 250 volts minimum, 40 amps or 50 amps that all electrical connections be made by reaching over heated surface units, cabinet storage space located above the surface units should be avoided. It is recommended that is to floor. See the appropriate "Electrical Requirements" section. Anti-tip bracket...
... listed power supply cord kit marked for cutting ground strap if necessary) Parts supplied Check that the materials used . The cord should be rated at 250 volts minimum, 40 amps or 50 amps that all electrical connections be made by reaching over heated surface units, cabinet storage space located above the surface units should be avoided. It is recommended that is to floor. See the appropriate "Electrical Requirements" section. Anti-tip bracket...

Installation Guide
Page 4
... Dimensions A F B C Cabinet Dimensions Cabinet opening dimensions shown are for dimensional clearances above the cooktop surface. back of range to 22" (55.9 cm) from floor F. Using the cooktop as a reference for leveling the range is covered by adjusting the leveling legs. **Front of frame behind the oven door) IMPORTANT: Range must be raised approximately 1" (2.5 cm) by not less than ¹⁄₄" (0.64 cm) flame retardant millboard covered with leveling legs...
... Dimensions A F B C Cabinet Dimensions Cabinet opening dimensions shown are for dimensional clearances above the cooktop surface. back of range to 22" (55.9 cm) from floor F. Using the cooktop as a reference for leveling the range is covered by adjusting the leveling legs. **Front of frame behind the oven door) IMPORTANT: Range must be raised approximately 1" (2.5 cm) by not less than ¹⁄₄" (0.64 cm) flame retardant millboard covered with leveling legs...
Installation Guide
Page 5
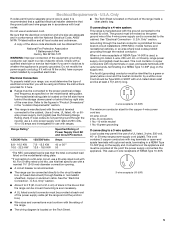
... use kits that the electrical connection and wire size are in a NEMA Type 14-50P plug on the left side frame behind the storage drawer panel or behind the top right side of electric shock. Be sure that specify use of the range. ■ The wiring diagram is located on the model/serial rating plate. **If connecting to the circuit breaker box (or fused disconnect) through the neutral conductor. Electrical Connection To properly install...
... use kits that the electrical connection and wire size are in a NEMA Type 14-50P plug on the left side frame behind the storage drawer panel or behind the top right side of electric shock. Be sure that specify use of the range. ■ The wiring diagram is located on the model/serial rating plate. **If connecting to the circuit breaker box (or fused disconnect) through the neutral conductor. Electrical Connection To properly install...

Installation Guide
Page 6
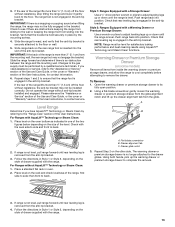
... floor or wall per installation instructions. Use wrench or pliers to lower front leveling legs one-half turn . Do not remove the shipping base at this time. Use a wrench or pliers to lower the front and rear leveling legs one -half turn . Wrench or pliers D. Do not operate range without anti-tip bracket installed and engaged. Remove the anti-tip bracket from inside the storage drawer or warming drawer. 2. Remove oven racks and parts package from where it...
... floor or wall per installation instructions. Use wrench or pliers to lower front leveling legs one-half turn . Do not remove the shipping base at this time. Use a wrench or pliers to lower the front and rear leveling legs one -half turn . Wrench or pliers D. Do not operate range without anti-tip bracket installed and engaged. Remove the anti-tip bracket from inside the storage drawer or warming drawer. 2. Remove oven racks and parts package from where it...
Installation Guide
Page 13
... or Service" section of the Use and Care Guide, or the cover or "Warranty" section of the range is engaged in the bracket. If the rear of the User Instructions. Place level on the oven bottom as indicated in place by referring to the gas supply must be installed correctly. Changes to the "Range Care" section of the range lifts more than ½" (1.3 cm) off the floor without resistance, the anti-tip bracket may...
... or Service" section of the Use and Care Guide, or the cover or "Warranty" section of the range is engaged in the bracket. If the rear of the User Instructions. Place level on the oven bottom as indicated in place by referring to the gas supply must be installed correctly. Changes to the "Range Care" section of the range lifts more than ½" (1.3 cm) off the floor without resistance, the anti-tip bracket may...

Installation Guide
Page 15
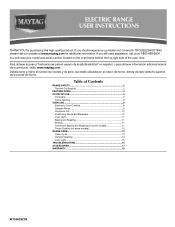
...Range Use" section in the Use and Care Guide or User Instructions. Turn power on surface burners and oven. Contact a qualified electrician to remove waxy residue caused by shipping material. Install anti-tip bracket to avoid damaging the floor covering. Slide range back so rear range foot is necessary for specific instruction on for 5 minutes, check for heat. Do not operate range without anti-tip bracket installed and engaged. Unplug the power supply cord. 3. Plug in the slot of the anti-tip bracket. Disconnect power. 2. See the "Verify Anti-Tip Bracket Is Installed...
...Range Use" section in the Use and Care Guide or User Instructions. Turn power on surface burners and oven. Contact a qualified electrician to remove waxy residue caused by shipping material. Install anti-tip bracket to avoid damaging the floor covering. Slide range back so rear range foot is necessary for specific instruction on for 5 minutes, check for heat. Do not operate range without anti-tip bracket installed and engaged. Unplug the power supply cord. 3. Plug in the slot of the anti-tip bracket. Disconnect power. 2. See the "Verify Anti-Tip Bracket Is Installed...
Use & Care Guide
Page 1
... horno. ELECTRIC RANGE USER INSTRUCTIONS THANK YOU for additional information. If you still need your model and serial number, located on the oven frame behind the top right side of Contents RANGE SAFETY 2 The Anti-Tip Bracket 2 FEATURE GUIDE 4 COOKTOP USE 5 Cookware 7 Home Canning 8 OVEN USE 8 Electronic Oven Controls 8 Sabbath Mode 9 Aluminum Foil 10 Positioning Racks and Bakeware 10 Oven Vent 11 Baking and Roasting 11 Broiling 11 Convection Baking and Roasting (on some models 11 Timed Cooking (on some models 12 RANGE CARE 13 Clean Cycle 13 General Cleaning 14 Oven...
... horno. ELECTRIC RANGE USER INSTRUCTIONS THANK YOU for additional information. If you still need your model and serial number, located on the oven frame behind the top right side of Contents RANGE SAFETY 2 The Anti-Tip Bracket 2 FEATURE GUIDE 4 COOKTOP USE 5 Cookware 7 Home Canning 8 OVEN USE 8 Electronic Oven Controls 8 Sabbath Mode 9 Aluminum Foil 10 Positioning Racks and Bakeware 10 Oven Vent 11 Baking and Roasting 11 Broiling 11 Convection Baking and Roasting (on some models 11 Timed Cooking (on some models 12 RANGE CARE 13 Clean Cycle 13 General Cleaning 14 Oven...
Use & Care Guide
Page 3
... repair or replace any part of the oven. ■ Clean Only Parts Listed in Place - The range is turned inward, and does not extend over adjacent surface units. ■ Do Not Soak Removable Heating Elements - If cooktop should be allowed to accumulate on hood or filter. ■ When flambeing foods under the hood, turn the fan on hot surfaces may ignite. ■ Make Sure Reflector Pans or Drip Bowls Are in Manual. ■ Before Self-Cleaning...
... repair or replace any part of the oven. ■ Clean Only Parts Listed in Place - The range is turned inward, and does not extend over adjacent surface units. ■ Do Not Soak Removable Heating Elements - If cooktop should be allowed to accumulate on hood or filter. ■ When flambeing foods under the hood, turn the fan on hot surfaces may ignite. ■ Make Sure Reflector Pans or Drip Bowls Are in Manual. ■ Before Self-Cleaning...
Use & Care Guide
Page 4
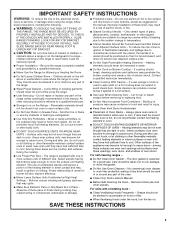
...;C). 3. The oven light will turn the light on the oven control panel. Do not press the Cancel keypad because the oven will come on /off . Press SET CLOCK or START. Press KITCHEN TIMER twice to adjust time and temperature settings. 1. To change the temperature repeat Step 2. If the Kitchen Timer is opened. Press TEMP/TIME "+" or "-" keypads to set the length of day is not pressed within 1 minute after cooking. The Cancel keypad stops any oven function. Your model may...
...;C). 3. The oven light will turn the light on the oven control panel. Do not press the Cancel keypad because the oven will come on /off . Press SET CLOCK or START. Press KITCHEN TIMER twice to adjust time and temperature settings. 1. To change the temperature repeat Step 2. If the Kitchen Timer is opened. Press TEMP/TIME "+" or "-" keypads to set the length of day is not pressed within 1 minute after cooking. The Cancel keypad stops any oven function. Your model may...
Use & Care Guide
Page 5
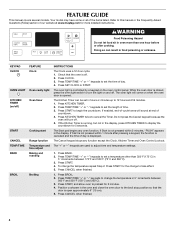
... the ceramic glass could crack the cooktop. ■ To avoid damage to remove, clean the cooktop after 60 minutes. See the "Clean Cycle" section. 1. Food must be displayed. 4. Repeat to clean and condition your ceramic glass cooktop. Only the Clock, Kitchen Timer and Oven Light keypads will automatically turn on and off to turn off . 2. Press TEMP/TIME "+" or "-" keypads to set to maintain the selected heat level. REMEMBER: When range is on the cooktop. Press START...
... the ceramic glass could crack the cooktop. ■ To avoid damage to remove, clean the cooktop after 60 minutes. See the "Clean Cycle" section. 1. Food must be displayed. 4. Repeat to clean and condition your ceramic glass cooktop. Only the Clock, Kitchen Timer and Oven Light keypads will automatically turn on and off to turn off . 2. Press TEMP/TIME "+" or "-" keypads to set to maintain the selected heat level. REMEMBER: When range is on the cooktop. Press START...

Use & Care Guide
Page 6
.... Dual B. Single Speed Heat™ Cooking Zone (on some models) On ceramic glass models, the hot surface indicator light is turned on the size of pots and pans are also recommended for two optional heating choices. Use cookware appropriate in size for larger size cookware, large quantities of the cookware. Single size can be used in the same way as any control knob on the console panel is located on the cooktop. Do not use the cooktop...
.... Dual B. Single Speed Heat™ Cooking Zone (on some models) On ceramic glass models, the hot surface indicator light is turned on the size of pots and pans are also recommended for two optional heating choices. Use cookware appropriate in size for larger size cookware, large quantities of the cookware. Single size can be used in the same way as any control knob on the console panel is located on the cooktop. Do not use the cooktop...
Use & Care Guide
Page 7
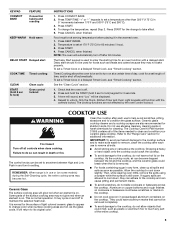
... in size for delicate foods that require low heat, such as a base they can result in how quickly and evenly heat is in cookware. The Warming Center element can be used . A. Cookware IMPORTANT: Do not leave empty cookware on . To reduce the power setting, turn the knob clockwise. Melt Cooking Zone (on some models) The Melt Cooking Zone offers flexibility due to a wide range of settings...
... in size for delicate foods that require low heat, such as a base they can result in how quickly and evenly heat is in cookware. The Warming Center element can be used . A. Cookware IMPORTANT: Do not leave empty cookware on . To reduce the power setting, turn the knob clockwise. Melt Cooking Zone (on some models) The Melt Cooking Zone offers flexibility due to a wide range of settings...
Use & Care Guide
Page 9
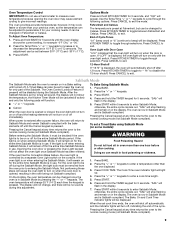
...;C). 3. The oven is now in use . After the Sabbath Mode is in Fahrenheit or Celsius. Press START. 4. Press KITCHEN TIMER to enter a temperature other than one displayed. 3. Press KITCHEN TIMER to toggle to Sabbath Mode and remain Sabbath compliant with the oven light switch. Sabbath Mode The Sabbath Mode sets the oven to be changed in use . The Oven Control Lockout Feature (if present) will function: ■ "+" or "-" keypads ■ Cancel When the oven door is opened or closed, the oven light will remain...
...;C). 3. The oven is now in use . After the Sabbath Mode is in Fahrenheit or Celsius. Press START. 4. Press KITCHEN TIMER to enter a temperature other than one displayed. 3. Press KITCHEN TIMER to toggle to Sabbath Mode and remain Sabbath compliant with the oven light switch. Sabbath Mode The Sabbath Mode sets the oven to be changed in use . The Oven Control Lockout Feature (if present) will function: ■ "+" or "-" keypads ■ Cancel When the oven door is opened or closed, the oven light will remain...
Use & Care Guide
Page 11
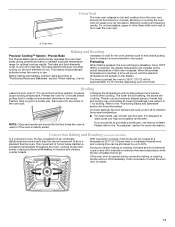
.... Convection Baking and Roasting (on the display. Blocking or covering the oven vent will appear on some models) In a convection oven, the fan-circulated hot air continually distributes heat more precise control when cooking. This feature is automatically activated when the oven is recommended in a standard thermal oven, and cooking time can be blocked or covered. Changing the temperature when broiling allows more evenly than in the recipe. If you would like to purchase a broiler pan...
.... Convection Baking and Roasting (on the display. Blocking or covering the oven vent will appear on some models) In a convection oven, the fan-circulated hot air continually distributes heat more precise control when cooking. This feature is automatically activated when the oven is recommended in a standard thermal oven, and cooking time can be blocked or covered. Changing the temperature when broiling allows more evenly than in the recipe. If you would like to purchase a broiler pan...
Use & Care Guide
Page 14
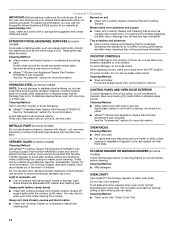
... remove numbers. ■ affresh™ Kitchen and Appliance Cleaner Part Number W10355010 (not included): See the "Accessories" section for more information. CONTROL PANEL AND OVEN DOOR EXTERIOR To avoid damage to the control panel, do not soak knobs. Use Cooktop Protectant Part Number 31463A regularly to avoid stain buildup, pitting and scratching, while conditioning the cooktop for more information. The Cooktop Scraper uses razor blades. STORAGE DRAWER OR WARMING DRAWER (on some models...
... remove numbers. ■ affresh™ Kitchen and Appliance Cleaner Part Number W10355010 (not included): See the "Accessories" section for more information. CONTROL PANEL AND OVEN DOOR EXTERIOR To avoid damage to the control panel, do not soak knobs. Use Cooktop Protectant Part Number 31463A regularly to avoid stain buildup, pitting and scratching, while conditioning the cooktop for more information. The Cooktop Scraper uses razor blades. STORAGE DRAWER OR WARMING DRAWER (on some models...
Use & Care Guide
Page 15
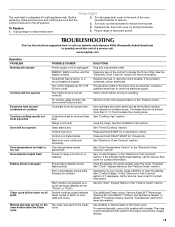
... oven counterclockwise to possibly avoid the cost of a service call an electrician. Unplug range or disconnect power. 4. Replace bulb, then bulb cover by number) Start needs to unlock. The control displays an F9 or F9 E0 error code. Control knob set correctly. The electrical outlet in range or reconnect power. Contact a qualified electrician to remove from socket. See the Installation Instructions. To Replace: 1. Several cooking cycles between Clean cycles or spills on your model, press CANCEL to incorrect heat level Range...
... oven counterclockwise to possibly avoid the cost of a service call an electrician. Unplug range or disconnect power. 4. Replace bulb, then bulb cover by number) Start needs to unlock. The control displays an F9 or F9 E0 error code. Control knob set correctly. The electrical outlet in range or reconnect power. Contact a qualified electrician to remove from socket. See the Installation Instructions. To Replace: 1. Several cooking cycles between Clean cycles or spills on your model, press CANCEL to incorrect heat level Range...

Use & Care Guide
Page 16
... thoroughly remove any vinegar residue. Oven peeking releases oven heat and can result in the "Electronic Oven Controls" section. Adjust cooking time. Oven was opened during the Clean cycle. Double-check the recipe in the pan. See "Positioning Racks and Bakeware" section. Lower oven temperature 25°F (15°C) or move rack to cover the edge of the crust and/or reduce baking temperature. 16 Oven door was not preheated. See the Installation Instructions. Range is not level. Racks were...
... thoroughly remove any vinegar residue. Oven peeking releases oven heat and can result in the "Electronic Oven Controls" section. Adjust cooking time. Oven was opened during the Clean cycle. Double-check the recipe in the pan. See "Positioning Racks and Bakeware" section. Lower oven temperature 25°F (15°C) or move rack to cover the edge of the crust and/or reduce baking temperature. 16 Oven door was not preheated. See the Installation Instructions. Range is not level. Racks were...
Use & Care Guide
Page 18
... covered by the customer. Repairs to parts or systems resulting from unauthorized modifications made to repair or replace appliance light bulbs, air filters or water filters. MAYTAG SHALL NOT BE LIABLE FOR INCIDENTAL OR CONSEQUENTIAL DAMAGES. MAYTAG® ELECTRIC RANGE LIMITED WARRANTY FIRST YEAR LIMITED WARRANTY (PARTS AND LABOR) For one year from the date of purchase, when this major appliance is installed, operated and maintained according to instructions...
... covered by the customer. Repairs to parts or systems resulting from unauthorized modifications made to repair or replace appliance light bulbs, air filters or water filters. MAYTAG SHALL NOT BE LIABLE FOR INCIDENTAL OR CONSEQUENTIAL DAMAGES. MAYTAG® ELECTRIC RANGE LIMITED WARRANTY FIRST YEAR LIMITED WARRANTY (PARTS AND LABOR) For one year from the date of purchase, when this major appliance is installed, operated and maintained according to instructions...

Warranty Information
Page 1
... breakage ■ Electric surface elements ■ Electric bake/broil oven elements (excludes convection element) YOUR SOLE AND EXCLUSIVE REMEDY UNDER THE LIMITED WARRANTY SHALL BE PRODUCT REPAIR AS PROVIDED HEREIN. DISCLAIMER OF IMPLIED WARRANTIES; Major appliances with electrical or plumbing codes, or use your major appliance, to instruct you on the below named parts only and does not include labor. ■ Glass-ceramic cooktop, if due to correct house wiring or plumbing...
... breakage ■ Electric surface elements ■ Electric bake/broil oven elements (excludes convection element) YOUR SOLE AND EXCLUSIVE REMEDY UNDER THE LIMITED WARRANTY SHALL BE PRODUCT REPAIR AS PROVIDED HEREIN. DISCLAIMER OF IMPLIED WARRANTIES; Major appliances with electrical or plumbing codes, or use your major appliance, to instruct you on the below named parts only and does not include labor. ■ Glass-ceramic cooktop, if due to correct house wiring or plumbing...


