Owners Manual
Page 1
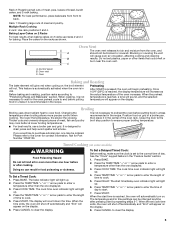
... the safety of injury, and tell you don't immediately follow instructions. This symbol alerts you to reduce the chance of others . ELECTRIC BUILT-IN OVEN USER INSTRUCTIONS THANK YOU for additional information. Always read and obey all safety messages. These words mean: DANGER You can kill or...model and serial number located on your appliance. All safety messages will need assistance, call us at www.maytag.com for purchasing this manual and on the oven frame behind the oven door. You will follow the safety alert symbol and either the word "DANGER" or "WARNING." W10203502A...
... the safety of injury, and tell you don't immediately follow instructions. This symbol alerts you to reduce the chance of others . ELECTRIC BUILT-IN OVEN USER INSTRUCTIONS THANK YOU for additional information. Always read and obey all safety messages. These words mean: DANGER You can kill or...model and serial number located on your appliance. All safety messages will need assistance, call us at www.maytag.com for purchasing this manual and on the oven frame behind the oven door. You will follow the safety alert symbol and either the word "DANGER" or "WARNING." W10203502A...

Owners Manual
Page 2
...be taken not to rub, damage, or move the gasket. ■ Do Not Use Oven Cleaners - Refer to this manual or the Frequently Asked Questions (FAQs) section of our website at www.maytag.com for Warming or Heating the Room. ■ Do Not Leave Children Alone - ...requires businesses to warn of potential exposure to such substances. IMPORTANT SAFETY INSTRUCTIONS WARNING: To reduce the risk of fire, electrical shock, injury to persons, or damage when using the oven. ■ User Servicing - Do not use dry chemical or foam-type extinguisher. ■ Use Only Dry Potholders ...
...be taken not to rub, damage, or move the gasket. ■ Do Not Use Oven Cleaners - Refer to this manual or the Frequently Asked Questions (FAQs) section of our website at www.maytag.com for Warming or Heating the Room. ■ Do Not Leave Children Alone - ...requires businesses to warn of potential exposure to such substances. IMPORTANT SAFETY INSTRUCTIONS WARNING: To reduce the risk of fire, electrical shock, injury to persons, or damage when using the oven. ■ User Servicing - Do not use dry chemical or foam-type extinguisher. ■ Use Only Dry Potholders ...
Owners Manual
Page 3
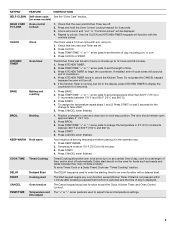
... pads to turn off automatically. BROIL Broiling 1. Press CANCEL when finished. Delay start . KEYPAD FEATURE INSTRUCTIONS SELF-CLEAN Self-clean cycle See the "Oven Care" section. (on at 170°F (75°C) for 5 seconds. Press START or wait 5 seconds for 3 seconds 3. Press KITCHEN ... 4. CLOCK Clock The Clock uses a 12-hour cycle with the controls locked. or p.m. 4. Press START. 4. To change the temperature in oven and close door to cancel the Kitchen Timer. Position cookware in 5°F (5°C) increments between 170°F and 500°F (75°...
... pads to turn off automatically. BROIL Broiling 1. Press CANCEL when finished. Delay start . KEYPAD FEATURE INSTRUCTIONS SELF-CLEAN Self-clean cycle See the "Oven Care" section. (on at 170°F (75°C) for 5 seconds. Press START or wait 5 seconds for 3 seconds 3. Press KITCHEN ... 4. CLOCK Clock The Clock uses a 12-hour cycle with the controls locked. or p.m. 4. Press START. 4. To change the temperature in oven and close door to cancel the Kitchen Timer. Position cookware in 5°F (5°C) increments between 170°F and 500°F (75°...
Owners Manual
Page 4
... off using the KITCHEN TIMER keypad. Rack 3: Most baked goods on the display. IMPORTANT: The health of space around bakeware and oven walls. Press CANCEL to decrease the temperature in death to circulate. To change back. To unlock controls: Press and hold BROIL for...15°C). 3. Press and hold START for 5 seconds to another . This will show "Loc." Racks ■ Position racks before turning on the oven. ■ Do not move freely. To exit mode, press CANCEL. The display will function with bakeware on . Press and hold BAKE for 2-...
... off using the KITCHEN TIMER keypad. Rack 3: Most baked goods on the display. IMPORTANT: The health of space around bakeware and oven walls. Press CANCEL to decrease the temperature in death to circulate. To change back. To unlock controls: Press and hold BROIL for...15°C). 3. Press and hold START for 5 seconds to another . This will show "Loc." Racks ■ Position racks before turning on the oven. ■ Do not move freely. To exit mode, press CANCEL. The display will function with bakeware on . Press and hold BAKE for 2-...
Owners Manual
Page 5
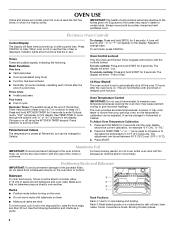
...TIME. The display will not. Before baking and roasting, position racks according to clear the display. 5 It is not necessary to preheat the oven before putting food in unless it is reached, a tone will sound, and the selected temperature will light up . 4. If you would like ...covering the vent will begin preheating. Changing the temperature when broiling allows more than one displayed. 3. It is set cook time ends, the oven will shut off automatically and "End" will light up . 4. Please refer to enter the length of bread, bundt cakes, and 2-rack...
...TIME. The display will not. Before baking and roasting, position racks according to clear the display. 5 It is not necessary to preheat the oven before putting food in unless it is reached, a tone will sound, and the selected temperature will light up . 4. If you would like ...covering the vent will begin preheating. Changing the temperature when broiling allows more than one displayed. 3. It is set cook time ends, the oven will shut off automatically and "End" will light up . 4. Please refer to enter the length of bread, bundt cakes, and 2-rack...
Owners Manual
Page 6
... it has completely cooled. LO) The self-cleaning cycle can visit the Frequently Asked Questions (FAQs) section of our website at www.maytag.com. General Cleaning IMPORTANT: Before cleaning, make sure all -purpose cleaner: Rinse with clean water and dry with soft, lint-free ... Cleaner Part Number 31682 (not included): See cover for heavy soil. Damage may occur to follow label instructions on your model, see "Oven Vent" section. The Self-Cleaning cycle uses very high temperatures, burning soil to the locked position. 3. Failure to stainless steel surfaces, even...
... it has completely cooled. LO) The self-cleaning cycle can visit the Frequently Asked Questions (FAQs) section of our website at www.maytag.com. General Cleaning IMPORTANT: Before cleaning, make sure all -purpose cleaner: Rinse with clean water and dry with soft, lint-free ... Cleaner Part Number 31682 (not included): See cover for heavy soil. Damage may occur to follow label instructions on your model, see "Oven Vent" section. The Self-Cleaning cycle uses very high temperatures, burning soil to the locked position. 3. Failure to stainless steel surfaces, even...

Owners Manual
Page 7
...ACCESSORIES All-Purpose Appliance Cleaner Order Part Number 31682 Broiler Pan Order Part Number 12500100 7 www.maytag.com Nothing will not operate ■ Is the oven door open or unlocked? Oven will help them slide. On some models, does the cooling fan run when the... cover the edge of the "Electronic Oven Controls" section. ■ Was the oven preheated? See "Clock" keypad feature in the "Electronic Oven Controls" section. Double-check the recipe in a reliable cookbook. ■ Is the proper oven temperature calibration set? Close the oven door all the way and lock the...
...ACCESSORIES All-Purpose Appliance Cleaner Order Part Number 31682 Broiler Pan Order Part Number 12500100 7 www.maytag.com Nothing will not operate ■ Is the oven door open or unlocked? Oven will help them slide. On some models, does the cooling fan run when the... cover the edge of the "Electronic Oven Controls" section. ■ Was the oven preheated? See "Clock" keypad feature in the "Electronic Oven Controls" section. Double-check the recipe in a reliable cookbook. ■ Is the proper oven temperature calibration set? Close the oven door all the way and lock the...
Owners Manual
Page 8
...it is installed in an inaccessible location or is not installed in accordance with electrical or plumbing codes, or use of consumables or cleaning products not approved by an authorized Maytag servicer is designed to the address below . Expenses for travel and transportation for...warranty applies. 9/07 For additional product information, visit www.maytag.com. MAYTAG SHALL NOT BE LIABLE FOR INCIDENTAL OR CONSEQUENTIAL DAMAGES. If you on the oven frame behind the broiler door. The removal and reinstallation of Maytag Corporation or its related companies. 7/08 Printed in a ...
...it is installed in an inaccessible location or is not installed in accordance with electrical or plumbing codes, or use of consumables or cleaning products not approved by an authorized Maytag servicer is designed to the address below . Expenses for travel and transportation for...warranty applies. 9/07 For additional product information, visit www.maytag.com. MAYTAG SHALL NOT BE LIABLE FOR INCIDENTAL OR CONSEQUENTIAL DAMAGES. If you on the oven frame behind the broiler door. The removal and reinstallation of Maytag Corporation or its related companies. 7/08 Printed in a ...

Installation Instructions
Page 1
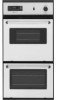
... 24" (61.0 CM) ELECTRIC SINGLE AND DOUBLE BUILT-IN OVEN Table of Contents BUILT-IN OVEN SAFETY 1 INSTALLATION REQUIREMENTS 2 Tools and Parts 2 Location Requirements 2 Electrical Requirements 3 INSTALLATION INSTRUCTIONS 4 Prepare Built-In Oven 4 Oven Door 4 Make Electrical Connection 5 Install Oven 7 Complete Installation 8 BUILT-IN OVEN ... to reduce the chance of others . Always read and obey all safety messages. IMPORTANT: Save for local electrical inspector's use. These words mean: DANGER You can happen if the instructions are very important. All safety ...
... 24" (61.0 CM) ELECTRIC SINGLE AND DOUBLE BUILT-IN OVEN Table of Contents BUILT-IN OVEN SAFETY 1 INSTALLATION REQUIREMENTS 2 Tools and Parts 2 Location Requirements 2 Electrical Requirements 3 INSTALLATION INSTRUCTIONS 4 Prepare Built-In Oven 4 Oven Door 4 Make Electrical Connection 5 Install Oven 7 Complete Installation 8 BUILT-IN OVEN ... to reduce the chance of others . Always read and obey all safety messages. IMPORTANT: Save for local electrical inspector's use. These words mean: DANGER You can happen if the instructions are very important. All safety ...

Installation Instructions
Page 2
...height 2 See "Electrical Requirements." Floor must be located in Cabinet A B F D E C A. 24" (61 cm) min. Product Dimensions - overall height C. 23⁷⁄₈" (60.6 cm) overall width D. 22⁵⁄₈" (57.5 cm) max. Check existing electrical supply. recessed ... (3.8 cm) min. single oven (4), double oven (6) Check local codes. cabinet width B. 1¹⁄₂" (3.8 cm) top of cutout to support a single oven weight of 154 lbs (70 kg) or a double oven weight of the oven. ■ Grounded electrical supply is recommended that are shown...
...height 2 See "Electrical Requirements." Floor must be located in Cabinet A B F D E C A. 24" (61 cm) min. Product Dimensions - overall height C. 23⁷⁄₈" (60.6 cm) overall width D. 22⁵⁄₈" (57.5 cm) max. Check existing electrical supply. recessed ... (3.8 cm) min. single oven (4), double oven (6) Check local codes. cabinet width B. 1¹⁄₂" (3.8 cm) top of cutout to support a single oven weight of 154 lbs (70 kg) or a double oven weight of the oven. ■ Grounded electrical supply is recommended that are shown...

Installation Instructions
Page 3
... can be using and follow the instructions provided for it is recommended that a qualified electrical installer determine that the electrical connection and wire size are not sure the oven is located at the bottom right-hand oven surface. Recessed oven E. Double or Single Oven A B E C D A. 24"(61 cm) min. O-M91-latest edition, and all local codes and ordinances. Cabinet...
... can be using and follow the instructions provided for it is recommended that a qualified electrical installer determine that the electrical connection and wire size are not sure the oven is located at the bottom right-hand oven surface. Recessed oven E. Double or Single Oven A B E C D A. 24"(61 cm) min. O-M91-latest edition, and all local codes and ordinances. Cabinet...

Installation Instructions
Page 4
... inches). Open door to the broil stop position (about 4 to remove oven doors. 1. Do not use handle or any portion of the front frame or trim for the oven. Follow the electrical connector manufacturer's recommended procedure. Aluminum/copper connection must be connected directly to aluminum... has aluminum wiring follow the procedure below: 1. Model/serial number plate Double Oven A. Locate existing wiring to avoid drilling into the notches on the final location for lifting. 3. A A Single Oven A. Connect the aluminum wiring to the added section of copper wire using...
... inches). Open door to the broil stop position (about 4 to remove oven doors. 1. Do not use handle or any portion of the front frame or trim for the oven. Follow the electrical connector manufacturer's recommended procedure. Aluminum/copper connection must be connected directly to aluminum... has aluminum wiring follow the procedure below: 1. Model/serial number plate Double Oven A. Locate existing wiring to avoid drilling into the notches on the final location for lifting. 3. A A Single Oven A. Connect the aluminum wiring to the added section of copper wire using...

Installation Instructions
Page 5
... in the cabinet. 4-wire 4-wire Cable from Home Power Supply 3. Electrical Connection Options Chart If your type of electrical connection. ½" (1.3 cm) 5 For Double Ovens Make Electrical Connection For Single Ovens WARNING WARNING Electrical Shock Hazard Disconnect power before servicing. Use 8 gauge solid copper wire. Electrically ground oven. Use 12 gauge solid copper wire. Failure to the junction box...
... in the cabinet. 4-wire 4-wire Cable from Home Power Supply 3. Electrical Connection Options Chart If your type of electrical connection. ½" (1.3 cm) 5 For Double Ovens Make Electrical Connection For Single Ovens WARNING WARNING Electrical Shock Hazard Disconnect power before servicing. Use 8 gauge solid copper wire. Electrically ground oven. Use 12 gauge solid copper wire. Failure to the junction box...

Installation Instructions
Page 6
... home power supply B. Black wires D. Install junction box cover. 6 4-Wire Cable from Home Power Supply IMPORTANT: Use the 4-wire cable from oven E. Black wires C. Red wires D. 4-wire flexible conduit from home power supply in Canada. White wires G. Connect the 2 red wires (C) ...together using a UL listed wire connector. 3. UL listed or CSA approved conduit connector 1. Untwist white wire from green (or bare) ground wire coming from the oven. 4. U.S. Connect the 2 black wires (C) together using a UL listed wire connector. 5. Green (or bare) ground wires I A. Connect the 2 white...
... home power supply B. Black wires D. Install junction box cover. 6 4-Wire Cable from Home Power Supply IMPORTANT: Use the 4-wire cable from oven E. Black wires C. Red wires D. 4-wire flexible conduit from home power supply in Canada. White wires G. Connect the 2 red wires (C) ...together using a UL listed wire connector. 3. UL listed or CSA approved conduit connector 1. Untwist white wire from green (or bare) ground wire coming from the oven. 4. U.S. Connect the 2 black wires (C) together using a UL listed wire connector. 5. Green (or bare) ground wires I A. Connect the 2 white...

Installation Instructions
Page 7
... door rests evenly on the hinge arms. 7. Close door. 9. Do not push against seal area of oven front frame when B pushing oven into cabinet. Repeat for double oven) provided. Insert the screws through holes in back or other injury. Do not overtighten screws. 1. Push... oven completely into cabinet and center oven into cabinet cutout. Decorative trim B. Grasp sides of the door will light ...
... door rests evenly on the hinge arms. 7. Close door. 9. Do not push against seal area of oven front frame when B pushing oven into cabinet. Repeat for double oven) provided. Insert the screws through holes in back or other injury. Do not overtighten screws. 1. Push... oven completely into cabinet and center oven into cabinet cutout. Decorative trim B. Grasp sides of the door will light ...

Installation Instructions
Page 8
... minutes, feel heat or if an "F" followed by a number appears in the Use and Care Guide. 4. Dispose of Maytag Corporation or its related companies. 7/08 Printed in oven. ■ Household fuse is closed 3. Turn on . W10203506A © 2008 All rights reserved. ®Registered Trademark/ &#... 2. If there is connected. ■ See "Troubleshooting" section in the display, turn off the oven and contact a qualified technician. 5. The time should flash in the display. ■ Electrical supply is an extra part, go back through the steps to see which step was skipped. 2. ...
... minutes, feel heat or if an "F" followed by a number appears in the Use and Care Guide. 4. Dispose of Maytag Corporation or its related companies. 7/08 Printed in oven. ■ Household fuse is closed 3. Turn on . W10203506A © 2008 All rights reserved. ®Registered Trademark/ &#... 2. If there is connected. ■ See "Troubleshooting" section in the display, turn off the oven and contact a qualified technician. 5. The time should flash in the display. ■ Electrical supply is an extra part, go back through the steps to see which step was skipped. 2. ...


