User Manual
Page 1
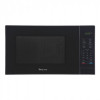
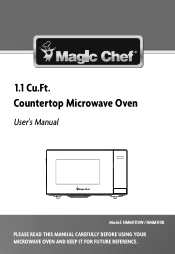
Countertop Microwave Oven User's Manual Model: HMM1110W/HMM110B PLEASE READ THIS MANUAL CAREFULLY BEFORE USING YOUR MICROWAVE OVEN AND KEEP IT FOR FUTURE REFERENCE. 1.1 Cu.Ft.
Countertop Microwave Oven User's Manual Model: HMM1110W/HMM110B PLEASE READ THIS MANUAL CAREFULLY BEFORE USING YOUR MICROWAVE OVEN AND KEEP IT FOR FUTURE REFERENCE. 1.1 Cu.Ft.

User Manual
Page 3
... you regarding a safety notification or product update. 2. Registering your product could act as your product include the following: 1. Product Registration Thank you for purchasing a Magic Chef product. The first step to protect your product will allow for more efficient warranty service processing when warranty service is to contact you for purchasing a Magic Chef product. The benefits of registering your...
... you regarding a safety notification or product update. 2. Registering your product could act as your product include the following: 1. Product Registration Thank you for purchasing a Magic Chef product. The first step to protect your product will allow for more efficient warranty service processing when warranty service is to contact you for purchasing a Magic Chef product. The benefits of registering your...
User Manual
Page 5
... FEATURES...7 TURNTABLE...7 z MICROWAVE OVEN CONTROL...7 DISPLAY...7 START...8 ADD 30 SECONDS...8 EXPRESS COOK...8 STOP/CANCEL...8 CLOCK...8 TONES...8 KITCHEN TIMER...8 CONTROL LOCK ...8 z MICROWAVE OVEN USE...9 FOOD CHARACTERISTICS...9 COOKING GUIDELINES...9 COOKWARE AND DINNERWARE...9 ALUMINUM FOIL AND METAL...10 MICROWAVE COOKING POWER...10 MANUAL COOKING...11 COOKING IN STAGES...11 DEFROST...11 MEMORY...12 POPCORN...12 POTATO...12 PIZZA...13 BEVERAGE...13 DINNER PLATE...13 FROZEN VEGETABLE ...13 z CARE OF YOUR MICROWAVE OVEN...14 z BEFORE YOU CALL FOR SERVICE...15 z CARE AND CLEANING...15...
... FEATURES...7 TURNTABLE...7 z MICROWAVE OVEN CONTROL...7 DISPLAY...7 START...8 ADD 30 SECONDS...8 EXPRESS COOK...8 STOP/CANCEL...8 CLOCK...8 TONES...8 KITCHEN TIMER...8 CONTROL LOCK ...8 z MICROWAVE OVEN USE...9 FOOD CHARACTERISTICS...9 COOKING GUIDELINES...9 COOKWARE AND DINNERWARE...9 ALUMINUM FOIL AND METAL...10 MICROWAVE COOKING POWER...10 MANUAL COOKING...11 COOKING IN STAGES...11 DEFROST...11 MEMORY...12 POPCORN...12 POTATO...12 PIZZA...13 BEVERAGE...13 DINNER PLATE...13 FROZEN VEGETABLE ...13 z CARE OF YOUR MICROWAVE OVEN...14 z BEFORE YOU CALL FOR SERVICE...15 z CARE AND CLEANING...15...
User Manual
Page 6
... this appliance outdoors. food in the cavity when not in oven. It is not always present. other fire when next using the oven. 20. for removing the container. interlock switches thereby rendering them inoperable. 19.Keep the waveguide cover clean at the fuse or to persons: a) Do not overheat the liquid. Wipe the oven interior with the provided installation instructions. Carefully attend appliance when paper...
... this appliance outdoors. food in the cavity when not in oven. It is not always present. other fire when next using the oven. 20. for removing the container. interlock switches thereby rendering them inoperable. 19.Keep the waveguide cover clean at the fuse or to persons: a) Do not overheat the liquid. Wipe the oven interior with the provided installation instructions. Carefully attend appliance when paper...
User Manual
Page 7
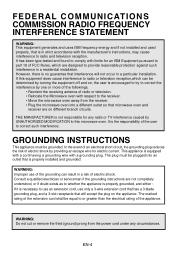
... to use an extension cord, use of the grounding can be plugged into a different outlet so that microwave oven and receiver are designed to correct the interference by providing an escape wire for an ISM Equipment pursuant to part 18 of the user to or greater than the electrical rating of electric shock. In the event of an electrical short circuit, the...
... to use an extension cord, use of the grounding can be plugged into a different outlet so that microwave oven and receiver are designed to correct the interference by providing an escape wire for an ISM Equipment pursuant to part 18 of the user to or greater than the electrical rating of electric shock. In the event of an electrical short circuit, the...
User Manual
Page 8
... oven after unpacking. Level, flat location. A short power-supply cord is located close to reduce the risks resulting from becoming entangled in or tripping over the counter top or tabletop where it can adversely affect oven wiring and contacts. 6. Do not block air vents. If a long cord or extension cord is used if care is visible, DO NOT INSTALL, and notify your local power source. Install the microwave oven...
... oven after unpacking. Level, flat location. A short power-supply cord is located close to reduce the risks resulting from becoming entangled in or tripping over the counter top or tabletop where it can adversely affect oven wiring and contacts. 6. Do not block air vents. If a long cord or extension cord is used if care is visible, DO NOT INSTALL, and notify your local power source. Install the microwave oven...

User Manual
Page 9
SPECIFICATIONS POWER SUPPLY INPUT POWER MICROWAVE ENERGY OUTPUT FREQUENCY OUTSIDE DIMENSIONS (W x H x D) CAVITY DIMENSIONS (W x H x D) CAVITY VOLUME NET WEIGHT TIMER POWER LEVELS * Specifications are subject to change without notice. 120V AC, 60Hz SINGLE PHASE WITH GROUNDING 1550 W 1000 W 2,450MHz 516 x 305 x 396 mm (20.3 x 12.0 x 15.6 in) 353 x 231 x 368 mm (13.9 x 9.1 x 14.5 in) 1.1 cu.ft APPROX. 30.6 lbs. 99 min. 99 sec. 11 Levels 20.3 15.6 12.0 EN-6
SPECIFICATIONS POWER SUPPLY INPUT POWER MICROWAVE ENERGY OUTPUT FREQUENCY OUTSIDE DIMENSIONS (W x H x D) CAVITY DIMENSIONS (W x H x D) CAVITY VOLUME NET WEIGHT TIMER POWER LEVELS * Specifications are subject to change without notice. 120V AC, 60Hz SINGLE PHASE WITH GROUNDING 1550 W 1000 W 2,450MHz 516 x 305 x 396 mm (20.3 x 12.0 x 15.6 in) 353 x 231 x 368 mm (13.9 x 9.1 x 14.5 in) 1.1 cu.ft APPROX. 30.6 lbs. 99 min. 99 sec. 11 Levels 20.3 15.6 12.0 EN-6
User Manual
Page 10
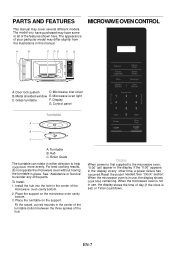
... model may cover several different models. When the microwave oven is set) or Timer countdown. MICROWAVE OVEN CONTROL A B C DE FG A. Control panel Turntable A B C A. Roller Guide The turntable can rotate in the display at any of day (if the clock is in place. To Install: 1. Place the support on the support. EN-7 Door lock system D. Display G. The appearance of the hub. Turntable B. See "Assistance or Service" to reorder any other time, a power failure has occurred.Reset the clock if needed.See "Clock...
... model may cover several different models. When the microwave oven is set) or Timer countdown. MICROWAVE OVEN CONTROL A B C DE FG A. Control panel Turntable A B C A. Roller Guide The turntable can rotate in the display at any of day (if the clock is in place. To Install: 1. Place the support on the support. EN-7 Door lock system D. Display G. The appearance of the hub. Turntable B. See "Assistance or Service" to reorder any other time, a power failure has occurred.Reset the clock if needed.See "Clock...
User Manual
Page 11
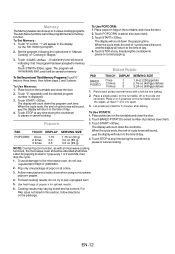
... control panel pads to lock and unlock the control panel. EN-8 End of cycle 2. To Set: The microwave oven must be in standby mode. Touch CLOCK control "00:00" will appear in the display, with each additional touch of the EXPRESS COOK controls (number pads 1-6) automatically starts the microwave oven at any program during the countdown to cancel the Kitchen Timer. End of Kitchen Timer countdown Express Cook Each of the control. Kitchen Timer The Kitchen Timer can be canceled by touching STOP...
... control panel pads to lock and unlock the control panel. EN-8 End of cycle 2. To Set: The microwave oven must be in standby mode. Touch CLOCK control "00:00" will appear in the display, with each additional touch of the EXPRESS COOK controls (number pads 1-6) automatically starts the microwave oven at any program during the countdown to cancel the Kitchen Timer. End of Kitchen Timer countdown Express Cook Each of the control. Kitchen Timer The Kitchen Timer can be canceled by touching STOP...

User Manual
Page 12
... cause them to vent steam.Condensation on the door and cavity surfaces is normal during heavy cooking. Starting Temperature Room temperature foods will heat faster than refrigerated MATERIAL RECOMMENDATIONS foods, and refrigerated foods will not melt in microwave oven. 4. Follow manufacturer's recommendations. Glass EN-9 MICROWAVE OVEN USE A magnetron in the microwave oven produces micro waves which reflect off the metal floor, walls and ceiling and pass through the turntable and appropriate...
... cause them to vent steam.Condensation on the door and cavity surfaces is normal during heavy cooking. Starting Temperature Room temperature foods will heat faster than refrigerated MATERIAL RECOMMENDATIONS foods, and refrigerated foods will not melt in microwave oven. 4. Follow manufacturer's recommendations. Glass EN-9 MICROWAVE OVEN USE A magnetron in the microwave oven produces micro waves which reflect off the metal floor, walls and ceiling and pass through the turntable and appropriate...

User Manual
Page 13
... Cookware or Dinnerware for microwave oven use . Aluminum Foil and Metal Always use the turntable. 3. If not used in the microwave oven. OK for Use Racks and bakeware supplied with the microwave oven (on some metal can occur and cause damage to touch the inside cavity walls, ceiling or floor. 2. Always use oven mitts or pot holders when removing dishes from the microwave oven. Cooking and heating foods that need a cook power lower than high. Simmering...
... Cookware or Dinnerware for microwave oven use . Aluminum Foil and Metal Always use the turntable. 3. If not used in the microwave oven. OK for Use Racks and bakeware supplied with the microwave oven (on some metal can occur and cause damage to touch the inside cavity walls, ceiling or floor. 2. Always use oven mitts or pot holders when removing dishes from the microwave oven. Cooking and heating foods that need a cook power lower than high. Simmering...

User Manual
Page 14
... is a manual defrost by touching START/+30Sec. Unwrap foods and remove lids (for frozen ready-made food. Place all meats in the display. 3. Touch STOP at any time during the cycling stage. Place food, uncovered, on the turntable and close the door. 2. Touch STOP at the end of time to 2 stages. Touch TIME COOK. 6. Do not cover. Touch START/+30Sec. The default microwave power is entered, the microwave oven will count down to the time of the power level you...
... is a manual defrost by touching START/+30Sec. Unwrap foods and remove lids (for frozen ready-made food. Place all meats in the display. 3. Touch STOP at any time during the cycling stage. Place food, uncovered, on the turntable and close the door. 2. Touch STOP at the end of time to 2 stages. Touch TIME COOK. 6. Do not cover. Touch START/+30Sec. The default microwave power is entered, the microwave oven will count down to the time of the power level you...
User Manual
Page 15
... Programs:Touch" 0 " twice or three times, then follow directions on the turntable, and close the door. 2. Touch START/+30Sec. . To Use Memory: 1. Place food on the turntable around the edges, at any time during the countdown to pause or cancel cooking. Touch STOP at least 1" (2.5 cm) apart. 3. Popcorn PAD TOUCH DISPLAY POPCORN Once 1.75 2 times 3.0 3 times 3.5 SERVING SIZE 1.75 oz (50 g) 3.0 oz (85 g) 3.5 oz (99 g) Baked Potato PAD BAKED POTATO TOUCH Once 2 times 3 times DISPLAY 1 2 3 SERVING SIZE...
... Programs:Touch" 0 " twice or three times, then follow directions on the turntable, and close the door. 2. Touch START/+30Sec. . To Use Memory: 1. Place food on the turntable around the edges, at any time during the countdown to pause or cancel cooking. Touch STOP at least 1" (2.5 cm) apart. 3. Popcorn PAD TOUCH DISPLAY POPCORN Once 1.75 2 times 3.0 3 times 3.5 SERVING SIZE 1.75 oz (50 g) 3.0 oz (85 g) 3.5 oz (99 g) Baked Potato PAD BAKED POTATO TOUCH Once 2 times 3 times DISPLAY 1 2 3 SERVING SIZE...

User Manual
Page 16
... nt down the cook time. Cover with smaller openings may heat faster. The display will count down the cook time. EN-13 Dinner Plate PAD TOUCH DISPLAY SERVING SIZE DINNER PLATE Once 2 times 3 times 9.0 12.0 18.0 9.0 oz (255 g) 12.0oz (340 g) 18.0oz (510 g) 1. Place food on a paper towel or paper plate. Place cup(s) on the turntable and close the door. 2. The diameter of da.y 4. To Use FROZEN VEGETABLE: 1. Whenthe...
... nt down the cook time. Cover with smaller openings may heat faster. The display will count down the cook time. EN-13 Dinner Plate PAD TOUCH DISPLAY SERVING SIZE DINNER PLATE Once 2 times 3 times 9.0 12.0 18.0 9.0 oz (255 g) 12.0oz (340 g) 18.0oz (510 g) 1. Place food on a paper towel or paper plate. Place cup(s) on the turntable and close the door. 2. The diameter of da.y 4. To Use FROZEN VEGETABLE: 1. Whenthe...

User Manual
Page 17
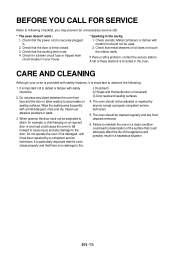
.... 7 The roller guide and oven cavity floor should not be used for cooking together with this oven. 3 If Glass Tray is hot, ALLOW TO COOL before cleaning or placing it in a hazardous situation. 1 Unplug the power cord before cleaning any part of this oven. 2 Keep the inside or around the outside oven surface should be cleaned frequently to seep into the ventilation openings. 4 If the Control Panel becomes wet, clean with a damp...
.... 7 The roller guide and oven cavity floor should not be used for cooking together with this oven. 3 If Glass Tray is hot, ALLOW TO COOL before cleaning or placing it in a hazardous situation. 1 Unplug the power cord before cleaning any part of this oven. 2 Keep the inside or around the outside oven surface should be cleaned frequently to seep into the ventilation openings. 4 If the Control Panel becomes wet, clean with a damp...
User Manual
Page 18
... not touch the interior walls. A list of the appliance and possibly result in the oven. It is no damage to accumulate on an opened door or any load could adversely affect the life of these stations is securely plugged in the cavity; 1. The oven should be subjected to strain, for a blown circuit fuse or tripped main circuit breaker in your oven is...
... not touch the interior walls. A list of the appliance and possibly result in the oven. It is no damage to accumulate on an opened door or any load could adversely affect the life of these stations is securely plugged in the cavity; 1. The oven should be subjected to strain, for a blown circuit fuse or tripped main circuit breaker in your oven is...
User Manual
Page 19
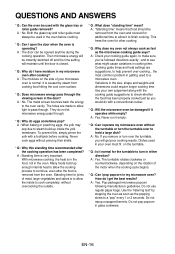
... microwave oven is normal. Do not repop unpopped kernels. Both the glass tray and roller guide must fit on the turntable. * Q : Is it to the oven cavity. Many foods build up inside to turn in the oven. Never cook eggs without the turntable or turn over the turntable, you 've followed directions exactly ; Do not pop popcorn in the size, shape and weights and dimensions could require longer cooking time. If you remove...
... microwave oven is normal. Do not repop unpopped kernels. Both the glass tray and roller guide must fit on the turntable. * Q : Is it to the oven cavity. Many foods build up inside to turn in the oven. Never cook eggs without the turntable or turn over the turntable, you 've followed directions exactly ; Do not pop popcorn in the size, shape and weights and dimensions could require longer cooking time. If you remove...

User Manual
Page 20
... be done. Remember, the Popcorn bag and tray can quickly dry out, burn or catch on a microwave safe glass or ceramic plate to avoid overheating and cracking the oven tray. The kernels can damage the oven. Wipe with low moisture carefully. Do not use recycled paper products as twist-ties, poultry pins, or gold rimmed dishes, in the microwave. • Recycled paper towels...
... be done. Remember, the Popcorn bag and tray can quickly dry out, burn or catch on a microwave safe glass or ceramic plate to avoid overheating and cracking the oven tray. The kernels can damage the oven. Wipe with low moisture carefully. Do not use recycled paper products as twist-ties, poultry pins, or gold rimmed dishes, in the microwave. • Recycled paper towels...
User Manual
Page 21
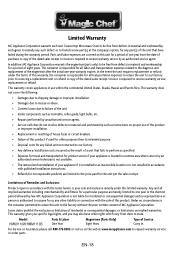
... to request warranty service or order parts. Parts and labor expenses are covered on this unit for a period of this product if used for other liability in connection with published installation instructions. • Refunds for non repairable products are hereby limited to receive warranty service by law. This warranty covers appliances in use of the product or improper installation. • Replacement or resetting of house fuses or circuit breakers...
... to request warranty service or order parts. Parts and labor expenses are covered on this unit for a period of this product if used for other liability in connection with published installation instructions. • Refunds for non repairable products are hereby limited to receive warranty service by law. This warranty covers appliances in use of the product or improper installation. • Replacement or resetting of house fuses or circuit breakers...

User Manual
Page 24
CNA International, Inc. www.mcappliance.com Printed in China N All rights reserved. d/b/a MC Appliance Corporation. Magic Chef®logo is a registered trademark of CNA International, Inc.
CNA International, Inc. www.mcappliance.com Printed in China N All rights reserved. d/b/a MC Appliance Corporation. Magic Chef®logo is a registered trademark of CNA International, Inc.


