
User Manual
Page 4
Preface 1-4 Connecting the Peripheral Devices 3-34 Connecting the Communication Devices 3-38 Components Replacement and Upgrade 3-41 BIOS Setup About BIOS Setup...4-2 When to Use BIOS Setup...4-2 How to Run BIOS Setup...4-2 Control Keys ...4-3 BIOS Setup Menu...4-4 Main menu...4-5 Advanced menu...4-7 Boot menu ...4-9 Security menu...4-10 Save & Exit menu...4-12 RAID Level 0 Introduction ...4-13 RAID0 Setup ...4-14
Preface 1-4 Connecting the Peripheral Devices 3-34 Connecting the Communication Devices 3-38 Components Replacement and Upgrade 3-41 BIOS Setup About BIOS Setup...4-2 When to Use BIOS Setup...4-2 How to Run BIOS Setup...4-2 Control Keys ...4-3 BIOS Setup Menu...4-4 Main menu...4-5 Advanced menu...4-7 Boot menu ...4-9 Security menu...4-10 Save & Exit menu...4-12 RAID Level 0 Introduction ...4-13 RAID0 Setup ...4-14
User Manual
Page 25
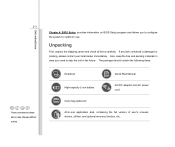
2-3 These accessories listed above may change without notice. If any item contained is damaged or missing, please contact your local dealer immediately. Introductions Chapter 4, BIOS Setup, provides information on BIOS Setup program and allows you need to configure the system for optimum use. The package should contain the following items: Notebook Quick Start...
2-3 These accessories listed above may change without notice. If any item contained is damaged or missing, please contact your local dealer immediately. Introductions Chapter 4, BIOS Setup, provides information on BIOS Setup program and allows you need to configure the system for optimum use. The package should contain the following items: Notebook Quick Start...

User Manual
Page 29
Yes x 1 WHQL Introductions 2-7 Video Graphics Display LCD Type Brightness Adjustment WebCam WebCam Software & BIOS USB Flash Boot BIOS Others Kensington Lock Hole Compliance Discrete 15.6" LED LCD (optional) Supported HD Camera Yes, USB floppy boot up DOS only Fast Boot Support ---
Yes x 1 WHQL Introductions 2-7 Video Graphics Display LCD Type Brightness Adjustment WebCam WebCam Software & BIOS USB Flash Boot BIOS Others Kensington Lock Hole Compliance Discrete 15.6" LED LCD (optional) Supported HD Camera Yes, USB floppy boot up DOS only Fast Boot Support ---

User Manual
Page 89
...still wish to enter Setup, either restart the system by turning it OFF and ON, or simultaneously pressing [Ctrl]+[Alt]+[Delete] keys to Use BIOS Setup? Be noted that the screen snaps and setting options in this chapter are for customized features. Š You want to reload the default... the default settings for your Notebook may be different because of BIOS update. To run SETUP. Š You want to run the BIOS Setup when: Š An error message appears on the screen during the POST procedure. BIOS Setup 4-2 About BIOS Setup When to restart. The actual setting screens and options on...
...still wish to enter Setup, either restart the system by turning it OFF and ON, or simultaneously pressing [Ctrl]+[Alt]+[Delete] keys to Use BIOS Setup? Be noted that the screen snaps and setting options in this chapter are for customized features. Š You want to reload the default... the default settings for your Notebook may be different because of BIOS update. To run SETUP. Š You want to run the BIOS Setup when: Š An error message appears on the screen during the POST procedure. BIOS Setup 4-2 About BIOS Setup When to restart. The actual setting screens and options on...

User Manual
Page 90
... one item under the menu title. Press down arrow to select one item under the menu title. 4-3 Control Keys BIOS Setup You can use only the keyboard to the previous screen in the BIOS Setup Utility. Bring up a sub-menu when available. Increase the setting value or make changes. + Decrease the setting... value or make changes. 1) Open the selected item to change setting options. 2) Bring up help screen providing the information of control keys. 1) Exit the BIOS Setup Utility. 2) Return to control the cursor in a sub-menu.
... one item under the menu title. Press down arrow to select one item under the menu title. 4-3 Control Keys BIOS Setup You can use only the keyboard to the previous screen in the BIOS Setup Utility. Bring up a sub-menu when available. Increase the setting value or make changes. + Decrease the setting... value or make changes. 1) Open the selected item to change setting options. 2) Bring up help screen providing the information of control keys. 1) Exit the BIOS Setup Utility. 2) Return to control the cursor in a sub-menu.

User Manual
Page 91
..., memory size and setting of the notebook in order to enter the other menus. Save & Exit Menu Save or discard the changes before leaving the BIOS Setup Menu. Advanced Menu Adjust the advanced settings, such as RAID level 0, power consumption, USB/ PCI devices, of system time and date. 4-4 The... BIOS items and figures shown here are for supervisor and user. Boot Menu Set up boot type and boot sequence. Security Menu Install or clear the ...
..., memory size and setting of the notebook in order to enter the other menus. Save & Exit Menu Save or discard the changes before leaving the BIOS Setup Menu. Advanced Menu Adjust the advanced settings, such as RAID level 0, power consumption, USB/ PCI devices, of system time and date. 4-4 The... BIOS items and figures shown here are for supervisor and user. Boot Menu Set up boot type and boot sequence. Security Menu Install or clear the ...

User Manual
Page 92
The year can be adjusted by BIOS (read-only). The date format is [hour:minute:second]. Š SATA Information These items display the types of the SATA devices installed in the notebook. ... you to 12 (December). Press [Enter] to bring up a window showing the detailed information of the week, from 01 (January) to set the system date. BIOS Setup 4-5 Main Menu Š System Date This item allows you shut down the PC or get into sleep mode. The date from 01 to set...
The year can be adjusted by BIOS (read-only). The date format is [hour:minute:second]. Š SATA Information These items display the types of the SATA devices installed in the notebook. ... you to 12 (December). Press [Enter] to bring up a window showing the detailed information of the week, from 01 (January) to set the system date. BIOS Setup 4-5 Main Menu Š System Date This item allows you shut down the PC or get into sleep mode. The date from 01 to set...

User Manual
Page 93
BIOS Setup 4-6 Š System Information This item provides the information about the firmware, processor, and system memory.
BIOS Setup 4-6 Š System Information This item provides the information about the firmware, processor, and system memory.

User Manual
Page 94
.... Š PCI Latency Timer This item controls how long each PCI device can conduct transactions for a longer time and thus improve the effective PCI bandwidth. BIOS Setup 4-7 Advanced Menu Š Intel(R) SpeedStep(tm) This item allows you should set the item to higher values. When set to Disabled, the system always...
.... Š PCI Latency Timer This item controls how long each PCI device can conduct transactions for a longer time and thus improve the effective PCI bandwidth. BIOS Setup 4-7 Advanced Menu Š Intel(R) SpeedStep(tm) This item allows you should set the item to higher values. When set to Disabled, the system always...

User Manual
Page 95
Setting options: Enabled, Disabled and Auto. Legacy USB Support Selecting Enabled allows users to use it to charge iPad in DOS system; or allows users to detect if the iPad is connected and you can use USB devices, such as mouse, keyboard, or portable disk, in Windows OS. Š System Performance Select this item to enhance system performance. Š USB Configuration Select this item to enter the sub-menu: -- BIOS Setup 4-8 Š iCharger Function This notebook supports iCharger function. "iCharger" is the application used to boot the system by USB device.
Setting options: Enabled, Disabled and Auto. Legacy USB Support Selecting Enabled allows users to use it to charge iPad in DOS system; or allows users to detect if the iPad is connected and you can use USB devices, such as mouse, keyboard, or portable disk, in Windows OS. Š System Performance Select this item to enhance system performance. Š USB Configuration Select this item to enter the sub-menu: -- BIOS Setup 4-8 Š iCharger Function This notebook supports iCharger function. "iCharger" is the application used to boot the system by USB device.

User Manual
Page 96
BIOS Setup 4-9 Boot Menu Š Set Boot Priority Configure settings during system boot. Š Boot Option #1, #2, #3, #4 These items allow you to set the sequence of boot devices where BIOS attempts to load the disk operating system.
BIOS Setup 4-9 Boot Menu Š Set Boot Priority Configure settings during system boot. Š Boot Option #1, #2, #3, #4 These items allow you to set the sequence of boot devices where BIOS attempts to load the disk operating system.

User Manual
Page 97
The password typed now will replace any change the settings of twenty-digit password and press [Enter]. BIOS Setup 4-10 Security Menu Š Supervisor Password / User Password When this item is set password from CMOS memory. Select User Password to give or to ... Password is selected, a message box shall appear on the screen as below: Enter New Password Type a maximum of the BIOS SETUP UTILITY, while User Password field only allows users to enter the BIOS SETUP UTILITY without having the authorization to make any previously set , new items User Password and Password Check will...
The password typed now will replace any change the settings of twenty-digit password and press [Enter]. BIOS Setup 4-10 Security Menu Š Supervisor Password / User Password When this item is set password from CMOS memory. Select User Password to give or to ... Password is selected, a message box shall appear on the screen as below: Enter New Password Type a maximum of the BIOS SETUP UTILITY, while User Password field only allows users to enter the BIOS SETUP UTILITY without having the authorization to make any previously set , new items User Password and Password Check will...

User Manual
Page 98
Always The password is required every time when the Notebook is required only when users try to access to BIOS SETUP UTILITY. Please note that is disabled, the system will boot and user can enter setup without entering password. To clear a set Supervisor Password/ User... [Enter] under Supervisor Password/ User Password field when you are described below: Setup The password is powered on or when users try to access to BIOS SETUP UTILITY. Settings are prompted to enter the password. A message box will pop up confirming password will be disabled. Once the password is implemented...
Always The password is required every time when the Notebook is required only when users try to access to BIOS SETUP UTILITY. Please note that is disabled, the system will boot and user can enter setup without entering password. To clear a set Supervisor Password/ User... [Enter] under Supervisor Password/ User Password field when you are described below: Setup The password is powered on or when users try to access to BIOS SETUP UTILITY. Settings are prompted to enter the password. A message box will pop up confirming password will be disabled. Once the password is implemented...

User Manual
Page 99
BIOS Setup 4-12 Save & Exit Menu Š Save Changes and Reset Save the changes you have made and reset the utility Š Discard Changes and Exit Ignore the previous configuration and exit the BIOS setup utility. Š Load Setup Defaults Select this item to load the default settings.
BIOS Setup 4-12 Save & Exit Menu Š Save Changes and Reset Save the changes you have made and reset the utility Š Discard Changes and Exit Ignore the previous configuration and exit the BIOS setup utility. Š Load Setup Defaults Select this item to load the default settings.

User Manual
Page 100
... in the loss of all data. NOTE: A RAID level 0 can be optionally supported by each disk is limited to the size of the smallest disk. BIOS Setup 4-13 RAID Level 0 Introduction (Optionally Supported) RAID level 0 is normally used to increase performance, which splits data evenly across two or more disks with...
... in the loss of all data. NOTE: A RAID level 0 can be optionally supported by each disk is limited to the size of the smallest disk. BIOS Setup 4-13 RAID Level 0 Introduction (Optionally Supported) RAID level 0 is normally used to increase performance, which splits data evenly across two or more disks with...

User Manual
Page 101
... Reset the system after saving the changes. Š Enter "SATA Mode Selection" field in the pop up . BIOS Setup 4-14 RAID0 Setup This section helps user to set RAID level 0, generally used to exit BIOS setting. :Select Screen :Select Item Enter: Select +/-: Change Opt. Advanced Boot Security Save & Exit Intel(R) SpeedStep(tm...
... Reset the system after saving the changes. Š Enter "SATA Mode Selection" field in the pop up . BIOS Setup 4-14 RAID0 Setup This section helps user to set RAID level 0, generally used to exit BIOS setting. :Select Screen :Select Item Enter: Select +/-: Change Opt. Advanced Boot Security Save & Exit Intel(R) SpeedStep(tm...

User Manual
Page 102
...", and press ENTER. Enter Main Screen of Intel Rapid Storage Technology. It takes BOTH hard disks in the notebook to make successful RAID0 volume creation. BIOS Setup 4-15 Creating RAID Volume To create RAID Volume, follow the steps below: 1.
...", and press ENTER. Enter Main Screen of Intel Rapid Storage Technology. It takes BOTH hard disks in the notebook to make successful RAID0 volume creation. BIOS Setup 4-15 Creating RAID Volume To create RAID Volume, follow the steps below: 1.

User Manual
Page 103
Create Volume Menu in the right appears, pressing ENTER to switch 3 between various fields. Name Specify an RAID Volume name. Default: Volume0 RAID Level RAID0(Stripe) Disks Not currently available Stripe Size Adjustable Capacity Adjustable Sync Not currently available 4 4. Press enter when confirmed. BIOS Setup 4-16 3.
Create Volume Menu in the right appears, pressing ENTER to switch 3 between various fields. Name Specify an RAID Volume name. Default: Volume0 RAID Level RAID0(Stripe) Disks Not currently available Stripe Size Adjustable Capacity Adjustable Sync Not currently available 4 4. Press enter when confirmed. BIOS Setup 4-16 3.

User Manual
Page 104
4-17 BIOS Setup 5. A Warning message prompted to confirm the RAID volume creation, 5 press "Y" to continue. 6. RAID information shows in the following screen indicating successful 6 work.
4-17 BIOS Setup 5. A Warning message prompted to confirm the RAID volume creation, 5 press "Y" to continue. 6. RAID information shows in the following screen indicating successful 6 work.

User Manual
Page 105
4-18 BIOS Setup 7. Select ESC to exit and press Y to OS installation, or a screen showed error messages shall appear. CAUTION: For users intended to use AHCI or RAID, set either item enabled in both BIOS PLUS Intel Rapid Storage Technology tool PRIOR to confirm. Finally, restart the computer to finish 7 RAID 0 setting.
4-18 BIOS Setup 7. Select ESC to exit and press Y to OS installation, or a screen showed error messages shall appear. CAUTION: For users intended to use AHCI or RAID, set either item enabled in both BIOS PLUS Intel Rapid Storage Technology tool PRIOR to confirm. Finally, restart the computer to finish 7 RAID 0 setting.


