
Installation Guide
Page 1
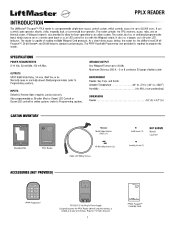
...is Remote Open (requires contact closure). INPUTS Default is capable of 2.0 Amps. The reader contains the CPU, memory, access relay, and an internal reader. It also has a beeper, and a bi-color LED indicator. LiftMaster 0 PPLX READER INTRODUCTION The LiftMaster® PassportTM' PPLX reader is ...to 50,000 users. Also programmable as needed up to Programming section). Requires 110 Volts AC power. 1 LiftMaster PPCSC Passport"' Proximity Cards It can control a gate operator, electric strike, magnetic lock, or commercial door operator. OUTPUTS SPST Solid State Relay, 1A max....
...is Remote Open (requires contact closure). INPUTS Default is capable of 2.0 Amps. The reader contains the CPU, memory, access relay, and an internal reader. It also has a beeper, and a bi-color LED indicator. LiftMaster 0 PPLX READER INTRODUCTION The LiftMaster® PassportTM' PPLX reader is ...to 50,000 users. Also programmable as needed up to Programming section). Requires 110 Volts AC power. 1 LiftMaster PPCSC Passport"' Proximity Cards It can control a gate operator, electric strike, magnetic lock, or commercial door operator. OUTPUTS SPST Solid State Relay, 1A max....

Installation Guide
Page 2
... Mega Operators Miracle-OneTM LA400 LA412/RSW/RSL LIFTMASTER® CONNECTIONS WHITE/BLACK (RELAY) WHITE/BROWN (RELAY) POWER SUPPLY FOR READER BLACK RED MG1300 Lock (Red + White) MG1300 Transformer (Black + White) - + Terminal 7 (Open) Terminal 4 (Common) - + Terminal 7 (Open) Terminal 3 (Common) - + Terminal 6 (Open) Terminal 5 (Common) - + Terminal 10 Terminal 9 - + Terminal 3 (Open Gate) Terminal 10 (Common) - + Terminal 21 (Strike Input...
... Mega Operators Miracle-OneTM LA400 LA412/RSW/RSL LIFTMASTER® CONNECTIONS WHITE/BLACK (RELAY) WHITE/BROWN (RELAY) POWER SUPPLY FOR READER BLACK RED MG1300 Lock (Red + White) MG1300 Transformer (Black + White) - + Terminal 7 (Open) Terminal 4 (Common) - + Terminal 7 (Open) Terminal 3 (Common) - + Terminal 6 (Open) Terminal 5 (Common) - + Terminal 10 Terminal 9 - + Terminal 3 (Open Gate) Terminal 10 (Common) - + Terminal 21 (Strike Input...

Installation Guide
Page 3
...to the reader (LED will end in the Advanced Programming section. GATE/DOOR OPERATOR Use separate power supplies for the maglock/strike and the reader. Record the name of each person to Normally Open. WIRING MAGLOCK/STRIKE Use separate power supplies for the reader. ...Refer to Configure Relay Output in approximately 10 seconds). White/Black O White/Brown Gate/Door i I piPower Supply 12 Vdc Power Supply Red + Black Black Brown Remote Open Normally Open ] Switch * Relay defaults to whom a Credential Device is issued, as well as a Card to...
...to the reader (LED will end in the Advanced Programming section. GATE/DOOR OPERATOR Use separate power supplies for the maglock/strike and the reader. Record the name of each person to Normally Open. WIRING MAGLOCK/STRIKE Use separate power supplies for the reader. ...Refer to Configure Relay Output in approximately 10 seconds). White/Black O White/Brown Gate/Door i I piPower Supply 12 Vdc Power Supply Red + Black Black Brown Remote Open Normally Open ] Switch * Relay defaults to whom a Credential Device is issued, as well as a Card to...

Installation Guide
Page 6
...LATCH TIMER (STRIKES AND MAGLOCKS) Enter Program mode. Press ENTER. then press the "Star" (*) Key; The beeper and LED are : 1 - OPTIONS 6 -Normally Open (Factory default) 7 -Normally Closed For example, to configure the relay normally closed operation. Press ENTER. A Green LED and beep indicates Latch Timer setting update. Standalone... the green LED. This input may be sent out via the white and green wires. NOTE: Setting Latch Timer for most gate and door operators. Then press either the "6" or "7". then press the digits representing the number of hours (2 digits);
...LATCH TIMER (STRIKES AND MAGLOCKS) Enter Program mode. Press ENTER. then press the "Star" (*) Key; The beeper and LED are : 1 - OPTIONS 6 -Normally Open (Factory default) 7 -Normally Closed For example, to configure the relay normally closed operation. Press ENTER. A Green LED and beep indicates Latch Timer setting update. Standalone... the green LED. This input may be sent out via the white and green wires. NOTE: Setting Latch Timer for most gate and door operators. Then press either the "6" or "7". then press the digits representing the number of hours (2 digits);


