LiftMaster 8350 Support and Manuals
Get Help and Manuals for this LiftMaster item
View All Support Options Below
Free LiftMaster 8350 manuals!
Problems with LiftMaster 8350?
Ask a Question
Free LiftMaster 8350 manuals!
Problems with LiftMaster 8350?
Ask a Question
Most Recent LiftMaster 8350 Questions

Remote Control For Liftmaster /chamberlain 3850 Garage Door Opener
what is the correct remote control for the chamberlain/liftmaster 3850 garage door opener
what is the correct remote control for the chamberlain/liftmaster 3850 garage door opener
(Posted by sendtoalice 9 years ago)
Popular LiftMaster 8350 Manual Pages
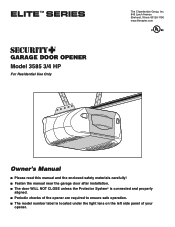
3585 Elite Series Manual - Page 1
... 60126-1196
www.liftmaster.com
Owner's Manual
■ Please read this manual and the enclosed safety materials carefully! ■ Fasten the manual near the garage door after installation. ■ The door WILL NOT CLOSE unless the Protector System® is connected and properly
aligned. ■ Periodic checks of the opener are required to ensure safe operation. ■ The model number label...
3585 Elite Series Manual - Page 2
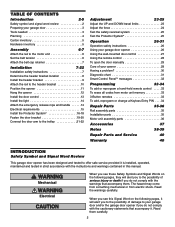
... Parts
35-36
Rail assembly parts 35
Installation parts 35
Motor unit assembly parts 36
Accessories
37
Notes
38-39
Repair Parts and Service
40
Warranty
40
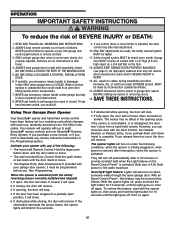
INTRODUCTION
Safety Symbol and Signal Word Review
This garage door opener has been designed and tested to offer safe service provided it is installed, operated, maintained and tested in strict accordance with the instructions...
3585 Elite Series Manual - Page 3

...opener, instructions will call for hand tools as shown. If your garage
door is balanced and is out of which are under EXTREME tension.
• Disable ALL locks and remove ALL ropes connected to garage door BEFORE installing and operating garage door opener to avoid malfunction and damage.
Lift the door about halfway as illustrated below. Release the
door. An unbalanced garage door...
3585 Elite Series Manual - Page 5
... White/Black Bell Wire attached
Safety Labels and Literature
Straight Door Arm Section
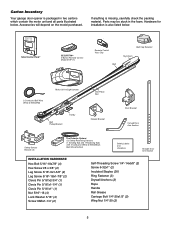
INSTALLATION HARDWARE
Hex Bolt 5/16"-18x7/8" (4) Hex Screw #8 ...Parts may be stuck in two cartons which contain the motor unit and all parts illustrated below . If anything is missing, carefully check the packing material. Accessories will depend on the model purchased. Carton Inventory
Your garage door opener...
3585 Elite Series Manual - Page 6
...the garage door opener until instructed to the
opener.
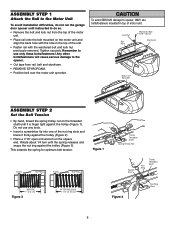
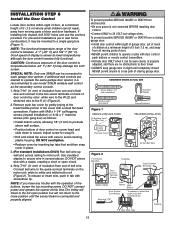
This extends the spring for optimum belt tension. ASSEMBLY STEP 1
Attach the Rail to the Motor Unit
To avoid installation difficulties,...Set the Belt Tension
• By hand, thread the spring trolley nut on the motor unit and align the back hole with the hole in top of motor unit. Do not use only these bolts/fasteners!
Liftmaster...
3585 Elite Series Manual - Page 7
... until
instructed to the installation section. HARDWARE SHOWN ACTUAL SIZE
To avoid possible SERIOUS INJURY to garage door control.
11. They could result in SEVERE
INJURY or DEATH.
• within sight of the garage door. • out of reach of children at minimum height of sprocket while operating opener. • Securely attach sprocket cover BEFORE operating. Install garage door opener...
3585 Elite Series Manual - Page 11
... to determine the correct mounting height from ceiling.
11 You will need help
at this point.
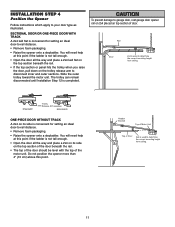
The trolley can remain disconnected until Installation Step 12 is convenient for setting an ideal door-to your door type as illustrated. INSTALLATION STEP 4
Position the Opener
Follow instructions which apply to -rail distance. • Remove foam packaging. • Raise the...
3585 Elite Series Manual - Page 12
.... Fasten the opener to required lengths.
3. Grease the top and underside of the hanging bracket to the hanging brackets with the header bracket if the bracket is centered over the door (or in the structural supports.
4. Attach one end of each side of the garage. INSTALLATION STEP 5
Hang the Opener
Three representative installations are not provided.
1. Operate the door manually.
3585 Elite Series Manual - Page 13
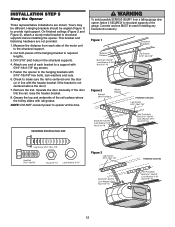
... m) where small children cannot reach, away from moving parts of door. • NEVER permit children to operate or play with door control push buttons or remote control transmitters. • Activate door ONLY when it can be connected to each garage door opener. INSTALLATION STEP 6
Install the Door Control
Locate door control within sight of garage door, out of reach
of children at a minimum...
3585 Elite Series Manual - Page 23

... MUST reverse on contact with proper operation of garage door travel limits) is binding or unbalanced, call for binding: Pull the emergency release handle. To prevent damage to vehicles, be sure fully open and close completely and the trolley bumps into the pulley bracket (page 4), try again. Manually open door provides adequate clearance. ADJUSTMENT STEP 1
Adjust...
3585 Elite Series Manual - Page 26
... operate or play with up to deactivate any repairs or removing covers.
15.
The opener lights will close the door with the safety reversing sensor correctly installed and aligned) 1. NEVER permit children to door travel limits) is 100 watts maximum. Weak or broken springs or unbalanced door could result in an open garage door. NEVER use emergency release handle to garage door...
3585 Elite Series Manual - Page 30

... correctly before the garage door opener will still not activate your door control is not blinking. Using the Wall Mounted Door Control, Light Feature...door travel .
• Manually check door for the force and limit settings is against the stop . Weather conditions in the down direction.
• Verify the safety sensors are properly installed, aligned and free of any binding problems...
3585 Elite Series Manual - Page 31
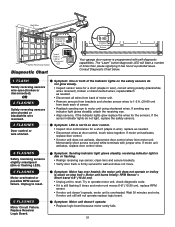
...
Safety Reversing Sensor
"Learn" Button LED or Diagnostic
LED
Diagnostic Chart
Installed Safety Reversing
Sensor
Your garage door opener is programmed with jumper wire.
Symptom: Motor has over heated; the motor unit does not operate or trolley is not lit on door control. • Inspect door control/wires for the sensors. OR 2 FLASHES
Safety reversing sensors wire...
3585 Elite Series Manual - Page 37

... and auxiliary button. Also can be limited to protect LiftMaster® garage door openers against damage from anywhere in the garage.
990LM
Surge Protector:
The Garage Door Opener Surge Protector is open garage door manually from outside by disengaging trolley.
373W
Extension Brackets:
(Optional) For safety sensor installation onto the wall or floor.
370LM
Designer Burled Walnut...
3585 Elite Series Manual - Page 40
....
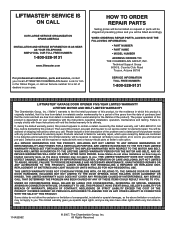
114A3396C
© 2007, The Chamberlain Group, Inc. Defective parts will be repaired or replaced with any product returned for a list of this limited warranty, will be shipped at prevailing prices and you . Country Club Road
Tucson, Arizona 85706
SERVICE INFORMATION TOLL FREE NUMBER:
1-800-528-9131
LIFTMASTER® GARAGE DOOR OPENER FIVE-YEAR LIMITED WARRANTY
LIFETIME MOTOR AND BELT...
LiftMaster 8350 Reviews
We have not received any reviews for LiftMaster yet.