
User's Guide for Windows 95 and Windows 98
Page 10
... • Set the number of copies to print • Reverse the printing order of your document Document/Quality tab to access the printer driver Help. The first page of your document will be on top of paper you are using • A print quality setting • Web Smoothing when... • Booklets • Two-sided documents Advanced tab to adjust: • Halftone settings • Image settings 6 Chapter 1 Help button on any tab in the Printer Properties to select: • Color settings for the type of document you are printing • The type of the stack in the paper exit tray...
... • Set the number of copies to print • Reverse the printing order of your document Document/Quality tab to access the printer driver Help. The first page of your document will be on top of paper you are using • A print quality setting • Web Smoothing when... • Booklets • Two-sided documents Advanced tab to adjust: • Halftone settings • Image settings 6 Chapter 1 Help button on any tab in the Printer Properties to select: • Color settings for the type of document you are printing • The type of the stack in the paper exit tray...

User's Guide for Windows 95 and Windows 98
Page 11
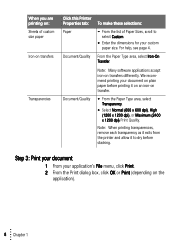
...stacking. Select the appropriate Paper Size setting. Paper Notes: • You can print quality photos with the black and color cartridge combination that came with a photo cartridge, Lexmark part number 12A1990. However, for the best possible print quality, replace the black cartridge with your printer. From the... most documents on specialty papers, use the following table. Paper Note: Your application may override the envelope settings in Printer Properties. For help, see page 22. • When printing photos, remove each photo as it exits from the printer and allow it to select the...
...stacking. Select the appropriate Paper Size setting. Paper Notes: • You can print quality photos with the black and color cartridge combination that came with a photo cartridge, Lexmark part number 12A1990. However, for the best possible print quality, replace the black cartridge with your printer. From the... most documents on specialty papers, use the following table. Paper Note: Your application may override the envelope settings in Printer Properties. For help, see page 22. • When printing photos, remove each photo as it exits from the printer and allow it to select the...
User's Guide for Windows 95 and Windows 98
Page 12
.... Step 3: Print your document 1 From your application's File menu, click Print. 2 From the Print dialog box, click OK or Print (depending on transfers differently. For help, see page 4. Note: When printing transparencies, remove each transparency as it exits from the printer and allow it on an iron-on plain paper before...
.... Step 3: Print your document 1 From your application's File menu, click Print. 2 From the Print dialog box, click OK or Print (depending on transfers differently. For help, see page 4. Note: When printing transparencies, remove each transparency as it exits from the printer and allow it on an iron-on plain paper before...
User's Guide for Windows 95 and Windows 98
Page 13
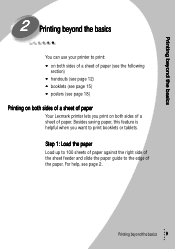
... beyond the basics 2 Printing beyond the basics 9 Besides saving paper, this feature is helpful when you print on both sides of a sheet of the paper. For help, see page 18) Printing on both sides of a sheet of paper Your Lexmark printer lets you want to the edge of paper (see the following section...
... beyond the basics 2 Printing beyond the basics 9 Besides saving paper, this feature is helpful when you print on both sides of a sheet of the paper. For help, see page 18) Printing on both sides of a sheet of paper Your Lexmark printer lets you want to the edge of paper (see the following section...
User's Guide for Windows 95 and Windows 98
Page 14
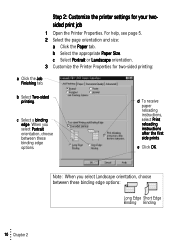
... twosided print job 1 Open the Printer Properties. When you select Landscape orientation, choose between these binding edge options: Long Edge Short Edge Binding Binding For help, see page 5. 2 Select the page orientation and size: a Click the Paper tab. d To receive paper reloading instructions, select Print reloading instructions after the first side...
... twosided print job 1 Open the Printer Properties. When you select Landscape orientation, choose between these binding edge options: Long Edge Short Edge Binding Binding For help, see page 5. 2 Select the page orientation and size: a Click the Paper tab. d To receive paper reloading instructions, select Print reloading instructions after the first side...
User's Guide for Windows 95 and Windows 98
Page 16
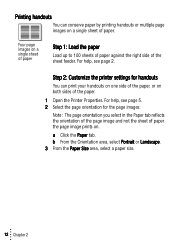
... you select in the Paper tab reflects the orientation of the page image and not the sheet of paper the page image prints on. For help , see page 5. 2 Select the page orientation for handouts You can conserve paper by printing handouts or multiple page images on a single sheet of paper. ... on a single sheet of paper Step 1: Load the paper Load up to 100 sheets of paper against the right side of the sheet feeder. For help , see page 2. b From the Orientation area, select Portrait or Landscape. 3 From the Paper Size area, select a paper size. 12 Chapter 2 a Click the Paper tab. ...
... you select in the Paper tab reflects the orientation of the page image and not the sheet of paper the page image prints on. For help , see page 5. 2 Select the page orientation for handouts You can conserve paper by printing handouts or multiple page images on a single sheet of paper. ... on a single sheet of paper Step 1: Load the paper Load up to 100 sheets of paper against the right side of the sheet feeder. For help , see page 2. b From the Orientation area, select Portrait or Landscape. 3 From the Paper Size area, select a paper size. 12 Chapter 2 a Click the Paper tab. ...
User's Guide for Windows 95 and Windows 98
Page 19
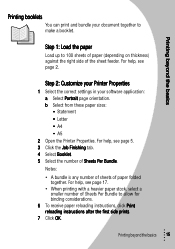
...folded together. b Select from these paper sizes: • Statement • Letter • A4 • A5 2 Open the Printer Properties. For help, see page 2. Printing booklets You can print and bundle your software application: a Select Portrait page orientation. Notes: • A bundle is any ... instructions, click Print reloading instructions after the first side prints. 7 Click OK. For help , see page 17. • When printing with a heavier paper stock, select a smaller number of Sheets Per Bundle. For help , see page 5. 3 Click the Job Finishing tab. 4 Select Booklet. 5 Select...
...folded together. b Select from these paper sizes: • Statement • Letter • A4 • A5 2 Open the Printer Properties. For help, see page 2. Printing booklets You can print and bundle your software application: a Select Portrait page orientation. Notes: • A bundle is any ... instructions, click Print reloading instructions after the first side prints. 7 Click OK. For help , see page 17. • When printing with a heavier paper stock, select a smaller number of Sheets Per Bundle. For help , see page 5. 3 Click the Job Finishing tab. 4 Select Booklet. 5 Select...

User's Guide for Windows 95 and Windows 98
Page 20
... the other side. 5 To go back to reload the paper. b Click OK. 6 Assemble your instruction page may be different than the instruction page shown. For help, see page 17. 16 Chapter 2 The second side of your printer software prompts you and the arrows pointing down . 4 Click OK. Step 3: Print your booklet...
... the other side. 5 To go back to reload the paper. b Click OK. 6 Assemble your instruction page may be different than the instruction page shown. For help, see page 17. 16 Chapter 2 The second side of your printer software prompts you and the arrows pointing down . 4 Click OK. Step 3: Print your booklet...
User's Guide for Windows 95 and Windows 98
Page 22
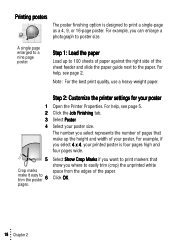
... to easily trim (crop) the unprinted white space from the edges of your printed poster is designed to the paper. Click OK. 18 Chapter 2 For help , see page 2. Click the Job Finishing tab. Select your poster Open the Printer Properties. Note: For the best print quality, use a heavy-weight ... represents the number of the sheet feeder and slide the paper guide next to print a single-page as a 4, 9, or 16-page poster. For help , see page 5. Printing posters The poster finishing option is four pages high and four pages wide. For example, you select 4 x 4, your poster...
... to easily trim (crop) the unprinted white space from the edges of your printed poster is designed to the paper. Click OK. 18 Chapter 2 For help , see page 2. Click the Job Finishing tab. Select your poster Open the Printer Properties. Note: For the best print quality, use a heavy-weight ... represents the number of the sheet feeder and slide the paper guide next to print a single-page as a 4, 9, or 16-page poster. For help , see page 5. Printing posters The poster finishing option is four pages high and four pages wide. For example, you select 4 x 4, your poster...

User's Guide for Windows 95 and Windows 98
Page 24
For help, see page 19. 6 To go back to print. or To quickly select a few tiles to print, click Remove All to remove all of the pages ...
For help, see page 19. 6 To go back to print. or To quickly select a few tiles to print, click Remove All to remove all of the pages ...
User's Guide for Windows 95 and Windows 98
Page 25
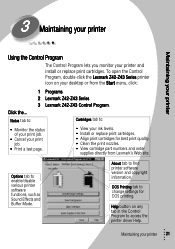
...ink levels. • Install or replace print cartridges. • Align print cartridges for DOS printing. About tab to access the printer driver Help. DOS Printing tab to : • Monitor the status of your print job. • Cancel your print job. • Print ...to enable/disable various printer software functions, such as Sound Effects and Buffer Mode. Options tab to : 1 Programs. 2 Lexmark Z42-Z43 Series. 3 Lexmark Z42-Z43 Control Program. 3 Maintaining your printer Maintaining your printer Using the Control Program The Control Program lets you monitor your printer 21 ...
...ink levels. • Install or replace print cartridges. • Align print cartridges for DOS printing. About tab to access the printer driver Help. DOS Printing tab to : • Monitor the status of your print job. • Cancel your print job. • Print ...to enable/disable various printer software functions, such as Sound Effects and Buffer Mode. Options tab to : 1 Programs. 2 Lexmark Z42-Z43 Series. 3 Lexmark Z42-Z43 Control Program. 3 Maintaining your printer Maintaining your printer Using the Control Program The Control Program lets you monitor your printer 21 ...

User's Guide for Windows 95 and Windows 98
Page 27
For help , see page 24. Push back firmly on the bottom of the print cartridge. Insert the replacement print cartridge into place. 5 Close the front cover. 6 From ... touch the gold area on the Alignment screen to complete the cartridge installation. Maintaining your printer 23 Follow the instructions on the print cartridge. For help , see page 21. 7 Select the cartridge type you installed and click OK. 8 If you are installing a new cartridge, remove only the sticker and transparent tape...
For help , see page 24. Push back firmly on the bottom of the print cartridge. Insert the replacement print cartridge into place. 5 Close the front cover. 6 From ... touch the gold area on the Alignment screen to complete the cartridge installation. Maintaining your printer 23 Follow the instructions on the print cartridge. For help , see page 21. 7 Select the cartridge type you installed and click OK. 8 If you are installing a new cartridge, remove only the sticker and transparent tape...
User's Guide for Windows 95 and Windows 98
Page 28
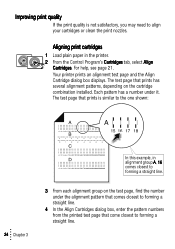
... quality is similar to the one shown: 24 Chapter 3 In this example, in the printer. 2 From the Control Program's Cartridges tab, select Align Cartridges. For help, see page 21. Aligning print cartridges 1 Load plain paper in alignment group A, 16 comes closest to forming a straight line. 3 From each alignment group on the...
... quality is similar to the one shown: 24 Chapter 3 In this example, in the printer. 2 From the Control Program's Cartridges tab, select Align Cartridges. For help, see page 21. Aligning print cartridges 1 Load plain paper in alignment group A, 16 comes closest to forming a straight line. 3 From each alignment group on the...
User's Guide for Windows 95 and Windows 98
Page 29
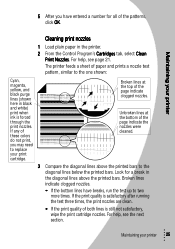
...the patterns, click OK. Maintaining your print cartridge. If any of the page indicate clogged nozzles. Unbroken lines at the top of these colors do not print, you have breaks, run the test up to replace your printer 25 Broken lines at the bottom of paper and ...; If the bottom lines have entered a number for a break in the printer. 2 From the Control Program's Cartridges tab, select Clean Print Nozzles. For help , see the next section. The printer feeds a sheet of the page indicate the nozzles were cleaned. 3 Compare the diagonal lines above the printed bars....
...the patterns, click OK. Maintaining your print cartridge. If any of the page indicate clogged nozzles. Unbroken lines at the top of these colors do not print, you have breaks, run the test up to replace your printer 25 Broken lines at the bottom of paper and ...; If the bottom lines have entered a number for a break in the printer. 2 From the Control Program's Cartridges tab, select Clean Print Nozzles. For help , see the next section. The printer feeds a sheet of the page indicate the nozzles were cleaned. 3 Compare the diagonal lines above the printed bars....
User's Guide for Windows 95 and Windows 98
Page 30
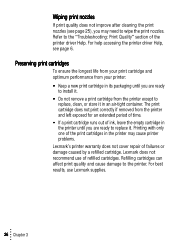
...the printer. The print cartridge does not print correctly if removed from the printer except to replace, clean, or store it . Lexmark does not recommend use Lexmark supplies. 26 Chapter 3 For best results, use of failures or damage caused by a refilled cartridge. Refilling cartridges can affect print...printer may need to the "Troubleshooting: Print Quality" section of ink, leave the empty cartridge in an air-tight container. For help accessing the printer driver Help, see page 25), you are ready to install it. • Do not remove a print cartridge from the printer and left...
...the printer. The print cartridge does not print correctly if removed from the printer except to replace, clean, or store it . Lexmark does not recommend use Lexmark supplies. 26 Chapter 3 For best results, use of failures or damage caused by a refilled cartridge. Refilling cartridges can affect print...printer may need to the "Troubleshooting: Print Quality" section of ink, leave the empty cartridge in an air-tight container. For help accessing the printer driver Help, see page 25), you are ready to install it. • Do not remove a print cartridge from the printer and left...
User's Guide for Windows 95 and Windows 98
Page 33
... page 27. For help , see page 22. • Your Lexmark printer is set as the default printer. Printer ejects a blank page after appearing to your printer from the switch box or other device (such as a ...; The printer is turned On, and the paper is loaded correctly. • The parallel or USB cable is completely plugged into the printer. • Your Lexmark printer is set as the default printer. If you have removed the sticker and transparent tape on the bottom of the print cartridges.
... page 27. For help , see page 22. • Your Lexmark printer is set as the default printer. Printer ejects a blank page after appearing to your printer from the switch box or other device (such as a ...; The printer is turned On, and the paper is loaded correctly. • The parallel or USB cable is completely plugged into the printer. • Your Lexmark printer is set as the default printer. If you have removed the sticker and transparent tape on the bottom of the print cartridges.
User's Guide for Windows 95 and Windows 98
Page 34
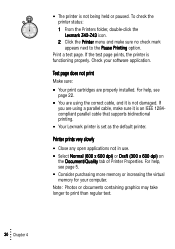
... open applications not in use. • Select Normal (600 x 600 dpi) or Draft (300 x 600 dpi) on the Document/Quality tab of Printer Properties. For help , see page 5. • Consider purchasing more memory or increasing the virtual memory for your software application. Test page does not print Make sure: • Your... to print than regular text. 30 Chapter 4 • The printer is functioning properly. To check the printer status: 1 From the Printers folder, double-click the Lexmark Z42-Z43 icon. 2 Click the Printer menu and make sure it is set as the default printer.
... open applications not in use. • Select Normal (600 x 600 dpi) or Draft (300 x 600 dpi) on the Document/Quality tab of Printer Properties. For help , see page 5. • Consider purchasing more memory or increasing the virtual memory for your software application. Test page does not print Make sure: • Your... to print than regular text. 30 Chapter 4 • The printer is functioning properly. To check the printer status: 1 From the Printers folder, double-click the Lexmark Z42-Z43 icon. 2 Click the Printer menu and make sure it is set as the default printer.
User's Guide for Windows 95 and Windows 98
Page 35
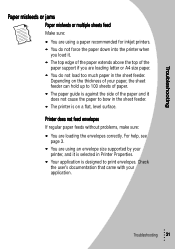
... guide is against the side of the paper and it . • The top edge of the paper extends above the top of your application. For help, see page 3. • You are loading the envelopes correctly. Depending on a flat, level surface. Printer does not feed envelopes If regular paper feeds without problems...
... guide is against the side of the paper and it . • The top edge of the paper extends above the top of your application. For help, see page 3. • You are loading the envelopes correctly. Depending on a flat, level surface. Printer does not feed envelopes If regular paper feeds without problems...
User's Guide for Windows 95 and Windows 98
Page 36
...the paper because it is too far into the printer and can't be removed: 1 Press the Power button to turn the printer On. 5 Resend your Lexmark printer driver is lodged too far into the printer, raise the front cover and pull the paper out. 3 Close the front cover. 4 Press the Power... button to turn the printer Off. 2 Pull firmly on the paper to print. For help , see page 24. • Clean the print nozzles. For help , see page 28. 32 Chapter 4 For help , see page 25. Printer has a paper jam Remove the paper from the Document/Quality tab of vertical straight...
...the paper because it is too far into the printer and can't be removed: 1 Press the Power button to turn the printer On. 5 Resend your Lexmark printer driver is lodged too far into the printer, raise the front cover and pull the paper out. 3 Close the front cover. 4 Press the Power... button to turn the printer Off. 2 Pull firmly on the paper to print. For help , see page 24. • Clean the print nozzles. For help , see page 28. 32 Chapter 4 For help , see page 25. Printer has a paper jam Remove the paper from the Document/Quality tab of vertical straight...
User's Guide for Windows 95 and Windows 98
Page 37
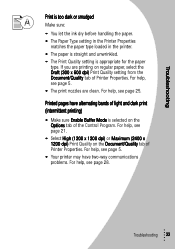
...printer may have alternating bands of light and dark print (intermittent printing) • Make sure Enable Buffer Mode is appropriate for the paper type. For help , see page 25. Troubleshooting Print is too dark or smudged Make sure: • You let the ink dry before handling the paper. •... the printer. • The paper is straight and unwrinkled. • The Print Quality setting is selected on the Options tab of the Control Program. For help , see page 21. • Select High (1200 x 1200 dpi) or Maximum (2400 x 1200 dpi) Print Quality on regular paper, select the Draft (300...
...printer may have alternating bands of light and dark print (intermittent printing) • Make sure Enable Buffer Mode is appropriate for the paper type. For help , see page 25. Troubleshooting Print is too dark or smudged Make sure: • You let the ink dry before handling the paper. •... the printer. • The paper is straight and unwrinkled. • The Print Quality setting is selected on the Options tab of the Control Program. For help , see page 21. • Select High (1200 x 1200 dpi) or Maximum (2400 x 1200 dpi) Print Quality on regular paper, select the Draft (300...

