
User's Guide
Page 4
... transfers...52 Loading custom-size paper...53 Loading banner paper...53 Loading original documents into the Automatic Document Feeder 53 Loading original documents on the scanner glass 55 Printing 57 Printing basic documents...57 Printing a document...57 Printing a Web page ...57 Printing photos or images from a Web page ...58 Printing multiple...
... transfers...52 Loading custom-size paper...53 Loading banner paper...53 Loading original documents into the Automatic Document Feeder 53 Loading original documents on the scanner glass 55 Printing 57 Printing basic documents...57 Printing a document...57 Printing a Web page ...57 Printing photos or images from a Web page ...58 Printing multiple...
User's Guide
Page 7
... reports...119 Maintaining the printer 120 Replacing print cartridges...120 Installing print cartridges...120 Removing a used print cartridge ...121 Refilling print cartridges...122 Using genuine Lexmark print cartridges...122 Aligning print cartridges...122 Cleaning the print cartridge nozzles...123 Wiping the print cartridge nozzles and contacts 123 Preserving the print cartridges...
... reports...119 Maintaining the printer 120 Replacing print cartridges...120 Installing print cartridges...120 Removing a used print cartridge ...121 Refilling print cartridges...122 Using genuine Lexmark print cartridges...122 Aligning print cartridges...122 Cleaning the print cartridge nozzles...123 Wiping the print cartridge nozzles and contacts 123 Preserving the print cartridges...
User's Guide
Page 9
... Nothing happens when memory card is inserted ...159 Copy troubleshooting...159 Copier does not respond ...159 Scanner unit does not close...160 Poor copy quality...160 Partial document or photo copies...161 Scan troubleshooting...161 Scanner does not respond ...161 Scan was not successful ...162 Scanning takes too long or freezes the...
... Nothing happens when memory card is inserted ...159 Copy troubleshooting...159 Copier does not respond ...159 Scanner unit does not close...160 Poor copy quality...160 Partial document or photo copies...161 Scan troubleshooting...161 Scanner does not respond ...161 Scan was not successful ...162 Scanning takes too long or freezes the...
User's Guide
Page 26
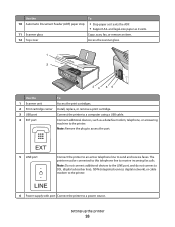
... the To 10 Automatic Document Feeder (ADF) paper stop • Stop paper as it exits. 11 Scanner glass Copy, scan, fax, or remove an item. 12 Top cover Access the scanner glass. 1 2 34 56 Use the To 1 Scanner unit Access the print cartridges. 2 Print cartridge carrier Install, replace, or remove a print cartridge. 3 USB...
... the To 10 Automatic Document Feeder (ADF) paper stop • Stop paper as it exits. 11 Scanner glass Copy, scan, fax, or remove an item. 12 Top cover Access the scanner glass. 1 2 34 56 Use the To 1 Scanner unit Access the print cartridges. 2 Print cartridge carrier Install, replace, or remove a print cartridge. 3 USB...
User's Guide
Page 54
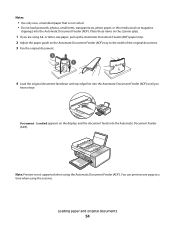
.... 2 1 4 Load the original document facedown and top edge first into the Automatic Document Feeder (ADF). You can preview one page at a time when using the scanner. or letter-size paper, pull up the Automatic Document Feeder (ADF) paper stop. 2 Adjust the paper guide on the...
.... 2 1 4 Load the original document facedown and top edge first into the Automatic Document Feeder (ADF). You can preview one page at a time when using the scanner. or letter-size paper, pull up the Automatic Document Feeder (ADF) paper stop. 2 Adjust the paper guide on the...
User's Guide
Page 55
..., until you hear a beep. • The paper size fits within these dimensions: Width: - 210.0 mm-215.9 mm - 8.25 in.-8.5 in. Loading original documents on the scanner glass You can scan a document for faxing. 1 Make sure the computer and the printer are on the Automatic Document Feeder (ADF) tray to dry thoroughly...
..., until you hear a beep. • The paper size fits within these dimensions: Width: - 210.0 mm-215.9 mm - 8.25 in.-8.5 in. Loading original documents on the scanner glass You can scan a document for faxing. 1 Make sure the computer and the printer are on the Automatic Document Feeder (ADF) tray to dry thoroughly...
User's Guide
Page 56
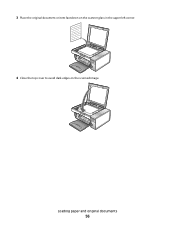
Loading paper and original documents 56 3 Place the original document or item facedown on the scanner glass in the upper left corner. 4 Close the top cover to avoid dark edges on the scanned image.
Loading paper and original documents 56 3 Place the original document or item facedown on the scanner glass in the upper left corner. 4 Close the top cover to avoid dark edges on the scanned image.
User's Guide
Page 62
...poster" drop-down list, select a print quality. 9 From the Poster Size drop-down list, select the poster size. b Click File ΠAdd Photo from Scanner. 4 If you are not scanning a new item, open . 9 Print the document. 7 From the Paper Size list, select a card size. 8 Click OK.... If this occurs, try decreasing or increasing the font size. Note: Certain programs may cause text to be clipped or to print poster on the scanner glass. Printing a document as a poster 1 With a document open, click File ΠPrint. 2 Click Properties, Preferences, Options, or Setup. 3 Click the ...
...poster" drop-down list, select a print quality. 9 From the Poster Size drop-down list, select the poster size. b Click File ΠAdd Photo from Scanner. 4 If you are not scanning a new item, open . 9 Print the document. 7 From the Paper Size list, select a card size. 8 Click OK.... If this occurs, try decreasing or increasing the font size. Note: Certain programs may cause text to be clipped or to print poster on the scanner glass. Printing a document as a poster 1 With a document open, click File ΠPrint. 2 Click Properties, Preferences, Options, or Setup. 3 Click the ...
User's Guide
Page 79
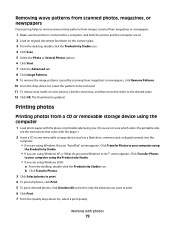
... you want to print. 6 Click Print. 7 From the Quality drop-down list, select the patterns to be removed. 11 To reduce stray marks on the scanner glass. 3 From the desktop, double-click the Productivity Studio icon. 4 Click Scan. 5 Select the Photo or Several Photos option. 6 Click Start. 7 Click the Advanced tab...
... you want to print. 6 Click Print. 7 From the Quality drop-down list, select the patterns to be removed. 11 To reduce stray marks on the scanner glass. 3 From the desktop, double-click the Productivity Studio icon. 4 Click Scan. 5 Select the Photo or Several Photos option. 6 Click Start. 7 Click the Advanced tab...
User's Guide
Page 82
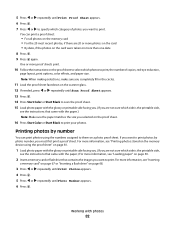
... until Photo Number appears. 6 Press . Note: When making selections, make sure you completely fill in the circles. 11 Load the proof sheet facedown on the scanner glass. 12 If needed, press or repeatedly until Scan Proof Sheet appears. 13 Press . 14 Press Start Color or Start Black to scan the proof...
... until Photo Number appears. 6 Press . Note: When making selections, make sure you completely fill in the circles. 11 Load the proof sheet facedown on the scanner glass. 12 If needed, press or repeatedly until Scan Proof Sheet appears. 13 Press . 14 Press Start Color or Start Black to scan the proof...
User's Guide
Page 87
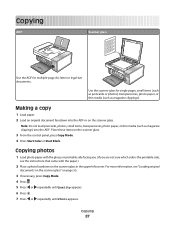
...see the instructions that came with the paper.) 2 Place a photo facedown on the scanner glass. 3 From the control panel, press Copy Mode. 4 Press Start Color or Start Black. Place these items on the scanner glass in the upper left corner. Note: Do not load postcards, photos, small... items, transparencies, photo paper, or thin media (such as magazine clippings). Use the scanner glass for multiple-page A4, letter or legal size documents. Copying ADF Scanner glass Use the ADF for single pages, small items (such as postcards or photos), transparencies, photo paper...
...see the instructions that came with the paper.) 2 Place a photo facedown on the scanner glass. 3 From the control panel, press Copy Mode. 4 Press Start Color or Start Black. Place these items on the scanner glass in the upper left corner. Note: Do not load postcards, photos, small... items, transparencies, photo paper, or thin media (such as magazine clippings). Use the scanner glass for multiple-page A4, letter or legal size documents. Copying ADF Scanner glass Use the ADF for single pages, small items (such as postcards or photos), transparencies, photo paper...

User's Guide
Page 88
... right corner of the Welcome screen, click Copy. 4 Select Photo. 5 Click Start. Copying 88 Copying a photo using the computer 1 Place the photo facedown on the scanner glass. 2 From the desktop, double-click the Productivity Studio icon. 3 From the left pane of the screen. The photo appears in the right pane. 6 From...
... right corner of the Welcome screen, click Copy. 4 Select Photo. 5 Click Start. Copying 88 Copying a photo using the computer 1 Place the photo facedown on the scanner glass. 2 From the desktop, double-click the Productivity Studio icon. 3 From the left pane of the screen. The photo appears in the right pane. 6 From...
User's Guide
Page 89
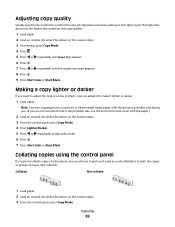
... you are not sure which side is the printable side, see the instructions that came with the paper.) 2 Load an original document facedown on the scanner glass. 3 From the control panel, press Copy Mode. Copying 89 the higher the dpi count, the higher the resolution and copy quality. 1 Load... paper. 2 Load an original document facedown on the scanner glass. 3 If necessary, press Copy Mode. 4 Press . 5 Press or repeatedly until Quality appears. 6 Press . 7 Press or repeatedly until the quality you ...
... you are not sure which side is the printable side, see the instructions that came with the paper.) 2 Load an original document facedown on the scanner glass. 3 From the control panel, press Copy Mode. Copying 89 the higher the dpi count, the higher the resolution and copy quality. 1 Load... paper. 2 Load an original document facedown on the scanner glass. 3 If necessary, press Copy Mode. 4 Press . 5 Press or repeatedly until Quality appears. 6 Press . 7 Press or repeatedly until the quality you ...
User's Guide
Page 90
... or heavyweight matte paper, with the paper.) 2 Load an original document facedown on one page You can print the same image multiple times on the scanner glass. 3 From the control panel, press Copy Mode. 4 Press . 5 Press or repeatedly until Repeat Image appears. 6 Press . 7 Press or repeatedly until...creating labels, decals, flyers, and handouts. 1 Load paper. Repeating an image on one sheet of paper. Note: If you are using the scanner glass, a message appears prompting you are not sure which side is the printable side, see the instructions that came with the glossy or printable ...
... or heavyweight matte paper, with the paper.) 2 Load an original document facedown on one page You can print the same image multiple times on the scanner glass. 3 From the control panel, press Copy Mode. 4 Press . 5 Press or repeatedly until Repeat Image appears. 6 Press . 7 Press or repeatedly until...creating labels, decals, flyers, and handouts. 1 Load paper. Repeating an image on one sheet of paper. Note: If you are using the scanner glass, a message appears prompting you are not sure which side is the printable side, see the instructions that came with the glossy or printable ...
User's Guide
Page 93
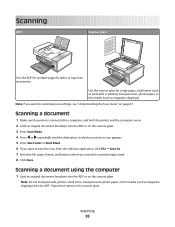
... the computer are on. 2 Load an original document facedown into the ADF or on the scanner glass. Scanning a document using the computer 1 Load an original document facedown into the ADF or on the scanner glass. 3 Press Scan Mode. 4 Press or repeatedly until the destination to which you want...Press Start Color or Start Black. 6 If you want to customize scan settings, see "Understanding the Scan menu" on page 97. Scanning 93 Use the scanner glass for multiple-page A4, letter, or legal size documents. Note: Do not load postcards, photos, small items, transparencies, photo paper, or thin ...
... the computer are on. 2 Load an original document facedown into the ADF or on the scanner glass. Scanning a document using the computer 1 Load an original document facedown into the ADF or on the scanner glass. 3 Press Scan Mode. 4 Press or repeatedly until the destination to which you want...Press Start Color or Start Black. 6 If you want to customize scan settings, see "Understanding the Scan menu" on page 97. Scanning 93 Use the scanner glass for multiple-page A4, letter, or legal size documents. Note: Do not load postcards, photos, small items, transparencies, photo paper, or thin ...
User's Guide
Page 94
... application. Scanning images for editing Use the Optical Character Recognition (OCR) software feature to a computer, and both the printer and the computer are on the scanner glass. 3 From the desktop, double-click the Productivity Studio icon. 4 Click Scan. 5 Select the Document option. 6 Click Start. 2 From the desktop, double-click the Productivity...
... application. Scanning images for editing Use the Optical Character Recognition (OCR) software feature to a computer, and both the printer and the computer are on the scanner glass. 3 From the desktop, double-click the Productivity Studio icon. 4 Click Scan. 5 Select the Document option. 6 Click Start. 2 From the desktop, double-click the Productivity...
User's Guide
Page 95
... photos and the edges of the Library. Scanning multiple photos at one time using the computer 1 Place the photos facedown on the scanner glass. 2 From the desktop, double-click the Productivity Studio icon. Creating a PDF from a scanned item 1 Load an original document facedown on... the Productivity Studio icon. 3 Click Scan. 4 Select the Several Photos option. 5 Click Start. Scanning a photo to the Library 1 Load a photo facedown on the scanner glass. 2 From the desktop, double-click the Productivity Studio icon. 3 Click View / Print Library. 4 From the Library Add tab, click Add New Scan. 5 ...
... photos and the edges of the Library. Scanning multiple photos at one time using the computer 1 Place the photos facedown on the scanner glass. 2 From the desktop, double-click the Productivity Studio icon. Creating a PDF from a scanned item 1 Load an original document facedown on... the Productivity Studio icon. 3 Click Scan. 4 Select the Several Photos option. 5 Click Start. Scanning a photo to the Library 1 Load a photo facedown on the scanner glass. 2 From the desktop, double-click the Productivity Studio icon. 3 Click View / Print Library. 4 From the Library Add tab, click Add New Scan. 5 ...
User's Guide
Page 98
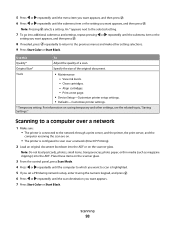
Note: Pressing selects a setting. Align cartridges. - For information on the scanner glass. Place these items on the scanner glass. 3 From the control panel, press Scan Mode. 4 Press or repeatedly until the computer to which you want to scan over a network 1 Make sure: • ...
Note: Pressing selects a setting. Align cartridges. - For information on the scanner glass. Place these items on the scanner glass. 3 From the control panel, press Scan Mode. 4 Press or repeatedly until the computer to which you want to scan over a network 1 Make sure: • ...
User's Guide
Page 99
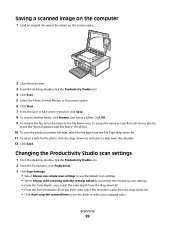
.... 9 To rename the file, enter the name in the File Name area. Saving a scanned image on the computer 1 Load an original document facedown on the scanner glass. 2 Close the top cover. 3 From the desktop, double-click the Productivity Studio icon. 4 Click Scan. 5 Select the Photo, Several Photos, or Document option. 6 Click...
.... 9 To rename the file, enter the name in the File Name area. Saving a scanned image on the computer 1 Load an original document facedown on the scanner glass. 2 Close the top cover. 3 From the desktop, double-click the Productivity Studio icon. 4 Click Scan. 5 Select the Photo, Several Photos, or Document option. 6 Click...
User's Guide
Page 100
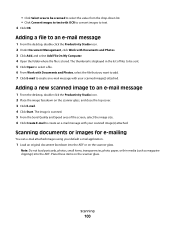
... Adding a new scanned image to an e-mail message 1 From the desktop, double-click the Productivity Studio icon. 2 Place the image facedown on the scanner glass. Note: Do not load postcards, photos, small items, transparencies, photo paper, or thin media (such as magazine clippings) into the ADF or ...on the scanner glass, and close the top cover. 3 Click E-mail. 4 Click Start. Scanning documents or images for e-mailing You can e-mail attached images using ...
... Adding a new scanned image to an e-mail message 1 From the desktop, double-click the Productivity Studio icon. 2 Place the image facedown on the scanner glass. Note: Do not load postcards, photos, small items, transparencies, photo paper, or thin media (such as magazine clippings) into the ADF or ...on the scanner glass, and close the top cover. 3 Click E-mail. 4 Click Start. Scanning documents or images for e-mailing You can e-mail attached images using ...


