User's Guide
Page 7
... a slideshow...94 Connecting the printer to a network 95 Networking overview...95 Finding your MAC address...95 Sharing a printer in a Windows environment 95 Finding a printer/print server located on remote subnets 96 Direct IP printing...96 Ping the printer...96 Maintaining the printer ...98 Removing a used print cartridge...98 Installing print cartridges...99 Refilling print cartridges...101 Using genuine Lexmark print cartridges 101 Aligning print cartridges...101 Cleaning the print cartridge nozzles 101 Wiping the print cartridge nozzles and contacts 102...
... a slideshow...94 Connecting the printer to a network 95 Networking overview...95 Finding your MAC address...95 Sharing a printer in a Windows environment 95 Finding a printer/print server located on remote subnets 96 Direct IP printing...96 Ping the printer...96 Maintaining the printer ...98 Removing a used print cartridge...98 Installing print cartridges...99 Refilling print cartridges...101 Using genuine Lexmark print cartridges 101 Aligning print cartridges...101 Cleaning the print cartridge nozzles 101 Wiping the print cartridge nozzles and contacts 102...
User's Guide
Page 9
User's Guide Description Where to find You can find this document in the printer box or on Windows operating Lexmark Web site at www.lexmark.com. systems) and some basic instructions for setting up hardware and software. Note: If your printer supports Macintosh operating systems, ...see the Mac Help: 1 From the Finder desktop, double-click the Lexmark 5000 Series folder. 2 Double-click the printer Help icon. 9 Where to find The User's Guide gives you instructions for setting up You...
User's Guide Description Where to find You can find this document in the printer box or on Windows operating Lexmark Web site at www.lexmark.com. systems) and some basic instructions for setting up hardware and software. Note: If your printer supports Macintosh operating systems, ...see the Mac Help: 1 From the Finder desktop, double-click the Lexmark 5000 Series folder. 2 Double-click the printer Help icon. 9 Where to find The User's Guide gives you instructions for setting up You...

User's Guide
Page 10
...of the following : • Using the software (on Windows operating systems) • In Windows Vista, click . • Loading paper • In Windows XP and earlier, click Start. • Printing 2 Click Programs or All Programs Œ Lexmark 5000 • Working with photos Series. • ...appears. such as: 1 Do one of the following : • In Windows Vista, click . • In Windows XP and earlier, click Start. 2 Click Programs or All Programs Œ Lexmark 5000 Series. 3 Select Lexmark Solution Center. 10 Troubleshooting). 2 Double-click the printer Help icon. 4...
...of the following : • Using the software (on Windows operating systems) • In Windows Vista, click . • Loading paper • In Windows XP and earlier, click Start. • Printing 2 Click Programs or All Programs Œ Lexmark 5000 • Working with photos Series. • ...appears. such as: 1 Do one of the following : • In Windows Vista, click . • In Windows XP and earlier, click Start. 2 Click Programs or All Programs Œ Lexmark 5000 Series. 3 Select Lexmark Solution Center. 10 Troubleshooting). 2 Double-click the printer Help icon. 4...
User's Guide
Page 12
Record the following information (located on the store receipt and the back of the printer), and have it ready when you contact us so that we may serve you faster: • Machine Type number • Serial number • Date purchased • Store where purchased Operating system notice All features and functions are operating system-dependent. For complete descriptions: • Windows users-See the User's Guide. • Macintosh users-If your product supports Macintosh, see the Mac Help installed with the printer software. 12
Record the following information (located on the store receipt and the back of the printer), and have it ready when you contact us so that we may serve you faster: • Machine Type number • Serial number • Date purchased • Store where purchased Operating system notice All features and functions are operating system-dependent. For complete descriptions: • Windows users-See the User's Guide. • Macintosh users-If your product supports Macintosh, see the Mac Help installed with the printer software. 12
User's Guide
Page 30
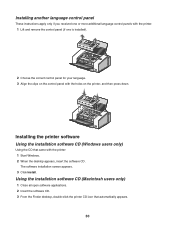
Installing the printer software Using the installation software CD (Windows users only) Using the CD that automatically appears. 30 The software installation screen appears. 3 Click Install. Using the installation software CD (Macintosh users only) 1 Close ... software CD. 3 From the Finder desktop, double-click the printer CD icon that came with the holes on the control panel with the printer: 1 Start Windows. 2 When the desktop appears, insert the software CD. Installing another language control panel These instructions apply only if you received one or more additional language...
Installing the printer software Using the installation software CD (Windows users only) Using the CD that automatically appears. 30 The software installation screen appears. 3 Click Install. Using the installation software CD (Macintosh users only) 1 Close ... software CD. 3 From the Finder desktop, double-click the printer CD icon that came with the holes on the control panel with the printer: 1 Start Windows. 2 When the desktop appears, insert the software CD. Installing another language control panel These instructions apply only if you received one or more additional language...

User's Guide
Page 31
...the Productivity Studio icon for your printer, and do many other tasks. The following : • In Windows Vista, click . • In Windows XP and earlier, click Start. 2 Click Programs or All Programs Œ Lexmark 5000 Series. 3 Select Productivity Studio. Depending on the printer you want to complete. Method 2 1 Do...the following is an overview of features of this software may not be applicable. Using the World Wide Web 1 Go to the Lexmark Web site at www.lexmark.com. 2 From the home page, navigate through the menu selection, and then click Drivers & Downloads. 3 Choose the printer...
...the Productivity Studio icon for your printer, and do many other tasks. The following : • In Windows Vista, click . • In Windows XP and earlier, click Start. 2 Click Programs or All Programs Œ Lexmark 5000 Series. 3 Select Productivity Studio. Depending on the printer you want to complete. Method 2 1 Do...the following is an overview of features of this software may not be applicable. Using the World Wide Web 1 Go to the Lexmark Web site at www.lexmark.com. 2 From the home page, navigate through the menu selection, and then click Drivers & Downloads. 3 Choose the printer...
User's Guide
Page 33
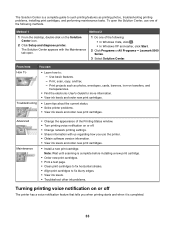
To open . 1 Do one of the Printing Status window. • Turn printing voice notification on the Solution Center icon. 2 Click Setup and diagnose printer. From here You can: How To • Learn how ...print cartridges. • Install a new print cartridge. Advanced Maintenance • Change the appearance of the following : • In Windows Vista, click . • In Windows XP and earlier, click Start. 2 Click Programs or All Programs Œ Lexmark 5000 Series. 3 Select Solution Center. Print, scan, copy, and fax. - Troubleshooting • Learn tips about the current...
To open . 1 Do one of the Printing Status window. • Turn printing voice notification on the Solution Center icon. 2 Click Setup and diagnose printer. From here You can: How To • Learn how ...print cartridges. • Install a new print cartridge. Advanced Maintenance • Change the appearance of the following : • In Windows Vista, click . • In Windows XP and earlier, click Start. 2 Click Programs or All Programs Œ Lexmark 5000 Series. 3 Select Solution Center. Print, scan, copy, and fax. - Troubleshooting • Learn tips about the current...
User's Guide
Page 34
... work properly, allow the printer software to run on or off: 1 Do one of the following: • In Windows Vista, click . • In Windows XP and earlier, click Start. 2 Click Programs or All Programs Œ Lexmark 5000 Series. 3 Click Solution Center. 4 Click Advanced. 5 Click Printing Status. 6 Select or clear Play voice notification for...
... work properly, allow the printer software to run on or off: 1 Do one of the following: • In Windows Vista, click . • In Windows XP and earlier, click Start. 2 Click Programs or All Programs Œ Lexmark 5000 Series. 3 Click Solution Center. 4 Click Advanced. 5 Click Printing Status. 6 Select or clear Play voice notification for...

User's Guide
Page 59
...also use this software to every fax you can choose from. Method 2 a Do one of the following : • In Windows Vista, click . • In Windows XP and earlier, click Start. c Click Productivity Studio. You can add new contacts or groups, edit or delete contacts or ...groups, and add contacts or groups to send a fax. 59 c Click Fax Solutions. b Click Programs or All Programs Œ Lexmark 5000 Series. b Click Programs or All Programs Œ Lexmark...
...also use this software to every fax you can choose from. Method 2 a Do one of the following : • In Windows Vista, click . • In Windows XP and earlier, click Start. c Click Productivity Studio. You can add new contacts or groups, edit or delete contacts or ...groups, and add contacts or groups to send a fax. 59 c Click Fax Solutions. b Click Programs or All Programs Œ Lexmark 5000 Series. b Click Programs or All Programs Œ Lexmark...
User's Guide
Page 63
... using Microsoft Internet Explorer 5.5 or later. 3 If you want to view the Web page before printing: a Click Preview. c Click: • Print in the Print Preview window, then click Print in or out, or select whether to the next step. 5 If needed, select a print option from the Toolbar: • Normal • Quick... • Black and White • Text Only 63 c Click OK. 4 If you want to check or change your print settings: a From the toolbar area, click Lexmark Œ Page Setup.
... using Microsoft Internet Explorer 5.5 or later. 3 If you want to view the Web page before printing: a Click Preview. c Click: • Print in the Print Preview window, then click Print in or out, or select whether to the next step. 5 If needed, select a print option from the Toolbar: • Normal • Quick... • Black and White • Text Only 63 c Click OK. 4 If you want to check or change your print settings: a From the toolbar area, click Lexmark Œ Page Setup.
User's Guide
Page 66
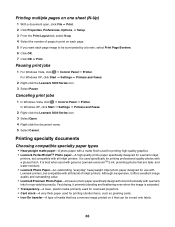
...designed for eye-catching results. and water-resistant. • Lexmark Photo Paper-An outstanding "everyday" heavyweight inkjet photo paper designed for printing professional quality photos with a glossy finish. Canceling print jobs 1 In Windows Vista, click Œ Control Panel Œ Printer. ... If you want each page image to bond chemically with Lexmark inks for Lexmark inkjet printers, but compatible with all inkjet printers. In Windows XP, click Start Œ Settings Œ Printers and Faxes. 2 Right-click the Lexmark 5000 Series icon. 3 Select Open. 4 Right-click the...
...designed for eye-catching results. and water-resistant. • Lexmark Photo Paper-An outstanding "everyday" heavyweight inkjet photo paper designed for printing professional quality photos with a glossy finish. Canceling print jobs 1 In Windows Vista, click Œ Control Panel Œ Printer. ... If you want each page image to bond chemically with Lexmark inks for Lexmark inkjet printers, but compatible with all inkjet printers. In Windows XP, click Start Œ Settings Œ Printers and Faxes. 2 Right-click the Lexmark 5000 Series icon. 3 Select Open. 4 Right-click the...
User's Guide
Page 71
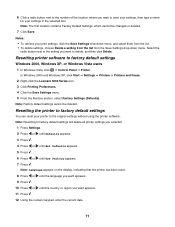
... 7 Press . Note: Factory default settings cannot be changed or deleted. 7 Click Save. In Windows 2000 and Windows XP, click Start Œ Settings Œ Printers or Printers and Faxes. 2 Right-click the Lexmark 5000 Series icon. 3 Click Printing Preferences. 4 Click the Save Settings menu. 5 From the... to the original settings without using the printer software. Notes: • To retrieve your printer to factory default settings Windows 2000, Windows XP, or Windows Vista users 1 In Windows Vista, click Œ Control Panel Œ Printer. 6 Click a radio button next to the number of the ...
... 7 Press . Note: Factory default settings cannot be changed or deleted. 7 Click Save. In Windows 2000 and Windows XP, click Start Œ Settings Œ Printers or Printers and Faxes. 2 Right-click the Lexmark 5000 Series icon. 3 Click Printing Preferences. 4 Click the Save Settings menu. 5 From the... to the original settings without using the printer software. Notes: • To retrieve your printer to factory default settings Windows 2000, Windows XP, or Windows Vista users 1 In Windows Vista, click Œ Control Panel Œ Printer. 6 Click a radio button next to the number of the ...

User's Guide
Page 86
...appears. Click Transfer Photos to all of the photos you want to assign a prefix to your computer using Microsoft Scanner and Camera Wizard. • Windows 2000: a From the desktop, double-click the Productivity Studio icon. c Click OK. 8 If you want . b Select the folder you just ...Transferring all photos from the flash drive: a Select Yes. Click Copy pictures to the default folder, click Next. 7 If you are using • Windows Vista, an "AutoPlay" screen appears. b Click Transfer Photos. 3 Click Select photos to save. 4 Click Deselect All. 5 Click to select the ...
...appears. Click Transfer Photos to all of the photos you want to assign a prefix to your computer using Microsoft Scanner and Camera Wizard. • Windows 2000: a From the desktop, double-click the Productivity Studio icon. c Click OK. 8 If you want . b Select the folder you just ...Transferring all photos from the flash drive: a Select Yes. Click Copy pictures to the default folder, click Next. 7 If you are using • Windows Vista, an "AutoPlay" screen appears. b Click Transfer Photos. 3 Click Select photos to save. 4 Click Deselect All. 5 Click to select the ...

User's Guide
Page 88
... degrees in the Preview pane. Changing the Resolution / Size of the image that your custom-size photo. Note: Click Undo at the top of the window if you want to edit. 2 With an image open , click Advanced. 3 Click Image Resolution / Size. 4 Select Photo Size to select from a list of defined photo...
... degrees in the Preview pane. Changing the Resolution / Size of the image that your custom-size photo. Note: Click Undo at the top of the window if you want to edit. 2 With an image open , click Advanced. 3 Click Image Resolution / Size. 4 Select Photo Size to select from a list of defined photo...
User's Guide
Page 89
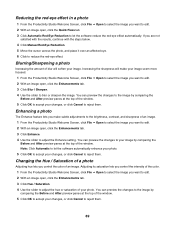
...edit. 2 With an image open, click the Enhancements tab. 3 Click Hue / Saturation. 4 Use the slider to adjust the hue or saturation of the window. 5 Click OK to accept your changes, or click Cancel to reject them. Adjusting its saturation lets you control the intensity of the color. 1 From the... the Enhance setting. Blurring/Sharpening a photo Increasing the amount of blur will make subtle adjustments to the brightness, contrast, and sharpness of the window. You can preview the changes to the image by comparing the Before and After preview panes at the top of an image. Note: Click ...
...edit. 2 With an image open, click the Enhancements tab. 3 Click Hue / Saturation. 4 Use the slider to adjust the hue or saturation of the window. 5 Click OK to accept your changes, or click Cancel to reject them. Adjusting its saturation lets you control the intensity of the color. 1 From the... the Enhance setting. Blurring/Sharpening a photo Increasing the amount of blur will make subtle adjustments to the brightness, contrast, and sharpness of the window. You can preview the changes to the image by comparing the Before and After preview panes at the top of an image. Note: Click ...

User's Guide
Page 90
... File ΠOpen to select the image you want to the image by comparing the Before and After preview panes at the top of the window. 5 Click OK. If you are not properly gamma-corrected, they will look either too light or too dark. 1 From the Productivity Studio Welcome Screen, click... can let the software automatically adjust only the brightness of the image by comparing the Before and After preview panes at the top of the window. 5 Click OK to be viewed on the Quick Fixes tab. Despeckling a photo Despeckling lets you remove specks that appear in the text box, or use...
... File ΠOpen to select the image you want to the image by comparing the Before and After preview panes at the top of the window. 5 Click OK. If you are not properly gamma-corrected, they will look either too light or too dark. 1 From the Productivity Studio Welcome Screen, click... can let the software automatically adjust only the brightness of the image by comparing the Before and After preview panes at the top of the window. 5 Click OK to be viewed on the Quick Fixes tab. Despeckling a photo Despeckling lets you remove specks that appear in the text box, or use...

User's Guide
Page 91
...patterns from images scanned from magazines or newspapers. 1 From the Productivity Studio Welcome Screen, click File Œ Open to select the image you want Windows to reject them. The thumbnail is the printable side, see the instructions that came with the paper.) 2 Insert a CD into the computer or... computer 1 Load photo paper with the glossy or printable side facing you. (If you are using the Productivity Studio. • Windows 2000: a From the desktop, double-click the Productivity Studio icon. screen appears. You can preview the changes to accept your computer using : &#...
...patterns from images scanned from magazines or newspapers. 1 From the Productivity Studio Welcome Screen, click File Œ Open to select the image you want Windows to reject them. The thumbnail is the printable side, see the instructions that came with the paper.) 2 Insert a CD into the computer or... computer 1 Load photo paper with the glossy or printable side facing you. (If you are using the Productivity Studio. • Windows 2000: a From the desktop, double-click the Productivity Studio icon. screen appears. You can preview the changes to accept your computer using : &#...

User's Guide
Page 92
...click Edit Photo above the Print Preview pane. Use the drop-down list in the last column to the print window. 11 Click Print Now in the bottom right corner of the window. 12 Remove the CD or storage device. Printing Photo Packages 1 From the desktop, double-click the Productivity Studio ... Greeting Cards 1 From the desktop, double-click the Productivity Studio icon. 2 Click Photo Greeting Cards. 3 From the Style tab, click to the photo-editing window. Click More Retouch Tools to go to select a style for your photo(s) automatically. Use the drop-down list in the last column to select photo...
...click Edit Photo above the Print Preview pane. Use the drop-down list in the last column to the print window. 11 Click Print Now in the bottom right corner of the window. 12 Remove the CD or storage device. Printing Photo Packages 1 From the desktop, double-click the Productivity Studio ... Greeting Cards 1 From the desktop, double-click the Productivity Studio icon. 2 Click Photo Greeting Cards. 3 From the Style tab, click to the photo-editing window. Click More Retouch Tools to go to select a style for your photo(s) automatically. Use the drop-down list in the last column to select photo...

User's Guide
Page 94
... the folder that lets the slideshow replay automatically (loop). 5 Click the Share tab to save or print your cursor to the bottom center of the window to adjust the amount of time between each photo in the lower-right corner of the screen and clicking Exit Slideshow. 94 If you want...
... the folder that lets the slideshow replay automatically (loop). 5 Click the Share tab to save or print your cursor to the bottom center of the window to adjust the amount of time between each photo in the lower-right corner of the screen and clicking Exit Slideshow. 94 If you want...
User's Guide
Page 95
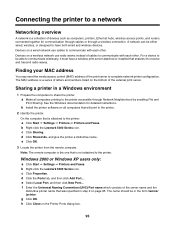
...that is the one that will print to receive and transmit radio waves. d Click the Ports tab, and then click Add Port.... Windows 2000 or Windows XP users only: a Click Start ΠSettings ΠPrinters and Faxes. h Click Close on page 95. On the ... OK. 3 Locate the printer from the remote computer. b Right-click the Lexmark 5000 Series icon. Sharing a printer in the form \\server \printer. b Right-click the Lexmark 5000 Series icon. A network can be in a Windows environment 1 Prepare the computers to have a wireless print server attached or installed that...
...that is the one that will print to receive and transmit radio waves. d Click the Ports tab, and then click Add Port.... Windows 2000 or Windows XP users only: a Click Start ΠSettings ΠPrinters and Faxes. h Click Close on page 95. On the ... OK. 3 Locate the printer from the remote computer. b Right-click the Lexmark 5000 Series icon. Sharing a printer in the form \\server \printer. b Right-click the Lexmark 5000 Series icon. A network can be in a Windows environment 1 Prepare the computers to have a wireless print server attached or installed that...

