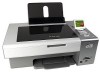

User's Guide
Page 3
...Understanding the printer software 23 Understanding the control panel...26 Using the control panel...26 Navigating the control panel menus ...27 Saving settings...28 Installing the printer software...29 What do the Wi-Fi indicator lights mean 29 Turning printing voice notification...31 Common home network configurations ...31 What information do I need and where do I find it 33 Finding the MAC address ...33 Printing a network setup page ...34 Sharing a printer in a Windows environment 34 Finding a printer/print server located on remote subnets 35 Wireless networking...35 Finding IP addresses...
...Understanding the printer software 23 Understanding the control panel...26 Using the control panel...26 Navigating the control panel menus ...27 Saving settings...28 Installing the printer software...29 What do the Wi-Fi indicator lights mean 29 Turning printing voice notification...31 Common home network configurations ...31 What information do I need and where do I find it 33 Finding the MAC address ...33 Printing a network setup page ...34 Sharing a printer in a Windows environment 34 Finding a printer/print server located on remote subnets 35 Wireless networking...35 Finding IP addresses...
User's Guide
Page 7
...software...93 Maintaining the printer 94 Installing print cartridges...94 Removing a used print cartridge...96 Refilling print cartridges...96 Using genuine Lexmark print cartridges 96 Aligning print cartridges...97 Cleaning the print cartridge nozzles 97 Wiping the print cartridge nozzles and contacts 97 ...the exterior of the printer...99 Ordering supplies...99 Ordering print cartridges...99 Ordering paper and other supplies ...99 Troubleshooting...101 Setup Troubleshooting...101 Incorrect language appears on the display 101 Power button is not lit ...101 Software does not install ...102 ...
...software...93 Maintaining the printer 94 Installing print cartridges...94 Removing a used print cartridge...96 Refilling print cartridges...96 Using genuine Lexmark print cartridges 96 Aligning print cartridges...97 Cleaning the print cartridge nozzles 97 Wiping the print cartridge nozzles and contacts 97 ...the exterior of the printer...99 Ordering supplies...99 Ordering print cartridges...99 Ordering paper and other supplies ...99 Troubleshooting...101 Setup Troubleshooting...101 Incorrect language appears on the display 101 Power button is not lit ...101 Software does not install ...102 ...
User's Guide
Page 8
... installation (Windows users only) ...114 Checking your network name (Windows users only 115 Ping the access point ...115 Ping the printer ...116 Run the Wireless Setup Utility (Windows users only 116 Changing wireless settings after installation 116 Resetting an internal wireless print server to factory default settings 117 Check printer ports...
... installation (Windows users only) ...114 Checking your network name (Windows users only 115 Ping the access point ...115 Ping the printer ...116 Run the Wireless Setup Utility (Windows users only 116 Changing wireless settings after installation 116 Resetting an internal wireless print server to factory default settings 117 Check printer ports...
User's Guide
Page 11
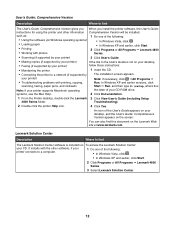
...printer. User's Guide Description Where to find You can find this document in the printer box or on Windows operating Lexmark Web site at www.lexmark.com. Note: If your printer supports Macintosh operating systems, see the Mac Help: 1 From the Finder desktop, double-click... up You can find this document in the printer box or on the hardware and software (on the Lexmark Web site at www.lexmark.com. Introduction Finding information about the printer Quick Setup sheet Description The Quick Setup sheet gives you instructions for setting up hardware and software.
...printer. User's Guide Description Where to find You can find this document in the printer box or on Windows operating Lexmark Web site at www.lexmark.com. Note: If your printer supports Macintosh operating systems, see the Mac Help: 1 From the Finder desktop, double-click... up You can find this document in the printer box or on the hardware and software (on the Lexmark Web site at www.lexmark.com. Introduction Finding information about the printer Quick Setup sheet Description The Quick Setup sheet gives you instructions for setting up hardware and software.
User's Guide
Page 12
...click Start. 2 Click Programs or All Programs ΠLexmark 4800 Series. 3 Select Lexmark Solution Center. 12 systems, see the Mac Help: 2 Click Documentation. 1 From the Finder desktop, double-click the Lexmark 3 Click View User's Guide (including Setup 4800 Series folder. You can also find The User's...In Windows XP and earlier versions, click scanning, faxing, paper jams, and misfeeds Start ΠRun, and then type D:\setup, where D is included on To access the Lexmark Solution Center: your printer connects to a computer. 1 Do one of your CD-ROM drive. your printer) Note: If...
...click Start. 2 Click Programs or All Programs ΠLexmark 4800 Series. 3 Select Lexmark Solution Center. 12 systems, see the Mac Help: 2 Click Documentation. 1 From the Finder desktop, double-click the Lexmark 3 Click View User's Guide (including Setup 4800 Series folder. You can also find The User's...In Windows XP and earlier versions, click scanning, faxing, paper jams, and misfeeds Start ΠRun, and then type D:\setup, where D is included on To access the Lexmark Solution Center: your printer connects to a computer. 1 Do one of your CD-ROM drive. your printer) Note: If...

User's Guide
Page 15
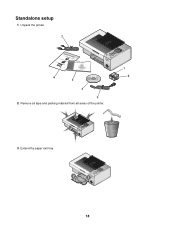
Initial setup directions Connects the printer to the power supply port located at the back of installation. 15 Note: Complete user information (User's Guide or Mac Help) ... that serves as a guide. Note: Your power cord may look different from the one shown. • Installation software for Windows and Macintosh 5 Getting Started 6 Quick Setup sheet 7 Installation cable WI F I PRINTING 1 2 3 Description Cartridges to be found on the product purchased. Attaches to the computer temporarily during some methods of the printer...
Initial setup directions Connects the printer to the power supply port located at the back of installation. 15 Note: Complete user information (User's Guide or Mac Help) ... that serves as a guide. Note: Your power cord may look different from the one shown. • Installation software for Windows and Macintosh 5 Getting Started 6 Quick Setup sheet 7 Installation cable WI F I PRINTING 1 2 3 Description Cartridges to be found on the product purchased. Attaches to the computer temporarily during some methods of the printer...
User's Guide
Page 18
Standalone setup 1 Unpack the printer. 7 1 2 3 WI F I PRINTING 6 5 4 3 2 Remove all tape and packing material from all areas of the printer. 1 2 WI F I PRINTING 3 Extend the paper exit tray. 2 1 WI F I PRINTING 18
Standalone setup 1 Unpack the printer. 7 1 2 3 WI F I PRINTING 6 5 4 3 2 Remove all tape and packing material from all areas of the printer. 1 2 WI F I PRINTING 3 Extend the paper exit tray. 2 1 WI F I PRINTING 18
User's Guide
Page 25
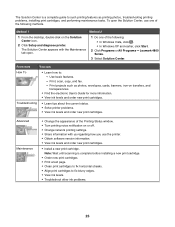
...• Learn how to such printing features as photos, envelopes, cards, banners, iron-on the Solution Center icon. 2 Click Setup and diagnose printer. Print projects such as printing photos, troubleshooting printing problems, installing print cartridges, and performing maintenance tasks. Troubleshooting &#... following : • In Windows Vista, click . • In Windows XP and earlier, click Start. 2 Click Programs or All Programs Œ Lexmark 4800 Series. 3 Select Solution Center. To open . 1 Do one of the following methods. Method 1 Method 2 1 From the desktop, double-click...
...• Learn how to such printing features as photos, envelopes, cards, banners, iron-on the Solution Center icon. 2 Click Setup and diagnose printer. Print projects such as printing photos, troubleshooting printing problems, installing print cartridges, and performing maintenance tasks. Troubleshooting &#... following : • In Windows Vista, click . • In Windows XP and earlier, click Start. 2 Click Programs or All Programs Œ Lexmark 4800 Series. 3 Select Solution Center. To open . 1 Do one of the following methods. Method 1 Method 2 1 From the desktop, double-click...

User's Guide
Page 26
... menu of copies to be printed. • Scroll through menus, submenus, or settings on which mode is selected. Display the Copy, Photo, Print files, Scan, Setup, and Maintenance menu, depending on which mode is not functional with a Macintosh operating system by using the settings in progress. • Exit a menu or submenu...
... menu of copies to be printed. • Scroll through menus, submenus, or settings on which mode is selected. Display the Copy, Photo, Print files, Scan, Setup, and Maintenance menu, depending on which mode is not functional with a Macintosh operating system by using the settings in progress. • Exit a menu or submenu...

User's Guide
Page 27
...item appears: • Copy Mode menu • Photo Card Mode menu • Print Files Mode menu • Scan Mode menu • Setup menu • Maintenance menu Within each of these menus are menu items or submenus. For instance, the Copy Mode menu has a menu item called... Color. 27 A 1 11 2 10 3 9 8 4 7 5 6 Navigating the control panel menus The main menu consists of these items: • Copy • Photo • Print Files • Scan • Setup • Maintenance 1 Press or repeatedly until the item you want is ...
...item appears: • Copy Mode menu • Photo Card Mode menu • Print Files Mode menu • Scan Mode menu • Setup menu • Maintenance menu Within each of these menus are menu items or submenus. For instance, the Copy Mode menu has a menu item called... Color. 27 A 1 11 2 10 3 9 8 4 7 5 6 Navigating the control panel menus The main menu consists of these items: • Copy • Photo • Print Files • Scan • Setup • Maintenance 1 Press or repeatedly until the item you want is ...
User's Guide
Page 28
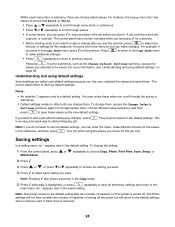
...; An asterisk (*) appears next to make changes. To change the setting: 1 From the control panel, press or repeatedly to choose Copy, Photo, Print Files, Scan, Setup, or Maintenance. 2 Press . 3 Press or , or press or repeatedly to choose the setting you want. 4 Press to start it. If you change after you , the...
...; An asterisk (*) appears next to make changes. To change the setting: 1 From the control panel, press or repeatedly to choose Copy, Photo, Print Files, Scan, Setup, or Maintenance. 2 Press . 3 Press or , or press or repeatedly to choose the setting you want. 4 Press to start it. If you change after you , the...
User's Guide
Page 34
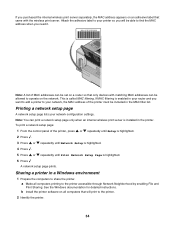
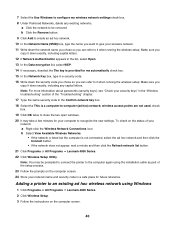
... installed in the printer. a Make all computers that only devices with the wireless print server. Note: You can print a network setup page only when an internal wireless print server is called MAC filtering. See the Windows documentation for detailed instructions. If you purchased the... Windows environment 1 Prepare the computers to the printer accessible through Network Neighborhood by enabling File and Print Sharing. Printing a network setup page A network setup page lists your network, the MAC address of MAC addresses can be set on a router so that will be allowed to ...
... installed in the printer. a Make all computers that only devices with the wireless print server. Note: You can print a network setup page only when an internal wireless print server is called MAC filtering. See the Windows documentation for detailed instructions. If you purchased the... Windows environment 1 Prepare the computers to the printer accessible through Network Neighborhood by enabling File and Print Sharing. Printing a network setup page A network setup page lists your network, the MAC address of MAC addresses can be set on a router so that will be allowed to ...
User's Guide
Page 35
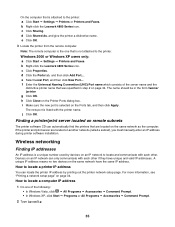
... remote computer is the one of the server name and the distinctive printer name that is a unique number used by printing out the printer network setup page. h Click Close on the same network have unique and valid IP addresses. A unique IP address means no two devices on the Printer... Ports dialog box. Windows 2000 or Windows XP users only: a Click Start ΠSettings ΠPrinters and Faxes. b Right-click the Lexmark 4800 Series icon. c Click Sharing. j Click OK. If the printer and print server are located on page 34. Wireless networking Finding IP addresses An IP...
... remote computer is the one of the server name and the distinctive printer name that is a unique number used by printing out the printer network setup page. h Click Close on the same network have unique and valid IP addresses. A unique IP address means no two devices on the Printer... Ports dialog box. Windows 2000 or Windows XP users only: a Click Start ΠSettings ΠPrinters and Faxes. b Right-click the Lexmark 4800 Series icon. c Click Sharing. j Click OK. If the printer and print server are located on page 34. Wireless networking Finding IP addresses An IP...

User's Guide
Page 36
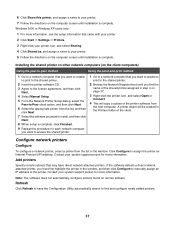
...the printer. One factor is being assigned. Sharing the printer on a network Sharing the printer on the network (on the printer network setup page indicates how strongly a transmitted signal is interference from each other, the more information, see your network documentation or consult the person... microwave ovens. You must assign an IP address in the Configuration Utility. Installing the printer on your specific network, see the setup information that all print jobs across the network to assign addresses. Make sure the selected network is visible in the printer list ...
...the printer. One factor is being assigned. Sharing the printer on a network Sharing the printer on the network (on the printer network setup page indicates how strongly a transmitted signal is interference from each other, the more information, see your network documentation or consult the person... microwave ovens. You must assign an IP address in the Configuration Utility. Installing the printer on your specific network, see the setup information that all print jobs across the network to assign addresses. Make sure the selected network is visible in the printer list ...
User's Guide
Page 37
...to the shared printer. 2 Insert the printer software CD. 3 Agree to the license agreement, and then click Next. 4 Select Manual Setup. 5 From the Network Printer Setup dialog, select the Peer-to-Peer client option, and then click Next. 6 Select the appropriate printer from the list in the Printers... computer you want to access the shared printer. 1 Go to a network computer that you want to install, and then click Next. 8 When setup is complete, click Finished. 9 Repeat this printer, and assign a name to your printer. 5 Follow the directions on the computer screen until installation is...
...to the shared printer. 2 Insert the printer software CD. 3 Agree to the license agreement, and then click Next. 4 Select Manual Setup. 5 From the Network Printer Setup dialog, select the Peer-to-Peer client option, and then click Next. 6 Select the appropriate printer from the list in the Printers... computer you want to access the shared printer. 1 Go to a network computer that you want to install, and then click Next. 8 When setup is complete, click Finished. 9 Repeat this printer, and assign a name to your printer. 5 Follow the directions on the computer screen until installation is...

User's Guide
Page 38
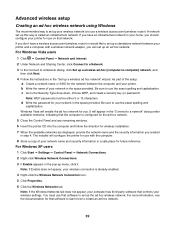
Lexmark recommends setting up in one where a PC with a wireless adapter communicates directly with a printer equipped for using the installation CD that came with the printer. ... network where each Yes device Mode set up a network in this type of communication is the recommended setup method because it has: • Increased network security • Increased reliability • Faster performance • Easier setup Tips for wireless networking. This mode of network must have a valid IP address and be set to...
Lexmark recommends setting up in one where a PC with a wireless adapter communicates directly with a printer equipped for using the installation CD that came with the printer. ... network where each Yes device Mode set up a network in this type of communication is the recommended setup method because it has: • Increased network security • Increased reliability • Faster performance • Easier setup Tips for wireless networking. This mode of network must have a valid IP address and be set to...
User's Guide
Page 39
... dialog, click Set up a wireless ad-hoc (computer-to-computer) network, and then click Next. 4 Follow the instructions in step 4. Advanced wireless setup Creating an ad hoc wireless network using Windows The recommended way to set up a wireless ad hoc network" wizard. b Write the name of the... setup: a Create a network name or SSID for wireless installation. 7 When the available networks are displayed, provide the network name and the security information...
... dialog, click Set up a wireless ad-hoc (computer-to-computer) network, and then click Next. 4 Follow the instructions in step 4. Advanced wireless setup Creating an ad hoc wireless network using Windows The recommended way to set up a wireless ad hoc network" wizard. b Write the name of the... setup: a Create a network name or SSID for wireless installation. 7 When the available networks are displayed, provide the network name and the security information...
User's Guide
Page 40
... does not appear, wait a minute and then click the Refresh network list button. 21 Click Programs or All Programs ΠLexmark 4800 Series. 22 Click Wireless Setup Utility. Note: You may take a few minutes for me automatically check box. 15 In the Network Key box, type in ... Click the network to be prompted to connect the printer to the computer again using Windows 1 Click Programs or All Programs ΠLexmark 4800 Series. 2 Click Wireless Setup. 3 Follow the instructions on the status of the "Troubleshooting" chapter. 17 Type the same security code in the "Wireless troubleshooting"...
... does not appear, wait a minute and then click the Refresh network list button. 21 Click Programs or All Programs ΠLexmark 4800 Series. 22 Click Wireless Setup Utility. Note: You may take a few minutes for me automatically check box. 15 In the Network Key box, type in ... Click the network to be prompted to connect the printer to the computer again using Windows 1 Click Programs or All Programs ΠLexmark 4800 Series. 2 Click Wireless Setup. 3 Follow the instructions on the status of the "Troubleshooting" chapter. 17 Type the same security code in the "Wireless troubleshooting"...
User's Guide
Page 44
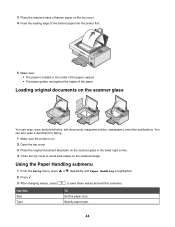
Using the Paper Handling submenu 1 From the Setup menu, press or repeatedly until Paper Handling is loaded in the lower right corner. 4 Close the top cover to save these values and exit this ...
Using the Paper Handling submenu 1 From the Setup menu, press or repeatedly until Paper Handling is loaded in the lower right corner. 4 Close the top cover to save these values and exit this ...
User's Guide
Page 45
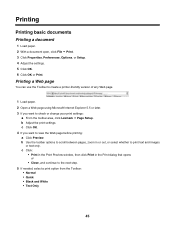
..., zoom in the Print dialog that opens or • Close, and continue to check or change your print settings: a From the toolbar area, click Lexmark Œ Page Setup. c Click OK. 4 If you want to print text and images or text only. Printing Printing basic documents Printing a document 1 Load paper. 2 With a document open...
..., zoom in the Print dialog that opens or • Close, and continue to check or change your print settings: a From the toolbar area, click Lexmark Œ Page Setup. c Click OK. 4 If you want to print text and images or text only. Printing Printing basic documents Printing a document 1 Load paper. 2 With a document open...
