User's Guide
Page 2
Contents Safety information 7 Learning about the printer 8 Printer overview...8 Applying control panel overlays...9 Understanding the printer features and functions 10 Printing a demonstration page...12 Printing a network setup page...14 Printing from Windows or DOS...14 Using IBM emulation mode...15 Using Epson ... 23 Setting the forms thickness lever...23 Paper paths...25 Using the Tear Off function...25 Loading continuous paper...26 Loading continuous forms using the push tractor...26 Front loading continuous forms using the pull tractor ...29 Bottom loading continuous forms using the pull...
Contents Safety information 7 Learning about the printer 8 Printer overview...8 Applying control panel overlays...9 Understanding the printer features and functions 10 Printing a demonstration page...12 Printing a network setup page...14 Printing from Windows or DOS...14 Using IBM emulation mode...15 Using Epson ... 23 Setting the forms thickness lever...23 Paper paths...25 Using the Tear Off function...25 Loading continuous paper...26 Loading continuous forms using the push tractor...26 Front loading continuous forms using the pull tractor ...29 Bottom loading continuous forms using the pull...
User's Guide
Page 14
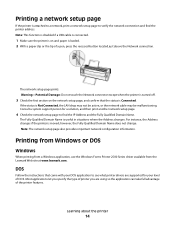
... When printing from a Windows application, use the Windows Forms Printer 2500 Series driver available from the Lexmark Web site at www.lexmark.com. Most applications let you specify the type of printer you are supported for a solution, and then print another network setup page. 4 Check the network setup page to verify the network connection and find the IP Address and the...
... When printing from a Windows application, use the Windows Forms Printer 2500 Series driver available from the Lexmark Web site at www.lexmark.com. Most applications let you specify the type of printer you are supported for a solution, and then print another network setup page. 4 Check the network setup page to verify the network connection and find the IP Address and the...

User's Guide
Page 56
...initialization signal on network models). The following list items outline and explain the Interface options and settings you can use with the printer: Interface Selection Unless turned off, the Auto setting automatically selects the printer interface from the Main menu. Understanding Setup mode and menu...To print a list of all default settings, press LineFeed from the available connection cables. Interface options Note: Use Setup mode to configure the printer according to your needs. Note: Auto is the factory default setting. The following connection cables are available: parallel...
...initialization signal on network models). The following list items outline and explain the Interface options and settings you can use with the printer: Interface Selection Unless turned off, the Auto setting automatically selects the printer interface from the Main menu. Understanding Setup mode and menu...To print a list of all default settings, press LineFeed from the available connection cables. Interface options Note: Use Setup mode to configure the printer according to your needs. Note: Auto is the factory default setting. The following connection cables are available: parallel...

User's Guide
Page 83
... paper is jammed in the printer 69 L left margin aligning 39 lights control panel 19 Load/Unload function using 20 loading continuous forms 26 cut form or envelope 37 locking control panel 20 M Main menu options 50 menu settings changing 49 N network setup page 14 noise emission levels 79... notices 77, 78, 79, 80 O offline setting printer 20 Okidata MICROLINE emulation mode using 16...
... paper is jammed in the printer 69 L left margin aligning 39 lights control panel 19 Load/Unload function using 20 loading continuous forms 26 cut form or envelope 37 locking control panel 20 M Main menu options 50 menu settings changing 49 N network setup page 14 noise emission levels 79... notices 77, 78, 79, 80 O offline setting printer 20 Okidata MICROLINE emulation mode using 16...
User's Guide
Page 84
...beyond edges of continuous forms 69 printer cleaning 57 features and functions 10 overview 8 parts 8 test 62 printer status checking 63 printer test page interrupting or stopping 62 running 62 printing demonstration page 12 from DOS 14 from Windows 14 network setup page 14 pull ...position tractor 44 pull tractor converting 46 paper paths 25 push position tractor 44 push tractor converting 45 paper paths 25 R recycling Lexmark...
...beyond edges of continuous forms 69 printer cleaning 57 features and functions 10 overview 8 parts 8 test 62 printer status checking 63 printer test page interrupting or stopping 62 running 62 printing demonstration page 12 from DOS 14 from Windows 14 network setup page 14 pull ...position tractor 44 pull tractor converting 46 paper paths 25 push position tractor 44 push tractor converting 45 paper paths 25 R recycling Lexmark...
Quick Reference
Page 47
...Honor Init. • Enabled-Honors the initialization signal on the parallel port • Disabled-Ignores the initialization signal on network models). Understanding Setup mode and menu options 47 Note: Auto is the factory default setting. The following list items outline and explain the ...parallel cable, USB cable, serial cable (only available when an optional serial interface is installed), and network cable (only available on the parallel port Note: Enabled is the factory default setting. Interface options Note: Use Setup mode to configure the printer according to your needs.
...Honor Init. • Enabled-Honors the initialization signal on the parallel port • Disabled-Ignores the initialization signal on network models). Understanding Setup mode and menu options 47 Note: Auto is the factory default setting. The following list items outline and explain the ...parallel cable, USB cable, serial cable (only available when an optional serial interface is installed), and network cable (only available on the parallel port Note: Enabled is the factory default setting. Interface options Note: Use Setup mode to configure the printer according to your needs.


