
Users Guide PDF
Page 33
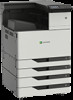
.... 5 From the control panel, set the paper size and paper type to the specified paper type. When using letterhead, do either of the fuser varies according to match the paper loaded. To avoid printing issues, match the paper type setting in the tray. Loading paper and specialty media 33...
.... 5 From the control panel, set the paper size and paper type to the specified paper type. When using letterhead, do either of the fuser varies according to match the paper loaded. To avoid printing issues, match the paper type setting in the tray. Loading paper and specialty media 33...

Users Guide PDF
Page 104
... and CS927 maintenance kits Maintenance kits 300K transfer belt maintenance kit Fuser maintenance kit, 100 V Fuser maintenance kit, 110 V Fuser maintenance kit, 120 V Fuser maintenance kit, 230 V Lexmark CS923 maintenance kits Maintenance kits 300K transfer belt maintenance kit Fuser maintenance kit Part number 41X1593 41X2060 41X2061 41X1860 41X1861 Part number 41X2090 41X1505 Configuring supply noti...
... and CS927 maintenance kits Maintenance kits 300K transfer belt maintenance kit Fuser maintenance kit, 100 V Fuser maintenance kit, 110 V Fuser maintenance kit, 120 V Fuser maintenance kit, 230 V Lexmark CS923 maintenance kits Maintenance kits 300K transfer belt maintenance kit Fuser maintenance kit Part number 41X1593 41X2060 41X2061 41X1860 41X1861 Part number 41X2090 41X1505 Configuring supply noti...

Users Guide PDF
Page 133
Note: Make sure that the door does not hit any of the following locations. To reduce the risk of the printer might be hot. Clearing jams 133 CAUTION-HOT SURFACE: The inside of injury from any cable attached to the printer. • If a 3000‑sheet tray is installed, then slide the tray to the right to open the door. 2 Remove the jammed paper from a hot component, allow the surface to cool before touching it. Notes: • Make sure that all paper fragments are removed. • Fuser area
Note: Make sure that the door does not hit any of the following locations. To reduce the risk of the printer might be hot. Clearing jams 133 CAUTION-HOT SURFACE: The inside of injury from any cable attached to the printer. • If a 3000‑sheet tray is installed, then slide the tray to the right to open the door. 2 Remove the jammed paper from a hot component, allow the surface to cool before touching it. Notes: • Make sure that all paper fragments are removed. • Fuser area

Users Guide PDF
Page 134
Clearing jams 134 • Below the fuser area • Duplex area
Clearing jams 134 • Below the fuser area • Duplex area

Users Guide PDF
Page 179
....) • 45.50 mm (1.79 in.) Transfer module • 37.70 mm (1.48 in.) • 78.50 mm (3.09 in.) • 55 mm (2.17 in.) Fuser • 79.80 mm (3.14 in.) • 94.30 mm (3.71 in.) Yes Take note of the distance, and then contact customer support. Is the...
....) • 45.50 mm (1.79 in.) Transfer module • 37.70 mm (1.48 in.) • 78.50 mm (3.09 in.) • 55 mm (2.17 in.) Fuser • 79.80 mm (3.14 in.) • 94.30 mm (3.71 in.) Yes Take note of the distance, and then contact customer support. Is the...
Users Guide PDF
Page 238
... in warranty service, damaged beyond repair, or if the product is not free of original purchase. Fuser Units, Transfer/Transport Units, Paper Feed items, if any, and any supplies and for repair or replacement (at Lexmark's option). To obtain warranty service you may not be available or only be required to deliver...
... in warranty service, damaged beyond repair, or if the product is not free of original purchase. Fuser Units, Transfer/Transport Units, Paper Feed items, if any, and any supplies and for repair or replacement (at Lexmark's option). To obtain warranty service you may not be available or only be required to deliver...

Users Guide PDF
Page 241
...;rmware, updating 229 flash drive printing from 42 font sample list printing 45 fully configured printer 12 fuser maintenance kit ordering parts 103 G genuine Lexmark parts and supplies 102 Google Cloud Print using 40 groups adding 20 deleting 21 editing 20 H hard disk installing 188 ... 136 staple finisher 142, 144 staple, hole punch finisher 146 jams avoiding 130 K keyboard on the display using 24 L Lexmark Mobile Print using 40 linking trays 33 loading card stock 32 transparencies 32 trays 25 loading envelopes multipurpose feeder 32 loading paper multipurpose feeder 32...
...;rmware, updating 229 flash drive printing from 42 font sample list printing 45 fully configured printer 12 fuser maintenance kit ordering parts 103 G genuine Lexmark parts and supplies 102 Google Cloud Print using 40 groups adding 20 deleting 21 editing 20 H hard disk installing 188 ... 136 staple finisher 142, 144 staple, hole punch finisher 146 jams avoiding 130 K keyboard on the display using 24 L Lexmark Mobile Print using 40 linking trays 33 loading card stock 32 transparencies 32 trays 25 loading envelopes multipurpose feeder 32 loading paper multipurpose feeder 32...
Users Guide PDF
Page 242
...feeder loading 32 N navigating the screen using gestures 23 navigating the screen using gestures 23 noise emission levels 231 nonvolatile memory erasing 92 Non‑Lexmark supply 153 non‑volatile memory 93 Not enough free space in flash memory for resources 153 notices 231, 232, 233, 234,...64257;nisher 142 paper jam, clearing 2 x 500‑sheet tray 132 3000‑sheet tray 137 booklet finisher 138 duplex unit 132 fuser 132 multipurpose feeder 132 optional tray 136 staple finisher 142 paper jams avoiding 130 location 131 paper size setting 25 paper sizes supported 34...
...feeder loading 32 N navigating the screen using gestures 23 navigating the screen using gestures 23 noise emission levels 231 nonvolatile memory erasing 92 Non‑Lexmark supply 153 non‑volatile memory 93 Not enough free space in flash memory for resources 153 notices 231, 232, 233, 234,...64257;nisher 142 paper jam, clearing 2 x 500‑sheet tray 132 3000‑sheet tray 137 booklet finisher 138 duplex unit 132 fuser 132 multipurpose feeder 132 optional tray 136 staple finisher 142 paper jams avoiding 130 location 131 paper size setting 25 paper sizes supported 34...

Quick Reference
Page 9
Note: Make sure that all paper fragments are removed. 9 • Above the duplex area 3 Open the standard trays, and then remove the jammed paper. Note: Make sure that all paper fragments are removed. • Fuser area • Duplex area • Below the fuser area Notes: • Make sure that the door does not hit any cable attached to the printer. • If a 3000‑sheet tray is installed, then slide the tray to the right to open the door. 2 Remove the jammed paper from any of the following locations.
Note: Make sure that all paper fragments are removed. 9 • Above the duplex area 3 Open the standard trays, and then remove the jammed paper. Note: Make sure that all paper fragments are removed. • Fuser area • Duplex area • Below the fuser area Notes: • Make sure that the door does not hit any cable attached to the printer. • If a 3000‑sheet tray is installed, then slide the tray to the right to open the door. 2 Remove the jammed paper from any of the following locations.


