
User's Guide
Page 3
Table of contents Chapter 1: Printer overview 9 Print speed ...10 Memory ...10 Paper handling 10 Chapter 2: Avoiding print quality problems 11 Media and supplies 11 Transparencies 11 Chapter 3: Canceling a print job 12 Chapter 4: Controlling printed output 13 Image Smoothing 13 Color correction 13 Print mode ...13 Toner darkness 14 Printing text ...14 Halftone screens 14 Chapter 5: Using the operator panel 16 Understanding the operator panel 16 Using the operator panel buttons 17 Changing printer settings 17 Printing the menu settings page 18 i
Table of contents Chapter 1: Printer overview 9 Print speed ...10 Memory ...10 Paper handling 10 Chapter 2: Avoiding print quality problems 11 Media and supplies 11 Transparencies 11 Chapter 3: Canceling a print job 12 Chapter 4: Controlling printed output 13 Image Smoothing 13 Color correction 13 Print mode ...13 Toner darkness 14 Printing text ...14 Halftone screens 14 Chapter 5: Using the operator panel 16 Understanding the operator panel 16 Using the operator panel buttons 17 Changing printer settings 17 Printing the menu settings page 18 i

User's Guide
Page 7
Chapter 39: Ordering supplies 133 Chapter 40: Calling for service 135 Chapter 41: Contacting Lexmark customer service on the Web 136 Chapter 42: Solving display problems 137 Chapter 43: Solving network printing problems 138 Chapter 44: Checking an unresponsive printer 139 Chapter 45: Solving printing problems 140 Chapter 46: Solving print quality problems 143 Chapter 47: Clearing paper jams 146 200 Paper Jam Pages Jammed (Check Areas A-F, T1-5, MPF 147 240 Paper Jam Check MP Feeder 163 24 Paper Jam Check Tray
Chapter 39: Ordering supplies 133 Chapter 40: Calling for service 135 Chapter 41: Contacting Lexmark customer service on the Web 136 Chapter 42: Solving display problems 137 Chapter 43: Solving network printing problems 138 Chapter 44: Checking an unresponsive printer 139 Chapter 45: Solving printing problems 140 Chapter 46: Solving print quality problems 143 Chapter 47: Clearing paper jams 146 200 Paper Jam Pages Jammed (Check Areas A-F, T1-5, MPF 147 240 Paper Jam Check MP Feeder 163 24 Paper Jam Check Tray

User's Guide
Page 8
... 183 Dimensions ...183 Chapter 54: Restoring factory default settings 184 Chapter 55: Printing sample fonts 185 Chapter 56: Understanding printer messages 186 Chapter 57: Using printer menus 235 Chapter 58: Color Menu 239 Chapter 59: Finishing Menu 242 Chapter 60: Infrared Menu 248 Chapter 61: Job Menu 253 Chapter 62: LocalTalk Menu 255...
... 183 Dimensions ...183 Chapter 54: Restoring factory default settings 184 Chapter 55: Printing sample fonts 185 Chapter 56: Understanding printer messages 186 Chapter 57: Using printer menus 235 Chapter 58: Color Menu 239 Chapter 59: Finishing Menu 242 Chapter 60: Infrared Menu 248 Chapter 61: Job Menu 253 Chapter 62: LocalTalk Menu 255...

User's Guide
Page 11
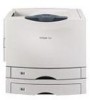
..., presentation graphics, line art, and text. 1 Printer overview The following illustrations show a Lexmark™ C910 standard model configuration and a fully configured network printer. Standard model configuration Fully configured The Lexmark C910 is critical. The printer's flexible design allows it the ideal solution for businesses where performance is a network color printer that uses electrophotographic technology to more like...
..., presentation graphics, line art, and text. 1 Printer overview The following illustrations show a Lexmark™ C910 standard model configuration and a fully configured network printer. Standard model configuration Fully configured The Lexmark C910 is critical. The printer's flexible design allows it the ideal solution for businesses where performance is a network color printer that uses electrophotographic technology to more like...

User's Guide
Page 12
...such as the size of the formatted page, the number of fonts, the number and complexity of color jobs. (Some models may also slow printing, depending on the printer settings you load a stack of color and mono jobs may ship with a 550-sheet tray, and one optional 3000-sheet high capacity... feeder. 10 Memory Your printer ships with 64MB of memory for spooling or collating print jobs. Print speed Your printer can print four-color and mono jobs at up to three optional drawers to the base printer, which can also add an optional high capacity feeder...
...such as the size of the formatted page, the number of fonts, the number and complexity of color jobs. (Some models may also slow printing, depending on the printer settings you load a stack of color and mono jobs may ship with a 550-sheet tray, and one optional 3000-sheet high capacity... feeder. 10 Memory Your printer ships with 64MB of memory for spooling or collating print jobs. Print speed Your printer can print four-color and mono jobs at up to three optional drawers to the base printer, which can also add an optional high capacity feeder...

User's Guide
Page 13
...If you use other transparencies, the print quality may need to be unacceptable or if you use transparencies not intended for laser printers, you use media that meets the recommended guidelines. Check the operator panel display, the Supplies Menu, or MarkVision for more information... tube on the photodeveloper, the film on the transfer belt, or the fuser rollers. Refer to the printer. Depending on transparencies, we recommend using the following Lexmark transparencies. This adjusts the fuser temperature and slows the print speed to Transparency before printing transparencies.
...If you use other transparencies, the print quality may need to be unacceptable or if you use transparencies not intended for laser printers, you use media that meets the recommended guidelines. Check the operator panel display, the Supplies Menu, or MarkVision for more information... tube on the photodeveloper, the film on the transfer belt, or the fuser rollers. Refer to the printer. Depending on transparencies, we recommend using the following Lexmark transparencies. This adjusts the fuser temperature and slows the print speed to Transparency before printing transparencies.

User's Guide
Page 14
3 Canceling a print job To cancel a print job: 1 Press Menu. The printer finishes printing any page already being printed, and then stops. Job Menu appears on the first line of the display and Cancel Job appears on the display. Canceling Job briefly appears on the second line. 2 Press Select. The printer returns to the Ready state. 12
3 Canceling a print job To cancel a print job: 1 Press Menu. The printer finishes printing any page already being printed, and then stops. Job Menu appears on the first line of the display and Cancel Job appears on the display. Canceling Job briefly appears on the second line. 2 Press Select. The printer returns to the Ready state. 12

User's Guide
Page 15
... on from the graphics tab of bitmapped images and smooths color transitions. Image Smoothing You can easily be especially useful when you have replaced a monochrome printer and want more information refer to print occasional color. Refer to give you the best screen frequency setting for...MarkVision remote operator panel. The setting has no effect on the page (text, graphics, and images). The Color Correction settings you can be made through your printer driver or from the World Wide Web at 300 dpi resolution or higher. The Black and White setting converts...
... on from the graphics tab of bitmapped images and smooths color transitions. Image Smoothing You can easily be especially useful when you have replaced a monochrome printer and want more information refer to print occasional color. Refer to give you the best screen frequency setting for...MarkVision remote operator panel. The setting has no effect on the page (text, graphics, and images). The Color Correction settings you can be made through your printer driver or from the World Wide Web at 300 dpi resolution or higher. The Black and White setting converts...

User's Guide
Page 16
... or varying tones. This helps ensure that make up a halftone screen and the orientation of the cell. Without halftoning, it is turned on a page printer. Printing text In both the number of halftone cells that small point size text has smooth, crisp edges. The spot function determines which of the...and white photograph in a magazine, it appears to contain many shades of gray. The values range from 1 (lightest setting) to represent a particular gray level or color tone. If you adjust the amount of toner released during printing. Your printer offers five Toner Darkness settings.
... or varying tones. This helps ensure that make up a halftone screen and the orientation of the cell. Without halftoning, it is turned on a page printer. Printing text In both the number of halftone cells that small point size text has smooth, crisp edges. The spot function determines which of the...and white photograph in a magazine, it appears to contain many shades of gray. The values range from 1 (lightest setting) to represent a particular gray level or color tone. If you adjust the amount of toner released during printing. Your printer offers five Toner Darkness settings.

User's Guide
Page 17
...give you the best screen frequency setting for high quality business graphics. Your printer default is set to print millions of colors. 15 It also ensures the alignment of the halftone screen and cells place ... reason for example, offset printing requires a higher setting, whereas newsprint generally requires a lower setting. The printer code defines the order by controlling the order in which the pels in the halftone cell are focused on...cell and then combining the different halftone screens, your printer is the higher settings may make the colors or halftones seem to the eye.
...give you the best screen frequency setting for high quality business graphics. Your printer default is set to print millions of colors. 15 It also ensures the alignment of the halftone screen and cells place ... reason for example, offset printing requires a higher setting, whereas newsprint generally requires a lower setting. The printer code defines the order by controlling the order in which the pels in the halftone cell are focused on...cell and then combining the different halftone screens, your printer is the higher settings may make the colors or halftones seem to the eye.

User's Guide
Page 18
... 5 Stop 6 Indicator light The indicator light gives information about MarkVision. Changes made to printer settings from a software application override changes made from MarkVision makes that setting the user default. Changing a printer setting from the operator panel or from the operator panel. Settings you change a setting... from your software application or printer driver. Refer to the printer. If the light is: • Off, the printer is off • On, the printer is on, but idle • Blinking, the printer is on and is busy 16 If you are ...
... 5 Stop 6 Indicator light The indicator light gives information about MarkVision. Changes made to printer settings from a software application override changes made from MarkVision makes that setting the user default. Changing a printer setting from the operator panel or from the operator panel. Settings you change a setting... from your software application or printer driver. Refer to the printer. If the light is: • Off, the printer is off • On, the printer is on, but idle • Blinking, the printer is on and is busy 16 If you are ...

User's Guide
Page 19
...PIN) for jobs to the Ready state. • Clear operator panel error messages. Press Menu: • When Ready is displayed, to take the printer offline (out of the button has a function. these numbers are used to print. Each end of the Ready state) and scroll through the menus.... scroll through a list of each button. Go Menu Select Return Stop Press the Go button to: • Return to the Ready state if the printer is offline, press Menu> to scroll through 6 appear beside the operator panel buttons; Note: Buttons act upon the information displayed on the operator panel)....
...PIN) for jobs to the Ready state. • Clear operator panel error messages. Press Menu: • When Ready is displayed, to take the printer offline (out of the button has a function. these numbers are used to print. Each end of the Ready state) and scroll through the menus.... scroll through a list of each button. Go Menu Select Return Stop Press the Go button to: • Return to the Ready state if the printer is offline, press Menu> to scroll through 6 appear beside the operator panel buttons; Note: Buttons act upon the information displayed on the operator panel)....

User's Guide
Page 20
... for the menu item appears. (The current user default setting has an asterisk [*] beside it is a menu, the menu opens and the first printer setting in effect until the page prints. If a message appears, see Print Menus, and then press Select. The menu names appear. 2 Continue ...If the selection is the last setting to indicate that can be : - If the selection is now the user default setting. You can modify printer settings by: • Selecting a setting from the operator panel. An asterisk appears beside the value to change or override the user default settings you...
... for the menu item appears. (The current user default setting has an asterisk [*] beside it is a menu, the menu opens and the first printer setting in effect until the page prints. If a message appears, see Print Menus, and then press Select. The menu names appear. 2 Continue ...If the selection is the last setting to indicate that can be : - If the selection is now the user default setting. You can modify printer settings by: • Selecting a setting from the operator panel. An asterisk appears beside the value to change or override the user default settings you...
User's Guide
Page 21
...are the function settings in the Utilities Menu. Once stored, these settings remain active until you change a printer default that the paper trays are configured for different printer functions and store in each menu. Note: Settings you choose from your software application may override the settings ... for individual print jobs. 19 4 Verify that the options you installed are correctly listed under "Printer Information." 6 Verify that has been set by the person managing the printer. These remain in effect until new ones are stored or the factory defaults are the settings you...
...are the function settings in the Utilities Menu. Once stored, these settings remain active until you change a printer default that the paper trays are configured for different printer functions and store in each menu. Note: Settings you choose from your software application may override the settings ... for individual print jobs. 19 4 Verify that the options you installed are correctly listed under "Printer Information." 6 Verify that has been set by the person managing the printer. These remain in effect until new ones are stored or the factory defaults are the settings you...

User's Guide
Page 22
... held • Accessing held jobs from the Job Menu. See Confidential jobs for more information. If you select Confidential Job, you must go to the printer and use the operator panel menus to identify which held jobs are ready to print. You can select either the Confidential Job or the Held... five choices: • Print All Jobs • Print A Job • Delete All Jobs • Delete A Job • Print Copies 20 When you are stored in printer memory, you can use the operator panel to specify what you want to hold the job in memory. From either Confidential Job or Held Jobs...
... held • Accessing held jobs from the Job Menu. See Confidential jobs for more information. If you select Confidential Job, you must go to the printer and use the operator panel menus to identify which held jobs are ready to print. You can select either the Confidential Job or the Held... five choices: • Print All Jobs • Print A Job • Delete All Jobs • Delete A Job • Print Copies 20 When you are stored in printer memory, you can use the operator panel to specify what you want to hold the job in memory. From either Confidential Job or Held Jobs...

User's Guide
Page 23
...You may want to print, use Menu to increase or decrease the number on the type of job you have sent to free up additional printer memory by scrolling through the list of the held jobs and deleting others you are prompted to access. 3 Press Select. If you have ... looking for more memory. 21 If you have marked. Accessing held jobs from the operator panel 1 To access held job, you want to enter your printer may print. • Delete the job. Recognizing when format errors occur If the symbol appears on ). 5 Press Select. - These formatting problems are most...
...You may want to print, use Menu to increase or decrease the number on the type of job you have sent to free up additional printer memory by scrolling through the list of the held jobs and deleting others you are prompted to access. 3 Press Select. If you have ... looking for more memory. 21 If you have marked. Accessing held jobs from the operator panel 1 To access held job, you want to enter your printer may print. • Delete the job. Recognizing when format errors occur If the symbol appears on ). 5 Press Select. - These formatting problems are most...

User's Guide
Page 24
... examine the first copy to process additional held jobs. See Printing and deleting held jobs. Verify Print If you send a Verify Print job, the printer prints one copy and holds the remaining copies you requested from the driver in memory so you can print additional copies later. Reserve Print If...job later. Note: Once all requested copies of the job and stores the job in memory. Reserve Print jobs may be deleted if the printer requires extra memory to process additional held jobs if you need help printing the additional copies stored in memory until you delete it is satisfactory...
... examine the first copy to process additional held jobs. See Printing and deleting held jobs. Verify Print If you send a Verify Print job, the printer prints one copy and holds the remaining copies you requested from the driver in memory so you can print additional copies later. Reserve Print If...job later. Note: Once all requested copies of the job and stores the job in memory. Reserve Print jobs may be deleted if the printer requires extra memory to process additional held jobs if you need help printing the additional copies stored in memory until you delete it is satisfactory...

User's Guide
Page 25
... PIN associated with your confidential job. Press Go to reenter the PIN, or press Stop to press for more information.) After printing the job, the printer deletes the confidential job from the operator panel and choose to print or delete the job. Enter PIN =**** 1 Menu 2 Select 3 Return 4 Go 5 Stop ...enter the PIN, asterisks are there to retrieve it, and no one else using the numbers 1-6. Confidential jobs When you send a job to the printer, you can enter a personal identification number (PIN) from the Job Menu and then select your user name, the following prompt is then held jobs...
... PIN associated with your confidential job. Press Go to reenter the PIN, or press Stop to press for more information.) After printing the job, the printer deletes the confidential job from the operator panel and choose to print or delete the job. Enter PIN =**** 1 Menu 2 Select 3 Return 4 Go 5 Stop ...enter the PIN, asterisks are there to retrieve it, and no one else using the numbers 1-6. Confidential jobs When you send a job to the printer, you can enter a personal identification number (PIN) from the Job Menu and then select your user name, the following prompt is then held jobs...

User's Guide
Page 26
7 Sending a job to print To send a job to the printer: 1 Open the file you want to print. 2 From the File menu, choose Print. 3 Verify that opens your need. The printer settings available are determined by the application that the correct printer is selected in the dialog box. 4 Adjust the printer settings according to the selected printer. 24 Note: Click Properties or Setup to adjust printer settings not available from the first screen, and then click OK. 5 Click OK or Print to send the job to your file.
7 Sending a job to print To send a job to the printer: 1 Open the file you want to print. 2 From the File menu, choose Print. 3 Verify that opens your need. The printer settings available are determined by the application that the correct printer is selected in the dialog box. 4 Adjust the printer settings according to the selected printer. 24 Note: Click Properties or Setup to adjust printer settings not available from the first screen, and then click OK. 5 Click OK or Print to send the job to your file.
User's Guide
Page 27
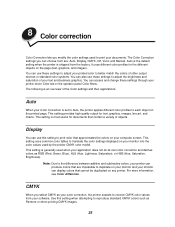
...settings to adjust your computer screen. This setting uses common color tables to receive CMYK color values from your monitor into the color values used by the printer CMYK color model. Auto is the default setting when the printer is most useful for text, graphics, images, line art,...are impossible to adjust the brightness and saturation of your printer driver Color tab or the operator panel Color Menu. For more information, see Color difference. Auto When your documents. 8 Color correction Color Correction lets you modify the color settings used to each object on the printed page. ...
...settings to adjust your computer screen. This setting uses common color tables to receive CMYK color values from your monitor into the color values used by the printer CMYK color model. Auto is the default setting when the printer is most useful for text, graphics, images, line art,...are impossible to adjust the brightness and saturation of your printer driver Color tab or the operator panel Color Menu. For more information, see Color difference. Auto When your documents. 8 Color correction Color Correction lets you modify the color settings used to each object on the printed page. ...


