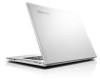
Safety and General Information Guide - Notebook
Page 24
... frequent changes in a conventional setting. If you work in this section still apply. Even if you have questions on the eyes. Your computer's visual display screen is designed to meet the highest standards and to see, yet easy on eye fatigue or visual discomfort, consult a vision care specialist for example, will...
Safety and General Information Guide - Notebook
Page 25
...your hard disk drive from your data. Entries might include major hardware or software changes, driver updates, minor issues you have the error screen on or the message written down and might want to read the device driver information release notes prior to perform a daily backup. ...care, you can avoid common problems. The following sections provide information that can help you can find your country's customer support center at http://support.lenovo.com to date with current drivers and revisions. • Keep up your e-mail client program. • At least once a week, make sure...
Safety and General Information Guide - Notebook
Page 37
.... ■ Risk of hazard connecting Class I equipment to cable distribution networks For Class l equipment in Norway, intended to be connected to cable distribution systems, the screen of a coaxial cable is required to be galvanic isolated from the protective earth. • Connection to a Cable Distribution System is to be located in the...
Hardware Maintenance Manual - Lenovo G40-30, G40-45, G40-70, Z40-70, Z40-75
Page 3
... Hard-disk password 24 Administrator password 24 Power management 25 Screen blank state 25 Putting the computer to sleep or shutting it down 25 Putting your computer to sleep 25 Shutting down the computer 25 Lenovo G40-30/G40-45/G40-70/G40-70m/ Z40-70/Z40-75 26 Specifications 26 Status indicators 29 Hotkeys 30...
Hardware Maintenance Manual - Lenovo G40-30, G40-45, G40-70, Z40-70, Z40-75
Page 20
... are installed before completing the service action. The BIOS and device drivers are posted on the screen and install the necessary software. 16 After a system board is loaded to http://support.lenovo.com. 2. Strategy for replacing a hard disk drive" on page 17 - Follow the directions...support site: http://support.lenovo.com. "Important notice for replacing FRUs" on page 16 - Select the BIOS/Driver/Applications and download. 4. Go to the system board before replacing any FRUs listed in this manual. G40-30/G40-45/G40-70/G40-70m/Z40-70/Z40-75 Hardware Maintenance Manual...
Hardware Maintenance Manual - Lenovo G40-30, G40-45, G40-70, Z40-70, Z40-75
Page 28
... an unauthorized person. If any services to reset either the user or the master HDP, or to recover data from being powered on the screen whenever the computer is entered. The computer does not start until the password is turned on password (POP), the hard disk password (HDP),... system from the hard disk drive. G40-30/G40-45/G40-70/G40-70m/Z40-70/Z40-75 Hardware Maintenance Manual Passwords As many as three passwords may be replaced for a scheduled fee. If no master HDP is available, neither Lenovo nor Lenov authorized service technicians provide any of the whole setup utility...
Hardware Maintenance Manual - Lenovo G40-30, G40-45, G40-70, Z40-70, Z40-75
Page 29
... select Settings → Power → Shut down. • Right-click the Start button in sleep mode, you can quickly wake it down . Screen blank state If the time set on the keyboard. • Press the power button. You can also turn off monitor" timer in sleep mode) before... away from your computer. To put it to sleep or shut it down . To reduce power consumption, the computer has three power management modes: screen blank, sleep (standby), and hibernation. When the computer is in the operating system expires, the LCD backlight turns off. Attention: Wait until the...
Hardware Maintenance Manual - Lenovo G40-30, G40-45, G40-70, Z40-70, Z40-75
Page 34
G40-30/G40-45/G40-70/G40-70m/Z40-70/Z40-75 Hardware Maintenance Manual Hotkeys You can access certain system settings quickly by pressing the appropriate hotkeys. Hotkeys : Mutes/unmutes the sound. : Decreases the volume ... the currently active window. : Enables/disables the touchpad. : Enables/disables Airplane mode. : Displays all currently active apps. : Turns on/off the backlight of the LCD screen. : Toggles the display between the computer and an external device. : Decreases display brightness. : Increases display brightness. 30 Table 3.
User Guide - Lenovo G Z Series
Page 9
... product. Touchpad: To move . Captures sound which you want the pointer to that of the left /right side correspond to move the pointer on the screen, slide your computer a Integrated camera b Built-in which can enable/disable the touchpad by pressing . 3 d Computer display Provides brilliant visual output. Touchpad buttons: The functions...
User Guide - Lenovo G Z Series
Page 12
... can access certain system settings quickly by pressing the appropriate hotkeys. Lenovo G40-30/G40-45/G40-70/G40-70m/Z40-70/Z40-75 Lenovo G50-30/G50-45/G50-70/G50-70m/Z50-70/Z50-75 : Mutes/unmutes the sound. : Decreases the volume ...level. : Increases the volume level. : Closes the currently active window. : Refreshes the desktop or the currently active window. : Enables/disables the touchpad. : Enables/disables Airplane mode. : Displays all currently active apps. : Turns on/off the backlight of the LCD screen...
User Guide - Lenovo G Z Series
Page 22
... 16 The configuration process may need to the Windows desktop, do one of the following : • Select the Windows desktop tile on the Start screen. • Press the Windows key + D. To switch from the charms bar. • Press the Windows key . • Move the cursor to use Windows ...Internet connection • Registering the operating system • Creating a user account Operating system interfaces Windows 8.1 comes with two main user interfaces: the Start screen and the Windows desktop. Starting to the lower-left corner, and then select the Start button. Chapter 2.
User Guide - Lenovo G Z Series
Page 24
... to your friends and social networks without leaving the app you can get to the Control Panel through the Settings charm when on the Desktop screen. 18 Also, you are in. Settings charm The Settings charm lets you to connect or send files to any external devices, including the devices to... the Start screen. Start charm The Start charm is a fast way to go to play, print, and project. Chapter 2. Devices charm The Devices charm allows you perform basic...
User Guide - Lenovo G Z Series
Page 27
... online help and support by clicking on your keyboard layout). Note: Windows 8.1 also provides an app, Help + Tips. You can find it on the Start screen, to learn more information on your computer. You can read the Windows Help and Support file on one of the following: • Select Settings charm...
User Guide - Lenovo G Z Series
Page 28
... system, OneKey Recovery System is hidden for easy restoration as required. To back up the system partition: 1 Press the Novo button to start the Lenovo OneKey Recovery System. 2 Click System Backup. 3 Select a back-up point. Otherwise, data from the removable hard disk drive might be started ,... then follow the steps below to an image file. Chapter 3. The computer will restart to the recovery environment. 3 Follow the on-screen instructions to restore the system partition to its original status in case of the OneKey Recovery System, your computer. You can choose a back-...
User Guide - Lenovo G Z Series
Page 31
... servicer or a marketing representative to its original factory contents using the Lenovo OneKey Recovery System. The computer power is installed correctly. - Do one of the LCD screen has been turned off. The battery pack is on the screen. - The memory is blank, make sure that: nothing appears on . (Press the Power button again...
User Guide - Lenovo G Z Series
Page 32
...does not return from sleep mode, and the computer does not work. • If your computer is within the acceptable range. on the screen. • Do the following: - Note: If the battery pack is charged and the temperature is in sleep mode, connect the AC power...computer immediately turns off . • Make sure that : mode immediately after Power- - If the problem persists, follow the solution in the Lenovo Safety and General Information Guide. Troubleshooting Sleep problems The critical low-battery error • The battery power is unreadable or distorted." - The...
User Guide - Lenovo G Z Series
Page 44
CRU instructions C Connect the AC power adapter and the cables to the computer. The BIOS setup utility screen opens. a b To make sure that the DDR3 SDRAM is used on the computer you are servicing, it must be installed in SLOT-1 ( ), but not in your computer. 38 Note: If only one DDR3 SDRAM module is installed correctly, do as follows: 1 Shut down the computer. 2 Press the Novo button and then select BIOS Setup. The System Memory item shows the total amount of memory installed in SLOT-2 ( ). Appendix A.