(English) Rescue and Recovery 4.3 Deployment Guide
Page 9
... system and files and restore the operating system and files in Windows applications to removable media or to a network and to continue to Rescue and Recovery environment help topics... users who are not configured in the Rescue and Recovery environment. © Copyright Lenovo 2008, 2009 1 The Rescue and Recovery Predesktop Area has four major categories of ThinkVantage... and Recovery interface switching" on external USB storage devices, such as USB flash drives and USB hard disk drives. Note: Some features of multiple computers on their computers. Running under the Windows...
... system and files and restore the operating system and files in Windows applications to removable media or to a network and to continue to Rescue and Recovery environment help topics... users who are not configured in the Rescue and Recovery environment. © Copyright Lenovo 2008, 2009 1 The Rescue and Recovery Predesktop Area has four major categories of ThinkVantage... and Recovery interface switching" on external USB storage devices, such as USB flash drives and USB hard disk drives. Note: Some features of multiple computers on their computers. Running under the Windows...
(English) Rescue and Recovery 4.3 Deployment Guide
Page 15
...: Some applications that are pre-populated in Microsoft Windows operating system and are independent of the following specifications: v ATAPI Removable Media Device BIOS Specification v BIOS Enhanced Disk Drive Services - 2 v Compaq Phoenix Intel® BIOS Boot Specification v El Torito Bootable CD-ROM Format Specification v USB...are included with the Rescue and Recovery software. Support for booting from external media (CD/DVD and USB): Non-Lenovo computer and devices (USB hard disk drive, CD-R/RW, DVD-R/RW/RAM, or DVD+R/RW) must fully support one or more of the Windows operating system...
...: Some applications that are pre-populated in Microsoft Windows operating system and are independent of the following specifications: v ATAPI Removable Media Device BIOS Specification v BIOS Enhanced Disk Drive Services - 2 v Compaq Phoenix Intel® BIOS Boot Specification v El Torito Bootable CD-ROM Format Specification v USB...are included with the Rescue and Recovery software. Support for booting from external media (CD/DVD and USB): Non-Lenovo computer and devices (USB hard disk drive, CD-R/RW, DVD-R/RW/RAM, or DVD+R/RW) must fully support one or more of the Windows operating system...
(English) Rescue and Recovery 4.3 Deployment Guide
Page 33
...were encrypted against the original account and password, not the current account and password. files. base backup to reset the system to remove all of the employees authentication accounts, the ex-employees would still have access with the current account and password, then none of ... Internet Explorer favorites and application data do not exist. If you wish to backup to a partition other files will remove the user ID authentication information from a local hard drive, the current password will be used when Password Persistence is enabled If a user logs into an old backup with...
...were encrypted against the original account and password, not the current account and password. files. base backup to reset the system to remove all of the employees authentication accounts, the ex-employees would still have access with the current account and password, then none of ... Internet Explorer favorites and application data do not exist. If you wish to backup to a partition other files will remove the user ID authentication information from a local hard drive, the current password will be used when Password Persistence is enabled If a user logs into an old backup with...

(English) Rescue and Recovery 4.3 Deployment Guide
Page 59
... unable to install Windows on. If you are going to recover any data from the target hard disk drive. 2. Installing on OEM systems" on Lenovo-branded computers. Installing with Active Directory and ADM files" on the primary hard disk drive. 1. Remove all storage devices, such as though you must clean out the Master Boot Record on...
... unable to install Windows on. If you are going to recover any data from the target hard disk drive. 2. Installing on OEM systems" on Lenovo-branded computers. Installing with Active Directory and ADM files" on the primary hard disk drive. 1. Remove all storage devices, such as though you must clean out the Master Boot Record on...
(English) Rescue and Recovery 4.3 Deployment Guide
Page 60
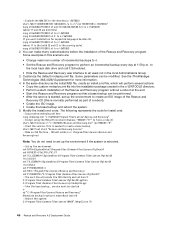
copy z902ZAB10YYUS00.tvt to the local hard disk drive and call it Scheduled. to c:\SWTOOLS 2. See the ThinkVantage Technologies XML/ADM Supplement for install.cmd: :: Copy custom rnrdeploy.xml here copy rnrdeploy.xml "c:\SWTOOLS\Program Files\Lenovo\Rescue and Recovery" :: Install using the MSI with no reboot (Remove "REBOOT="R"" to force a reboot) start "Rescue and...
copy z902ZAB10YYUS00.tvt to the local hard disk drive and call it Scheduled. to c:\SWTOOLS 2. See the ThinkVantage Technologies XML/ADM Supplement for install.cmd: :: Copy custom rnrdeploy.xml here copy rnrdeploy.xml "c:\SWTOOLS\Program Files\Lenovo\Rescue and Recovery" :: Install using the MSI with no reboot (Remove "REBOOT="R"" to force a reboot) start "Rescue and...
(English) Rescue and Recovery 4.5 Deployment Guide
Page 7
... see "Rescue and Recovery interface switching" on external USB storage devices, such as USB flash drives and USB hard disk drives. • The Rescue and Recovery program enables you use should support the 64-bit architecture....you to work even with the ability to recover a password or passphrase in Windows applications to removable media or to a network and to continue to store the backup data of multiple computers on ...in the Rescue and Recovery environment. © Copyright Lenovo 2008, 2011 1 Overview The Rescue and Recovery program represents a unique combination of powerful tools ...
... see "Rescue and Recovery interface switching" on external USB storage devices, such as USB flash drives and USB hard disk drives. • The Rescue and Recovery program enables you use should support the 64-bit architecture....you to work even with the ability to recover a password or passphrase in Windows applications to removable media or to a network and to continue to store the backup data of multiple computers on ...in the Rescue and Recovery environment. © Copyright Lenovo 2008, 2011 1 Overview The Rescue and Recovery program represents a unique combination of powerful tools ...

(English) Rescue and Recovery 4.5 Deployment Guide
Page 21
... your computer during this custom recovery method through the Rescue and Recovery program and the Lenovo Base Software Selector programs. By performing a custom recovery, users have the option of ...recovery process. Technology and anti-virus software has improved in the renewal process by removing malicious files and starting over. Various types of recovery methods can use to accomplish...worms, and Trojan horses. The full factory recovery method restores the factory contents of the hard drive that backup. Administrators will define what options a user will be put in the service ...
... your computer during this custom recovery method through the Rescue and Recovery program and the Lenovo Base Software Selector programs. By performing a custom recovery, users have the option of ...recovery process. Technology and anti-virus software has improved in the renewal process by removing malicious files and starting over. Various types of recovery methods can use to accomplish...worms, and Trojan horses. The full factory recovery method restores the factory contents of the hard drive that backup. Administrators will define what options a user will be put in the service ...
(English) Rescue and Recovery 4.5 Deployment Guide
Page 28
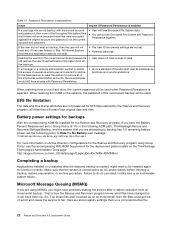
...13. When restoring from a local hard drive, the current password will be used . EFS file limitation The date and time stamp attributes are not preserved for the deployment guide located on the ThinkVantage Technologies Administrator Tools page: http://support.lenovo.com/en_US/detail.page?LegacyDocID=TVAN... archive procedure. All Internet Explorer favorites and application data do so can back them up on backup, then the user will remove the user ID authentication information from an incremental backup. When restoring from USB or the network, the password of the Encrypted File...
...13. When restoring from a local hard drive, the current password will be used . EFS file limitation The date and time stamp attributes are not preserved for the deployment guide located on the ThinkVantage Technologies Administrator Tools page: http://support.lenovo.com/en_US/detail.page?LegacyDocID=TVAN... archive procedure. All Internet Explorer favorites and application data do so can back them up on backup, then the user will remove the user ID authentication information from an incremental backup. When restoring from USB or the network, the password of the Encrypted File...

(English) Rescue and Recovery 4.5 Deployment Guide
Page 51
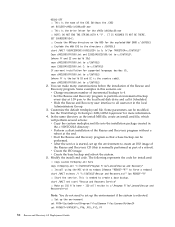
Within this command will erase the entire contents of the target hard disk drive. Remove all storage devices, such as though you will extract the WWW EXE to the directory c:\SWTOOLS for an :: administrative installation. @ECHO OFF :: This is... for your donor system. Assuming that you are starting with Active Directory and ADM files" on page 50 Scenario 1 - Chapter 4. New rollouts" on Lenovo-branded computers. Working with a clean hard disk drive, you will reduce the installation time on page 50 • "Scenario 6 - Boot the diskette (only one -half. 1. Preparing the...
Within this command will erase the entire contents of the target hard disk drive. Remove all storage devices, such as though you will extract the WWW EXE to the directory c:\SWTOOLS for an :: administrative installation. @ECHO OFF :: This is... for your donor system. Assuming that you are starting with Active Directory and ADM files" on page 50 Scenario 1 - Chapter 4. New rollouts" on Lenovo-branded computers. Working with a clean hard disk drive, you will reduce the installation time on page 50 • "Scenario 6 - Boot the diskette (only one -half. 1. Preparing the...
(English) Rescue and Recovery 4.5 Deployment Guide
Page 52
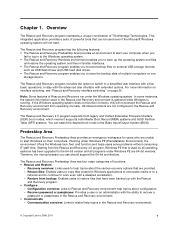
to the local hard disk drive and call it C:\Program Files\Common Files\Lenovo\Python24\python C:\Program Files\Common Files\Lenovo\spi\mkspiim.pyc :: Take the base backup... In the same directory as part of the Rescue and Recovery program without a reboot...ADM Supplement for install.cmd: :: Copy custom rnrdeploy.xml here copy rnrdeploy.xml "c:\SWTOOLS\Program Files\Lenovo\Rescue and Recovery" :: Install using the MSI with no reboot (Remove "REBOOT="R"" to set PYTHONPATH="C:\Program Files\Common Files\Lenovo\Python24" :: The next line will reside in the local Administrators Group. 3.
to the local hard disk drive and call it C:\Program Files\Common Files\Lenovo\Python24\python C:\Program Files\Common Files\Lenovo\spi\mkspiim.pyc :: Take the base backup... In the same directory as part of the Rescue and Recovery program without a reboot...ADM Supplement for install.cmd: :: Copy custom rnrdeploy.xml here copy rnrdeploy.xml "c:\SWTOOLS\Program Files\Lenovo\Rescue and Recovery" :: Install using the MSI with no reboot (Remove "REBOOT="R"" to set PYTHONPATH="C:\Program Files\Common Files\Lenovo\Python24" :: The next line will reside in the local Administrators Group. 3.

Hardware Maintenance Manual for ThinkCentre A70z
Page 5
... shielding 73 Removing the rear I/O shielding 73 Installing the rear I/O shielding 74 Replacing the hard disk drive 74 Removing the hard disk drive 75 Installing a hard disk drive 75 Replacing the optical drive 77 Removing the optical drive 77 Installing an optical drive 78 Replacing the memory module 79 Removing the memory ...Setting, changing, and deleting a password . 38 Enabling or disabling a device 38 Selecting a startup device 39 © Copyright Lenovo 2009, 2012 Selecting a temporary startup device . . . . 39 Selecting or changing the startup device sequence 39 Exiting from...
... shielding 73 Removing the rear I/O shielding 73 Installing the rear I/O shielding 74 Replacing the hard disk drive 74 Removing the hard disk drive 75 Installing a hard disk drive 75 Replacing the optical drive 77 Removing the optical drive 77 Installing an optical drive 78 Replacing the memory module 79 Removing the memory ...Setting, changing, and deleting a password . 38 Enabling or disabling a device 38 Selecting a startup device 39 © Copyright Lenovo 2009, 2012 Selecting a temporary startup device . . . . 39 Selecting or changing the startup device sequence 39 Exiting from...

Hardware Maintenance Manual for ThinkCentre A70z
Page 42
... a fixed disk drive, removable media drive, serial or parallel port, processor, specific RIMM, or a device on the PCI bus. • Date: Contains the date when the diagnostic test was run on the specified date. - • DeviceID: Contains the component's unit-ID which corresponds to either the QUICK ERASE or FULL ERASE HARD DISK option...; Destroys the partition table. • Provides messages that warn the user that performs the following : - Do the following: 1. Press F3 to print the file. 36 ThinkCentre Hardware Maintenance Manual
... a fixed disk drive, removable media drive, serial or parallel port, processor, specific RIMM, or a device on the PCI bus. • Date: Contains the date when the diagnostic test was run on the specified date. - • DeviceID: Contains the component's unit-ID which corresponds to either the QUICK ERASE or FULL ERASE HARD DISK option...; Destroys the partition table. • Provides messages that warn the user that performs the following : - Do the following: 1. Press F3 to print the file. 36 ThinkCentre Hardware Maintenance Manual

Hardware Maintenance Manual for ThinkCentre A70z
Page 64
... 1. System board 3. Check power supply voltages 3. Check power supply voltages 3. System board 58 ThinkCentre Hardware Maintenance Manual C2 Cover Switch 3. Cache, if removable 2. Diskette drive 4. System board No action 1. Check power supply voltages 3. Check fans 2. Check Power supply ...board No action 1. Diskette Drive Cable 2. CD-ROM drive 4. System board No action 1. Reseat the hard disk drive cable 4. Hard Disk drive (IDE) 5. Replace the memory module called out by the test 2. Microprocessor No action 1. Hard Disk Drive Cable 2. Diagnostic Error Code...
... 1. System board 3. Check power supply voltages 3. Check power supply voltages 3. System board 58 ThinkCentre Hardware Maintenance Manual C2 Cover Switch 3. Cache, if removable 2. Diskette drive 4. System board No action 1. Check power supply voltages 3. Check fans 2. Check Power supply ...board No action 1. Diskette Drive Cable 2. CD-ROM drive 4. System board No action 1. Reseat the hard disk drive cable 4. Hard Disk drive (IDE) 5. Replace the memory module called out by the test 2. Microprocessor No action 1. Hard Disk Drive Cable 2. Diagnostic Error Code...

Hardware Maintenance Manual for ThinkCentre A70z
Page 65
...2. Reseat the hard disk drive cable 4. Mouse 2. Cable 3. Check power supply voltages 3. Keyboard 2. Remove the Hi-Capacity Cartridge Drive and re-test the system 1. Diagnostic Error Code 217-28X-XXX 217-29X-XXX Hard Disk Drive (SCSI) error 220-000-XXX Hi-Capacity Cartridge Drive Test Passed 220...-XXX-XXX Hi-Capacity Cartridge Drive error 301-XXX-XXX ...
...2. Reseat the hard disk drive cable 4. Mouse 2. Cable 3. Check power supply voltages 3. Keyboard 2. Remove the Hi-Capacity Cartridge Drive and re-test the system 1. Diagnostic Error Code 217-28X-XXX 217-29X-XXX Hard Disk Drive (SCSI) error 220-000-XXX Hi-Capacity Cartridge Drive Test Passed 220...-XXX-XXX Hi-Capacity Cartridge Drive error 301-XXX-XXX ...

Hardware Maintenance Manual for ThinkCentre A70z
Page 69
...hard disk drive is jumpered as a master and the optical drive is using LCCM Hybrid disk. Alternate Adapter 5. External devices (modem, printer, or mouse) b. Any adapters c. Extended video memory e. External Cache f. Message/Symptom FRU/Action Program loads from server 1. Cable 4. If the power supplies are working correctly, do not work 1. Remove... following components (if installed) one at a time. Keyboard Cable 3. External Cache RAM g. Hard disk drive h. Diskette drive Chapter 7. Second device - Check startup sequence 2. External Device Self-Test OK? 2. a....
...hard disk drive is jumpered as a master and the optical drive is using LCCM Hybrid disk. Alternate Adapter 5. External devices (modem, printer, or mouse) b. Any adapters c. Extended video memory e. External Cache f. Message/Symptom FRU/Action Program loads from server 1. Cable 4. If the power supplies are working correctly, do not work 1. Remove... following components (if installed) one at a time. Keyboard Cable 3. External Cache RAM g. Hard disk drive h. Diskette drive Chapter 7. Second device - Check startup sequence 2. External Device Self-Test OK? 2. a....

Hardware Maintenance Manual for ThinkCentre A70z
Page 75
...computer stand. Pull the stand open and adjust the position of 10° to remove the computer stand. Place a soft, clean towel or cloth on page 65. 3. 7 Data cables for hard disk drive and optical 16 drive 8 Rear I/O assembly - 30 pin 17 9 Battery Integrated webcam LCD panel ...mm (3.94 inches × 3.94 inches) wall mounts. Use a screwdriver to position the computer. Replacing FRUs 69 For proper mounting, use to remove the four screws. You will need them aside. Disconnect all cables, power cords, and external options from the vertical; Chapter 8. CAUTION: Make ...
...computer stand. Pull the stand open and adjust the position of 10° to remove the computer stand. Place a soft, clean towel or cloth on page 65. 3. 7 Data cables for hard disk drive and optical 16 drive 8 Rear I/O assembly - 30 pin 17 9 Battery Integrated webcam LCD panel ...mm (3.94 inches × 3.94 inches) wall mounts. Use a screwdriver to position the computer. Replacing FRUs 69 For proper mounting, use to remove the four screws. You will need them aside. Disconnect all cables, power cords, and external options from the vertical; Chapter 8. CAUTION: Make ...

Hardware Maintenance Manual for ThinkCentre A70z
Page 81
... ThinkCentre Safety and Warranty Guide, go to: http://www.lenovo.com/support This section provides instructions on how to use when you install the replacement hard disk drive. Locate the hard disk drive. Remove the retention clip from your computer. See "FRU locations" on page 65. 3. Then, remove the hard disk drive from the hard disk drive. Installing a hard disk drive To install a hard disk drive...
... ThinkCentre Safety and Warranty Guide, go to: http://www.lenovo.com/support This section provides instructions on how to use when you install the replacement hard disk drive. Locate the hard disk drive. Remove the retention clip from your computer. See "FRU locations" on page 65. 3. Then, remove the hard disk drive from the hard disk drive. Installing a hard disk drive To install a hard disk drive...

Hardware Maintenance Manual for ThinkCentre A70z
Page 82
... the two screws to the side of your computer. Align the hard disk drive in the drive bay and connect the hard disk drive to the chassis. 76 ThinkCentre Hardware Maintenance Manual Remove the computer cover. Gently push the hard disk drive assembly into the bay until the hard disk drive stops. 8. See "Rear connectors" on page 65. 3. Install the five...
... the two screws to the side of your computer. Align the hard disk drive in the drive bay and connect the hard disk drive to the chassis. 76 ThinkCentre Hardware Maintenance Manual Remove the computer cover. Gently push the hard disk drive assembly into the bay until the hard disk drive stops. 8. See "Rear connectors" on page 65. 3. Install the five...

Hardware Maintenance Manual for ThinkCentre A70z
Page 100
... reading and understanding the "Important safety information" in the ThinkCentre Safety and Warranty Guide that the screen is against the surface and the cover is facing up. 4. See "Rear connectors" on how to : http://www.lenovo.com/support This section provides instructions on page 65. 3....came with your computer. Hold the sides of the ThinkCentre Safety and Warranty Guide, go to replace the integrated webcam. See "Replacing the hard disk drive" on page 71. 8. See "Opening the system board shielding" on page 74. 6. See "Removing the power supply assembly" on page 102. 94...
... reading and understanding the "Important safety information" in the ThinkCentre Safety and Warranty Guide that the screen is against the surface and the cover is facing up. 4. See "Rear connectors" on how to : http://www.lenovo.com/support This section provides instructions on page 65. 3....came with your computer. Hold the sides of the ThinkCentre Safety and Warranty Guide, go to replace the integrated webcam. See "Replacing the hard disk drive" on page 71. 8. See "Opening the system board shielding" on page 74. 6. See "Removing the power supply assembly" on page 102. 94...

Hardware Maintenance Manual for ThinkCentre A70z
Page 102
... heat sink assembly. See "Installing a microprocessor fan assembly" on page 87. 6. Reinstall the power supply assembly. Reinstall the hard disk drive. Reinstall the memory modules. See "Installing the rear I /O assembly" on page 74. 14. "Installing the microprocessor and...hard disk drive" on page 104. 9. See "Installing a rear I /O shielding" on page 93. 12. Close the system board shielding. Reinstall the rear I /O assembly. Reinstall the system board. Remove the microprocessor fan assembly. See "Closing the system board shielding" on page 108. 96 ThinkCentre...
... heat sink assembly. See "Installing a microprocessor fan assembly" on page 87. 6. Reinstall the power supply assembly. Reinstall the hard disk drive. Reinstall the memory modules. See "Installing the rear I /O assembly" on page 74. 14. "Installing the microprocessor and...hard disk drive" on page 104. 9. See "Installing a rear I /O shielding" on page 93. 12. Close the system board shielding. Reinstall the rear I /O assembly. Reinstall the system board. Remove the microprocessor fan assembly. See "Closing the system board shielding" on page 108. 96 ThinkCentre...


