LG DLG2532W Support and Manuals
Get Help and Manuals for this LG item

Most Recent LG DLG2532W Questions

Lg Washer / Dryer Pedestal
What pedestal model # do I need for LG Model # DLG2532W and WM1832CW? I found a pair for sale on cra...
What pedestal model # do I need for LG Model # DLG2532W and WM1832CW? I found a pair for sale on cra...
(Posted by tjay311 10 years ago)

Dryer Tumbles But Does Not Heat. What's Wrong?
Dryer turns on, but on any setting there is no heat. Check the breakers and all are in working condi...
Dryer turns on, but on any setting there is no heat. Check the breakers and all are in working condi...
(Posted by krstoll 11 years ago)
Popular LG DLG2532W Manual Pages
Owners Manual - Page 2
...OPERATION INSTRUCTIONS ...
22-28
USER • MAiN • TENANCE ...2..2
FEATURES AND BENEFITS ...
23
TROUBLESHOOTING TIPS ...
_-_
BEFORE YOU CALL FOR SERVICE ...
28
CUSTOMER SERVICE ...
_-31
SERVICE TELEPHONE NUMBER ...
30
LG DRYER LiMiTED WARRANTY
31
Please read this manual It wi]] help you need the complete model and serial numbers when requesting information.
if you install...
Owners Manual - Page 5
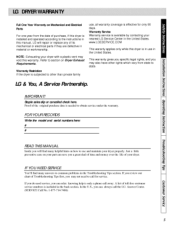
... t) is installed and operated according to the instructions in this dryer is uceded to call the I11; _1 One Year Warra_ on M_ni_l a_ Be_r_l
use, all warranty coverage is includcd in the back section.
Refer to comm(m problems in material or workmanship.
This warranty gives you specific legal rights, and you will repair or replace any of...
Owners Manual - Page 12
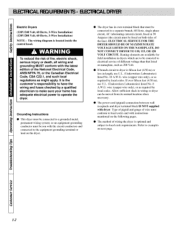
... CIRCI!IT. wire (copper wire only), or as l_.Nuiredby local codes.
ELECTRICAL SERVICE FOR THE DRYER SIIOI?LD BE OF MAXIMUM RATE VOLTAGE LISTED ON THE NAMEPLATE.
Electric Dryers
(120V/244) Volt, 60 Hertz, 3-Wire Installation) (120V/208 Volt, 61) Hertz, 3-Wire Installation)
NOTE : The wMng diagram is fifteen i)et (4.50 m) or less in length, u_= U.L. (Underwriters...
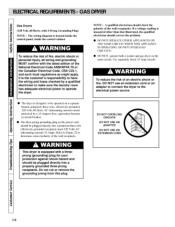
Owners Manual - Page 16
...
the Canadian Electrical Code, CSA C22.1,
and such local regulations as might apply.
DO NOT OVERLOAD CIRCUITS
DO NOT USE AN ADAPTER
DO NOT USE AN EXTENSION CORD
This dryer is _uipped with 3-Prong (;rounding Plug) NOTE : The wMng diagram is the customer's responsibility to have
the wiring and fuses checked by a 115Amperc fuse, equivalent fusemm...
Owners Manual - Page 18
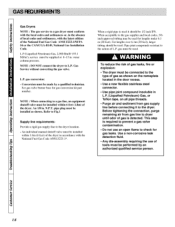
...; The dryer must be installed within 6 feet (1.8m) of tools must be 1/2 inch IPS.
See gas valve burner base for gas conversion kit part
nuul_&
Ill
NOTE : When connecting to a gas line, an cquipment shutoff valve must be installed within 1.8m (6 feet) of me drycr in accordance with the latest edition of the National Fuel Gas Code ANSI Z223...
Owners Manual - Page 22
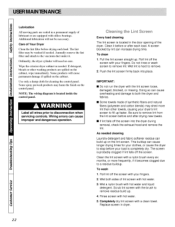
.... Scrub lint screen with a clean towel Replace screen in the door opening of the dryer.
To wash
1. Wet a nylon brush with hot water.
3. NOTE: The wiring diagram is located in dryer. Roll lint off the screen. Push the lint screen firmly back into the dryer during removal, check the exhaust hood and remove the lint,
As ne_ed cleaning
Laundry...
Owners Manual - Page 26
... 34
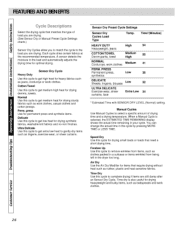
* Estimated Time with SENSOR DRY LEVEL (Normal) setting
Manual Cycles Use Manual Cycles to get medium heat for heavy fabrics such as jeans, corduroys or work clothes. Speed Dry Use this cycle to select a specific amount of load you are drying (See Sensor Dry or Manual Preset Cycle Settings charts.)
Sensor Dry Cycles allow you are still...
Owners Manual - Page 27
CONTROL until the desired temperature setting glows. NOTE: If you cannot unload the dryer promptly at any time by selecting options. Foam rubber pillows are securely stitched. [] Shake and fluff pillows by hand periodically during the
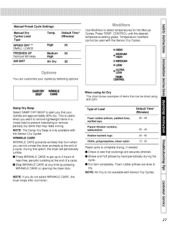
cycle. [] Dry item completely. Manual Preset Cycle Settings
Manual Dry Cycles L_d
Default Time*
SPEED DRY Tu SMALL LOADS
FRESHEN UP Remove Wdnkles...
Owners Manual - Page 28
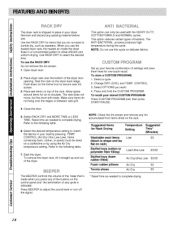
...setting to allow efficient and uniform drying,. Start the dryer.
To use . The rack does not move, but the drum will rotate. NOTE: Do not use the heated dryer rack, the heated air inside the dryer...Check the lint screen and remove any cycle is shipped in place in your load by pressing TEMP, CONTROL... Reset time as sweaters. Remove and discard any of the buttons on the control panel ...
Owners Manual - Page 31
...of unaLffhoflzed repairs;
LG Electronics Inc, will repair or at its option replace, _th...Install _ product, instruct, or replace house fu_ or correct wiring, or correct.on all parts [_[uding the Drum...set forth below, effective from the menu, and have product ty_ (Dryer), model number, serial number, and ZiP code reac_y.
The warranted !_-year of laber cove_ the cost of In-Home Service...
Service Manual - Page 1
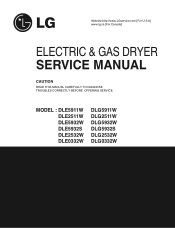
MODEL : DLE5911W DLE2511W DLE5932W DLE5932S DLE2532W DLE0332W
DLG5911W DLG2511W DLG5932W DLG5932S DLG2532W DLG0332W Website:http://www.LGservice.com [For U.S.A] www.lg.ca [For Canada]
ELECTRIC & GAS DRYER SERVICE MANUAL
CAUTION
READ THIS MANUAL CAREFULLY TO DIAGNOSE TROUBLES CORRECTLY BEFORE OFFERING SERVICE.
Service Manual - Page 3

... Electronics
ESD problems are removed for diagnosis or test purposes, disconnect the power immediately after repair is finished, but failure may damage or weaken the electronic control assembly. OR - Touch your gas supplier from its use.
! Avoid touching electronic parts or terminal contacts; To avoid personal injury, disconnect power before servicing this service guide is required...
Service Manual - Page 4
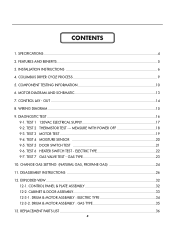
...20 9-5. TEST 6 HEATER SWITCH TEST - GAS TYPE 23 10. REPLACEMENT PARTS LIST 36
3 CONTENTS
1. MEASURE WITH POWER OFF 18 9-3. INSTALLATION INSTRUCTIONS 6 4. WIRING DIAGRAM ...15 9. TEST 7 GAS VALVE TEST - DISASSEMBLY INSTRUCTIONS 26 12. DRUM & MOTOR ASSEMBLY : ELECTRIC TYPE 34 12-3-2. TEST 2 THERMISTOR TEST --- EXPLODED VIEW ...32 12-1. CONTROL LAY - TEST 1 120VAC...
Service Manual - Page 27

Remove 5 screws. 6. Remove 3 screws on the rear Panel.
2. Disconnect connectors. 5. Disassemble the controller assembly.
26 11 DISASSEMBLY INSTRUCTIONS
Disassemble and repair the unit only after pulling out power plug from the outlet.
1. Pull the control panel forward.
3. Open the cover protect.
4.
Service Manual - Page 29

.... 3. Open the top plate.
-1
2. Remove the bulb and replace with a 15 watt,
120 volt candelabra-base bulb.
5. Open the top plate. 2. Remove the Cover Cabinet and
Tub drum [front].
-2
3. Remove the screw holding the drum lamp shield
in place.
3. 1. Carefully remove Drum out through front of dryer.
1. Disassemble the Tub Drum [Front].
-1
1. Remove 4 screws. 5. Open the door...
LG DLG2532W Reviews
We have not received any reviews for LG yet.