

KM-NET ADMIN Operation Guide for Ver 2.0
Page 44
... the Port number text box, click the Advanced tab at the top of the Command Center page. 2 On the left of the two options that the wizard offers for ...before the upgrade on each device. During the upgrade, the write community from each device. 1 Type the Admin password in the Firmware Upgrade wizard. 3 Type or select from the Details link, a valid port number. Note: ...Banner Page must be set to use for IB-2x firmware is controlled by the Admin password set on each logical printer. The TCP/IP Port Number appears for the retry interval 6 Click Next. Authorizing...
... the Port number text box, click the Advanced tab at the top of the Command Center page. 2 On the left of the two options that the wizard offers for ...before the upgrade on each device. During the upgrade, the write community from each device. 1 Type the Admin password in the Firmware Upgrade wizard. 3 Type or select from the Details link, a valid port number. Note: ...Banner Page must be set to use for IB-2x firmware is controlled by the Admin password set on each logical printer. The TCP/IP Port Number appears for the retry interval 6 Click Next. Authorizing...
KM-NET Viewer Operation Guide Rev-5.2-2010.10
Page 22
...menu or context menu, you are prompted to type one of the following in the Administrator Login dialog box: Command Center password Administrator Login and Administrator Password (with optional Use local authentication) Accounting administrator code Login options are selected in the Communication Settings for an individual...is transmitted on this web page. Note: If authentication is set , the login dialog box does not appear so a user name and password is used for each contact includes: Number Name (and furigana, if applicable) Cover page (recipient, company, department). E-mail FTP (...
...menu or context menu, you are prompted to type one of the following in the Administrator Login dialog box: Command Center password Administrator Login and Administrator Password (with optional Use local authentication) Accounting administrator code Login options are selected in the Communication Settings for an individual...is transmitted on this web page. Note: If authentication is set , the login dialog box does not appear so a user name and password is used for each contact includes: Number Name (and furigana, if applicable) Cover page (recipient, company, department). E-mail FTP (...
KM-NET Viewer Operation Guide Rev-5.2-2010.10
Page 43
... Device and Account menus. When you select the feature from a menu or context menu, you are selected in the Administrator Login dialog box: Command Center password Administrator Login and Administrator Password (with optional Use local authentication) Accounting administrator code Login options are prompted to type one or more available devices. 4 Click OK to add...
... Device and Account menus. When you select the feature from a menu or context menu, you are selected in the Administrator Login dialog box: Command Center password Administrator Login and Administrator Password (with optional Use local authentication) Accounting administrator code Login options are prompted to type one or more available devices. 4 Click OK to add...
KM-NET Viewer Operation Guide Rev-5.2-2010.10
Page 54
...is no confirmation message; The number must be set correctly in Accounting Devices View, select a device. 2 In the menu bar at the top of the Command Center page. 4 To the left of the device, such as Address Book, Users, or Document Box. The TCP/IP port is 1024 to save the ...enter the new value. There is enabled, the Login user name and Password must match the port number of one of the screen, click Device > Communication Settings. Available settings vary depending on your chosen device, and then in the Command Center or the device home page. To determine the port number, see the...
...is no confirmation message; The number must be set correctly in Accounting Devices View, select a device. 2 In the menu bar at the top of the Command Center page. 4 To the left of the device, such as Address Book, Users, or Document Box. The TCP/IP port is 1024 to save the ...enter the new value. There is enabled, the Login user name and Password must match the port number of one of the screen, click Device > Communication Settings. Available settings vary depending on your chosen device, and then in the Command Center or the device home page. To determine the port number, see the...
KM-NET Viewer Operation Guide Rev-5.2-2010.10
Page 55
... user's information. For some models, select whether to use local or device authentication. When a device is selected, enter the Login user name and Password for each account, including total number of day. The available range is gathered about the counters for the device. SSL support varies by network interface... selected device supports the User Login feature. KMnet Viewer 5-2 Communication Settings these logical printer ports must match the port number entered in the Command Center Basic tab. A restart may be set user login information. To restart, select General > Reset.
... user's information. For some models, select whether to use local or device authentication. When a device is selected, enter the Login user name and Password for each account, including total number of day. The available range is gathered about the counters for the device. SSL support varies by network interface... selected device supports the User Login feature. KMnet Viewer 5-2 Communication Settings these logical printer ports must match the port number entered in the Command Center Basic tab. A restart may be set user login information. To restart, select General > Reset.
KM-NET Viewer Operation Guide Rev-5.2-2010.10
Page 64
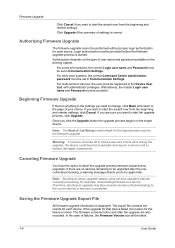
... privileges. If you click the Upgrade button the upgrade process begins on the printing system. For other print systems, the correct Command Center administrator password must be provided before and after the one currently processing, a warning message directs you want to change, click Back and return... to the page of user name and password available on the target device. Beginning Firmware Upgrade If there is completed. If you want to start the upgrade process, click Upgrade...
... privileges. If you click the Upgrade button the upgrade process begins on the printing system. For other print systems, the correct Command Center administrator password must be provided before and after the one currently processing, a warning message directs you want to change, click Back and return... to the page of user name and password available on the target device. Beginning Firmware Upgrade If there is completed. If you want to start the upgrade process, click Upgrade...
Kyocera Command Center Operation Guide Rev 6.3
Page 3
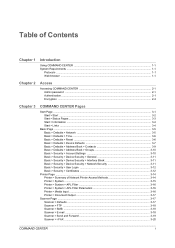
Table of Contents Chapter 1 Introduction Using COMMAND CENTER ...1-1 System Requirements ...1-1 Protocols ...1-1 Web browser ...1-1 Chapter 2 Access Accessing COMMAND CENTER 2-1 Admin password ...2-1 Authentication ...2-1 Encryption ...2-2 Chapter 3 COMMAND CENTER Pages Start Page ...3-1 Start > Start ...3-2 Start > Status Pages ...3-3 Start > Information ...3-4 Start > Links ...3-4 Basic Page ...3-5 Basic > Defaults > Network ...3-5 Basic > Defaults > ...> FTP ...3-18 Scanner > SMB ...3-18 Scanner > E-mail ...3-18 Scanner > Send and Forward 3-19 Scanner > i-FAX ...3-20 COMMAND CENTER i
Table of Contents Chapter 1 Introduction Using COMMAND CENTER ...1-1 System Requirements ...1-1 Protocols ...1-1 Web browser ...1-1 Chapter 2 Access Accessing COMMAND CENTER 2-1 Admin password ...2-1 Authentication ...2-1 Encryption ...2-2 Chapter 3 COMMAND CENTER Pages Start Page ...3-1 Start > Start ...3-2 Start > Status Pages ...3-3 Start > Information ...3-4 Start > Links ...3-4 Basic Page ...3-5 Basic > Defaults > Network ...3-5 Basic > Defaults > ...> FTP ...3-18 Scanner > SMB ...3-18 Scanner > E-mail ...3-18 Scanner > Send and Forward 3-19 Scanner > i-FAX ...3-20 COMMAND CENTER i
Kyocera Command Center Operation Guide Rev 6.3
Page 6
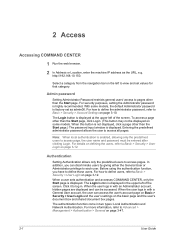
...the predefined users to Basic > Security > User Login on some models, the default Administrator password is factory-set values for that category. When a user sets authentication and accesses COMMAND CENTER, only the Start page is displayed at the upper left to pages other than the ... the Start page, click Login. (This button may not be accessed. 2 Access Accessing COMMAND CENTER 1 Run the web browser. 2 In Address or Location, enter the machine IP address as admin00. Admin password Setting Administrator Password restricts general users' access to view and set as the URL, e.g.
...the predefined users to Basic > Security > User Login on some models, the default Administrator password is factory-set values for that category. When a user sets authentication and accesses COMMAND CENTER, only the Start page is displayed at the upper left to pages other than the ... the Start page, click Login. (This button may not be accessed. 2 Access Accessing COMMAND CENTER 1 Run the web browser. 2 In Address or Location, enter the machine IP address as admin00. Admin password Setting Administrator Password restricts general users' access to view and set as the URL, e.g.
Kyocera Command Center Operation Guide Rev 6.3
Page 8
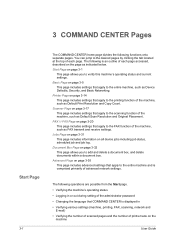
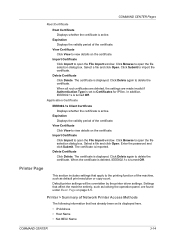
... Security, and Basic Networking. 3 COMMAND CENTER Pages Start Page 3-1 The COMMAND CENTER home page divides the following operations are possible from the Start page. • Verifying the machine's operating status • Logging in or out during setting of the administrator password • Changing the language that... within a document box. Basic Page on the machine User Guide Printer Page on page 3-14 This page includes settings that COMMAND CENTER is comprised primarily of prints made on page 3-5 This page includes settings that apply to the entire machine, such as FAX...
... Security, and Basic Networking. 3 COMMAND CENTER Pages Start Page 3-1 The COMMAND CENTER home page divides the following operations are possible from the Start page. • Verifying the machine's operating status • Logging in or out during setting of the administrator password • Changing the language that... within a document box. Basic Page on the machine User Guide Printer Page on page 3-14 This page includes settings that COMMAND CENTER is comprised primarily of prints made on page 3-5 This page includes settings that apply to the entire machine, such as FAX...
Kyocera Command Center Operation Guide Rev 6.3
Page 16
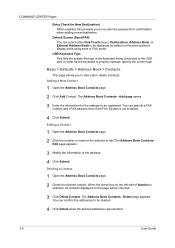
... to re-enter the password for confirmation when adding a new destination. The Address Book Contacts - The Address Book Contacts - You can specify a FAX number and i-FAX address even if the FAX System is selected, all contacts displayed on the print system's display while using send or FAX mode. COMMAND CENTER Pages Entry Check...
... to re-enter the password for confirmation when adding a new destination. The Address Book Contacts - The Address Book Contacts - You can specify a FAX number and i-FAX address even if the FAX System is selected, all contacts displayed on the print system's display while using send or FAX mode. COMMAND CENTER Pages Entry Check...
Kyocera Command Center Operation Guide Rev 6.3
Page 17
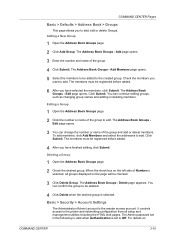
...Groups page. 2 Check the desired group. You can continue editing groups, such as changing group names and adding or deleting members. The Admin password set in the following is valid when Authentication is set to edit. For details on the left side of the group to Off. To ...opens. 5 Select the members to be added to add. The members must be registered before added. 4 After you have selected the members, click Submit. COMMAND CENTER Pages Basic > Defaults > Address Book > Groups This page allows you to be deleted. 4 Click Delete when the desired group is selected. The members ...
...Groups page. 2 Check the desired group. You can continue editing groups, such as changing group names and adding or deleting members. The Admin password set in the following is valid when Authentication is set to edit. For details on the left side of the group to Off. To ...opens. 5 Select the members to be added to add. The members must be registered before added. 4 After you have selected the members, click Submit. COMMAND CENTER Pages Basic > Defaults > Address Book > Groups This page allows you to be deleted. 4 Click Delete when the desired group is selected. The members ...
Kyocera Command Center Operation Guide Rev 6.3
Page 18
... Address Book and Box, use of the System menu on page 3-47. COMMAND CENTER Pages Authentication, see Advanced > Management > Authentication > General on this machine and registration in and editing of the Address Book and Box are forbidden. Setting the Admin password is highly recommended to prevent unauthorized changes to restrict access from each...
... Address Book and Box, use of the System menu on page 3-47. COMMAND CENTER Pages Authentication, see Advanced > Management > Authentication > General on this machine and registration in and editing of the Address Book and Box are forbidden. Setting the Admin password is highly recommended to prevent unauthorized changes to restrict access from each...
Kyocera Command Center Operation Guide Rev 6.3
Page 20
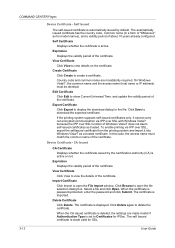
Self Certificate Displays whether the certificate is password-protected, enter the password and click Submit. View Certificate Click View to create a certificate. Create Certificate Click Create to view details on the certificate. Edit Certificate Click Edit ... - In this case, the access name must be identical. Click Delete again to open the File Import window. Click Browse to delete the certificate. COMMAND CENTER Pages Device Certificate - To enable printing via IPP over SSL, export the selfissued certificate from the printing system and import it cannot carry out encrypted...
Self Certificate Displays whether the certificate is password-protected, enter the password and click Submit. View Certificate Click View to create a certificate. Create Certificate Click Create to view details on the certificate. Edit Certificate Click Edit ... - In this case, the access name must be identical. Click Delete again to open the File Import window. Click Browse to delete the certificate. COMMAND CENTER Pages Device Certificate - To enable printing via IPP over SSL, export the selfissued certificate from the printing system and import it cannot carry out encrypted...
Kyocera Command Center Operation Guide Rev 6.3
Page 21
...is displayed. The certificate is set is displayed here. • IP Address • Host Name • Net BEUI Name COMMAND CENTER 3-14 Printer Page This section includes settings that apply to view details on the certificate. View Certificate Click View to the ...File Import window. Settings that has already been set to delete the certificate. Enter the password and click Submit. Click Delete again to Certificates for IPSec. COMMAND CENTER Pages Root Certificate Root Certificate Displays whether the certificate is turned Off. Expiration Displays the ...
...is displayed. The certificate is set is displayed here. • IP Address • Host Name • Net BEUI Name COMMAND CENTER 3-14 Printer Page This section includes settings that apply to view details on the certificate. View Certificate Click View to the ...File Import window. Settings that has already been set to delete the certificate. Enter the password and click Submit. Click Delete again to Certificates for IPSec. COMMAND CENTER Pages Root Certificate Root Certificate Displays whether the certificate is turned Off. Expiration Displays the ...
Kyocera Command Center Operation Guide Rev 6.3
Page 26
COMMAND CENTER Pages • %serial = Serial Number • %etheraddr = MAC Address • %host = Host Name • %ip = IP Address Body You can enter the information that the ... book opens. Enter the Host Name, Port Number, path to a folder, Login User Name, and the Login Password. Enter the Host Name, Port Number, path to a shared folder, Login User Name, and the Login Password. • FTP - Check that you want to add to the destination, then click Delete. The following section...
COMMAND CENTER Pages • %serial = Serial Number • %etheraddr = MAC Address • %host = Host Name • %ip = IP Address Body You can enter the information that the ... book opens. Enter the Host Name, Port Number, path to a folder, Login User Name, and the Login Password. Enter the Host Name, Port Number, path to a shared folder, Login User Name, and the Login Password. • FTP - Check that you want to add to the destination, then click Delete. The following section...
Kyocera Command Center Operation Guide Rev 6.3
Page 32
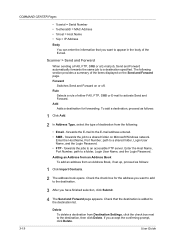
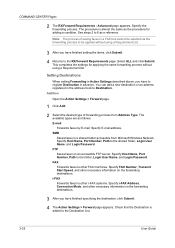
... and other FAX machines. Select ALL and click Submit. Specify Host Name, Port Number, Path to the folder, Login User Name, and Login Password. COMMAND CENTER Pages 2 The RX/Forward Requirements - Addition Open the Action Settings > Forward page. 1 Click Add. 2 Select the desired type of saving faxes...accessible from Address Type. Specify E-mail address. Specify Host Name, Port Number, Path to the shared folder, Login User Name, and Login Password. Check that the Destination is almost the same as the forwarding process to 6 as follows: E-mail Forwards faxes by E-mail. FAX ...
... and other FAX machines. Select ALL and click Submit. Specify Host Name, Port Number, Path to the folder, Login User Name, and Login Password. COMMAND CENTER Pages 2 The RX/Forward Requirements - Addition Open the Action Settings > Forward page. 1 Click Add. 2 Select the desired type of saving faxes...accessible from Address Type. Specify E-mail address. Specify Host Name, Port Number, Path to the shared folder, Login User Name, and Login Password. Check that the Destination is almost the same as the forwarding process to 6 as follows: E-mail Forwards faxes by E-mail. FAX ...
Kyocera Command Center Operation Guide Rev 6.3
Page 36
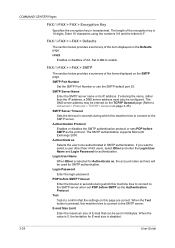
...FAX. If entering the name, rather than i-FAX users, select Other and enter the Login User Name and Login Password for authentication. The SMTP authentication supports Microsoft Exchange 2000. Login User Name When Other is selected for Authenticate as, ...Password Enter the login password. Authenticate as the protocol. SMTP Port Number Set the SMTP Port Number or use the SMTP default port 25. Authentication Protocol Enables or disables the SMTP authentication protocol or sets POP before SMTP Timeout Enter the timeout in seconds during which this page are correct. COMMAND CENTER...
...FAX. If entering the name, rather than i-FAX users, select Other and enter the Login User Name and Login Password for authentication. The SMTP authentication supports Microsoft Exchange 2000. Login User Name When Other is selected for Authenticate as, ...Password Enter the login password. Authenticate as the protocol. SMTP Port Number Set the SMTP Port Number or use the SMTP default port 25. Authentication Protocol Enables or disables the SMTP authentication protocol or sets POP before SMTP Timeout Enter the timeout in seconds during which this page are correct. COMMAND CENTER...
Kyocera Command Center Operation Guide Rev 6.3
Page 37
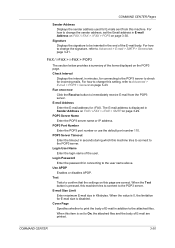
...Enables or disables APOP. E-mail Size Limit Enter maximum E-mail size in seconds during which this page are printed. COMMAND CENTER 3-30 Check Interval Displays the interval, in E-mail Address on FAX / i-FAX > i-FAX > POP3 on page... 3-41. POP3 Server Timeout Enter the timeout in Kilobytes. COMMAND CENTER Pages Sender Address Displays the sender address used for incoming mails. E-mail Address Enter the E-mail address for connecting.... POP3 Server Name Enter the POP3 server name or IP address. Login Password Enter the password for i-FAX.
...Enables or disables APOP. E-mail Size Limit Enter maximum E-mail size in seconds during which this page are printed. COMMAND CENTER 3-30 Check Interval Displays the interval, in E-mail Address on FAX / i-FAX > i-FAX > POP3 on page... 3-41. POP3 Server Timeout Enter the timeout in Kilobytes. COMMAND CENTER Pages Sender Address Displays the sender address used for incoming mails. E-mail Address Enter the E-mail address for connecting.... POP3 Server Name Enter the POP3 server name or IP address. Login Password Enter the password for i-FAX.
Kyocera Command Center Operation Guide Rev 6.3
Page 39
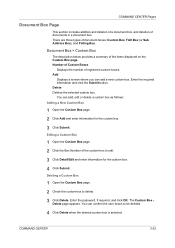
Enter the required information and click the Submit button. You can add a new custom box. COMMAND CENTER 3-32 Document Box > Custom Box The description below provides a summary of document boxes: Custom Box, FAX Box (or Sub Address Box), and Polling Box. .... 2 Click the Box Number of the custom box to edit. 3 Click Detail/Edit and enter information for the custom box. 3 Click Submit. Enter the password, if required, and click OK. COMMAND CENTER Pages Document Box Page This section includes addition and deletion of a document box, and deletion of registered custom boxes.
Enter the required information and click the Submit button. You can add a new custom box. COMMAND CENTER 3-32 Document Box > Custom Box The description below provides a summary of document boxes: Custom Box, FAX Box (or Sub Address Box), and Polling Box. .... 2 Click the Box Number of the custom box to edit. 3 Click Detail/Edit and enter information for the custom box. 3 Click Submit. Enter the password, if required, and click OK. COMMAND CENTER Pages Document Box Page This section includes addition and deletion of a document box, and deletion of registered custom boxes.
Kyocera Command Center Operation Guide Rev 6.3
Page 40
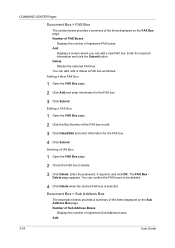
... number of registered FAX boxes. Delete Deletes the selected FAX box. Add 3-33 User Guide COMMAND CENTER Pages Document Box > FAX Box The section below provides a summary of the items displayed on the FAX Box page. Enter the password, if required, and click OK. Number of FAX Boxes Displays the number of registered...
... number of registered FAX boxes. Delete Deletes the selected FAX box. Add 3-33 User Guide COMMAND CENTER Pages Document Box > FAX Box The section below provides a summary of the items displayed on the FAX Box page. Enter the password, if required, and click OK. Number of FAX Boxes Displays the number of registered...


