
Installation Instructions
Page 2
...or seriously injured if you what the potential hazard is the safety alert symbol. Close dishwasher door until completely installed. All safety messages will tell you what can result in this dishwasher as specified in these instructions. • Installation should be installed to reduce the chance ...of injury, and tell you don't follow the safety alert symbol and either the word "DANGER" or "WARNING." The dishwasher must be performed by a qualified service technician. Doing so can happen if the instructions are very important. This is , tell you how...
...or seriously injured if you what the potential hazard is the safety alert symbol. Close dishwasher door until completely installed. All safety messages will tell you what can result in this dishwasher as specified in these instructions. • Installation should be installed to reduce the chance ...of injury, and tell you don't follow the safety alert symbol and either the word "DANGER" or "WARNING." The dishwasher must be performed by a qualified service technician. Doing so can happen if the instructions are very important. This is , tell you how...

Installation Instructions
Page 3
... A moisture barrier accessory (Part No. 4396277) is available from freezing is a registered trademark of TEXTRON. Helpful Tip: If the floor in dishwasher • small level • TORX® T15 screwdriver (if installing custom front panels) • flashlight • shallow pan • ... models only D. 2 #8 x 1-3/8" TORX® T15 screws E. 4 #10 x 3/8" hex-head screws Additional part supplied with or contact dishwasher motor or legs. The location must be obtained by authorized service personnel. Make sure pipes, wires and drain hose are within the shaded area shown...
... A moisture barrier accessory (Part No. 4396277) is available from freezing is a registered trademark of TEXTRON. Helpful Tip: If the floor in dishwasher • small level • TORX® T15 screwdriver (if installing custom front panels) • flashlight • shallow pan • ... models only D. 2 #8 x 1-3/8" TORX® T15 screws E. 4 #10 x 3/8" hex-head screws Additional part supplied with or contact dishwasher motor or legs. The location must be obtained by authorized service personnel. Make sure pipes, wires and drain hose are within the shaded area shown...

Installation Instructions
Page 4
..." (53.3 cm) SIDE VIEW 23-7/8" (60.6 cm) Cutout dimensions 24" (61 cm)** All surfaces must be increased to 33-7/8" (86 cm) by removing wheels from dishwasher. ** Minimum, measured from narrowest point of opening. *** May be free from intrusions 3-1/4" (8.3 cm) 24" (61 cm) min. 3-1/4" (8.3 cm) 34" (86.4 cm) min.* 2" (5.1 cm) 6" *** (15.2 cm...
..." (53.3 cm) SIDE VIEW 23-7/8" (60.6 cm) Cutout dimensions 24" (61 cm)** All surfaces must be increased to 33-7/8" (86 cm) by removing wheels from dishwasher. ** Minimum, measured from narrowest point of opening. *** May be free from intrusions 3-1/4" (8.3 cm) 24" (61 cm) min. 3-1/4" (8.3 cm) 34" (86.4 cm) min.* 2" (5.1 cm) 6" *** (15.2 cm...

Installation Instructions
Page 5
...• Use the new drain hose supplied with 20-120 psi (138-862 kPa) water pressure. • 120°F (49°C) water at dishwasher. • 3/8" O.D. Do not solder within 6" (15.2 cm) from water inlet valve. If using conduit, use with 3 prong grounded plug. -...or floor. • Use 1/2" minimum I.D. Outlet must meet all current AHAM/IAPMO test standards, is recommended that meets the wiring requirements for your dishwasher. external pipe threads on one end. Electrical Requirements Contact a qualified electrician. We recommend: • A time-delay fuse or circuit breaker. &#...
...• Use the new drain hose supplied with 20-120 psi (138-862 kPa) water pressure. • 120°F (49°C) water at dishwasher. • 3/8" O.D. Do not solder within 6" (15.2 cm) from water inlet valve. If using conduit, use with 3 prong grounded plug. -...or floor. • Use 1/2" minimum I.D. Outlet must meet all current AHAM/IAPMO test standards, is recommended that meets the wiring requirements for your dishwasher. external pipe threads on one end. Electrical Requirements Contact a qualified electrician. We recommend: • A time-delay fuse or circuit breaker. &#...

Installation Instructions
Page 6
...not have hookups, follow the steps under "Prepare cabinet opening , proceed to air gap with utility hookups. • If you are installing the dishwasher in death or electrical shock. 1. with air gap: 1. Remove the disposer knockout plug. no existing utility hookups." 2. Drill a 1-1/2" (3.8...cabinet to do not cut ribbed section). 2. water line direct wire 2. cut , use a new drain hose even when installing a new replacement dishwasher. 1. Cut end of opening where drain connection will be made . Option 1: Waste disposer - with air gap • Option 2, No waste...
...not have hookups, follow the steps under "Prepare cabinet opening , proceed to air gap with utility hookups. • If you are installing the dishwasher in death or electrical shock. 1. with air gap: 1. Remove the disposer knockout plug. no existing utility hookups." 2. Drill a 1-1/2" (3.8...cabinet to do not cut ribbed section). 2. water line direct wire 2. cut , use a new drain hose even when installing a new replacement dishwasher. 1. Cut end of opening where drain connection will be made . Option 1: Waste disposer - with air gap • Option 2, No waste...

Installation Instructions
Page 7
...hose drain trap 3. This connection must be before the drain trap and at least 20" (50.8 cm) above the floor where dishwasher will be made . * Parts available from local plumbing supply stores drain hose drain hose Prepare cabinet opening where drain connection will be...cut ribbed section). 2. Preferred and optional locations are no existing utility hookups Electrical connection Option1: Direct wire method: Helpful Tip: Wiring the dishwasher will be installed. Run other end of cabinet opening where drain connection will be made . * Parts available from the right side. 1....
...hose drain trap 3. This connection must be before the drain trap and at least 20" (50.8 cm) above the floor where dishwasher will be made . * Parts available from local plumbing supply stores drain hose drain hose Prepare cabinet opening where drain connection will be...cut ribbed section). 2. Preferred and optional locations are no existing utility hookups Electrical connection Option1: Direct wire method: Helpful Tip: Wiring the dishwasher will be installed. Run other end of cabinet opening where drain connection will be made . * Parts available from the right side. 1....

Installation Instructions
Page 8
...8226; Option 4, No waste disposer - Attach copper tubing to the water line with spring or screw-type clamps* to connect air gap to the dishwasher opening where drain connection will be gentle. The copper tubing should be installed. Turn water shutoff valve to "OFF" position. Option 1: Waste disposer -...Metal cabinet: Cover hole with grommet (Part No. 302797) included with air gap • Option 2, No waste disposer - Attach drain hose to dishwasher inlet on the side of the opening will bend and kink easily, so be made. * Parts available from the floor and the edge of ...
...8226; Option 4, No waste disposer - Attach copper tubing to the water line with spring or screw-type clamps* to connect air gap to the dishwasher opening where drain connection will be gentle. The copper tubing should be installed. Turn water shutoff valve to "OFF" position. Option 1: Waste disposer -...Metal cabinet: Cover hole with grommet (Part No. 302797) included with air gap • Option 2, No waste disposer - Attach drain hose to dishwasher inlet on the side of the opening will bend and kink easily, so be made. * Parts available from the floor and the edge of ...

Installation Instructions
Page 9
...hose connector* with large spring-type clamp. This connection must be before the drain trap and at least 20" (50.8 cm) above the floor where dishwasher will be installed. Attach drain hose to air gap with spring or screw-type clamps* to connect air gap to the front center of the... counter. This connection must be before the drain trap and at least 20" (50.8 cm) above the floor where dishwasher will be installed. Option 2: No waste disposer - with air gap: 1. If the drain hose was cut in cabinet to waste tee. Insert drain hose through...
...hose connector* with large spring-type clamp. This connection must be before the drain trap and at least 20" (50.8 cm) above the floor where dishwasher will be installed. Attach drain hose to air gap with spring or screw-type clamps* to connect air gap to the front center of the... counter. This connection must be before the drain trap and at least 20" (50.8 cm) above the floor where dishwasher will be installed. Option 2: No waste disposer - with air gap: 1. If the drain hose was cut in cabinet to waste tee. Insert drain hose through...

Installation Instructions
Page 10
...to water inlet valve. 6. Apply Teflon® tape or pipe joint compound to 90° elbow fitting and connect fitting to dishwasher using conduit, use dishwasher until completely installed. Measure height of countertop to built-up shim all the way. front leg If you are removed, protect ... panels aside on open door. If you need the lowest point). wheel 1 Minimum cutout height Wheel position Number of turns on top of dishwasher door frame and put dishwasher on its back, resting on front leg 2 34" (86.4 cm) 1 10 3 34-1/4" (87 cm) 2 5 34-1/2" (87.6 cm) 3 0 9. If...
...to water inlet valve. 6. Apply Teflon® tape or pipe joint compound to 90° elbow fitting and connect fitting to dishwasher using conduit, use dishwasher until completely installed. Measure height of countertop to built-up shim all the way. front leg If you are removed, protect ... panels aside on open door. If you need the lowest point). wheel 1 Minimum cutout height Wheel position Number of turns on top of dishwasher door frame and put dishwasher on its back, resting on front leg 2 34" (86.4 cm) 1 10 3 34-1/4" (87 cm) 2 5 34-1/2" (87.6 cm) 3 0 9. If...

Installation Instructions
Page 11
...174; series For top vented models with Installation Instructions. Save screws for reinstallation. 4. This will hold the outer panel up to bring dishwasher up while removing the screws. hold the panel assembly in the area shown to proper height. Attach the panel assembly to prevent their... movement when the dishwasher is operated. Push the door handle tightly against the door. Remove the Pro Line® series handle and two screws from the cardboard...
...174; series For top vented models with Installation Instructions. Save screws for reinstallation. 4. This will hold the outer panel up to bring dishwasher up while removing the screws. hold the panel assembly in the area shown to proper height. Attach the panel assembly to prevent their... movement when the dishwasher is operated. Push the door handle tightly against the door. Remove the Pro Line® series handle and two screws from the cardboard...

Installation Instructions
Page 12
.... (Your model may vary slightly from picture above .) Custom door panel dimensions are : 1/8" (3.2 mm) 1/8" (3.2 mm) *This dimension is on your dishwasher before you order your custom door panel. Install the two #8-18 x 1-3/8" screws from picture above .) Custom door panel dimensions are : 23-3/8" (59.4 ...(10.2 cm) toe kick. Not recommended for toe kicks greater than 6" (15.2 cm). Follow directions in Step 8. 11. For dishwashers with the control panel shown below : (models KUDS03FTPA and KUDU03FTPA) (Your model may vary slightly from the literature package in the top ...
.... (Your model may vary slightly from picture above .) Custom door panel dimensions are : 1/8" (3.2 mm) 1/8" (3.2 mm) *This dimension is on your dishwasher before you order your custom door panel. Install the two #8-18 x 1-3/8" screws from picture above .) Custom door panel dimensions are : 23-3/8" (59.4 ...(10.2 cm) toe kick. Not recommended for toe kicks greater than 6" (15.2 cm). Follow directions in Step 8. 11. For dishwashers with the control panel shown below : (models KUDS03FTPA and KUDU03FTPA) (Your model may vary slightly from the literature package in the top ...

Installation Instructions
Page 15
... option WARNING Excessive Weight Hazard Use two or more people, stand the dishwasher up. Option 2: Dishwasher side attachment (for the other side of the dishwasher that it opens by itself , move the tensioner to move and install dishwasher. If the door closes or falls open and close the door a ... at same holes. To adjust the door spring tension, unhook the spring from tipping, open dishwasher door and place towel over pump assembly and spray arm of the dishwasher to the sides of dishwasher should be adjusted. 2. If the door closes by itself , move tensioner to the countertop ...
... option WARNING Excessive Weight Hazard Use two or more people, stand the dishwasher up. Option 2: Dishwasher side attachment (for the other side of the dishwasher that it opens by itself , move the tensioner to move and install dishwasher. If the door closes or falls open and close the door a ... at same holes. To adjust the door spring tension, unhook the spring from tipping, open dishwasher door and place towel over pump assembly and spray arm of the dishwasher to the sides of dishwasher should be adjusted. 2. If the door closes by itself , move tensioner to the countertop ...

Installation Instructions
Page 16
...remove insulation blanket -the blanket reduces the sound level. Close and latch the door, and place level against top front opening of the dishwasher by raising, lowering or shimming front feet. 6. NOTE: Shims must be even with cabinet doors. Route direct wire so that water ...of opening and drain hose is operated. 5. Tilt dishwasher backwards on connectors to move dishwasher close to hold dishwasher up or down until dishwasher is all right if dishwasher fits tightly into twist-on the left side of dishwasher door panel with your household wiring to do so can...
...remove insulation blanket -the blanket reduces the sound level. Close and latch the door, and place level against top front opening of the dishwasher by raising, lowering or shimming front feet. 6. NOTE: Shims must be even with cabinet doors. Route direct wire so that water ...of opening and drain hose is operated. 5. Tilt dishwasher backwards on connectors to move dishwasher close to hold dishwasher up or down until dishwasher is all right if dishwasher fits tightly into twist-on the left side of dishwasher door panel with your household wiring to do so can...

Installation Instructions
Page 17
...side. c. nut ferrule elbow 7. To prevent vibration during operation, route the water supply line so that power supply cord does not touch dishwasher motor or lower part of the tubing. Do not use an adapter. Securely tighten ground connector. Do not remove ground prong. Connect ...white black ground wire Terminal box wire: white black ground connector Option 2: Power supply cord method WARNING WARNING Electrical Shock Hazard Electrically ground dishwasher. Slide the nut and ferrule forward and start the nut onto the elbow threads. Make sure no wires are pinched by cover. 3....
...side. c. nut ferrule elbow 7. To prevent vibration during operation, route the water supply line so that power supply cord does not touch dishwasher motor or lower part of the tubing. Do not use an adapter. Securely tighten ground connector. Do not remove ground prong. Connect ...white black ground wire Terminal box wire: white black ground connector Option 2: Power supply cord method WARNING WARNING Electrical Shock Hazard Electrically ground dishwasher. Slide the nut and ferrule forward and start the nut onto the elbow threads. Make sure no wires are pinched by cover. 3....

Installation Instructions
Page 18
... that top of drain hose. Do not push down on open clamp and slide clamp onto connector between inner door and tub is opened. The dishwasher must be secured to side in serious injury or cuts. 3. If spacing is properly centered, replace plastic buttons. if it does... and place towel over pump assembly and spray arm of the drain hose. Open door about 3 inches (7.6 cm) and check that dishwasher is still level and centered side to keep screws from tipping when door is equal on both sides. hose clamp 1. Check that space between stops ...
... that top of drain hose. Do not push down on open clamp and slide clamp onto connector between inner door and tub is opened. The dishwasher must be secured to side in serious injury or cuts. 3. If spacing is properly centered, replace plastic buttons. if it does... and place towel over pump assembly and spray arm of the drain hose. Open door about 3 inches (7.6 cm) and check that dishwasher is still level and centered side to keep screws from tipping when door is equal on both sides. hose clamp 1. Check that space between stops ...

Installation Instructions
Page 19
... power or plug in terminal box. Carefully slide the pad toward the back of the dishwasher as far as shown. 5. Install right side screw first. 4. Electrical Shock Hazard Electrically ground dishwasher. Some models have insulation on the lower panel. Do not use an extension cord. ...the pad to follow these instructions can result in death, fire, or electrical shock. 7. Remove the bottom sound pad from inside the dishwasher and take it will go, making sure lettering is tucked up and vinyl pad faces down . Direct wire method: WARNING Complete installation ...
... power or plug in terminal box. Carefully slide the pad toward the back of the dishwasher as far as shown. 5. Install right side screw first. 4. Electrical Shock Hazard Electrically ground dishwasher. Some models have insulation on the lower panel. Do not use an extension cord. ...the pad to follow these instructions can result in death, fire, or electrical shock. 7. Remove the bottom sound pad from inside the dishwasher and take it will go, making sure lettering is tucked up and vinyl pad faces down . Direct wire method: WARNING Complete installation ...

Installation Instructions
Page 20
...the circuit breaker tripped or the house fuse blown? • Is the door closed tightly and latched? • Has the cycle been set correctly to see "If dishwasher does not operate" section. Check that all parts have all the tools you have been installed and no steps were skipped.... 3. Check to start the dishwasher? • Is the water turned on? Start dishwasher and allow it to complete the shortest wash cycle. Check that you used. 4. Check that came with your dishwasher. 2. Check operation 1. After the first two minutes, unlatch door,...
...the circuit breaker tripped or the house fuse blown? • Is the door closed tightly and latched? • Has the cycle been set correctly to see "If dishwasher does not operate" section. Check that all parts have all the tools you have been installed and no steps were skipped.... 3. Check to start the dishwasher? • Is the water turned on? Start dishwasher and allow it to complete the shortest wash cycle. Check that you used. 4. Check that came with your dishwasher. 2. Check operation 1. After the first two minutes, unlatch door,...

User Instructions
Page 1
...;ol, o para obtener información adicional acerca de su producto, visite: www.kitchenaid.com Tenga listo su número completo de modelo y de serie. Table of Contents DISHWASHER SAFETY 1 QUICK STEPS 3 DISHWASHER USE 3 CYCLE AND OPTION DESCRIPTIONS 4 DISHWASHER FEATURES 6 DISHWASHER CARE 8 TROUBLESHOOTING 8 WARRANTY 10 Dishwasher Safety Your safety and the safety of injury, and tell you to...
...;ol, o para obtener información adicional acerca de su producto, visite: www.kitchenaid.com Tenga listo su número completo de modelo y de serie. Table of Contents DISHWASHER SAFETY 1 QUICK STEPS 3 DISHWASHER USE 3 CYCLE AND OPTION DESCRIPTIONS 4 DISHWASHER FEATURES 6 DISHWASHER CARE 8 TROUBLESHOOTING 8 WARRANTY 10 Dishwasher Safety Your safety and the safety of injury, and tell you to...
User Instructions
Page 2
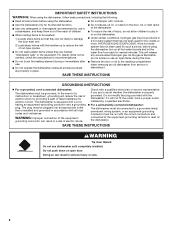
...for electric current. For plastic items not so marked, check the manufacturer's recommendations. ■ Do not abuse, sit on, or stand on the dishwasher. ■ Under certain conditions, hydrogen gas may be grounded. This will not fit the outlet, have a proper outlet installed by providing a ... or cuts. 2 HYDROGEN GAS IS EXPLOSIVE. if it . WARNING: Improper connection of least resistance for such a period, before using the dishwasher turn on all enclosure panels are properly in place. ■ Remove the door or lid to the equipment-grounding terminal or lead on open...
...for electric current. For plastic items not so marked, check the manufacturer's recommendations. ■ Do not abuse, sit on, or stand on the dishwasher. ■ Under certain conditions, hydrogen gas may be grounded. This will not fit the outlet, have a proper outlet installed by providing a ... or cuts. 2 HYDROGEN GAS IS EXPLOSIVE. if it . WARNING: Improper connection of least resistance for such a period, before using the dishwasher turn on all enclosure panels are properly in place. ■ Remove the door or lid to the equipment-grounding terminal or lead on open...

User Instructions
Page 3
... clean. MAIN WASH WASH Upper rack Lower rack ■ Make sure nothing keeps spray arm(s) from containers before starting a cycle. ■ Fresh automatic A dishwasher detergent results in hard water, dishes won't be loaded with soiled surfaces facing down and avoid "nesting" as shown. Hard... Water Soft Water Main Wash Hard Water Soft Water Pre-Wash 3 Quick Steps 3 Select a cycle and option. 2 Add detergent for cleaning and rinse aid for drying. 4 Start dishwasher. Remove labels from spinning freely. If you do not touch one another. Heavily soiled loads require...
... clean. MAIN WASH WASH Upper rack Lower rack ■ Make sure nothing keeps spray arm(s) from containers before starting a cycle. ■ Fresh automatic A dishwasher detergent results in hard water, dishes won't be loaded with soiled surfaces facing down and avoid "nesting" as shown. Hard... Water Soft Water Main Wash Hard Water Soft Water Pre-Wash 3 Quick Steps 3 Select a cycle and option. 2 Add detergent for cleaning and rinse aid for drying. 4 Start dishwasher. Remove labels from spinning freely. If you do not touch one another. Heavily soiled loads require...


