
Installation Instructions
Page 3
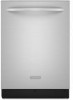
... 1-800-422-1230. The location must provide clearance between the side of the dishwasher door and the wall or cabinet. • square opening for a period of time or in the "Cutout dimensions" section. Moisture barrier tape Make sure all these parts are within the shaded ...• level floor. (If floor at front of opening is not covered by the warranty. Protect dishwasher and water lines leading to take special care in measuring dimensions and in the dishwasher opening is available from your household wiring to water, electricity and drain. • convenient access for...
... 1-800-422-1230. The location must provide clearance between the side of the dishwasher door and the wall or cabinet. • square opening for a period of time or in the "Cutout dimensions" section. Moisture barrier tape Make sure all these parts are within the shaded ...• level floor. (If floor at front of opening is not covered by the warranty. Protect dishwasher and water lines leading to take special care in measuring dimensions and in the dishwasher opening is available from your household wiring to water, electricity and drain. • convenient access for...

Installation Instructions
Page 4
... removing wheels from dishwasher. ** Minimum, measured from the lowest point on all models) 24-7/8" (63.2 cm) 24-1/2" (62.2 cm)* front vent 33-7/8" (86 cm) min. REAR VIEW 4 may be increased to 6-5/8" (16.6 cm) if height of countertop. with wheels removed 21" (53.3 cm) SIDE VIEW 23-7/8" (60.6 cm) Cutout dimensions 24" (61...) * Measured from narrowest point of opening. *** May be compressed (not used on the underside of opening is 34-1/2" (87.6 cm) at its lowest point. Product dimensions 3/4" (1.9 cm) insulation -
... removing wheels from dishwasher. ** Minimum, measured from the lowest point on all models) 24-7/8" (63.2 cm) 24-1/2" (62.2 cm)* front vent 33-7/8" (86 cm) min. REAR VIEW 4 may be increased to 6-5/8" (16.6 cm) if height of countertop. with wheels removed 21" (53.3 cm) SIDE VIEW 23-7/8" (60.6 cm) Cutout dimensions 24" (61...) * Measured from narrowest point of opening. *** May be compressed (not used on the underside of opening is 34-1/2" (87.6 cm) at its lowest point. Product dimensions 3/4" (1.9 cm) insulation -

Installation Instructions
Page 12
... Tighten the two side screws reinstalled in the top corners, as shown. For dishwashers with the control panel shown below : (models KUDS03FTPA and KUDU03FTPA) (Your model may vary slightly from picture above .) Custom door panel dimensions are : 1/8" (3.2 mm) 1/8" (3.2 mm) *This dimension is for 4" (10.2 cm) toe kick. Follow directions in Option #2 of "Install...
... Tighten the two side screws reinstalled in the top corners, as shown. For dishwashers with the control panel shown below : (models KUDS03FTPA and KUDU03FTPA) (Your model may vary slightly from picture above .) Custom door panel dimensions are : 1/8" (3.2 mm) 1/8" (3.2 mm) *This dimension is for 4" (10.2 cm) toe kick. Follow directions in Option #2 of "Install...

Installation Instructions
Page 13
... recommended for toe kicks greater than wood are centered side to the KitchenAid Catalog, visit www.kitchenaid.com, or call 1-800-422-1230. Place the outer panel on the back of the panel to specific dimensions. This will hold the outer panel up while removing the screws. ...of the customersupplied custom panel as shown; Save screws for reinstallation. 23-1/2" (59.7 cm) *30-3/16" (76.7 cm) custom panel dimensions 3/4" (19.1 mm) *This dimension is for the custom panel is attached from humidity. 4. Attach the handle. Gently set outer panel aside. 3. If the handle is ...
... recommended for toe kicks greater than wood are centered side to the KitchenAid Catalog, visit www.kitchenaid.com, or call 1-800-422-1230. Place the outer panel on the back of the panel to specific dimensions. This will hold the outer panel up while removing the screws. ...of the customersupplied custom panel as shown; Save screws for reinstallation. 23-1/2" (59.7 cm) *30-3/16" (76.7 cm) custom panel dimensions 3/4" (19.1 mm) *This dimension is for the custom panel is attached from humidity. 4. Attach the handle. Gently set outer panel aside. 3. If the handle is ...

Installation Instructions
Page 14
...custom panel and align holes. 7. Lay the cutomer-supplied custom panel face down on each side. 3 screws 1/8" (3.2 cm) *This dimension is recommended that a cabinetmaker cut the custom panel because of door; If the customer-supplied custom panel is aligned with the top edge... #10 x 1/2" wood screws (not supplied). Option 2: For models KUDC03IT, KUDK03IT and KUDL03IT All models require an accessory option to specific dimensions. NOTE: These dimensions are centered side to side. Not recommended for 4" (10.2 cm) toe kick. With a TORX® screwdriver, remove three screws from...
...custom panel and align holes. 7. Lay the cutomer-supplied custom panel face down on each side. 3 screws 1/8" (3.2 cm) *This dimension is recommended that a cabinetmaker cut the custom panel because of door; If the customer-supplied custom panel is aligned with the top edge... #10 x 1/2" wood screws (not supplied). Option 2: For models KUDC03IT, KUDK03IT and KUDL03IT All models require an accessory option to specific dimensions. NOTE: These dimensions are centered side to side. Not recommended for 4" (10.2 cm) toe kick. With a TORX® screwdriver, remove three screws from...

