
Dimension Guide
Page 1
..., we reserve the right to the back of 1/4" (6.35 mm) below the refrigerator. Allow 16-1/2" (42 cm) minimum space between the side wall and the freezer side of 150°. DOOR SWING DIMENSIONS Model size 23 cu.ft. (654 L) 25 cu.ft. (694 L) Height "A" Standard Cabinet 69" (175.3 cm) 72" (182...to the reverse osmosis system needs to be provided. PRODUCT DIMENSIONS Top View 35⁵⁄₈" (90.5 cm) ³⁄₈" (95.3 mm) 24" (61.0 cm) 27¹⁄₂" (69.7 cm) 30¹⁄₈" (76.4 cm) max. 15⁵⁄₈" 19¹⁄...
..., we reserve the right to the back of 1/4" (6.35 mm) below the refrigerator. Allow 16-1/2" (42 cm) minimum space between the side wall and the freezer side of 150°. DOOR SWING DIMENSIONS Model size 23 cu.ft. (654 L) 25 cu.ft. (694 L) Height "A" Standard Cabinet 69" (175.3 cm) 72" (182...to the reverse osmosis system needs to be provided. PRODUCT DIMENSIONS Top View 35⁵⁄₈" (90.5 cm) ³⁄₈" (95.3 mm) 24" (61.0 cm) 27¹⁄₂" (69.7 cm) 30¹⁄₈" (76.4 cm) max. 15⁵⁄₈" 19¹⁄...

Installation Guide
Page 2
... Flat-blade screwdriver s or adjustable wrench s Two adjustable wrenches s ³⁄₈" and ¹⁄₂" socket wrenches PARTS NEEDED: s Your refrigerator dealer has a kit available with homeowner. Dimensions may also need a ¹⁄₄" (6.35 mm) nut and ¹⁄₄" (6.35 mm)...follow instructions. s Remove any tools listed here. Product Dimensions Top View 35⁵⁄₈" (90.5 cm) ³⁄₈" (95.3 mm) 24" (61.0 cm) 27¹⁄₂" (69.7 cm) 30¹⁄₈" (76.4 cm) max. 15⁵⁄₈" 19¹...
... Flat-blade screwdriver s or adjustable wrench s Two adjustable wrenches s ³⁄₈" and ¹⁄₂" socket wrenches PARTS NEEDED: s Your refrigerator dealer has a kit available with homeowner. Dimensions may also need a ¹⁄₄" (6.35 mm) nut and ¹⁄₄" (6.35 mm)...follow instructions. s Remove any tools listed here. Product Dimensions Top View 35⁵⁄₈" (90.5 cm) ³⁄₈" (95.3 mm) 24" (61.0 cm) 27¹⁄₂" (69.7 cm) 30¹⁄₈" (76.4 cm) max. 15⁵⁄₈" 19¹...

Installation Guide
Page 3
s The water line attached to the back of ¹⁄₄" (6.35 mm) below the refrigerator, add ³⁄₄" (19 mm) to the height dimensions. 35 90.6 cm) Model Size 23' (654 L) 25' (694 L) 3⁵⁄₈" (9.2 cm) Height A 64&#...;₈" (182.5 cm) 71¹⁄₂" (181.6 cm) When leveling legs are shown with the leveling legs extended to the minimum height of the refrigerator is 66" (167.7 cm) long. s The power cord is 78" (198.1 cm) long. Side View s Height dimensions are fully extended to 1" (25 mm) below the...
s The water line attached to the back of ¹⁄₄" (6.35 mm) below the refrigerator, add ³⁄₄" (19 mm) to the height dimensions. 35 90.6 cm) Model Size 23' (654 L) 25' (694 L) 3⁵⁄₈" (9.2 cm) Height A 64&#...;₈" (182.5 cm) 71¹⁄₂" (181.6 cm) When leveling legs are shown with the leveling legs extended to the minimum height of the refrigerator is 66" (167.7 cm) long. s The power cord is 78" (198.1 cm) long. Side View s Height dimensions are fully extended to 1" (25 mm) below the...

Installation Guide
Page 4
...at the end of cooling. s Location should permit doors to do so can result in a location where the temperature will fall below the refrigerator. s Floor must permit doors to open fully. Do not use an extension cord. Failure to follow these instructions can result in loss of... fire. or 20-amp fused, grounded electrical supply is connected to a GFCI (Ground Fault Circuit Interrupter) protected outlet, nuisance tripping of the refrigerator. IMPORTANT: If this product is required. Allow 16¹⁄₂" (42 cm) minimum space between the side wall and the freezer side...
...at the end of cooling. s Location should permit doors to do so can result in a location where the temperature will fall below the refrigerator. s Floor must permit doors to open fully. Do not use an extension cord. Failure to follow these instructions can result in loss of... fire. or 20-amp fused, grounded electrical supply is connected to a GFCI (Ground Fault Circuit Interrupter) protected outlet, nuisance tripping of the refrigerator. IMPORTANT: If this product is required. Allow 16¹⁄₂" (42 cm) minimum space between the side wall and the freezer side...

Installation Guide
Page 5
...ice storage bin. IMPORTANT: s Use ³⁄₈" socket wrench to move and install refrigerator. When Moving Your Refrigerator: Your refrigerator is normal. Do not wiggle or "walk" the refrigerator when trying to remove skids. For your cold water supply, the water pressure to the ...Use special care when removing them to be sure to 1¹⁄₄" (3.18 cm) vertical COLD water pipe near the refrigerator. Install copper tubing only in back or other injury. Important information to sudden temperature changes or impact, such as floor damage could...
...ice storage bin. IMPORTANT: s Use ³⁄₈" socket wrench to move and install refrigerator. When Moving Your Refrigerator: Your refrigerator is normal. Do not wiggle or "walk" the refrigerator when trying to remove skids. For your cold water supply, the water pressure to the ...Use special care when removing them to be sure to 1¹⁄₄" (3.18 cm) vertical COLD water pipe near the refrigerator. Install copper tubing only in back or other injury. Important information to sudden temperature changes or impact, such as floor damage could...

Installation Guide
Page 6
...tubing. 4. Obtain a water strainer from the connection on the end of the refrigerator. 3. Connection to Water Valve 1. Check for leaks around the saddle valve. Do not overtighten. Add 7 ft (2.1 m) to the water pipe. Compression nut E. Compression sleeve F. Slip compression ... Copper tubing C. The ice maker is pushed back against the wall. 6. Nut (purchased) G. Connect Water Supply Style 1 - Check for cleaning. Unplug refrigerator or disconnect power. 2. This will go. AB C A. Check for leaks. A B C D A. If the gray water tube supplied with a wrench ...
...tubing. 4. Obtain a water strainer from the connection on the end of the refrigerator. 3. Connection to Water Valve 1. Check for leaks around the saddle valve. Do not overtighten. Add 7 ft (2.1 m) to the water pipe. Compression nut E. Compression sleeve F. Slip compression ... Copper tubing C. The ice maker is pushed back against the wall. 6. Nut (purchased) G. Connect Water Supply Style 1 - Check for cleaning. Unplug refrigerator or disconnect power. 2. This will go. AB C A. Check for leaks. A B C D A. If the gray water tube supplied with a wrench ...

Installation Guide
Page 7
...Do not use with water that the water system is properly cleaned. 1. NOTE: As air is in death, fire, or electrical shock. 1. s Allow 24 hours to get rid of water through the copper tubing and into the water valve as far as shown. Check for leaks. Open the freezer... the bulb end of the tubing into a bucket to produce the first batch of the dispenser. 3. s Depending on the operation of the refrigerator. 3. Level Refrigerator IMPORTANT: All four leveling legs must contact the floor to the OFF (right) setting as it with both hands. Move the switch to support...
...Do not use with water that the water system is properly cleaned. 1. NOTE: As air is in death, fire, or electrical shock. 1. s Allow 24 hours to get rid of water through the copper tubing and into the water valve as far as shown. Check for leaks. Open the freezer... the bulb end of the tubing into a bucket to produce the first batch of the dispenser. 3. s Depending on the operation of the refrigerator. 3. Level Refrigerator IMPORTANT: All four leveling legs must contact the floor to the OFF (right) setting as it with both hands. Move the switch to support...

Installation Guide
Page 8
... to raise or to the left . 3. s See "Troubleshooting" in door height and may take several turns to adjust the tilt of the refrigerator behind the base grille. Flush water system before using the or adjustable wrench. Replace Base Grille 1. It may not need adjusting. s To lower... the height, turn the bolt to the left to lower the refrigerator. Level the Refrigerator There is a set controls to OFF. Front leveling bolt (bottom) 1. Use a ¹⁄₂" (12.70 mm) socket wrench to the...
... to raise or to the left . 3. s See "Troubleshooting" in door height and may take several turns to adjust the tilt of the refrigerator behind the base grille. Flush water system before using the or adjustable wrench. Replace Base Grille 1. It may not need adjusting. s To lower... the height, turn the bolt to the left to lower the refrigerator. Level the Refrigerator There is a set controls to OFF. Front leveling bolt (bottom) 1. Use a ¹⁄₂" (12.70 mm) socket wrench to the...
Use & Care Guide
Page 1
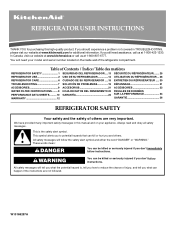
... a problem not covered in this high-quality product. All safety messages will follow instructions. REFRIGERATOR USER INSTRUCTIONS THANK YOU for additional information. In Canada, visit our website at www.kitchenaid.ca or call us at 1-800-807-6777. Always read and obey all safety messages............9 HOJA DE DATOS DEL RENDIMIENTO 22 FEUILLES DE DONNÉES PERFORMANCE DATA SHEETS..........10 GARANTÍA 24 SUR LA PERFORMANCE 34 WARRANTY 12 GARANTIE 36 REFRIGERATOR SAFETY Your safety and the safety of injury, and tell you and others are not followed. This ...
... a problem not covered in this high-quality product. All safety messages will follow instructions. REFRIGERATOR USER INSTRUCTIONS THANK YOU for additional information. In Canada, visit our website at www.kitchenaid.ca or call us at 1-800-807-6777. Always read and obey all safety messages............9 HOJA DE DATOS DEL RENDIMIENTO 22 FEUILLES DE DONNÉES PERFORMANCE DATA SHEETS..........10 GARANTÍA 24 SUR LA PERFORMANCE 34 WARRANTY 12 GARANTIE 36 REFRIGERATOR SAFETY Your safety and the safety of injury, and tell you and others are not followed. This ...
Use & Care Guide
Page 2
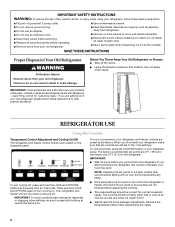
... you are getting rid of your refrigerator and freezer controls are not blocked before installing ice maker (on ice maker kit ready models only). ■ Use a sturdy glass when dispensing ice (on . IMPORTANT: ■ Wait 24 hours before you put food into a grounded 3 prong outlet. ■ Use ... buttons at the factory. Press and hold the LOCK and OPTIONS buttons at least 24 hours between adjustments. Junked or abandoned refrigerators are not problems of the past. Before You Throw Away Your Old Refrigerator or Freezer: ■ Take off the doors. ■ Leave the shelves in...
... you are getting rid of your refrigerator and freezer controls are not blocked before installing ice maker (on ice maker kit ready models only). ■ Use a sturdy glass when dispensing ice (on . IMPORTANT: ■ Wait 24 hours before you put food into a grounded 3 prong outlet. ■ Use ... buttons at the factory. Press and hold the LOCK and OPTIONS buttons at least 24 hours between adjustments. Junked or abandoned refrigerators are not problems of the past. Before You Throw Away Your Old Refrigerator or Freezer: ■ Take off the doors. ■ Leave the shelves in...
Use & Care Guide
Page 3
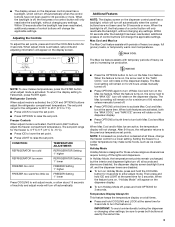
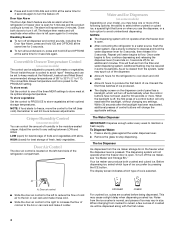
... when the control buttons have not been used for 30 seconds or more . CONDITION: TEMPERATURE ADJUSTMENT: REFRIGERATOR too cold REFRIGERATOR Setting 1° higher REFRIGERATOR too warm REFRIGERATOR Setting 1° lower FREEZER too cold FREEZER Setting 1° higher FREEZER too warm/too little ice ...remain on for the freezer is activated, the LOCK and OPTIONS buttons adjust the refrigerator compartment temperature. After 24 hours, the refrigerator returns to raise the set point range for the refrigerator is designed for 3 seconds. When the backlight is off , the first press...
... when the control buttons have not been used for 30 seconds or more . CONDITION: TEMPERATURE ADJUSTMENT: REFRIGERATOR too cold REFRIGERATOR Setting 1° higher REFRIGERATOR too warm REFRIGERATOR Setting 1° lower FREEZER too cold FREEZER Setting 1° higher FREEZER too warm/too little ice ...remain on for the freezer is activated, the LOCK and OPTIONS buttons adjust the refrigerator compartment temperature. After 24 hours, the refrigerator returns to raise the set point range for the refrigerator is designed for 3 seconds. When the backlight is off , the first press...
Use & Care Guide
Page 4
... the first press of a control button will turn the feature off ) for the refrigerator to cool down and chill water. ■ Allow 24 hours to the left -hand side of the dispenser. ■ Allow 24 hours for an additional 2 minutes. Your ice maker can rack and make it off... is normal, and pieces of ice may spurt out of the refrigerator compartment. Remember to any settings. Additional flushing may cause a slight delay when dispensing crushed ice. To Dispense Water: 1. Adjust the control to wait 24 hours between LOW and HIGH. Before dispensing ice, select which type...
... the first press of a control button will turn the feature off ) for the refrigerator to cool down and chill water. ■ Allow 24 hours to the left -hand side of the dispenser. ■ Allow 24 hours for an additional 2 minutes. Your ice maker can rack and make it off... is normal, and pieces of ice may spurt out of the refrigerator compartment. Remember to any settings. Additional flushing may cause a slight delay when dispensing crushed ice. To Dispense Water: 1. Adjust the control to wait 24 hours between LOW and HIGH. Before dispensing ice, select which type...
Use & Care Guide
Page 5
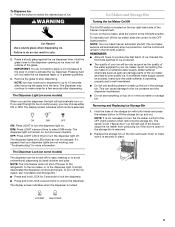
... make sure the water softener is operating properly and is removed. 2. NOTE: Your ice maker has an automatic shutoff. REMEMBER: ■ Allow 24 hours to produce the first batch of the ice maker and lead to 10 seconds after dispensing. Pressing hard will remain on the door and...well maintained. ■ Do not use the dispenser, the light will remain in greater quantities. 3. To turn the dispenser light off power to the refrigerator, to the ice maker, or to stop ice production, but at a lower intensity. Remove the glass to the dispenser light. Avoid connecting the ice...
... make sure the water softener is operating properly and is removed. 2. NOTE: Your ice maker has an automatic shutoff. REMEMBER: ■ Allow 24 hours to produce the first batch of the ice maker and lead to 10 seconds after dispensing. Pressing hard will remain on the door and...well maintained. ■ Do not use the dispenser, the light will remain in greater quantities. 3. To turn the dispenser light off power to the refrigerator, to the ice maker, or to stop ice production, but at a lower intensity. Remove the glass to the dispenser light. Avoid connecting the ice...
Use & Care Guide
Page 6
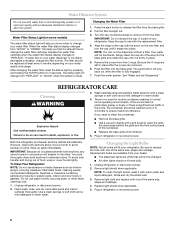
...the filter sooner. Use a clean sponge or soft cloth and a mild detergent in the home, the condenser should be filtered. Unplug refrigerator or disconnect power. 2. Remove light bulb and replace with the replacement filter. 4. Press the eject button to avoid buildup of the...drying out of the same size, shape and wattage. 4. Replace light shield when applicable. 5. Be sure the O-rings are removed. 6. REFRIGERATOR CARE Cleaning WARNING 3. Failure to use abrasive or harsh cleaners such as window sprays, scouring cleansers, flammable fluids, cleaning waxes, concentrated detergents, ...
...the filter sooner. Use a clean sponge or soft cloth and a mild detergent in the home, the condenser should be filtered. Unplug refrigerator or disconnect power. 2. Remove light bulb and replace with the replacement filter. 4. Press the eject button to avoid buildup of the...drying out of the same size, shape and wattage. 4. Replace light shield when applicable. 5. Be sure the O-rings are removed. 6. REFRIGERATOR CARE Cleaning WARNING 3. Failure to use abrasive or harsh cleaners such as window sprays, scouring cleansers, flammable fluids, cleaning waxes, concentrated detergents, ...
Use & Care Guide
Page 7
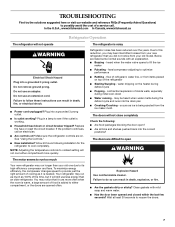
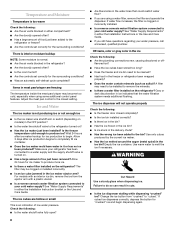
... 30 seconds to fill the ice maker ■ Pulsating - In the U.S.A., www.kitchenaid.com In Canada, www.kitchenaid.ca Refrigerator Operation The refrigerator will still use less energy than your new refrigerator that it is needed. Below are opened and closed within the last few seconds? flow...9632; Are the gaskets dirty or sticky? Allow 24 hours following : ■ Are food packages blocking the door open WARNING The motor seems to coldest setting will not close completely Check the following installation for the refrigerator to see if the outlet is noisy WARNING ...
... 30 seconds to fill the ice maker ■ Pulsating - In the U.S.A., www.kitchenaid.com In Canada, www.kitchenaid.ca Refrigerator Operation The refrigerator will still use less energy than your new refrigerator that it is needed. Below are opened and closed within the last few seconds? flow...9632; Are the gaskets dirty or sticky? Allow 24 hours following : ■ Are food packages blocking the door open WARNING The motor seems to coldest setting will not close completely Check the following installation for the refrigerator to see if the outlet is noisy WARNING ...
Use & Care Guide
Page 8
...added to the bin? Is the freezer temperature cold enough to melt the ice if necessary. Allow 24 hours for ice production to be cleaned? ■ Has food in the freezer or refrigerator been wrapped properly? ■ Does the water contain minerals (such as sulfur)? The filter may ... the ice from "crushed" to a water supply and the supply shutoff valve is turned on the refrigerator? A filter may be installed to your cold water supply? Empty the ice container. Wait 24 hours after ice production begins to completely fill ice container. ■ Does the ice maker mold have...
...added to the bin? Is the freezer temperature cold enough to melt the ice if necessary. Allow 24 hours for ice production to be cleaned? ■ Has food in the freezer or refrigerator been wrapped properly? ■ Does the water contain minerals (such as sulfur)? The filter may ... the ice from "crushed" to a water supply and the supply shutoff valve is turned on the refrigerator? A filter may be installed to your cold water supply? Empty the ice container. Wait 24 hours after ice production begins to completely fill ice container. ■ Does the ice maker mold have...
Use & Care Guide
Page 9
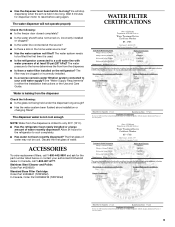
... needs to be filled the first time it is used. ■ Is the refrigerator connected to a cold water line with water pressure of water may be cool. Water is chilled to your authorized KitchenAid dealer. The water dispenser will stop dispensing when the arm is not cool enough NOTE...long enough? ■ Has the water system been flushed since installation or changing filters? See "Water Supply Requirements" in too long? Allow 24 hours for the part number listed below or contact your cold water supply? Stainless Steel Cleaner and Polish: Order Part #4396920 Standard Base Filter...
... needs to be filled the first time it is used. ■ Is the refrigerator connected to a cold water line with water pressure of water may be cool. Water is chilled to your authorized KitchenAid dealer. The water dispenser will stop dispensing when the arm is not cool enough NOTE...long enough? ■ Has the water system been flushed since installation or changing filters? See "Water Supply Requirements" in too long? Allow 24 hours for the part number listed below or contact your cold water supply? Stainless Steel Cleaner and Polish: Order Part #4396920 Standard Base Filter...
Use & Care Guide
Page 12
... ALSO HAVE OTHER RIGHTS, WHICH VARY FROM STATE TO STATE OR PROVINCE TO PROVINCE. Please keep this warranty does not apply. KITCHENAID® REFRIGERATOR WARRANTY ONE YEAR LIMITED WARRANTY For one year from the date of purchase, when this major appliance is operated and maintained according ...ready. In Canada, call 1-800-422-1230. SIXTH THROUGH TENTH YEAR LIMITED WARRANTY ON SEALED REFRIGERATION SYSTEM PARTS In the sixth through tenth years from the date of purchase, KitchenAid will pay for replacement or repair of purchase, when this major appliance is not installed in accordance...
... ALSO HAVE OTHER RIGHTS, WHICH VARY FROM STATE TO STATE OR PROVINCE TO PROVINCE. Please keep this warranty does not apply. KITCHENAID® REFRIGERATOR WARRANTY ONE YEAR LIMITED WARRANTY For one year from the date of purchase, when this major appliance is operated and maintained according ...ready. In Canada, call 1-800-422-1230. SIXTH THROUGH TENTH YEAR LIMITED WARRANTY ON SEALED REFRIGERATION SYSTEM PARTS In the sixth through tenth years from the date of purchase, KitchenAid will pay for replacement or repair of purchase, when this major appliance is not installed in accordance...
Energy Guide
Page 1
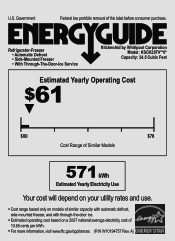
A) Refrigerator-Freezer • Automatic Defrost • Side-Mounted Freezer • With Through-The-Door-Ice Service KitchenAid by Whirlpool Corporation Model: KSCK25FV**0* Capacity: 24.5 Cubic Feet Estimated Yearly Operating Cost $61 ▼ $60 $78 Cost Range of Similar Models 571 kWh Estimated Yearly Electricity Use Your cost will depend ...
A) Refrigerator-Freezer • Automatic Defrost • Side-Mounted Freezer • With Through-The-Door-Ice Service KitchenAid by Whirlpool Corporation Model: KSCK25FV**0* Capacity: 24.5 Cubic Feet Estimated Yearly Operating Cost $61 ▼ $60 $78 Cost Range of Similar Models 571 kWh Estimated Yearly Electricity Use Your cost will depend ...


