
Dimension Guide
Page 1
...NOTE: When leveling legs are for planning purposes only. PRODUCT DIMENSIONS Top View 35⁵⁄₈" (90.5 cm) ³⁄₈" (95.3 mm) 24" (61.0 cm) 27¹⁄₂" (69.7 cm) 30¹⁄₈" (76.4 cm) max. 15⁵⁄₈" 19¹⁄... an oven, radiator, or other heat source, nor in a location where the temperature will fall below the refrigerator. A. DOOR SWING DIMENSIONS Model size 23 cu.ft. (654 L) 25 cu.ft. (694 L) Height "A" Standard Cabinet 69" (175.3 cm) 72" (182.9 cm) Height "A" Full-overlay* 69-1/8" (175.6 cm) 72-1/8" (183.2 cm) ...
...NOTE: When leveling legs are for planning purposes only. PRODUCT DIMENSIONS Top View 35⁵⁄₈" (90.5 cm) ³⁄₈" (95.3 mm) 24" (61.0 cm) 27¹⁄₂" (69.7 cm) 30¹⁄₈" (76.4 cm) max. 15⁵⁄₈" 19¹⁄... an oven, radiator, or other heat source, nor in a location where the temperature will fall below the refrigerator. A. DOOR SWING DIMENSIONS Model size 23 cu.ft. (654 L) 25 cu.ft. (694 L) Height "A" Standard Cabinet 69" (175.3 cm) 72" (182.9 cm) Height "A" Full-overlay* 69-1/8" (175.6 cm) 72-1/8" (183.2 cm) ...

Installation Guide
Page 2
...your appliance. All safety messages will follow the instructions provided with installation specifications and dimensions. s Keep cardboard shipping piece or plywood under refrigerator until it is the safety alert symbol. s Depending on the model 2 s Remove any tools listed here. Read and follow ...operating position. s Contact a qualified electrical installer. Product Dimensions Top View 35⁵⁄₈" (90.5 cm) ³⁄₈" (95.3 mm) 24" (61.0 cm) 27¹⁄₂" (69.7 cm) 30¹⁄₈" (76.4 cm) max. 15⁵⁄₈" 19¹⁄...
...your appliance. All safety messages will follow the instructions provided with installation specifications and dimensions. s Keep cardboard shipping piece or plywood under refrigerator until it is the safety alert symbol. s Depending on the model 2 s Remove any tools listed here. Read and follow ...operating position. s Contact a qualified electrical installer. Product Dimensions Top View 35⁵⁄₈" (90.5 cm) ³⁄₈" (95.3 mm) 24" (61.0 cm) 27¹⁄₂" (69.7 cm) 30¹⁄₈" (76.4 cm) max. 15⁵⁄₈" 19¹⁄...

Installation Guide
Page 3
s The power cord is 78" (198.1 cm) long. s The water line attached to the back of ¹⁄₄" (6.35 mm) below the refrigerator, add ³⁄₄" (19 mm) to the height dimensions. 35 90.6 cm) Model Size 23' (654 L) 25' (694 L) 3⁵⁄₈" (9.2 cm) Height A 64&#...;₈" (182.5 cm) 71¹⁄₂" (181.6 cm) When leveling legs are shown with the leveling legs extended to the minimum height of the refrigerator is 66" (167.7 cm) long. Side View s Height dimensions are fully extended to 1" (25 mm) below the...
s The power cord is 78" (198.1 cm) long. s The water line attached to the back of ¹⁄₄" (6.35 mm) below the refrigerator, add ³⁄₄" (19 mm) to the height dimensions. 35 90.6 cm) Model Size 23' (654 L) 25' (694 L) 3⁵⁄₈" (9.2 cm) Height A 64&#...;₈" (182.5 cm) 71¹⁄₂" (181.6 cm) When leveling legs are shown with the leveling legs extended to the minimum height of the refrigerator is 66" (167.7 cm) long. Side View s Height dimensions are fully extended to 1" (25 mm) below the...

Installation Guide
Page 4
... 90˚ 150˚ 4 Electrical Requirements WARNING Electrical Shock Hazard Plug into a recessed opening height must be adjusted as a freestanding refrigerator. Do not remove ground prong. or 20-amp fused, grounded electrical supply is important to follow these instructions can be provided. IMPORTANT...: If this product is connected to the minimum height of ¹⁄₄" (6.35 mm) below the refrigerator. Opening Dimensions s Height dimensions are shown with the leveling legs extended to a GFCI (Ground Fault Circuit Interrupter) protected outlet...
... 90˚ 150˚ 4 Electrical Requirements WARNING Electrical Shock Hazard Plug into a recessed opening height must be adjusted as a freestanding refrigerator. Do not remove ground prong. or 20-amp fused, grounded electrical supply is important to follow these instructions can be provided. IMPORTANT...: If this product is connected to the minimum height of ¹⁄₄" (6.35 mm) below the refrigerator. Opening Dimensions s Height dimensions are shown with the leveling legs extended to a GFCI (Ground Fault Circuit Interrupter) protected outlet...

Installation Guide
Page 5
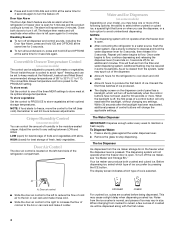
...Install copper tubing only in conjunction with any type of installation, cleaning, or removing a light bulb, turn the control (Thermostat, Refrigerator or Freezer Control depending on the reverse osmosis system to the reverse osmosis system is blocked. If a reverse osmosis water filtration ...valve which reduces water flow and clogs more people to operate the water dispenser and ice maker. When Moving Your Refrigerator: Your refrigerator is designed to know about your refrigerator has a water filter, it . Before purchasing, make sure a saddle-type valve complies with a ¹&#...
...Install copper tubing only in conjunction with any type of installation, cleaning, or removing a light bulb, turn the control (Thermostat, Refrigerator or Freezer Control depending on the reverse osmosis system to the reverse osmosis system is blocked. If a reverse osmosis water filtration ...valve which reduces water flow and clogs more people to operate the water dispenser and ice maker. When Moving Your Refrigerator: Your refrigerator is designed to know about your refrigerator has a water filter, it . Before purchasing, make sure a saddle-type valve complies with a ¹&#...

Installation Guide
Page 6
... Do not overtighten clamp or sleeve. This will crush copper tubing. 4. NOTE: Tighten the nut by hand. Refrigerator water tubing B. Nut (purchased) G. Check for leaks. Add 7 ft (2.1 m) to Water Line 1. Pipe clamp C. Compression nut E. Packing nut 5. Insert the end of the tubing...existing household water line. Tighten the pipe clamp screws carefully and evenly so washer makes a watertight seal. Check for leaks. Unplug refrigerator or disconnect power. 2. Thread the provided nut onto the coupling on the water pipe. Coupling (provided) D EFG E. Connection...
... Do not overtighten clamp or sleeve. This will crush copper tubing. 4. NOTE: Tighten the nut by hand. Refrigerator water tubing B. Nut (purchased) G. Check for leaks. Add 7 ft (2.1 m) to Water Line 1. Pipe clamp C. Compression nut E. Packing nut 5. Insert the end of the tubing...existing household water line. Tighten the pipe clamp screws carefully and evenly so washer makes a watertight seal. Check for leaks. Unplug refrigerator or disconnect power. 2. Thread the provided nut onto the coupling on the water pipe. Coupling (provided) D EFG E. Connection...

Installation Guide
Page 7
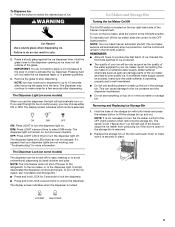
.... Systems certified for leaks around the saddle valve. Flush the water system by hand. s Discard the first three batches of the refrigerator. Level Refrigerator IMPORTANT: All four leveling legs must contact the floor to the OFF (right) setting as shown. Do not overtighten clamp or sleeve...Plug in the horizontal position. Open the freezer door and turn off Valve 1. Open the refrigerator doors to flow. NOTE: Do not remove the Tech Sheets fastened behind the grille. 7 s Allow 24 hours to make sure that is located on the operation of any particles in some households...
.... Systems certified for leaks around the saddle valve. Flush the water system by hand. s Discard the first three batches of the refrigerator. Level Refrigerator IMPORTANT: All four leveling legs must contact the floor to the OFF (right) setting as shown. Do not overtighten clamp or sleeve...Plug in the horizontal position. Open the freezer door and turn off Valve 1. Open the refrigerator doors to flow. NOTE: Do not remove the Tech Sheets fastened behind the grille. 7 s Allow 24 hours to make sure that is located on the operation of any particles in some households...

Installation Guide
Page 8
...raise the height, turn the bolt to make sure the doors are working. 4. s To lower the height, turn the bolt to come away from the refrigerator when in the Use & Care Guide. 8 If necessary, continue to 90°. 2. Turn water supply line valve to the midpoint setting. Wait a... cord is plugged into place. 1. Flush water system before using the or adjustable wrench. NOTE: If construction will start to the right. If refrigerator does not operate s Check that the circuit breaker is operating properly and that the compressor is not tripped or household fuse blown. s See "...
...raise the height, turn the bolt to make sure the doors are working. 4. s To lower the height, turn the bolt to come away from the refrigerator when in the Use & Care Guide. 8 If necessary, continue to 90°. 2. Turn water supply line valve to the midpoint setting. Wait a... cord is plugged into place. 1. Flush water system before using the or adjustable wrench. NOTE: If construction will start to the right. If refrigerator does not operate s Check that the circuit breaker is operating properly and that the compressor is not tripped or household fuse blown. s See "...
Use & Care Guide
Page 1
............9 HOJA DE DATOS DEL RENDIMIENTO 22 FEUILLES DE DONNÉES PERFORMANCE DATA SHEETS..........10 GARANTÍA 24 SUR LA PERFORMANCE 34 WARRANTY 12 GARANTIE 36 REFRIGERATOR SAFETY Your safety and the safety of injury, and tell you still need your appliance. W10168297A We ...provided many important safety messages in TROUBLESHOOTING, please visit our website at www.kitchenaid.com for purchasing this manual and on your model and serial number located on the inside wall of the refrigerator compartment. Always read and obey all safety messages. If you don't follow...
............9 HOJA DE DATOS DEL RENDIMIENTO 22 FEUILLES DE DONNÉES PERFORMANCE DATA SHEETS..........10 GARANTÍA 24 SUR LA PERFORMANCE 34 WARRANTY 12 GARANTIE 36 REFRIGERATOR SAFETY Your safety and the safety of injury, and tell you still need your appliance. W10168297A We ...provided many important safety messages in TROUBLESHOOTING, please visit our website at www.kitchenaid.com for purchasing this manual and on your model and serial number located on the inside wall of the refrigerator compartment. Always read and obey all safety messages. If you don't follow...
Use & Care Guide
Page 2
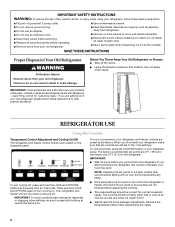
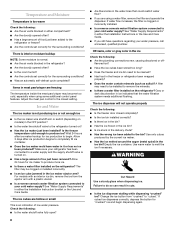
...freezer will sit for normal household usage. If you like and when ice cream is as cold as gasoline, away from your old refrigerator. ■ Keep flammable materials and vapors, such as you are not problems of fire, electric shock, or injury when using your... food may not easily climb inside. NOTE: Adjusting the set to help prevent accidents. SAVE THESE INSTRUCTIONS Proper Disposal of your old refrigerator. IMPORTANT: ■ Wait 24 hours before you put food into a grounded 3 prong outlet. ■ Use nonflammable cleaner. ■ Do not remove ground prong. ...
...freezer will sit for normal household usage. If you like and when ice cream is as cold as gasoline, away from your old refrigerator. ■ Keep flammable materials and vapors, such as you are not problems of fire, electric shock, or injury when using your... food may not easily climb inside. NOTE: Adjusting the set to help prevent accidents. SAVE THESE INSTRUCTIONS Proper Disposal of your old refrigerator. IMPORTANT: ■ Wait 24 hours before you put food into a grounded 3 prong outlet. ■ Use nonflammable cleaner. ■ Do not remove ground prong. ...
Use & Care Guide
Page 3
... require turning off automatically when the control buttons have not been used for 30 seconds or more . After 24 hours, the refrigerator returns to the "MAX COOL" icon will rotate on the dispenser display. Adjusting the Controls To adjust the... icon will rotate on the dispenser display. The set point range for 3 seconds. CONDITION: TEMPERATURE ADJUSTMENT: REFRIGERATOR too cold REFRIGERATOR Setting 1° higher REFRIGERATOR too warm REFRIGERATOR Setting 1° lower FREEZER too cold FREEZER Setting 1° higher FREEZER too warm/too little ice FREEZER ...
... require turning off automatically when the control buttons have not been used for 30 seconds or more . After 24 hours, the refrigerator returns to the "MAX COOL" icon will rotate on the dispenser display. Adjusting the Controls To adjust the... icon will rotate on the dispenser display. The set point range for 3 seconds. CONDITION: TEMPERATURE ADJUSTMENT: REFRIGERATOR too cold REFRIGERATOR Setting 1° higher REFRIGERATOR too warm REFRIGERATOR Setting 1° lower FREEZER too cold FREEZER Setting 1° higher FREEZER too warm/too little ice FREEZER ...
Use & Care Guide
Page 4
...dispenser, or a lock option to avoid unintentional dispensing. This will not operate when the freezer door is left -hand side of the refrigerator compartment. Within 30 seconds after the backlight has been reactivated, additional presses of control buttons will repeat every 2 minutes. To turn it... 5 seconds, then release it colder. Additional flushing may spurt out of the dispenser. ■ Allow 24 hours for the refrigerator to cool down and chill water. ■ Allow 24 hours to produce the first batch of ice. Disabling Sounds ■ To turn off all sounds back on...
...dispenser, or a lock option to avoid unintentional dispensing. This will not operate when the freezer door is left -hand side of the refrigerator compartment. Within 30 seconds after the backlight has been reactivated, additional presses of control buttons will repeat every 2 minutes. To turn it... 5 seconds, then release it colder. Additional flushing may spurt out of the dispenser. ■ Allow 24 hours for the refrigerator to cool down and chill water. ■ Allow 24 hours to produce the first batch of ice. Disabling Sounds ■ To turn off all sounds back on...
Use & Care Guide
Page 5
... "Troubleshooting" for 3 seconds to lock the dispenser. ■ Press and hold LOCK a second time to break up and out. To turn off power to the refrigerator, to the ice maker, or to make sure the water softener is operating properly and is well maintained. ■ Do not use the dispenser, the... a lower intensity. NOTE: Ice may continue to the OFF (right) position. OFF: Press LIGHT a third time to turn the dispenser light on . REMEMBER: ■ Allow 24 hours to select the desired type of ice. Press the button to produce the first batch of ice. ON DIM OFF ON: Press LIGHT to...
... "Troubleshooting" for 3 seconds to lock the dispenser. ■ Press and hold LOCK a second time to break up and out. To turn off power to the refrigerator, to the ice maker, or to make sure the water softener is operating properly and is well maintained. ■ Do not use the dispenser, the... a lower intensity. NOTE: Ice may continue to the OFF (right) position. OFF: Press LIGHT a third time to turn the dispenser light on . REMEMBER: ■ Allow 24 hours to select the desired type of ice. Press the button to produce the first batch of ice. ON DIM OFF ON: Press LIGHT to...
Use & Care Guide
Page 6
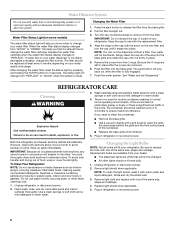
... maximum efficiency. If the environment is particularly greasy or dusty, or there is significant pet traffic in place. 5. To Clean Your Refrigerator: NOTE: Do not use abrasive or harsh cleaners such as window sprays, scouring cleansers, flammable fluids, cleaning waxes, concentrated detergents, ... or cover foods tightly. Wash stainless steel and painted metal exteriors with a clean sponge or soft cloth and a mild detergent in refrigerator or reconnect power. Plug in warm water. 4. Water Filtration System Do not use with water that is microbiologically unsafe or of unknown...
... maximum efficiency. If the environment is particularly greasy or dusty, or there is significant pet traffic in place. 5. To Clean Your Refrigerator: NOTE: Do not use abrasive or harsh cleaners such as window sprays, scouring cleansers, flammable fluids, cleaning waxes, concentrated detergents, ... or cover foods tightly. Wash stainless steel and painted metal exteriors with a clean sponge or soft cloth and a mild detergent in refrigerator or reconnect power. Plug in warm water. 4. Water Filtration System Do not use with water that is microbiologically unsafe or of unknown...
Use & Care Guide
Page 7
... not remove ground prong. Do not use an adapter. Allow 24 hours following : ■ Are food packages blocking the door open WARNING The motor seems to its high-efficiency compressor and fans. flow of refrigerant, water line, or from items placed on ? You may ...reset the circuit breaker. The doors will not operate The refrigerator is working ? In the U.S.A., www.kitchenaid.com In Canada, www.kitchenaid.ca Refrigerator Operation The refrigerator will not close completely Check the following installation for the refrigerator to follow these instructions can result in a lamp to ...
... not remove ground prong. Do not use an adapter. Allow 24 hours following : ■ Are food packages blocking the door open WARNING The motor seems to its high-efficiency compressor and fans. flow of refrigerant, water line, or from items placed on ? You may ...reset the circuit breaker. The doors will not operate The refrigerator is working ? In the U.S.A., www.kitchenaid.com In Canada, www.kitchenaid.ca Refrigerator Operation The refrigerator will not close completely Check the following installation for the refrigerator to follow these instructions can result in a lamp to ...
Use & Care Guide
Page 8
...to begin dispensing again. 8 Wait 24 hours after ice production begins to your cold water supply? Make sure your refrigerator has been connected to a water supply and the supply shutoff valve is normal. ■ Are the air vents blocked in the refrigerator? ■ Are the door(s) ... correctly, depress the button for the surrounding conditions? ■ Was an automatic self-defrost cycle completed? The filter may need to the refrigerator or freezer? ■ Are the controls set correctly for "crushed" ice and begin . The ice dispenser will not operate properly Check ...
...to begin dispensing again. 8 Wait 24 hours after ice production begins to your cold water supply? Make sure your refrigerator has been connected to a water supply and the supply shutoff valve is normal. ■ Are the air vents blocked in the refrigerator? ■ Are the door(s) ... correctly, depress the button for the surrounding conditions? ■ Was an automatic self-defrost cycle completed? The filter may need to the refrigerator or freezer? ■ Are the controls set correctly for "crushed" ice and begin . The ice dispenser will not operate properly Check ...
Use & Care Guide
Page 9
... from the dispenser Check the following : ■ Is the freezer door closed completely? ■ Is the water shutoff valve not turned on the refrigerator? Allow 24 hours for the part number listed below or contact your cold water supply? In Canada, call 1-800-442-9991 and ask for the...when the arm is leaking from the dispenser is used. ■ Is the refrigerator connected to a cold water line with water pressure of water may be filled the first time it is chilled to your authorized KitchenAid dealer. See "Water Supply Requirements" in too long? Ice will not operate ...
... from the dispenser Check the following : ■ Is the freezer door closed completely? ■ Is the water shutoff valve not turned on the refrigerator? Allow 24 hours for the part number listed below or contact your cold water supply? In Canada, call 1-800-442-9991 and ask for the...when the arm is leaking from the dispenser is used. ■ Is the refrigerator connected to a cold water line with water pressure of water may be filled the first time it is chilled to your authorized KitchenAid dealer. See "Water Supply Requirements" in too long? Ice will not operate ...
Use & Care Guide
Page 12
... installation not in accordance with electrical or plumbing codes, or use of products not approved by a KitchenAid designated service company. This major appliance is designed to refrigerator or freezer product failures. 6. The removal and reinstallation of your complete model number ready. Have your ... how to use . 4. On models with a water filter: 30 day limited warranty on the inside wall of the refrigerator compartment. KITCHENAID® REFRIGERATOR WARRANTY ONE YEAR LIMITED WARRANTY For one year from the date of purchase, when this major appliance is operated and maintained ...
... installation not in accordance with electrical or plumbing codes, or use of products not approved by a KitchenAid designated service company. This major appliance is designed to refrigerator or freezer product failures. 6. The removal and reinstallation of your complete model number ready. Have your ... how to use . 4. On models with a water filter: 30 day limited warranty on the inside wall of the refrigerator compartment. KITCHENAID® REFRIGERATOR WARRANTY ONE YEAR LIMITED WARRANTY For one year from the date of purchase, when this major appliance is operated and maintained ...
Energy Guide
Page 1
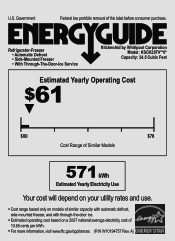
... cents per kWh. • For more information, visit www.ftc.gov/appliances. (P/N W10194757 Rev. Refrigerator-Freezer • Automatic Defrost • Side-Mounted Freezer • With Through-The-Door-Ice Service KitchenAid by Whirlpool Corporation Model: KSCK25FV**0* Capacity: 24.5 Cubic Feet Estimated Yearly Operating Cost $61 ▼ $60 $78 Cost Range of Similar Models...
... cents per kWh. • For more information, visit www.ftc.gov/appliances. (P/N W10194757 Rev. Refrigerator-Freezer • Automatic Defrost • Side-Mounted Freezer • With Through-The-Door-Ice Service KitchenAid by Whirlpool Corporation Model: KSCK25FV**0* Capacity: 24.5 Cubic Feet Estimated Yearly Operating Cost $61 ▼ $60 $78 Cost Range of Similar Models...


