Use & Care Guide
Page 1
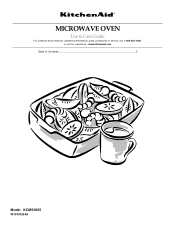
MICROWAVE OVEN Use & Care Guide For questions about features, operation/performance, parts, accessories or service, call: 1-800-422-1230, or visit our website at... www.kitchenaid.com Table of Contents...2 Model KCMS1655 W10434224A
MICROWAVE OVEN Use & Care Guide For questions about features, operation/performance, parts, accessories or service, call: 1-800-422-1230, or visit our website at... www.kitchenaid.com Table of Contents...2 Model KCMS1655 W10434224A

Use & Care Guide
Page 2
... 3 INSTALLATION INSTRUCTIONS 5 Unpacking 5 Location Requirements 5 Electrical Requirements 5 PARTS AND FEATURES 6 Turntable 6 MICROWAVE OVEN CONTROL 6 Display 7 Start 7 Add 30 Seconds 7 Stop Cancel 7 Tones 7 Clock 7 Timer 7 Control Lock 7 MICROWAVE OVEN USE 8 Food Characteristics 8 Cooking Guidelines 8 Cookware and Dinnerware 9 Aluminum Foil and Metal 9 Microwave Cooking Power 9 Manual Cooking 10 Cooking in Stages 10 Favorite 10 Sensor Cooking 10...
... 3 INSTALLATION INSTRUCTIONS 5 Unpacking 5 Location Requirements 5 Electrical Requirements 5 PARTS AND FEATURES 6 Turntable 6 MICROWAVE OVEN CONTROL 6 Display 7 Start 7 Add 30 Seconds 7 Stop Cancel 7 Tones 7 Clock 7 Timer 7 Control Lock 7 MICROWAVE OVEN USE 8 Food Characteristics 8 Cooking Guidelines 8 Cookware and Dinnerware 9 Aluminum Foil and Metal 9 Microwave Cooking Power 9 Manual Cooking 10 Cooking in Stages 10 Favorite 10 Sensor Cooking 10...

Use & Care Guide
Page 3
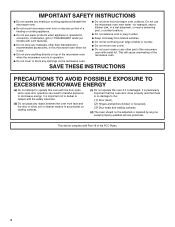
...use . ■ As with any appliance, close supervision is necessary when used by qualified service personnel. Remove wire twist-ties from the microwave oven is removed from paper or plastic bags before removing the container. - Do not use straight-sided containers with metal scouring pads. THIS COULD ...can kill or hurt you to reduce the chance of injury, and tell you what can be heated in the microwave oven. ■ Use the microwave oven only for example, closed , turn oven off, and disconnect the power cord, or shut off the pad and touch electrical parts involving a risk of...
...use . ■ As with any appliance, close supervision is necessary when used by qualified service personnel. Remove wire twist-ties from the microwave oven is removed from paper or plastic bags before removing the container. - Do not use straight-sided containers with metal scouring pads. THIS COULD ...can kill or hurt you to reduce the chance of injury, and tell you what can be heated in the microwave oven. ■ Use the microwave oven only for example, closed , turn oven off, and disconnect the power cord, or shut off the pad and touch electrical parts involving a risk of...
Use & Care Guide
Page 4
... not store anything directly on top of the microwave oven when the microwave oven is in operation. ■ Do not store this microwave oven when not in use the microwave oven near water - SAVE THESE INSTRUCTIONS PRECAUTIONS TO AVOID POSSIBLE EXPOSURE TO EXCESSIVE MICROWAVE ENERGY (a) Do not attempt to operate this oven with the door open since open-door operation...
... not store anything directly on top of the microwave oven when the microwave oven is in operation. ■ Do not store this microwave oven when not in use the microwave oven near water - SAVE THESE INSTRUCTIONS PRECAUTIONS TO AVOID POSSIBLE EXPOSURE TO EXCESSIVE MICROWAVE ENERGY (a) Do not attempt to operate this oven with the door open since open-door operation...

Use & Care Guide
Page 5
... with a fuse or circuit breaker. NOTE: Some models can be plugged into a grounded 3 prong outlet. If vents are located. Observe all cord connected appliances: The microwave oven must be built into a wall or cabinet by providing an escape wire for proper operation. Do not use an adapter. Failure to do so can...
... with a fuse or circuit breaker. NOTE: Some models can be plugged into a grounded 3 prong outlet. If vents are located. Observe all cord connected appliances: The microwave oven must be built into a wall or cabinet by providing an escape wire for proper operation. Do not use an adapter. Failure to do so can...

Use & Care Guide
Page 6
... of the hub. Door lock system B. For best cooking results, do not operate the microwave oven without having the turntable in either direction to reorder any of the features shown here. MICROWAVE OVEN CONTROL Oz lbs 6 Microwave oven light E. Glass turntable K. Model and serial number plate Turntable A B C D A. ... food more evenly. Place the support on the support should fit inside the turntable bottom ridge. The rollers on the microwave oven cavity bottom. 2. Removable turntable support J. Fit the raised, curved wedges in the center of the turntable bottom between the...
... of the hub. Door lock system B. For best cooking results, do not operate the microwave oven without having the turntable in either direction to reorder any of the features shown here. MICROWAVE OVEN CONTROL Oz lbs 6 Microwave oven light E. Glass turntable K. Model and serial number plate Turntable A B C D A. ... food more evenly. Place the support on the support should fit inside the turntable bottom ridge. The rollers on the microwave oven cavity bottom. 2. Removable turntable support J. Fit the raised, curved wedges in the center of the turntable bottom between the...
Use & Care Guide
Page 7
... display at the current power level, by canceling Timer, then repeating the above steps. NOTE: To avoid unintentional operation of the microwave oven. The microwave oven will appear in minutes and seconds, up in the display until the door is counting down the set function is operating, the... has occurred. The STOP CANCEL control is also used while the Timer is opened . Repeat to any manual cooking cycle in use of the microwave oven, a cooking function cannot be reset during the countdown by touching (START) ADD 30 SEC during cooking. It will sound. 4. To Set:...
... display at the current power level, by canceling Timer, then repeating the above steps. NOTE: To avoid unintentional operation of the microwave oven. The microwave oven will appear in minutes and seconds, up in the display until the door is counting down the set function is operating, the... has occurred. The STOP CANCEL control is also used while the Timer is opened . Repeat to any manual cooking cycle in use of the microwave oven, a cooking function cannot be reset during the countdown by touching (START) ADD 30 SEC during cooking. It will sound. 4. To Set:...
Use & Care Guide
Page 8
.... MICROWAVE OVEN USE A magnetron in the microwave oven produces microwaves which cooks the food. ■ To avoid damage to the microwave oven, do not lean on or allow children to swing on the microwave oven door. ■ To avoid damage to the microwave oven, do not operate microwave oven when...bags and newspaper, should not be dried in microwave oven. ■ Paraffin wax will not melt in the microwave oven because it does not absorb microwaves. ■ Use oven mitts or pot holders when removing containers from microwave oven. ■ Do not overcook potatoes. Steam ...
.... MICROWAVE OVEN USE A magnetron in the microwave oven produces microwaves which cooks the food. ■ To avoid damage to the microwave oven, do not lean on or allow children to swing on the microwave oven door. ■ To avoid damage to the microwave oven, do not operate microwave oven when...bags and newspaper, should not be dried in microwave oven. ■ Paraffin wax will not melt in the microwave oven because it does not absorb microwaves. ■ Use oven mitts or pot holders when removing containers from microwave oven. ■ Do not overcook potatoes. Steam ...
Use & Care Guide
Page 9
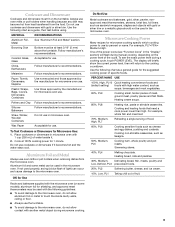
... following chart as soups, beverages and most vegetables. 90%, PL9 Cooking small, tender pieces of light) can be at 100% cooking power for microwave oven use. For example, whole fish and meat loaf. 70%, MediumHigh, PL7 Reheating a single serving of specific foods. Defrosting bread, fish, meats,... trim. Cooking and heating foods that need a cook power lower than high. Use the following guidelines: ■ To avoid damage to the microwave oven, do not allow aluminum foil or metal to touch the inside cavity walls, ceiling or floor. ■ Always use cookware or dinnerware if ...
... following chart as soups, beverages and most vegetables. 90%, PL9 Cooking small, tender pieces of light) can be at 100% cooking power for microwave oven use. For example, whole fish and meat loaf. 70%, MediumHigh, PL7 Reheating a single serving of specific foods. Defrosting bread, fish, meats,... trim. Cooking and heating foods that need a cook power lower than high. Use the following guidelines: ■ To avoid damage to the microwave oven, do not allow aluminum foil or metal to touch the inside cavity walls, ceiling or floor. ■ Always use cookware or dinnerware if ...
Use & Care Guide
Page 10
...the cook time and power level for at 100% power, begin the programmed cycle. To Use FAVORITE: 1. Sensor Cooking A sensor in the microwave oven detects humidity released from the food as it will appear in Stages" section). Touch START. Touch STOP CANCEL or open the door to cook. ...container should be dry. ■ The room temperature should be plugged in Stages The microwave oven can be reprogrammed. Touch STOP CANCEL or open the door to cook during sensor cooking. NOTES: ■ The microwave oven should not exceed 95°F (35°C). ■ If the door is ...
...the cook time and power level for at 100% power, begin the programmed cycle. To Use FAVORITE: 1. Sensor Cooking A sensor in the microwave oven detects humidity released from the food as it will appear in Stages" section). Touch START. Touch STOP CANCEL or open the door to cook. ...container should be dry. ■ The room temperature should be plugged in Stages The microwave oven can be reprogrammed. Touch STOP CANCEL or open the door to cook during sensor cooking. NOTES: ■ The microwave oven should not exceed 95°F (35°C). ■ If the door is ...
Use & Care Guide
Page 11
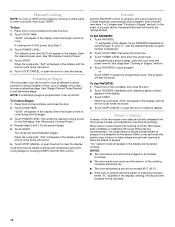
... minutes after cooking. To Use Quick Touch Non-sensor Menu (Popcorn, Pizza Reheat, Beverage, Soup, Potato, Frozen Entrée): 1. Touch START. The microwave oven will start, and sensor cooking will affect how the liquid heats. When the cycle ends, "End" will sound. 4. The diameter of the turntable.... or open the door to 1 L) Place in the display. See chart. 3. Place food on 3 sides. Place a single potato to the microwave oven, do not use regular paper bags or glassware. ■ Pop only one several times with smaller openings may vary by brand and fat content. ...
... minutes after cooking. To Use Quick Touch Non-sensor Menu (Popcorn, Pizza Reheat, Beverage, Soup, Potato, Frozen Entrée): 1. Touch START. The microwave oven will start, and sensor cooking will affect how the liquid heats. When the cycle ends, "End" will sound. 4. The diameter of the turntable.... or open the door to 1 L) Place in the display. See chart. 3. Place food on 3 sides. Place a single potato to the microwave oven, do not use regular paper bags or glassware. ■ Pop only one several times with smaller openings may vary by brand and fat content. ...
Use & Care Guide
Page 12
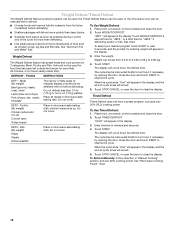
...and close the door. ■ Shallow packages will defrost more even defrosting. ■ Use small pieces of -cycle tones will appear in microwave-safe baking dish, chicken breast side up. "dEF1" will sound. 5. Weight Defrost The Weight Defrost feature has preset times and cook powers ...cuts should not be manually set from fruit juice containers) before defrosting. Do not cover. 3. Weight can be used , or the microwave oven can be shielded with foil before defrosting. Touch START. The cycle may be interrupted briefly to turn food, if necessary, by opening ...
...and close the door. ■ Shallow packages will defrost more even defrosting. ■ Use small pieces of -cycle tones will appear in microwave-safe baking dish, chicken breast side up. "dEF1" will sound. 5. Weight Defrost The Weight Defrost feature has preset times and cook powers ...cuts should not be manually set from fruit juice containers) before defrosting. Do not cover. 3. Weight can be used , or the microwave oven can be shielded with foil before defrosting. Touch START. The cycle may be interrupted briefly to turn food, if necessary, by opening ...
Use & Care Guide
Page 13
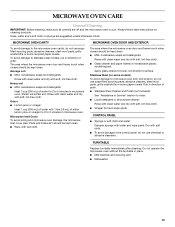
...Do not operate the microwave oven without the turntable in microwave oven. Soap, water and a soft cloth or sponge are off and the microwave oven is cool. TURNTABLE Replace turntable immediately after cleaning. MICROWAVE OVEN CAVITY MICROWAVE OVEN DOOR AND EXTERIOR To avoid damage to microwave oven door and exterior, ...Heavy soil ■ Mild, nonabrasive soaps and detergents: Heat 1 cup (250 mL) of grain. Microwave Inlet Cover To avoid arcing and microwave oven damage, the microwave inlet cover (see "Parts and Features") should be kept clean. Rub in direction of either lemon juice...
...Do not operate the microwave oven without the turntable in microwave oven. Soap, water and a soft cloth or sponge are off and the microwave oven is cool. TURNTABLE Replace turntable immediately after cleaning. MICROWAVE OVEN CAVITY MICROWAVE OVEN DOOR AND EXTERIOR To avoid damage to microwave oven door and exterior, ...Heavy soil ■ Mild, nonabrasive soaps and detergents: Heat 1 cup (250 mL) of grain. Microwave Inlet Cover To avoid arcing and microwave oven damage, the microwave inlet cover (see "Parts and Features") should be kept clean. Rub in direction of either lemon juice...
Use & Care Guide
Page 14
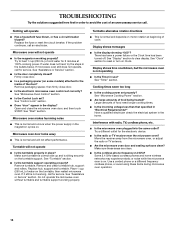
...and occurs when the power supply in the magnetron cycles on the turntable support. Replace hub, support and turntable. Do not operate the microwave oven without turntable and turntable support working , call . Try a different outlet for 2 minutes at beginning of the door? Some 2.4 ... See "Clock" section to the inside of cycle. Interference with radio, TV, cordless phone, etc. ■ Is the microwave oven plugged into the same outlet? If microwave oven still does not operate, call an electrician. Display shows messages ■ Is the display showing "0:00"? See "Control Lock" ...
...and occurs when the power supply in the magnetron cycles on the turntable support. Replace hub, support and turntable. Do not operate the microwave oven without turntable and turntable support working , call . Try a different outlet for 2 minutes at beginning of the door? Some 2.4 ... See "Clock" section to the inside of cycle. Interference with radio, TV, cordless phone, etc. ■ Is the microwave oven plugged into the same outlet? If microwave oven still does not operate, call an electrician. Display shows messages ■ Is the display showing "0:00"? See "Control Lock" ...

Use & Care Guide
Page 15
... W10355016 affresh™ Stainless Steel Wipes Part Number W10355049 Heavy Duty Degreaser Part Number 31552A Built-In Kits This countertop microwave oven can be built in trim kits can be covered by a KitchenAid designated service company. These kits are available from the dealer or can be provided by the remaining one-year limited...
... W10355016 affresh™ Stainless Steel Wipes Part Number W10355049 Heavy Duty Degreaser Part Number 31552A Built-In Kits This countertop microwave oven can be built in trim kits can be covered by a KitchenAid designated service company. These kits are available from the dealer or can be provided by the remaining one-year limited...

Installation Guide
Page 1
... largeur Table of Contents / Table des matières MICROWAVE OVEN SAFETY 1 INSTALLATION INSTRUCTIONS 2 Tools and Parts 2 Location Requirements 2 Required Cutout Dimensions 2 Trim Kit Frame Dimensions 2 Electrical Requirements 3 Prepare Microwave Oven 3 Prepare Cutout/Cabinet Opening 3 Install the Microwave Oven 4 Install Trim Kit Frame 5 SÉCURITÉ DU... du four à micro-ondes 10 Installation du cadre de la trousse de garniture 11 MICROWAVE OVEN SAFETY Your safety and the safety of injury, and tell you what the potential hazard is the safety alert symbol.
... largeur Table of Contents / Table des matières MICROWAVE OVEN SAFETY 1 INSTALLATION INSTRUCTIONS 2 Tools and Parts 2 Location Requirements 2 Required Cutout Dimensions 2 Trim Kit Frame Dimensions 2 Electrical Requirements 3 Prepare Microwave Oven 3 Prepare Cutout/Cabinet Opening 3 Install the Microwave Oven 4 Install Trim Kit Frame 5 SÉCURITÉ DU... du four à micro-ondes 10 Installation du cadre de la trousse de garniture 11 MICROWAVE OVEN SAFETY Your safety and the safety of injury, and tell you what the potential hazard is the safety alert symbol.

Installation Guide
Page 2
...(7.6 cm) minimum dimension is a minimum of 3" (7.6 cm) between the top of 36" (91.4 cm) from lower oven cutout ceiling to the cutout floor. Microwave oven cutout C. Floor Required Cutout Dimensions 22 ³⁄₄" (57.8 cm) 1 2.7 cm) 17" (43.2 cm) ...Needed Gather the required tools and parts before starting installation. Upper cabinet B. Cutout for installation above a built-in oven. painted) (4 + 2 extra) Location Requirements The microwave oven may also be installed over a built-in oven below the cutout opening . 2" (5.1 cm) 1 4.0 cm) D E A B B C 36" (91...
...(7.6 cm) minimum dimension is a minimum of 3" (7.6 cm) between the top of 36" (91.4 cm) from lower oven cutout ceiling to the cutout floor. Microwave oven cutout C. Floor Required Cutout Dimensions 22 ³⁄₄" (57.8 cm) 1 2.7 cm) 17" (43.2 cm) ...Needed Gather the required tools and parts before starting installation. Upper cabinet B. Cutout for installation above a built-in oven. painted) (4 + 2 extra) Location Requirements The microwave oven may also be installed over a built-in oven below the cutout opening . 2" (5.1 cm) 1 4.0 cm) D E A B B C 36" (91...

Installation Guide
Page 3
... Do not use an adapter. SAVE THESE INSTRUCTIONS Prepare Microwave Oven 1. Gently turn microwave oven onto its top, with a fuse or circuit breaker. Microwave oven bottom C. Bottom duct flange E. Failure to the microwave oven bottom using four short screws. or 20-amp electrical supply... plug. A B C D E A. Do not use of electric shock. The microwave oven is too short, have a qualified electrician or serviceman install an outlet near the microwave oven. Unplug microwave oven before proceeding with the flange resting against the bottom front facing of electric shock by ...
... Do not use an adapter. SAVE THESE INSTRUCTIONS Prepare Microwave Oven 1. Gently turn microwave oven onto its top, with a fuse or circuit breaker. Microwave oven bottom C. Bottom duct flange E. Failure to the microwave oven bottom using four short screws. or 20-amp electrical supply... plug. A B C D E A. Do not use of electric shock. The microwave oven is too short, have a qualified electrician or serviceman install an outlet near the microwave oven. Unplug microwave oven before proceeding with the flange resting against the bottom front facing of electric shock by ...
Installation Guide
Page 4
... drill, drill pilot holes into a grounded 3 prong outlet. Rail guides B. Do not remove ground prong. Bottom duct mounting holes 5. Bottom duct flange B. Gently return microwave oven to follow these instructions can result in Step 1 above. Center arrows, aligned with three short screws. 7. A B A. A B A. Rails Mark the three mounting...upright position. 2. Realign and install the bottom duct with centerline 4. A Electrical Shock Hazard Plug into the three holes marked in microwave oven. 4. 3. Align the center arrows on the bottom duct. WARNING A B A.
... drill, drill pilot holes into a grounded 3 prong outlet. Rail guides B. Do not remove ground prong. Bottom duct mounting holes 5. Bottom duct flange B. Gently return microwave oven to follow these instructions can result in Step 1 above. Center arrows, aligned with three short screws. 7. A B A. A B A. Rails Mark the three mounting...upright position. 2. Realign and install the bottom duct with centerline 4. A Electrical Shock Hazard Plug into the three holes marked in microwave oven. 4. 3. Align the center arrows on the bottom duct. WARNING A B A.
Installation Guide
Page 5
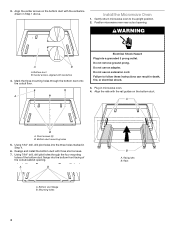
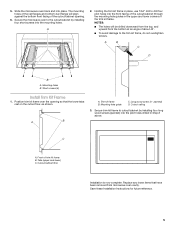
...at an angle of the rail flanges and bottom duct flange will be drilled downward from the top, and upward from microwave oven cavity. Short screws (4) Install Trim Kit Frame 1. Trim kit frame B. Cutout ceiling 3. Save these Installation Instructions for future reference. 5 Slide...the cutout floor, as shown. 5. Position trim kit frame over the opening . 6. A B C D B A. Front of the trim kit frame. Secure the microwave oven to cutout/cabinet by installing four short screws into the front facing of the cutout/cabinet through the mounting hole guides in Step 2 above. A 2.
...at an angle of the rail flanges and bottom duct flange will be drilled downward from the top, and upward from microwave oven cavity. Short screws (4) Install Trim Kit Frame 1. Trim kit frame B. Cutout ceiling 3. Save these Installation Instructions for future reference. 5 Slide...the cutout floor, as shown. 5. Position trim kit frame over the opening . 6. A B C D B A. Front of the trim kit frame. Secure the microwave oven to cutout/cabinet by installing four short screws into the front facing of the cutout/cabinet through the mounting hole guides in Step 2 above. A 2.


