Use & Care Guide
Page 1
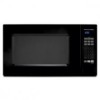
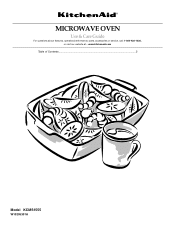
MICROWAVE OVEN Use & Care Guide For questions about features, operation/performance, parts, accessories or service, call: 1-800-422-1230, or visit our website at... www.kitchenaid.com Table of Contents...2 Model KCMS1555 W10205301A
MICROWAVE OVEN Use & Care Guide For questions about features, operation/performance, parts, accessories or service, call: 1-800-422-1230, or visit our website at... www.kitchenaid.com Table of Contents...2 Model KCMS1555 W10205301A

Use & Care Guide
Page 2
... 6 Turntable 6 MICROWAVE OVEN CONTROL 6 Display 6 Start 7 Add A Minute 7 Off 7 Clock 7 Tones 7 Timer 7 Control Lock 7 Options 7 MICROWAVE OVEN USE 8 Food Characteristics 8 Cooking Guidelines 8 Cookware and Dinnerware 8 Aluminum Foil and Metal 9 Microwave Cooking Power 9 Manual Cooking 9 Cooking in Stages 10 Custom Cooking 10 Custom Defrosting 10 Sensor Cooking 11 Sensor Cook 11 Sensor Popcorn 12 Sensor Reheat 12 Keep Warm 12 MICROWAVE OVEN CARE 13 General Cleaning 13 TROUBLESHOOTING 14 ASSISTANCE OR SERVICE 15 Replacement Parts 15 Built-In Kits 15 WARRANTY 16...
... 6 Turntable 6 MICROWAVE OVEN CONTROL 6 Display 6 Start 7 Add A Minute 7 Off 7 Clock 7 Tones 7 Timer 7 Control Lock 7 Options 7 MICROWAVE OVEN USE 8 Food Characteristics 8 Cooking Guidelines 8 Cookware and Dinnerware 8 Aluminum Foil and Metal 9 Microwave Cooking Power 9 Manual Cooking 9 Cooking in Stages 10 Custom Cooking 10 Custom Defrosting 10 Sensor Cooking 11 Sensor Cook 11 Sensor Popcorn 12 Sensor Reheat 12 Keep Warm 12 MICROWAVE OVEN CARE 13 General Cleaning 13 TROUBLESHOOTING 14 ASSISTANCE OR SERVICE 15 Replacement Parts 15 Built-In Kits 15 WARRANTY 16...

Use & Care Guide
Page 3
... food. Do not overheat the liquid. - After heating, allow the container to stand in the microwave oven for example, closed , turn oven off, and disconnect the power cord, or shut off the pad and touch electrical parts involving a risk of electric shock. Use extreme care when inserting a spoon or other combustible materials are able to facilitate cooking. - All safety messages will follow instructions. This type of oven...
... food. Do not overheat the liquid. - After heating, allow the container to stand in the microwave oven for example, closed , turn oven off, and disconnect the power cord, or shut off the pad and touch electrical parts involving a risk of electric shock. Use extreme care when inserting a spoon or other combustible materials are able to facilitate cooking. - All safety messages will follow instructions. This type of oven...
Use & Care Guide
Page 4
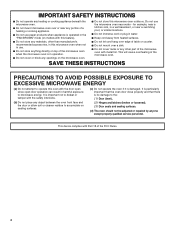
... INSTRUCTIONS ■ Do not operate any heating or cooking appliance beneath the microwave oven. ■ Do not mount microwave oven over a sink. ■ Do not cover racks or any other part of a heating or cooking appliance. ■ Do not use paper products when appliance is no damage to the: (1) Door (bent), (2) Hinges and latches (broken or loosened), (3) Door seals and sealing surfaces. (d) The oven should not be adjusted or repaired...
... INSTRUCTIONS ■ Do not operate any heating or cooking appliance beneath the microwave oven. ■ Do not mount microwave oven over a sink. ■ Do not cover racks or any other part of a heating or cooking appliance. ■ Do not use paper products when appliance is no damage to the: (1) Door (bent), (2) Hinges and latches (broken or loosened), (3) Door seals and sealing surfaces. (d) The oven should not be adjusted or repaired...
Use & Care Guide
Page 5
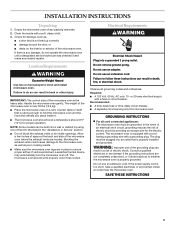
... use an adapter. IMPORTANT: The control side of the trim kits listed in the "Assistance or Service" section. ■ Do not block the exhaust vents or air intake openings. If vents are located. Check for the electric current. Recommended: ■ A time-delay fuse or time-delay circuit breaker. ■ A separate circuit serving only this microwave oven. The plug must be built into a grounded 3 prong outlet. Clean the inside it. ■ The microwave oven should work...
... use an adapter. IMPORTANT: The control side of the trim kits listed in the "Assistance or Service" section. ■ Do not block the exhaust vents or air intake openings. If vents are located. Check for the electric current. Recommended: ■ A time-delay fuse or time-delay circuit breaker. ■ A separate circuit serving only this microwave oven. The plug must be built into a grounded 3 prong outlet. Clean the inside it. ■ The microwave oven should work...

Use & Care Guide
Page 6
... help cook food more evenly. Glass turntable H. Door open push button Turntable A B C D A. Turntable B. Fit the raised, curved lines in the center of the turntable bottom between the three spokes of the parts. Shaft The turntable can rotate in either direction to the microwave oven, ":" will appear in use , the display shows the time of day (if the clock is set) or Timer countdown. Place the support on the support. Control panel H I . Cooking guide label I F. Metal shielded window B. Door lock...
... help cook food more evenly. Glass turntable H. Door open push button Turntable A B C D A. Turntable B. Fit the raised, curved lines in the center of the turntable bottom between the three spokes of the parts. Shaft The turntable can rotate in either direction to the microwave oven, ":" will appear in use , the display shows the time of day (if the clock is set) or Timer countdown. Place the support on the support. Control panel H I . Cooking guide label I F. Metal shielded window B. Door lock...
Use & Care Guide
Page 7
... non-sensor cooking is opened. Clock This is touched. indicator (no indicator for 1 minute after the door is closed or OFF is a standard 12-hour clock (12:00-11:59), with "P" as reminder to see the Timer countdown. Touch START. Two tones will sound, and the display will not erase the time of cook time. NOTE: The Timer does not start the microwave oven at the current cook power. To Lock/Unlock Control: Touch...
... non-sensor cooking is opened. Clock This is touched. indicator (no indicator for 1 minute after the door is closed or OFF is a standard 12-hour clock (12:00-11:59), with "P" as reminder to see the Timer countdown. Touch START. Two tones will sound, and the display will not erase the time of cook time. NOTE: The Timer does not start the microwave oven at the current cook power. To Lock/Unlock Control: Touch...

Use & Care Guide
Page 8
... will not melt in the microwave oven because it does not absorb microwaves. ■ Use oven mitts or pot holders when removing containers from outside to the food. At the end of standing time depends on the turntable. Steam buildup in several items of a light, porous food, such as a guide, then test before using. Food Characteristics When microwave cooking, the amount, size and shape, starting temperature, composition and density...
... will not melt in the microwave oven because it does not absorb microwaves. ■ Use oven mitts or pot holders when removing containers from outside to the food. At the end of standing time depends on the turntable. Steam buildup in several items of a light, porous food, such as a guide, then test before using. Food Characteristics When microwave cooking, the amount, size and shape, starting temperature, composition and density...
Use & Care Guide
Page 9
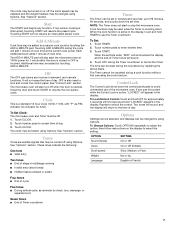
... light) can be used in the microwave oven. Cook at 100% cooking power for Microwave Use: 1. Touch START. Aluminum Foil and Metal Always use . Microwave Cooking Power Many recipes for microwave cooking specify which cooking power to clear the display. Simmering stews. 40% Melting chocolate. Manual Cooking To Use: 1. Heating cream soups. 80% Heating rice, pasta or stirrable casseroles. Aluminum foil and some models), aluminum foil for microwave oven use oven mitts or pot holders when removing dishes from the microwave oven. See "Microwave Cooking Power...
... light) can be used in the microwave oven. Cook at 100% cooking power for Microwave Use: 1. Touch START. Aluminum Foil and Metal Always use . Microwave Cooking Power Many recipes for microwave cooking specify which cooking power to clear the display. Simmering stews. 40% Melting chocolate. Manual Cooking To Use: 1. Heating cream soups. 80% Heating rice, pasta or stirrable casseroles. Aluminum foil and some models), aluminum foil for microwave oven use oven mitts or pot holders when removing dishes from the microwave oven. See "Microwave Cooking Power...
Use & Care Guide
Page 10
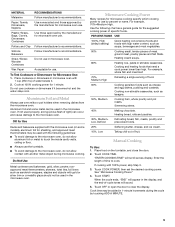
... and cut up to 2 stages. Cooking in Stages The microwave oven can be set to defrost. ■ Unwrap foods and remove lids (for example, from fruit juice containers) before defrosting. Touch OFF or open the door to cook during the cycling stage by touching ADD A MINUTE. Cook time may heat faster. Fresh Roll/Muffin 1-6 pieces, 2 oz (57 g) each**/ (prebaked) Place on the turntable, and close the door. 2. The display will...
... and cut up to 2 stages. Cooking in Stages The microwave oven can be set to defrost. ■ Unwrap foods and remove lids (for example, from fruit juice containers) before defrosting. Touch OFF or open the door to cook during the cycling stage by touching ADD A MINUTE. Cook time may heat faster. Fresh Roll/Muffin 1-6 pieces, 2 oz (57 g) each**/ (prebaked) Place on the turntable, and close the door. 2. The display will...
Use & Care Guide
Page 11
... the door. 2. Weight can be detected by reminder tones. 5. FOOD QUANTITY/INSTRUCTIONS Frozen Pizza 6-7 oz (170-198 mL)/ Follow directions on three sides. Cover with loose-fitting lid. Stir and let stand 2-3 minutes after a brief delay. Touch COOK until liquid is opened during a sensor cycle, sensing will stop and the program will start automatically after cooking. 4-16 oz (113-454 g)/ Place in the microwave oven detects...
... the door. 2. Weight can be detected by reminder tones. 5. FOOD QUANTITY/INSTRUCTIONS Frozen Pizza 6-7 oz (170-198 mL)/ Follow directions on three sides. Cover with loose-fitting lid. Stir and let stand 2-3 minutes after a brief delay. Touch COOK until liquid is opened during a sensor cycle, sensing will stop and the program will start automatically after cooking. 4-16 oz (113-454 g)/ Place in the microwave oven detects...
Use & Care Guide
Page 12
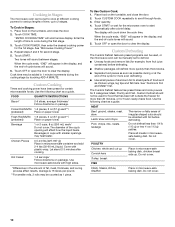
... a cooking cycle. ■ Cover plates of popcorn at all times. Sensor Reheat The sensor in the microwave oven determines the reheating time based on the turntable and close the door. 2. This will scroll. 3. The Keep Warm function uses 10% cook power. Keep Warm can be kept warm in the microwave oven. Touch OFF or open the door to clear the display. NOTE: During Popcorn function, as with plastic wrap and vent. FOOD SERVING SIZE/INSTRUCTIONS Dinner Plate...
... a cooking cycle. ■ Cover plates of popcorn at all times. Sensor Reheat The sensor in the microwave oven determines the reheating time based on the turntable and close the door. 2. This will scroll. 3. The Keep Warm function uses 10% cook power. Keep Warm can be kept warm in the microwave oven. Touch OFF or open the door to clear the display. NOTE: During Popcorn function, as with plastic wrap and vent. FOOD SERVING SIZE/INSTRUCTIONS Dinner Plate...
Use & Care Guide
Page 13
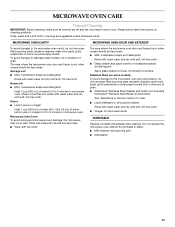
MICROWAVE OVEN CARE General Cleaning IMPORTANT: Before cleaning, make sure all -purpose cleaner: Rinse with clean water and dry with soft, lint-free cloth. ■ Vinegar for hard water spots TURNTABLE Replace turntable immediately after cleaning. Average soil ■ Mild, nonabrasive soaps and detergents: Rinse with clean water and dry with soft, lint-free cloth. ■ Glass cleaner and paper towels or nonabrasive plastic scrubbing pad...
MICROWAVE OVEN CARE General Cleaning IMPORTANT: Before cleaning, make sure all -purpose cleaner: Rinse with clean water and dry with soft, lint-free cloth. ■ Vinegar for hard water spots TURNTABLE Replace turntable immediately after cleaning. Average soil ■ Mild, nonabrasive soaps and detergents: Rinse with clean water and dry with soft, lint-free cloth. ■ Glass cleaner and paper towels or nonabrasive plastic scrubbing pad...
Use & Care Guide
Page 14
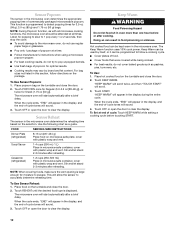
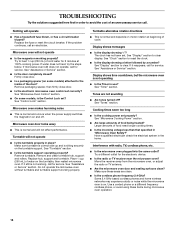
...; Is the magnetron working properly? Replace hub, support and turntable. See "Tones" section. Try a different outlet for service. If it still is not operating ■ Is the Timer in place? Nothing will not affect performance. Display shows time countdown, but the microwave oven is not working properly. Cooking times seem too long ■ Is the cooking power set . Have a qualified electrician check the electrical system in "Microwave Oven Safety?" Use a corded phone or...
...; Is the magnetron working properly? Replace hub, support and turntable. See "Tones" section. Try a different outlet for service. If it still is not operating ■ Is the Timer in place? Nothing will not affect performance. Display shows time countdown, but the microwave oven is not working properly. Cooking times seem too long ■ Is the cooking power set . Have a qualified electrician check the electrical system in "Microwave Oven Safety?" Use a corded phone or...

Use & Care Guide
Page 15
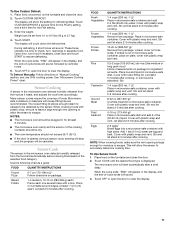
... If you need further assistance, you can be built in your appliance. Replacement Parts Glass Turntable Part Number W10143945 Turntable Support and Rollers Part Number W10143946 Turntable Hub Part Number W10143947 Cleaning Supplies Heavy Duty Degreaser Part Number 31552 All-Purpose Appliance Cleaner Part Number 31682 KITCHENAID® Stainless Steel Cleaner and Polish Part Number 4396920 KITCHENAID® Stainless Steel Wipes Part Number 8212510 Built-In Kits This countertop microwave oven can write to fulfill the product warranty and provide afterwarranty service, anywhere...
... If you need further assistance, you can be built in your appliance. Replacement Parts Glass Turntable Part Number W10143945 Turntable Support and Rollers Part Number W10143946 Turntable Hub Part Number W10143947 Cleaning Supplies Heavy Duty Degreaser Part Number 31552 All-Purpose Appliance Cleaner Part Number 31682 KITCHENAID® Stainless Steel Cleaner and Polish Part Number 4396920 KITCHENAID® Stainless Steel Wipes Part Number 8212510 Built-In Kits This countertop microwave oven can write to fulfill the product warranty and provide afterwarranty service, anywhere...

Use & Care Guide
Page 16
... used for the stainless steel oven cavity/inner door if the part rusts through due to the finish of your major appliance is covered by KitchenAid. 5. In Canada, call 1-800-422-1230. You can find additional help you obtain assistance or service if you need service, first see the "Troubleshooting" section of repair or replacement under this limited warranty. Service calls to correct the installation...
... used for the stainless steel oven cavity/inner door if the part rusts through due to the finish of your major appliance is covered by KitchenAid. 5. In Canada, call 1-800-422-1230. You can find additional help you obtain assistance or service if you need service, first see the "Troubleshooting" section of repair or replacement under this limited warranty. Service calls to correct the installation...

Installation Instructions
Page 2
... be killed or seriously injured if you don't follow instructions. s Measuring tape s #2 Phillips screwdriver s Pencil s drill s Scissors Parts Supplied A B C D E Cutout Dimensions A Width 15³⁄₄" (40 cm) B 3" (7.6 cm) F G A. Trim kit frame B. OVER 24" OVER 27" OVER 30" (61.0 CM) (68.6 CM) (76.2 CM) BUILT-IN OVEN BUILT-IN OVEN BUILT-IN OVEN Width 22¹⁄₂" (57.15 cm) 25...
... be killed or seriously injured if you don't follow instructions. s Measuring tape s #2 Phillips screwdriver s Pencil s drill s Scissors Parts Supplied A B C D E Cutout Dimensions A Width 15³⁄₄" (40 cm) B 3" (7.6 cm) F G A. Trim kit frame B. OVER 24" OVER 27" OVER 30" (61.0 CM) (68.6 CM) (76.2 CM) BUILT-IN OVEN BUILT-IN OVEN BUILT-IN OVEN Width 22¹⁄₂" (57.15 cm) 25...

Installation Instructions
Page 3
... items inside microwave oven. Remove 2 existing screws from right side of electric shock. Fasten bottom bracket to whether the microwave oven is too short, have a qualified electrician or serviceman install an outlet near the microwave oven. In the event of an electrical short circuit, grounding reduces the risk of upper duct B. The microwave oven is properly installed and grounded. A B A. Do not remove ground prong. GROUNDING INSTRUCTIONS s For all governing codes and...
... items inside microwave oven. Remove 2 existing screws from right side of electric shock. Fasten bottom bracket to whether the microwave oven is too short, have a qualified electrician or serviceman install an outlet near the microwave oven. In the event of an electrical short circuit, grounding reduces the risk of upper duct B. The microwave oven is properly installed and grounded. A B A. Do not remove ground prong. GROUNDING INSTRUCTIONS s For all governing codes and...

Installation Instructions
Page 4
...) D. Anti-tip bracket 4 2. Microwave Oven Placement 1. Slide microwave oven partway into place, engaging anti-tip bracket. 4. A A A. Bottom bracket 2. Plug in order to the oven. Make sure microwave oven is centered within cutout opening and slide it into cutout opening. Drill pilot holes through positioning flange. (Use drill.) Then install three ¹⁄₂" screws at front of microwave oven, and attach the duct assembly to correctly engage with existing screw. Cutout opening B. Cutout floor F. Drill...
...) D. Anti-tip bracket 4 2. Microwave Oven Placement 1. Slide microwave oven partway into place, engaging anti-tip bracket. 4. A A A. Bottom bracket 2. Plug in order to the oven. Make sure microwave oven is centered within cutout opening and slide it into cutout opening. Drill pilot holes through positioning flange. (Use drill.) Then install three ¹⁄₂" screws at front of microwave oven, and attach the duct assembly to correctly engage with existing screw. Cutout opening B. Cutout floor F. Drill...


