Use & Care Guide
Page 1
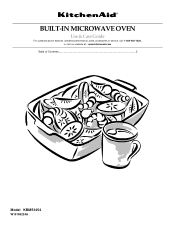
www.kitchenaid.com Table of Contents...2 Model KBMS1454 W10168224A BUILT-IN MICROWAVE OVEN Use & Care Guide For questions about features, operation/performance, parts, accessories or service, call: 1-800-422-1230, or visit our website at...
www.kitchenaid.com Table of Contents...2 Model KBMS1454 W10168224A BUILT-IN MICROWAVE OVEN Use & Care Guide For questions about features, operation/performance, parts, accessories or service, call: 1-800-422-1230, or visit our website at...
Use & Care Guide
Page 2
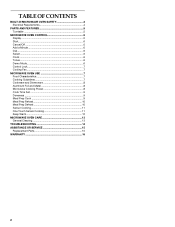
... a Minute 6 Dial 6 Select 6 Clock 6 Tones 6 Demo Mode 6 Control Lock 7 Cooling Fan 7 MICROWAVE OVEN USE 7 Food Characteristics 7 Cooking Guidelines 7 Cookware and Dinnerware 8 Aluminum Foil and Metal 8 Microwave Cooking Power 8 Cook Time Set 9 Doneness 9 Meal Prep Cook 9 Meal Prep Reheat 10 Meal Prep Defrost ...10 Sensor Cooking 11 One Touch Sensor Cooking 11 Keep Warm 12 MICROWAVE OVEN CARE 13 General Cleaning 13 ...
... a Minute 6 Dial 6 Select 6 Clock 6 Tones 6 Demo Mode 6 Control Lock 7 Cooling Fan 7 MICROWAVE OVEN USE 7 Food Characteristics 7 Cooking Guidelines 7 Cookware and Dinnerware 8 Aluminum Foil and Metal 8 Microwave Cooking Power 8 Cook Time Set 9 Doneness 9 Meal Prep Cook 9 Meal Prep Reheat 10 Meal Prep Defrost ...10 Sensor Cooking 11 One Touch Sensor Cooking 11 Keep Warm 12 MICROWAVE OVEN CARE 13 General Cleaning 13 ...
Use & Care Guide
Page 3
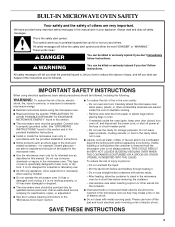
... facilitate cooking. - Do not leave paper products, cooking utensils, or food in the cavity when not in this section. ■ The microwave oven must be killed or seriously injured if you don't immediately follow instructions. Do not overheat the liquid. - SAVE THESE INSTRUCTIONS 3 We...risk of injury, and tell you and others are placed inside the oven ignite, keep oven door closed glass jars - Carefully attend the microwave oven when paper, plastic, or other utensil into the container. ■ Oversized foods or oversized metal utensils should be inserted in accordance...
... facilitate cooking. - Do not leave paper products, cooking utensils, or food in the cavity when not in this section. ■ The microwave oven must be killed or seriously injured if you don't immediately follow instructions. Do not overheat the liquid. - SAVE THESE INSTRUCTIONS 3 We...risk of injury, and tell you and others are placed inside the oven ignite, keep oven door closed glass jars - Carefully attend the microwave oven when paper, plastic, or other utensil into the container. ■ Oversized foods or oversized metal utensils should be inserted in accordance...

Use & Care Guide
Page 4
...This device complies with a fuse or circuit breaker. Failure to follow these instructions can result in harmful exposure to whether the microwave oven is in death, fire, or electrical shock. Consult a qualified electrician or serviceman if the grounding instructions are not ...completely understood, or if doubt exists as to microwave energy. If the power supply cord is too short, have a qualified electrician or serviceman install an outlet near water - Recommended: ...
...This device complies with a fuse or circuit breaker. Failure to follow these instructions can result in harmful exposure to whether the microwave oven is in death, fire, or electrical shock. Consult a qualified electrician or serviceman if the grounding instructions are not ...completely understood, or if doubt exists as to microwave energy. If the power supply cord is too short, have a qualified electrician or serviceman install an outlet near water - Recommended: ...

Use & Care Guide
Page 5
...display shows the time of your particular model may cover several different models. Touch CANCEL/OFF to the microwave oven, a ":" will be active in the display. 5 When the microwave oven is sensing, sensor animation (clockwise "racetrack" movement) will blink in the display. The appearance... of day. Control panel C. Door handle H. MICROWAVE OVEN CONTROL A A. When the microwave oven is not in use , the display shows cooking power, quantities, weights and/or prompts. PARTS AND FEATURES This...
...display shows the time of your particular model may cover several different models. Touch CANCEL/OFF to the microwave oven, a ":" will be active in the display. 5 When the microwave oven is sensing, sensor animation (clockwise "racetrack" movement) will blink in the display. The appearance... of day. Control panel C. Door handle H. MICROWAVE OVEN CONTROL A A. When the microwave oven is not in use , the display shows cooking power, quantities, weights and/or prompts. PARTS AND FEATURES This...

Use & Care Guide
Page 6
... seconds. Three short tones will also turn off , and their volume cannot be added to the next step. ■ Set or cancel clock. The microwave oven will sound. Touch SELECT or START. Touch SELECT or START to pieces, cups or servings. The clock-setting display will appear in the display...minute of cook time, up to a total remaining cook time of 10 minutes. The next time the clock is opened and closed for 1 minute. The microwave oven light will come on while in the display. 4. Repeat to resume the cycle. It will appear, with the hour flashing. 2. Close the door ...
... seconds. Three short tones will also turn off , and their volume cannot be added to the next step. ■ Set or cancel clock. The microwave oven will sound. Touch SELECT or START. Touch SELECT or START to pieces, cups or servings. The clock-setting display will appear in the display...minute of cook time, up to a total remaining cook time of 10 minutes. The next time the clock is opened and closed for 1 minute. The microwave oven light will come on while in the display. 4. Repeat to resume the cycle. It will appear, with the hour flashing. 2. Close the door ...
Use & Care Guide
Page 7
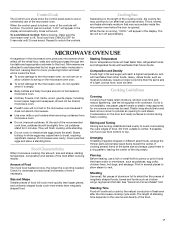
... metal floor, walls and ceiling and pass through the turntable and appropriate cookware to vent. When the control panel is off automatically. MICROWAVE OVEN USE A magnetron in fat and sugar will reach a higher temperature, and will turn food over from outside to swing on ...to cook by fat, sugar and water molecules in a ring pattern, leaving the center of food. Size and Shape Smaller pieces of microwave oven cavity. Starting Temperature Room temperature foods will heat faster than refrigerated foods, and refrigerated foods will cook more quickly than irregularly shaped ...
... metal floor, walls and ceiling and pass through the turntable and appropriate cookware to vent. When the control panel is off automatically. MICROWAVE OVEN USE A magnetron in fat and sugar will reach a higher temperature, and will turn food over from outside to swing on ...to cook by fat, sugar and water molecules in a ring pattern, leaving the center of food. Size and Shape Smaller pieces of microwave oven cavity. Starting Temperature Room temperature foods will heat faster than refrigerated foods, and refrigerated foods will cook more quickly than irregularly shaped ...
Use & Care Guide
Page 8
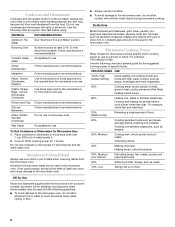
... Ceramic Glass, Glass Acceptable for use . Paper: Towels, Dinnerware, Napkins Use nonrecycled and those approved by the manufacturer for Microwave Use: 1. Silicone Bakeware Follow manufacturer's recommendations. Wax Paper Acceptable for use . Do not use by the manufacturer for 1... Follow manufacturer's recommendations. Heating cream soups. 80% Heating rice, pasta or stirrable casseroles. To Test Cookware or Dinnerware for microwave oven use oven mitts or pot holders when removing dishes from the food. Plastic: Wraps, Bags, Covers, Dinnerware, Containers Use...
... Ceramic Glass, Glass Acceptable for use . Paper: Towels, Dinnerware, Napkins Use nonrecycled and those approved by the manufacturer for Microwave Use: 1. Silicone Bakeware Follow manufacturer's recommendations. Wax Paper Acceptable for use . Do not use by the manufacturer for 1... Follow manufacturer's recommendations. Heating cream soups. 80% Heating rice, pasta or stirrable casseroles. To Test Cookware or Dinnerware for microwave oven use oven mitts or pot holders when removing dishes from the food. Plastic: Wraps, Bags, Covers, Dinnerware, Containers Use...
Use & Care Guide
Page 9
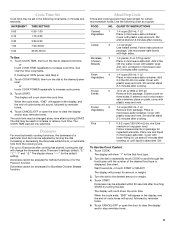
...and vent. Touch CANCEL/OFF or open the door to the desired amount or weight. 4. Fresh 4 Vegetables 1-4 cups (250 mL-1 L)/ Place in microwave-safe container. safe container, place on package for the Popcorn function. Frozen 6 Vegetables 1-4 cups (250 mL-1 L)/ Remove from package. Touch COOK....time. Doneness may be changed at 100% power, skip Step 2. 2. The COOK TIME pad will change the doneness value. Place in microwave-safe container. Cover with plastic wrap and vent. Wait 5 seconds, or touch START or SELECT. See chart for Boneless Chicken Breasts function....
...and vent. Touch CANCEL/OFF or open the door to the desired amount or weight. 4. Fresh 4 Vegetables 1-4 cups (250 mL-1 L)/ Place in microwave-safe container. safe container, place on package for the Popcorn function. Frozen 6 Vegetables 1-4 cups (250 mL-1 L)/ Remove from package. Touch COOK....time. Doneness may be changed at 100% power, skip Step 2. 2. The COOK TIME pad will change the doneness value. Place in microwave-safe container. Cover with plastic wrap and vent. Wait 5 seconds, or touch START or SELECT. See chart for Boneless Chicken Breasts function....
Use & Care Guide
Page 10
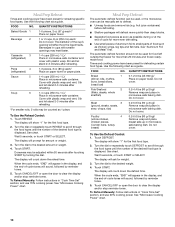
...bread loaf) 0.1-2.0 lbs (45-900 g)/ Place on paper towel or paper plate. Do not cover. See chart. To Defrost Manually: Follow instructions in microwave-safe container. Use the following chart as 1 piece. Doneness may be counted as a guide. Meat 3 (ground, steaks, roasts, stew, chops, ...food types. Pizza 4 (refrigerated) 1-3 pieces, 3 oz (85 g) each/ Place on paper towel. To Use the Reheat Control: 1. Beverages in microwave-safe container. Soup 6 1-4 cups (250 mL-1 L)/ Place in "Cook Time Set" section, and use 70% cooking power. The display will ...
...bread loaf) 0.1-2.0 lbs (45-900 g)/ Place on paper towel or paper plate. Do not cover. See chart. To Defrost Manually: Follow instructions in microwave-safe container. Use the following chart as 1 piece. Doneness may be counted as a guide. Meat 3 (ground, steaks, roasts, stew, chops, ...food types. Pizza 4 (refrigerated) 1-3 pieces, 3 oz (85 g) each/ Place on paper towel. To Use the Reheat Control: 1. Beverages in microwave-safe container. Soup 6 1-4 cups (250 mL-1 L)/ Place in "Cook Time Set" section, and use 70% cooking power. The display will ...
Use & Care Guide
Page 11
...See chart for optimal results. Baked Potato 1-4 medium, 10-13 oz (283-369 g) each one package at least 3 minutes. ■ The microwave oven cavity and the exterior of -cycle tones will sound, followed by reminder tones. 3. To Use Baked Potato and Meal Reheat: 1. Turning the ... be attended at least 1" (2.5 cm) apart. The sensor animation will show "3.0-" followed by brand and fat content. NOTES: ■ The microwave oven should be canceled. FOOD SERVING SIZE INSTRUCTIONS Popcorn* 3.0-3.5 oz (85-99 g) Pop only one several times during the first 20 seconds of...
...See chart for optimal results. Baked Potato 1-4 medium, 10-13 oz (283-369 g) each one package at least 3 minutes. ■ The microwave oven cavity and the exterior of -cycle tones will sound, followed by reminder tones. 3. To Use Baked Potato and Meal Reheat: 1. Turning the ... be attended at least 1" (2.5 cm) apart. The sensor animation will show "3.0-" followed by brand and fat content. NOTES: ■ The microwave oven should be canceled. FOOD SERVING SIZE INSTRUCTIONS Popcorn* 3.0-3.5 oz (85-99 g) Pop only one several times during the first 20 seconds of...
Use & Care Guide
Page 12
... cycle has ended, the end-ofcycle tones will sound, and then the Keep Warm cycle will flash. To Set at End of day mode. See "Microwave Cooking Power" chart. 12 The Cook Time indicator will flash, and the display will count down the warming time, and the Cook Time indicator will... Set" section, and use 10% cooking power. To Use (for single cycle): 1. Adjust the warming time, if desired, by itself or can result in the microwave oven.
... cycle has ended, the end-ofcycle tones will sound, and then the Keep Warm cycle will flash. To Set at End of day mode. See "Microwave Cooking Power" chart. 12 The Cook Time indicator will flash, and the display will count down the warming time, and the Cook Time indicator will... Set" section, and use 10% cooking power. To Use (for single cycle): 1. Adjust the warming time, if desired, by itself or can result in the microwave oven.
Use & Care Guide
Page 13
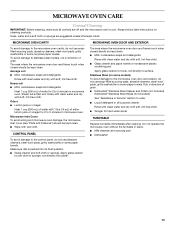
... kept clean. ■ Wipe with 1 tbs (15 mL) of grain. ■ KitchenAid® Stainless Steel Cleaner and Polish (not included) KitchenAid® Stainless Steel Wipes (not included): See "Assistance or Service" section to 5 minutes in microwave oven. The area where the microwave oven door and frame touch when closed should be kept clean. Make...
... kept clean. ■ Wipe with 1 tbs (15 mL) of grain. ■ KitchenAid® Stainless Steel Cleaner and Polish (not included) KitchenAid® Stainless Steel Wipes (not included): See "Assistance or Service" section to 5 minutes in microwave oven. The area where the microwave oven door and frame touch when closed should be kept clean. Make...
Use & Care Guide
Page 14
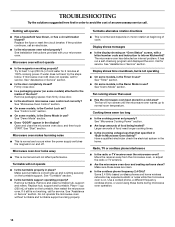
.... Make sure turntable is correct side up to inform KitchenAid? Replace hub, support and turntable. See "Demo Mode" section. Larger amounts of food being heated? Remove and clean turntable hub, support and rollers. Fan running slower than that specified in "Built-In Microwave Oven Safety?" If the problem continues, call for service...
.... Make sure turntable is correct side up to inform KitchenAid? Replace hub, support and turntable. See "Demo Mode" section. Larger amounts of food being heated? Remove and clean turntable hub, support and rollers. Fan running slower than that specified in "Built-In Microwave Oven Safety?" If the problem continues, call for service...

Use & Care Guide
Page 16
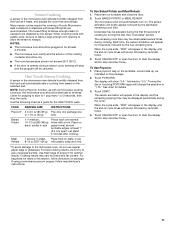
... and Canada, this limited warranty does not apply. Repairs when your major appliance is located in a remote area where service by a KitchenAid designated service company. KITCHENAID® BUILT-IN OVEN & MICROWAVE WARRANTY LIMITED WARRANTY For one year from the date of purchase, when this major appliance is operated and maintained according to instructions...
... and Canada, this limited warranty does not apply. Repairs when your major appliance is located in a remote area where service by a KitchenAid designated service company. KITCHENAID® BUILT-IN OVEN & MICROWAVE WARRANTY LIMITED WARRANTY For one year from the date of purchase, when this major appliance is operated and maintained according to instructions...

Installation Guide
Page 1
... you to reduce the chance of injury, and tell you don't immediately follow instructions. Table of Contents BUILT-IN MICROWAVE OVEN SAFETY 1 INSTALLATION REQUIREMENTS 2 Tools and Parts 2 Location Requirements 2 Minimum Dimensions 3 Product Dimensions 4 Electrical Requirements 5 INSTALLATION INSTRUCTIONS 6 Install the...the potential hazard is the safety alert symbol. This product is not suitable for use below non-vented electric or gas cooktops. BUILT-IN MICROWAVE OVEN INSTALLATION INSTRUCTIONS 24" (61.0 cm), 27" (68.6 cm), 30" (76.2 cm) This product is suitable for use above...
... you to reduce the chance of injury, and tell you don't immediately follow instructions. Table of Contents BUILT-IN MICROWAVE OVEN SAFETY 1 INSTALLATION REQUIREMENTS 2 Tools and Parts 2 Location Requirements 2 Minimum Dimensions 3 Product Dimensions 4 Electrical Requirements 5 INSTALLATION INSTRUCTIONS 6 Install the...the potential hazard is the safety alert symbol. This product is not suitable for use below non-vented electric or gas cooktops. BUILT-IN MICROWAVE OVEN INSTALLATION INSTRUCTIONS 24" (61.0 cm), 27" (68.6 cm), 30" (76.2 cm) This product is suitable for use above...

Installation Guide
Page 2
... C, D 30" (76.2 cm) installation A, B, C, E *Extension plate (B) will be removed from side bracket (A) for weight of the microwave oven. The location must provide: s Wood cabinetry. s Cutout floor that is solid, level and flush with any tools listed here. A C B Location Requirements The... microwave oven may be used for installation location. Removable extension plates (shaded piece, 2) C. 1" T-10 screws (6) D. The cutout ...
... C, D 30" (76.2 cm) installation A, B, C, E *Extension plate (B) will be removed from side bracket (A) for weight of the microwave oven. The location must provide: s Wood cabinetry. s Cutout floor that is solid, level and flush with any tools listed here. A C B Location Requirements The... microwave oven may be used for installation location. Removable extension plates (shaded piece, 2) C. 1" T-10 screws (6) D. The cutout ...
Installation Guide
Page 3
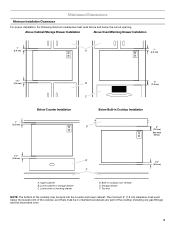
... into the counter and lower cabinet. Lower oven or warming drawer D. Toe kick NOTE: The bottom of the cooktop (including any gas fittings) and the microwave oven. 3 Above Cabinet/Storage Drawer Installation Above Oven/Warming Drawer Installation 1" (2.5 cm) A 1" (2.5 cm) 1¹⁄₂" (3.8 cm) 1" (2.5 cm) Below Counter Installation B 3" (7.6 cm) C Below Built-in...
... into the counter and lower cabinet. Lower oven or warming drawer D. Toe kick NOTE: The bottom of the cooktop (including any gas fittings) and the microwave oven. 3 Above Cabinet/Storage Drawer Installation Above Oven/Warming Drawer Installation 1" (2.5 cm) A 1" (2.5 cm) 1¹⁄₂" (3.8 cm) 1" (2.5 cm) Below Counter Installation B 3" (7.6 cm) C Below Built-in...
Installation Guide
Page 4
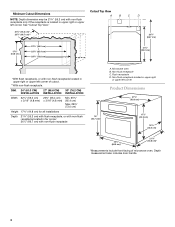
... non-flush receptacle. Non-flush receptacle located in far corner; 26¹⁄₄" (66.7 cm) with non-flush receptacle 18" (45.7 cm)* A. Microwave oven B. Depth measurement also includes door handle. 4 Minimum Cutout Dimensions Cutout Top View A B C D NOTE: Depth dimension may be 21³⁄₄"... (55.2 cm) with non-flush receptacle only if the receptacle is located in upper right or upper left corner of microwave oven. Flush receptacle D. See "Cutout Top View." 21³⁄₄" (55.2 cm)* 26¹⁄₄" (66.7 cm)** 26...
... non-flush receptacle. Non-flush receptacle located in far corner; 26¹⁄₄" (66.7 cm) with non-flush receptacle 18" (45.7 cm)* A. Microwave oven B. Depth measurement also includes door handle. 4 Minimum Cutout Dimensions Cutout Top View A B C D NOTE: Depth dimension may be 21³⁄₄"... (55.2 cm) with non-flush receptacle only if the receptacle is located in upper right or upper left corner of microwave oven. Flush receptacle D. See "Cutout Top View." 21³⁄₄" (55.2 cm)* 26¹⁄₄" (66.7 cm)** 26...
Installation Guide
Page 5
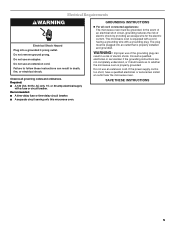
...grounded 3 prong outlet. If the power supply cord is too short, have a qualified electrician or serviceman install an outlet near the microwave oven. or 20-amp electrical supply with a grounding plug. In the event of an electrical short circuit, grounding reduces the risk of... electric shock. SAVE THESE INSTRUCTIONS 5 GROUNDING INSTRUCTIONS s For all governing codes and ordinances. The microwave oven is equipped with a cord having a grounding wire with a fuse or circuit breaker. Do not use an extension cord. Consult a...
...grounded 3 prong outlet. If the power supply cord is too short, have a qualified electrician or serviceman install an outlet near the microwave oven. or 20-amp electrical supply with a grounding plug. In the event of an electrical short circuit, grounding reduces the risk of... electric shock. SAVE THESE INSTRUCTIONS 5 GROUNDING INSTRUCTIONS s For all governing codes and ordinances. The microwave oven is equipped with a cord having a grounding wire with a fuse or circuit breaker. Do not use an extension cord. Consult a...


