Instruction Manual
Page 4
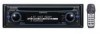
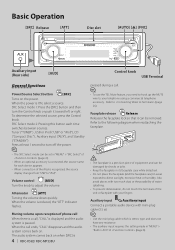
...is a call ends, "CALL" disappears and the audio system comes back on the power. Tuner ("TUNER") , USB or iPod ("USB" or "iPod"), CD ("Compact Disc") , Auxiliary input ("AUX"), and Standby ("STANDBY") Press at least 1 second to turn the Control knob or push it can be removed. .../ KDC-MP538U pressed during a call. ⁄ • To use the TEL Mute feature, you need to hook up the MUTE wire to "iPod". Refer to the following diagram when reattaching the faceplate. ¤ • The faceplate is connected, the source name for each time switches between sources. Also avoid ...
...is a call ends, "CALL" disappears and the audio system comes back on the power. Tuner ("TUNER") , USB or iPod ("USB" or "iPod"), CD ("Compact Disc") , Auxiliary input ("AUX"), and Standby ("STANDBY") Press at least 1 second to turn the Control knob or push it can be removed. .../ KDC-MP538U pressed during a call. ⁄ • To use the TEL Mute feature, you need to hook up the MUTE wire to "iPod". Refer to the following diagram when reattaching the faceplate. ¤ • The faceplate is connected, the source name for each time switches between sources. Also avoid ...
Instruction Manual
Page 25
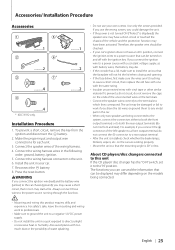
...through the fuse box. ¤ • Mounting and wiring this unit If the CD player/ disc changer has the "O-N" switch, set it to the "N" position. If ... to any metal part in turn may cause a short circuit, that the faceplate will not hit the lid when closing and opening. • If the... the - Accessories/ Installation Procedure Accessories 1 5* ..........1 ..........1 2 6* ..........2 ..........2 3 7* ..........4 4 ..........2 ..........4 * KDC-X592 only. Installation Procedure 1. Make the proper input and output wire connections for each unit. 3. Connect the wiring harness...
...through the fuse box. ¤ • Mounting and wiring this unit If the CD player/ disc changer has the "O-N" switch, set it to the "N" position. If ... to any metal part in turn may cause a short circuit, that the faceplate will not hit the lid when closing and opening. • If the... the - Accessories/ Installation Procedure Accessories 1 5* ..........1 ..........1 2 6* ..........2 ..........2 3 7* ..........4 4 ..........2 ..........4 * KDC-X592 only. Installation Procedure 1. Make the proper input and output wire connections for each unit. 3. Connect the wiring harness...


