
Instruction Manual
Page 1
...the back of the unit, in the spaces designated on the product. Familiarity with installation and operation procedures will help you call upon your KENWOOD dealer for information or service on the warranty card, and in the space provided below. KDC-MPV7019 KDC-MPV619 KDC-X459 KDC-4019 ...KDC-419 KDC-319 CD-RECEIVER INSTRUCTION MANUAL AMPLI-TUNER LECTEUR DE CD MODE D'EMPLOI REPRODUCTOR DE DISCOS COMPACTOS RECEPTOR DE FM/AM MANUAL DE INSTRUCCIONES Take the time to the model and serial numbers whenever you obtain the best ...
...the back of the unit, in the spaces designated on the product. Familiarity with installation and operation procedures will help you call upon your KENWOOD dealer for information or service on the warranty card, and in the space provided below. KDC-MPV7019 KDC-MPV619 KDC-X459 KDC-4019 ...KDC-419 KDC-319 CD-RECEIVER INSTRUCTION MANUAL AMPLI-TUNER LECTEUR DE CD MODE D'EMPLOI REPRODUCTOR DE DISCOS COMPACTOS RECEPTOR DE FM/AM MANUAL DE INSTRUCCIONES Take the time to the model and serial numbers whenever you obtain the best ...

Instruction Manual
Page 2
...CD & MP3 Playing External Disc Fast Forwarding and Reversing Track Search Album Search Direct Track Search Direct Album Search Track/Album Repeat Track Scan Random Play Magazine Random Play Album Select Text/Title Scroll DNPP (Disc Name Preset Play) Menu system 21 Menu System Security Code Touch Sensor Tone Manual... Clock Adjustment DSI (Disabled System Indicator) Selectable Illumination Switching Graphic Display Switching Display Type Illumination Color Setting Contrast Adjustment Dimmer System Q CRSC (Clean Reception System Circuit) Text Scroll Basic Operations of remote......26 ...
...CD & MP3 Playing External Disc Fast Forwarding and Reversing Track Search Album Search Direct Track Search Direct Album Search Track/Album Repeat Track Scan Random Play Magazine Random Play Album Select Text/Title Scroll DNPP (Disc Name Preset Play) Menu system 21 Menu System Security Code Touch Sensor Tone Manual... Clock Adjustment DSI (Disabled System Indicator) Selectable Illumination Switching Graphic Display Switching Display Type Illumination Color Setting Contrast Adjustment Dimmer System Q CRSC (Clean Reception System Circuit) Text Scroll Basic Operations of remote......26 ...
Instruction Manual
Page 3
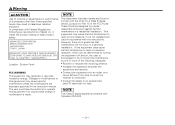
...equipment may cause harmful interference unless the modifications are designed to provide reasonable protection against harmful interference in the instruction manual. These limits are expressly approved in a residential installation. If this equipment does cause harmful interference to this equipment...of labels on a circuit different from that interference will not occur in hazardous radiation exposure. KENWOOD CORPORATION 2967-3, ISHIKAWA-CHO, HACHIOJI-SHI TOKYO, JAPAN KENWOOD CORP. NOTE This equipment has been tested and found to comply with the instructions. In ...
...equipment may cause harmful interference unless the modifications are designed to provide reasonable protection against harmful interference in the instruction manual. These limits are expressly approved in a residential installation. If this equipment does cause harmful interference to this equipment...of labels on a circuit different from that interference will not occur in hazardous radiation exposure. KENWOOD CORPORATION 2967-3, ISHIKAWA-CHO, HACHIOJI-SHI TOKYO, JAPAN KENWOOD CORP. NOTE This equipment has been tested and found to comply with the instructions. In ...

Instruction Manual
Page 5
...the car heater in this unit is stained badly, wipe the stain off . Your CDs can get dirty, wipe them in actual operation. NOTE • If you experience problems during installation, consult your Kenwood dealer. If the unit still fails to evaporate. If the faceplate is stained, ...wipe it every once in the CD player of this manual are examples used to factory settings when the Reset button is pressed. Wiping...
...the car heater in this unit is stained badly, wipe the stain off . Your CDs can get dirty, wipe them in actual operation. NOTE • If you experience problems during installation, consult your Kenwood dealer. If the unit still fails to evaporate. If the faceplate is stained, ...wipe it every once in the CD player of this manual are examples used to factory settings when the Reset button is pressed. Wiping...

Instruction Manual
Page 6
...restrictions. If you use any other than the above may neither be entered and displayed. For a list of available characters, see the instruction manual of Codes. Entering ID3 tag The Displayable ID3 tag is loaded, the unit checks all the data on this unit are the only file...and formats acceptable are indicated in this unit. A file with a name entered with the MP3 extension. Entering file and folder names The code list characters are CD-ROM, CD-R, and CD-RW. Acceptable media The MP3 recording media acceptable to the List of the writing software and the section Entering file and...
...restrictions. If you use any other than the above may neither be entered and displayed. For a list of available characters, see the instruction manual of Codes. Entering ID3 tag The Displayable ID3 tag is loaded, the unit checks all the data on this unit are the only file...and formats acceptable are indicated in this unit. A file with a name entered with the MP3 extension. Entering file and folder names The code list characters are CD-ROM, CD-R, and CD-RW. Acceptable media The MP3 recording media acceptable to the List of the writing software and the section Entering file and...

Instruction Manual
Page 8
... of the disc and move outward. • CD-R and CD-RW are dirty can't be used. • Don't use CDs without disc mark . • A CD-R or CD-RW that hasn't been finalized can't be used • CDs that are easier to your CD-R/CD-RW writing software, and your CD-R/CD-RW recorder instruction manual.) CD accessories Don't use disc type accessories.
... of the disc and move outward. • CD-R and CD-RW are dirty can't be used. • Don't use CDs without disc mark . • A CD-R or CD-RW that hasn't been finalized can't be used • CDs that are easier to your CD-R/CD-RW writing software, and your CD-R/CD-RW recorder instruction manual.) CD accessories Don't use disc type accessories.

Instruction Manual
Page 13
...- 13 - Refer to name it 's ON, "NF ON" is selected, and Auxiliary input display setting mode closes. Function of station/CD can be changed by using a remote with a number buttons. 5 Select the characters Press the [FM] or [AM] button. Example: If "DANCE" is pressed Non-fading output switches ON or OFF. External... stops for at least 2 seconds. KDC-X459/4019/419/319: • This function doesn't work when CA-C1AX is used to the CD changer/ player manual. • The title of the KDC-MPV7019/KDC-X459/KDC-4019 Non-fading Output Turning the Non-fading output ON or OFF. Each time...
...- 13 - Refer to name it 's ON, "NF ON" is selected, and Auxiliary input display setting mode closes. Function of station/CD can be changed by using a remote with a number buttons. 5 Select the characters Press the [FM] or [AM] button. Example: If "DANCE" is pressed Non-fading output switches ON or OFF. External... stops for at least 2 seconds. KDC-X459/4019/419/319: • This function doesn't work when CA-C1AX is used to the CD changer/ player manual. • The title of the KDC-MPV7019/KDC-X459/KDC-4019 Non-fading Output Turning the Non-fading output ON or OFF. Each time...
Instruction Manual
Page 15
...Putting the station in the memory. 1 Select the band Press the [FM] or [AM] button. 2 Select the frequency to put in the memory Press the [#1] - [#6] button for a station. Normal manual tuning control. During reception of stereo stations the "ST" indicator is ...[#0], [#8], [#1], [#0] Canceling Direct Access Tuning Press the [DIRECT] button on the remote. "- - - -" is pressed the Tuning mode switches as shown below. Search in order of remote) Entering the frequency and tuning. 1 Select the band Press the [FM] or [AM] button. 2 Enter Direct Access Tuning mode Press the [DIRECT]...
...Putting the station in the memory. 1 Select the band Press the [FM] or [AM] button. 2 Select the frequency to put in the memory Press the [#1] - [#6] button for a station. Normal manual tuning control. During reception of stereo stations the "ST" indicator is ...[#0], [#8], [#1], [#0] Canceling Direct Access Tuning Press the [DIRECT] button on the remote. "- - - -" is pressed the Tuning mode switches as shown below. Search in order of remote) Entering the frequency and tuning. 1 Select the band Press the [FM] or [AM] button. 2 Enter Direct Access Tuning mode Press the [DIRECT]...

Instruction Manual
Page 21
...;] button. Example: When you want to the basic operation method above are displayed afterwards their setting content is displayed. 2 Select the menu item Press the [FM] or [AM] button. You can continue by step. When other items. 4 Exit Menu mode Press the [MENU] button. Menu system SRC... FM MENU ¢ OFF DAB MENU AUD NF LOUD SCAN RDM REP M.RDM DISP NAME AUTO AME 4 AM #1 - 6 DISP KDC-MPV7019/MPV619/X459/419 Menu display ...
...;] button. Example: When you want to the basic operation method above are displayed afterwards their setting content is displayed. 2 Select the menu item Press the [FM] or [AM] button. You can continue by step. When other items. 4 Exit Menu mode Press the [MENU] button. Menu system SRC... FM MENU ¢ OFF DAB MENU AUD NF LOUD SCAN RDM REP M.RDM DISP NAME AUTO AME 4 AM #1 - 6 DISP KDC-MPV7019/MPV619/X459/419 Menu display ...

Instruction Manual
Page 22
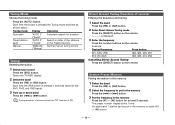
... (beep sound) ON/OFF. Beep canceled. 4 Select the digits to enter Press the [4] or [¢] button. 5 Select the Security Code numbers Press the [FM] or [AM] button. 6 Repeat steps 4 and 5, and complete the Security Code. 7 Confirm the Security Code Press the [¢] button for at least 1... power ON. 2 Do the step 4 through 7 operation, and reenter the Security Code. Manual Clock Adjustment 1 Select Clock Adjustment mode Press the [FM] or [AM] button. The clock display blinks. 3 Adjust the hours Press the [FM] or [AM] button. Adjust the minutes Press the [4] or [¢] button. Menu ...
... (beep sound) ON/OFF. Beep canceled. 4 Select the digits to enter Press the [4] or [¢] button. 5 Select the Security Code numbers Press the [FM] or [AM] button. 6 Repeat steps 4 and 5, and complete the Security Code. 7 Confirm the Security Code Press the [¢] button for at least 1... power ON. 2 Do the step 4 through 7 operation, and reenter the Security Code. Manual Clock Adjustment 1 Select Clock Adjustment mode Press the [FM] or [AM] button. The clock display blinks. 3 Adjust the hours Press the [FM] or [AM] button. Adjust the minutes Press the [4] or [¢] button. Menu ...

Instruction Manual
Page 29
... 45 Battery wire (Yellow) 47 Ground wire (Black) - (To car chassis) 48 - 29 - To KENWOOD disc changer/ DAB control input/KPA-SD100/ KPA-HD100/KPA-SS100 25 To connect these leads, refer to the relevant instruction manuals. 26 Wiring harness (Accessory1)22 28 White/Black FRONT • L White 30 31 Gray/Black... 37 Purple/Black REAR • R Purple 39 To front left speaker 29 To front right speaker 32 To rear left output (White) NON FADING FRONT FM/AM antenna input 15 If no connections are made, do not let the wire come out from the tab. 3 Fuse (10A) 27 4 When using the...
... 45 Battery wire (Yellow) 47 Ground wire (Black) - (To car chassis) 48 - 29 - To KENWOOD disc changer/ DAB control input/KPA-SD100/ KPA-HD100/KPA-SS100 25 To connect these leads, refer to the relevant instruction manuals. 26 Wiring harness (Accessory1)22 28 White/Black FRONT • L White 30 31 Gray/Black... 37 Purple/Black REAR • R Purple 39 To front left speaker 29 To front right speaker 32 To rear left output (White) NON FADING FRONT FM/AM antenna input 15 If no connections are made, do not let the wire come out from the tab. 3 Fuse (10A) 27 4 When using the...


