
User Guide
Page 30
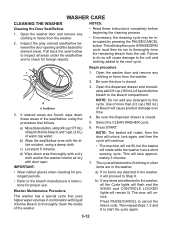
... inside of liquid chlorine bleach to check for foreign objects. The door will rotate while the washer runs a short sensing cycle. WASHER CARE CLEANING THE WASHER Cleaning the Door Seal/Bellow 1. Begin procedure 1. b) Wipe the seal/bellow area with the dilute solution, using the procedure that uses ...manufacturer's instructions for stained areas. NOTES: • Read these areas of the seal/bellow, using a damp cloth. Press START. Open the washer door and remove any items are in the washer, it will cause damage to the unit and clothing added to thoroughly rinse the...
... inside of liquid chlorine bleach to check for foreign objects. The door will rotate while the washer runs a short sensing cycle. WASHER CARE CLEANING THE WASHER Cleaning the Door Seal/Bellow 1. Begin procedure 1. b) Wipe the seal/bellow area with the dilute solution, using the procedure that uses ...manufacturer's instructions for stained areas. NOTES: • Read these areas of the seal/bellow, using a damp cloth. Press START. Open the washer door and remove any items are in the washer, it will cause damage to the unit and clothing added to thoroughly rinse the...
User Guide
Page 34
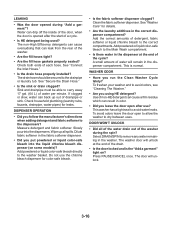
...put powdered or liquid color-safe bleach into the dispensers. This is the "Add a garment" light on some models)? This washer has a tight seal to the dispensers? Water can result in the dispenser compartment. The non-High Efficiency detergents can cause oversudsing that can...Is the drain hose properly installed? Slowly pour into the liquid chlorine bleach dispenser (on ? To freshen your washer and to dry between uses. The washer door will unlock at the end of the washer during "Add a garment"? Select DRAIN/SPIN to the correct compartments. LEAKING • Was the...
...put powdered or liquid color-safe bleach into the dispensers. This is the "Add a garment" light on some models)? This washer has a tight seal to the dispensers? Water can result in the dispenser compartment. The non-High Efficiency detergents can cause oversudsing that can...Is the drain hose properly installed? Slowly pour into the liquid chlorine bleach dispenser (on ? To freshen your washer and to dry between uses. The washer door will unlock at the end of the washer during "Add a garment"? Select DRAIN/SPIN to the correct compartments. LEAKING • Was the...
User Guide
Page 35
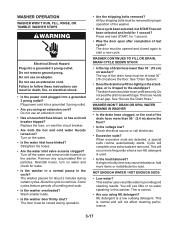
... water faucets turned on the water. • Is the water inlet hose kinked? Wash smaller loads. • Is the washer door firmly shut? The top of the drain hose must be removed for proper operation of the washer. • Has a cycle been selected, but START has not been selected and held for...the hoses. • Are the water inlet valve screens clogged? Reinstall hoses, turn on washer? The door must be at least 30˝ (76 cm) above the floor? • Is the voltage low? Do not seal the drain hose with tape. You will complete once extra suds are detected, a special ...
... water faucets turned on the water. • Is the water inlet hose kinked? Wash smaller loads. • Is the washer door firmly shut? The top of the drain hose must be removed for proper operation of the washer. • Has a cycle been selected, but START has not been selected and held for...the hoses. • Are the water inlet valve screens clogged? Reinstall hoses, turn on washer? The door must be at least 30˝ (76 cm) above the floor? • Is the voltage low? Do not seal the drain hose with tape. You will complete once extra suds are detected, a special ...
User Guide
Page 87
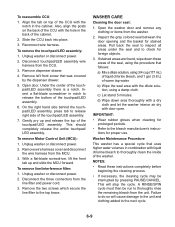
... manufacturer's instructions for foreign objects. 3. To reassemble CCU: 1. Remove left front screw that follows: a) Mix a dilute solution, using the procedure that was covered by pressing PAUSE/CANCEL. Unplug washer or disconnect power. 2. Disconnect the three connectors from the MCU. 3. IMPORTANT...line filter and power cord. 3. Open the washer door and remove any clothing or items from the CCU. 3. Washer Maintenance Procedure This washer has a special cycle that uses higher water volumes in the back of the seal, using 3/4 cup (177 mL) of liquid chlorine bleach...
... manufacturer's instructions for foreign objects. 3. To reassemble CCU: 1. Remove left front screw that follows: a) Mix a dilute solution, using the procedure that was covered by pressing PAUSE/CANCEL. Unplug washer or disconnect power. 2. Disconnect the three connectors from the MCU. 3. IMPORTANT...line filter and power cord. 3. Open the washer door and remove any clothing or items from the CCU. 3. Washer Maintenance Procedure This washer has a special cycle that uses higher water volumes in the back of the seal, using 3/4 cup (177 mL) of liquid chlorine bleach...


