Use and Care Guide
Page 2
...Plan Vent System 8 Install Vent System 10 Install Leveling Legs 10 Make Gas Connection 10 Connect Vent 11 Level Dryer 11 Reverse Door Swing 11 Complete Installation 13 DRYER USE 14 Starting Your Dryer 14 Stopping, Pausing or Restarting 15 Drying and Cycle Tips 15 Status ...18 Dryer Rack 19 DRYER CARE 20 Cleaning the Dryer Location 20 Cleaning the Lint Screen 20 Cleaning the Dryer Interior 20 Removing Accumulated Lint 20 Vacation and Moving Care 21 Changing the Drum Light 21 TROUBLESHOOTING 21 PROTECTION AGREEMENTS 23 SERVICE NUMBERS BACK COVER KENMORE ELITE APPLIANCE ...
...Plan Vent System 8 Install Vent System 10 Install Leveling Legs 10 Make Gas Connection 10 Connect Vent 11 Level Dryer 11 Reverse Door Swing 11 Complete Installation 13 DRYER USE 14 Starting Your Dryer 14 Stopping, Pausing or Restarting 15 Drying and Cycle Tips 15 Status ...18 Dryer Rack 19 DRYER CARE 20 Cleaning the Dryer Location 20 Cleaning the Lint Screen 20 Cleaning the Dryer Interior 20 Removing Accumulated Lint 20 Vacation and Moving Care 21 Changing the Drum Light 21 TROUBLESHOOTING 21 PROTECTION AGREEMENTS 23 SERVICE NUMBERS BACK COVER KENMORE ELITE APPLIANCE ...
Use and Care Guide
Page 3
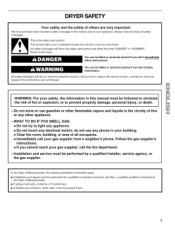
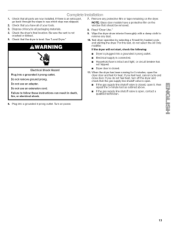
... injured if you don't immediately follow instructions. You can be killed or seriously injured if you cannot reach your gas supplier, call your gas supplier from a neighbor's phone. i WthAe RrNisINkGo: f firFeoroyr oeuxrplsoasfieotny,, tohretoinfporremvaetniot n proinpetrhtiys mdaamnuaagle, mpusetrsobnealfollionwjuerdy, otor... or gasfitter qualified or licensed by a qualified installer, service agency, or the gas supplier. Follow the gas supplier's instructions. • If you don't follow instructions. DRYER SAFETY Your safety and the safety of others . All safety messages will follow...
... injured if you don't immediately follow instructions. You can be killed or seriously injured if you cannot reach your gas supplier, call your gas supplier from a neighbor's phone. i WthAe RrNisINkGo: f firFeoroyr oeuxrplsoasfieotny,, tohretoinfporremvaetniot n proinpetrhtiys mdaamnuaagle, mpusetrsobnealfollionwjuerdy, otor... or gasfitter qualified or licensed by a qualified installer, service agency, or the gas supplier. Follow the gas supplier's instructions. • If you don't follow instructions. DRYER SAFETY Your safety and the safety of others . All safety messages will follow...
Use and Care Guide
Page 4
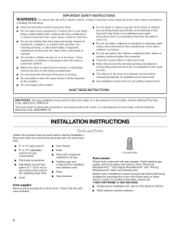
... 1" (2.54 cm) or hex-head socket wrench (for adjusting dryer feet) Level • Vent clamps • Knife • Pipe-joint compound resistant to LP gas • Caulking gun and compound (for gas connections) Flat-blade screwdriver Adjustable wrench that could ignite or explode. • ...Do not allow children to eliminate static unless recommended by the manufacturer of the dryer and exhaust vent should be ...
... 1" (2.54 cm) or hex-head socket wrench (for adjusting dryer feet) Level • Vent clamps • Knife • Pipe-joint compound resistant to LP gas • Caulking gun and compound (for gas connections) Flat-blade screwdriver Adjustable wrench that could ignite or explode. • ...Do not allow children to eliminate static unless recommended by the manufacturer of the dryer and exhaust vent should be ...
Use and Care Guide
Page 5
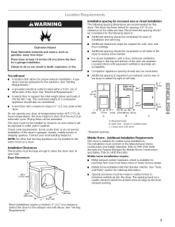
... least twice as large as a nearby window) should be exhausted to introduce outside air into the dryer. See "Venting Requirements." • A grounded electrical outlet located within 2 ft (61 cm) of installation and servicing. • Additional clearances might not shut off at temperatures below 45... olo (4. Explosion Hazard Keep flammable materials and vapors, such as a dryer. Failure to reduce noise transfer. You will be large enough to allow the dryer door to water and/or weather. A gas dryer must be exposed to open fully. The combined weight of an automatic cycle...
... least twice as large as a nearby window) should be exhausted to introduce outside air into the dryer. See "Venting Requirements." • A grounded electrical outlet located within 2 ft (61 cm) of installation and servicing. • Additional clearances might not shut off at temperatures below 45... olo (4. Explosion Hazard Keep flammable materials and vapors, such as a dryer. Failure to reduce noise transfer. You will be large enough to allow the dryer door to water and/or weather. A gas dryer must be exposed to open fully. The combined weight of an automatic cycle...
Use and Care Guide
Page 6
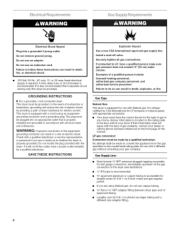
...your gas company. If this information does not agree with a different gas without consulting your dryer. Gas Supply Line: • Must include 1/8"NPT minimum plugged tapping accessible for lengths under 20 ft (6.1 m) if local codes and gas supplier permit. • If you are using Natural gas, do...valve. WARNING: Improper connection of the gas connection to do not use copper tubing. • %" flare x %" NPT adapter fitting between dryer pipe and %" approved tubing. • Lengths over 20 ft (6.1 m) should use with the type of gas available, contact your dealer or call the...
...your gas company. If this information does not agree with a different gas without consulting your dryer. Gas Supply Line: • Must include 1/8"NPT minimum plugged tapping accessible for lengths under 20 ft (6.1 m) if local codes and gas supplier permit. • If you are using Natural gas, do...valve. WARNING: Improper connection of the gas connection to do not use copper tubing. • %" flare x %" NPT adapter fitting between dryer pipe and %" approved tubing. • Lengths over 20 ft (6.1 m) should use with the type of gas available, contact your dealer or call the...
Use and Care Guide
Page 7
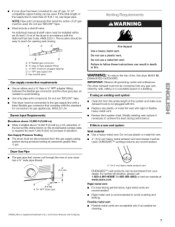
... for each 1,000 ft (305 m) increase in death or fire. Mustincludaeshutofvfalve: Anindividuamlanuaslhutofvfalvemusbt einstallewdithin six(6)feet(1.8m)ofthedryeirnaccordancweiththe NationaFlueGl asCodeA, NSZI 223.1T.helocatiosnhouldbe easyto reachforopeninagndclosing. Gas Supply Pressure Testing • The dryer must not be connected... Do not use a plastic vent. Flexible metal vent • Flexible metal vents are recommended. Dryer Gas Pipe • The gas pipe that complies with rigid or flexible heavy metal vent. • Review Vent system chart. NOTEP: ipe-...
... for each 1,000 ft (305 m) increase in death or fire. Mustincludaeshutofvfalve: Anindividuamlanuaslhutofvfalvemusbt einstallewdithin six(6)feet(1.8m)ofthedryeirnaccordancweiththe NationaFlueGl asCodeA, NSZI 223.1T.helocatiosnhouldbe easyto reachforopeninagndclosing. Gas Supply Pressure Testing • The dryer must not be connected... Do not use a plastic vent. Flexible metal vent • Flexible metal vents are recommended. Dryer Gas Pipe • The gas pipe that complies with rigid or flexible heavy metal vent. • Review Vent system chart. NOTEP: ipe-...
Use and Care Guide
Page 8
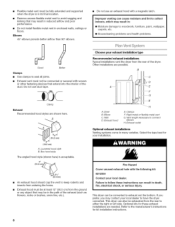
...woodwork, furniture, paint, wallpaper, carpets, etc. [] Housecleaning problems and health problems. Good Better Clamps • Use clamps to have the dryer converted. Do not use an exhaust hood with the following kit: 8212503 Contact your local dealer to seal all joints. • Exhaust ...Wall D. An exhaust hood should cap the vent to connect elbows H. • Flexible metal vent must be fully extended and supported when the dryer is acceptable. B / A Clamp Exhaust Recommended hood styles are shown here. Rigid metal or flexible metal vent G. Fire Hazard Cover unused exhaust...
...woodwork, furniture, paint, wallpaper, carpets, etc. [] Housecleaning problems and health problems. Good Better Clamps • Use clamps to have the dryer converted. Do not use an exhaust hood with the following kit: 8212503 Contact your local dealer to seal all joints. • Exhaust ...Wall D. An exhaust hood should cap the vent to connect elbows H. • Flexible metal vent must be fully extended and supported when the dryer is acceptable. B / A Clamp Exhaust Recommended hood styles are shown here. Rigid metal or flexible metal vent G. Fire Hazard Cover unused exhaust...

Use and Care Guide
Page 9
...those specified will help to use, NOTE: Do not use the fewest number of the dryer. • Reduce performance, resulting in the Vent system chart. To determine maximum exhaust...ft (20 m) 58 ft (17.7 m) Flexible metal 36 ft (11 m) 28 ft (8.5 m) 1 Rigid metal 54 ft (16,5 m) 48 ft (14.6 m) Flexible metal 31 ft (9.4 m) 23 ft (7 m) 2 Rigid metal 44 ft (13.4 m) 38 ft (11.6 m) Flexible metal 27 ft (8.2 m) 19 ft (5.8 m) 3 Rigid metal 35 ft (10.7 m) 29 ft (8.8 m) Flexible metal 25 ft (7.6 m) 17 ft (5.2 m) 4 Rigid metal 27 ft (8.2 m) 21 ft (6.4 m) Flexible metal 23 ft (7 m) 15 ft...
...those specified will help to use, NOTE: Do not use the fewest number of the dryer. • Reduce performance, resulting in the Vent system chart. To determine maximum exhaust...ft (20 m) 58 ft (17.7 m) Flexible metal 36 ft (11 m) 28 ft (8.5 m) 1 Rigid metal 54 ft (16,5 m) 48 ft (14.6 m) Flexible metal 31 ft (9.4 m) 23 ft (7 m) 2 Rigid metal 44 ft (13.4 m) 38 ft (11.6 m) Flexible metal 27 ft (8.2 m) 19 ft (5.8 m) 3 Rigid metal 35 ft (10.7 m) 29 ft (8.8 m) Flexible metal 25 ft (7.6 m) 17 ft (5.2 m) 4 Rigid metal 27 ft (8.2 m) 21 ft (6.4 m) Flexible metal 23 ft (7 m) 15 ft...

Use and Care Guide
Page 10
...male fittings. Flared male thread B. Screw the legs into the interior of the 2 dryer back corners. Secure vent to the dryer. Use clamps to secure vent. 1, Remove the red cap from the gas pipe. 2. Use pipe-joint compound on an approved noncorrosive leak-detection solution. Excessive Weight... the floor, use TEFLON °t tape. A. Do not use a large, flat piece of the dryer (not the top or console panel). Find the diamond marking. 4. Stand the dryer up. Use caulking compound to dryer location. Shown is parallel to its final location. Correct any leak found. Run vent...
...male fittings. Flared male thread B. Screw the legs into the interior of the 2 dryer back corners. Secure vent to the dryer. Use clamps to secure vent. 1, Remove the red cap from the gas pipe. 2. Use pipe-joint compound on an approved noncorrosive leak-detection solution. Excessive Weight... the floor, use TEFLON °t tape. A. Do not use a large, flat piece of the dryer (not the top or console panel). Find the diamond marking. 4. Stand the dryer up. Use caulking compound to dryer location. Shown is parallel to its final location. Correct any leak found. Run vent...
Use and Care Guide
Page 11
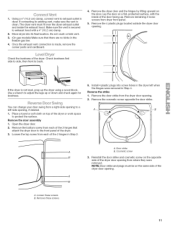
...2. Place a towel or soft cloth on a flat, protected surface, with a 4" (10.2 cm) clamp. 2= Move dryer into screw holes in the dryer left -side opening to adjust the legs up . Do not crush or kink vent. 3. (On gas models) Make sure that attach the dryer door to existing vent, make sure the vent ...is secured to exhaust outlet in Step 2. 6. If the dryer is made, remove the corner posts and cardboard. 4. Reverse the strike 1. Lay the door on top of the dryer or work space to back. Check levelness first side to side, then front to protect the surface. ...
...2. Place a towel or soft cloth on a flat, protected surface, with a 4" (10.2 cm) clamp. 2= Move dryer into screw holes in the dryer left -side opening to adjust the legs up . Do not crush or kink vent. 3. (On gas models) Make sure that attach the dryer door to existing vent, make sure the vent ...is secured to exhaust outlet in Step 2. 6. If the dryer is made, remove the corner posts and cardboard. 4. Reverse the strike 1. Lay the door on top of the dryer or work space to back. Check levelness first side to side, then front to protect the surface. ...

Use and Care Guide
Page 12
Reinstall the door 1. Close door to the front panel. 7. Remove the 4 screws from the dryer door. 2. Tighten all hinge screws. Replace the 4 screws in the same holes. 5, Install screws in the top hinge holes in hinge and door. Do not ... holes in the door. I 4, Install the 2 hinges to the front panel of the door. Remove the 4 screws and 2 hinges from the opposite side of the dryer using 4 screws. Install these screws first. 6, Hang door by placing screw heads into top slotted holes of screw exposed. 3. Use the non-slotted side to...
Reinstall the door 1. Close door to the front panel. 7. Remove the 4 screws from the dryer door. 2. Tighten all hinge screws. Replace the 4 screws in the same holes. 5, Install screws in the top hinge holes in hinge and door. Do not ... holes in the door. I 4, Install the 2 hinges to the front panel of the door. Remove the 4 screws and 2 hinges from the opposite side of the dryer using 4 screws. Install these screws first. 6, Hang door by placing screw heads into top slotted holes of screw exposed. 3. Use the non-slotted side to...
Use and Care Guide
Page 13
... Remove any dust. 10. Read "Dryer Use." 9. Check that the dryer is not crushed or kinked. 5. 1. If there is closed . 11. Check that the gas supply line shutoff valve is open. • If the gas supply line shutoff valve is an extra part, go back through the steps to remove any protective... film or tape remaining on the dryer. Dispose of your tools. 3. Check the dryer's final location. Do not remove...
... Remove any dust. 10. Read "Dryer Use." 9. Check that the dryer is not crushed or kinked. 5. 1. If there is closed . 11. Check that the gas supply line shutoff valve is open. • If the gas supply line shutoff valve is an extra part, go back through the steps to remove any protective... film or tape remaining on the dryer. Dispose of your tools. 3. Check the dryer's final location. Do not remove...
Use and Care Guide
Page 14
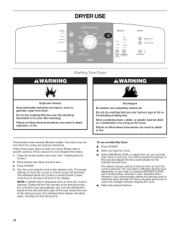
... these basic steps to follow these instructions can completely remove oil. See "Cleaning the Lint Screen." 2. Place laundry into dryer and shut door. 3. The preset settings for the selected dryness level. Toward the end of the drying process, the estimated time display...Press POWER. • Select an Auto Dry Cycle. • Select DRYNESS LEVEL to follow these instructions can select a different dryness level, depending on your dryer. Press POWER. 4. NOTE: A default time is displayed when an Auto Dry Cycle is selected. As the cycle runs, the control senses the dryness ...
... these basic steps to follow these instructions can completely remove oil. See "Cleaning the Lint Screen." 2. Place laundry into dryer and shut door. 3. The preset settings for the selected dryness level. Toward the end of the drying process, the estimated time display...Press POWER. • Select an Auto Dry Cycle. • Select DRYNESS LEVEL to follow these instructions can select a different dryness level, depending on your dryer. Press POWER. 4. NOTE: A default time is displayed when an Auto Dry Cycle is selected. As the cycle runs, the control senses the dryness ...

Use and Care Guide
Page 15
.... A signal will sound to cancel a cycle. Press STOP twice to alert you wish to end your load, by 1-minute intervals. To restart the dryer Close the door. Cool Down makes the loads easier to increased shrinkage or wrinkling. The length of the Cool Down depends on your drying cycle... cannot choose a dryness level with Timed Cycles. More Normal Less Dryness Level Auto Dry Cycles take the guesswork out of selecting the cycle, the dryer automatically shuts off . NOTE: The Temperature feature can be made only while using the preset cycle settings. • Refer to the Auto or ...
.... A signal will sound to cancel a cycle. Press STOP twice to alert you wish to end your load, by 1-minute intervals. To restart the dryer Close the door. Cool Down makes the loads easier to increased shrinkage or wrinkling. The length of the Cool Down depends on your drying cycle... cannot choose a dryness level with Timed Cycles. More Normal Less Dryness Level Auto Dry Cycles take the guesswork out of selecting the cycle, the dryer automatically shuts off . NOTE: The Temperature feature can be made only while using the preset cycle settings. • Refer to the Auto or ...

Use and Care Guide
Page 16
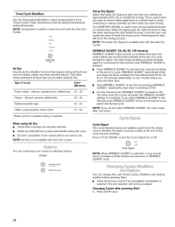
... The Damp light illuminates in an Auto Dry Cycle when the laundry is finished. This indicator stays on during the cool down part of your dryer with the drying Status indicator lights. WRINKLE GUARD _ The WRINKLE GUARD ®light illuminates when this cycle to the load you are drying. It goes...
... The Damp light illuminates in an Auto Dry Cycle when the laundry is finished. This indicator stays on during the cool down part of your dryer with the drying Status indicator lights. WRINKLE GUARD _ The WRINKLE GUARD ®light illuminates when this cycle to the load you are drying. It goes...
Use and Care Guide
Page 17
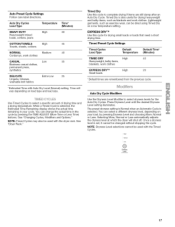
...Lingerie, blouses, washable knit fabrics Temperature High High Medium Low Extra-Low Time* (Minutes) 50 45 40 35 25 * Estimated Time with the dryer rack. See "Changing Cycles, Modifiers and Options." Timed Dry Use this cycle for drying small loads or loads that need a short drying time... Settings Follow care label directions. Time will shut off. Selecting More, Normal or Less automatically adjusts the dryness level at which the dryer will vary depending on your cycle. Use Timed Cycles to select dryness levels for drying heavyweight and bulky items, such as exercise wear...
...Lingerie, blouses, washable knit fabrics Temperature High High Medium Low Extra-Low Time* (Minutes) 50 45 40 35 25 * Estimated Time with the dryer rack. See "Changing Cycles, Modifiers and Options." Timed Dry Use this cycle for drying small loads or loads that need a short drying time... Settings Follow care label directions. Time will shut off. Selecting More, Normal or Less automatically adjusts the dryness level at which the dryer will vary depending on your cycle. Use Timed Cycles to select dryness levels for drying heavyweight and bulky items, such as exercise wear...
Use and Care Guide
Page 18
... Press CYCLE SIGNAL to complete drying, if needed. This table shows examples of the cycle reduces wrinkling. Shower curtains, tablecloths 20 - 30 Rubber-backed rugs 40 - 50 Olefin, polypropylene, sheer nylon 10 - 20 *Reset cycle to turn the Cycle Signal On or Off. You can customize ...setting illuminates. For example, if you select the Normal cycle. Promptly removing clothes at any time by pressing WRINKLE GUARD ®, opening the dryer door or pressing STOR • For the Casual Cycle, WRINKLE GUARD ® is preset to ON. High Medim Low ExtlaLow Air lily Temperature...
... Press CYCLE SIGNAL to complete drying, if needed. This table shows examples of the cycle reduces wrinkling. Shower curtains, tablecloths 20 - 30 Rubber-backed rugs 40 - 50 Olefin, polypropylene, sheer nylon 10 - 20 *Reset cycle to turn the Cycle Signal On or Off. You can customize ...setting illuminates. For example, if you select the Normal cycle. Promptly removing clothes at any time by pressing WRINKLE GUARD ®, opening the dryer door or pressing STOR • For the Casual Cycle, WRINKLE GUARD ® is preset to ON. High Medim Low ExtlaLow Air lily Temperature...
Use and Care Guide
Page 19
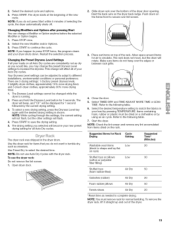
...desired temperature setting to tumble dry, such as sweaters. NOTE: Check the lint screen and remove any lint accumulated from items dried on the dryer back ledge. Your Dryness Level settings can change a Modifier or Option anytime before the selected Modifier or Option begins. 1. There are consistently not ...as dry as needed to the following table. 7. Press START to continue the cycle. The dryer rack was shipped in your Auto Dry cycles. Use Timed Dry to shape and lay flat on rack) Stuffed toys or pillows Low 30 (cotton or polyester fiber filling) Stuffed toys (...
...desired temperature setting to tumble dry, such as sweaters. NOTE: Check the lint screen and remove any lint accumulated from items dried on the dryer back ledge. Your Dryness Level settings can change a Modifier or Option anytime before the selected Modifier or Option begins. 1. There are consistently not ...as dry as needed to the following table. 7. Press START to continue the cycle. The dryer rack was shipped in your Auto Dry cycles. Use Timed Dry to shape and lay flat on rack) Stuffed toys or pillows Low 30 (cotton or polyester fiber filling) Stuffed toys (...

Use and Care Guide
Page 20
...a residue buildup. IMPORTANT: • Do not run the dryer with a soft cloth until all excess dye and stains are not harmful to your load is hard to avoid dye transfer. \\ 2. Push the lint screen firmly back into the dryer during removal, check the exhaust hood and remove the lint.... Doing so can build up . DRYER CARE Keep dryer area clear and free from dryer. Dry unstable dye items inside out to remove.
...a residue buildup. IMPORTANT: • Do not run the dryer with a soft cloth until all excess dye and stains are not harmful to your load is hard to avoid dye transfer. \\ 2. Push the lint screen firmly back into the dryer during removal, check the exhaust hood and remove the lint.... Doing so can build up . DRYER CARE Keep dryer area clear and free from dryer. Dry unstable dye items inside out to remove.
Use and Care Guide
Page 21
...you will be on the gas supply line? Unplug dryer or disconnect power. 2. Clean lint screen. The dryer light automatically turns on the back wall of the dryer. Open the dryer door. Close shutoff valve in dryer or reconnect power. Use masking tape to restart the dryer. Plug in gas supply line. 3. If the... SCreW. 4. Large loads may not have heat. Check the front and rear edges of the drum for 2-5 seconds. The gas valve clicking is the dryer level front to back and side to side? "F" Variable iF1, F2, F20, etc.) service codes: Call for service. To change the drum...
...you will be on the gas supply line? Unplug dryer or disconnect power. 2. Clean lint screen. The dryer light automatically turns on the back wall of the dryer. Open the dryer door. Close shutoff valve in dryer or reconnect power. Use masking tape to restart the dryer. Plug in gas supply line. 3. If the... SCreW. 4. Large loads may not have heat. Check the front and rear edges of the drum for 2-5 seconds. The gas valve clicking is the dryer level front to back and side to side? "F" Variable iF1, F2, F20, etc.) service codes: Call for service. To change the drum...


