Use and Care Guide
Page 2
...Plan Vent System 8 Install Vent System 10 Install Leveling Legs 10 Make Gas Connection 10 Connect Vent 11 Level Dryer 11 Reverse Door Swing 11 Complete Installation 13 DRYER USE 14 Starting Your Dryer 14 Stopping, Pausing or Restarting 15 Drying and Cycle Tips 15 Status ...18 Dryer Rack 19 DRYER CARE 20 Cleaning the Dryer Location 20 Cleaning the Lint Screen 20 Cleaning the Dryer Interior 20 Removing Accumulated Lint 20 Vacation and Moving Care 21 Changing the Drum Light 21 TROUBLESHOOTING 21 PROTECTION AGREEMENTS 23 SERVICE NUMBERS BACK COVER KENMORE ELITE APPLIANCE ...
...Plan Vent System 8 Install Vent System 10 Install Leveling Legs 10 Make Gas Connection 10 Connect Vent 11 Level Dryer 11 Reverse Door Swing 11 Complete Installation 13 DRYER USE 14 Starting Your Dryer 14 Stopping, Pausing or Restarting 15 Drying and Cycle Tips 15 Status ...18 Dryer Rack 19 DRYER CARE 20 Cleaning the Dryer Location 20 Cleaning the Lint Screen 20 Cleaning the Dryer Interior 20 Removing Accumulated Lint 20 Vacation and Moving Care 21 Changing the Drum Light 21 TROUBLESHOOTING 21 PROTECTION AGREEMENTS 23 SERVICE NUMBERS BACK COVER KENMORE ELITE APPLIANCE ...
Use and Care Guide
Page 3
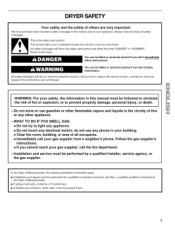
... if you cannot reach your appliance. i WthAe RrNisINkGo: f firFeoroyr oeuxrplsoasfieotny,, tohretoinfporremvaetniot n proinpetrhtiys mdaamnuaagle, mpusetrsobnealfollionwjuerdy, otor dmeinaitmh.ize - WHAT TO DO IF YOU SMELL GAS: • Do not try to reduce the chance of injury, and tell you what the potential hazard is the safety alert symbol.... DRYER SAFETY Your safety and the safety of others . This is , tell you how to light any appliance. • Do not touch any other ...
... if you cannot reach your appliance. i WthAe RrNisINkGo: f firFeoroyr oeuxrplsoasfieotny,, tohretoinfporremvaetniot n proinpetrhtiys mdaamnuaagle, mpusetrsobnealfollionwjuerdy, otor dmeinaitmh.ize - WHAT TO DO IF YOU SMELL GAS: • Do not try to reduce the chance of injury, and tell you what the potential hazard is the safety alert symbol.... DRYER SAFETY Your safety and the safety of others . This is , tell you how to light any appliance. • Do not touch any other ...
Use and Care Guide
Page 4
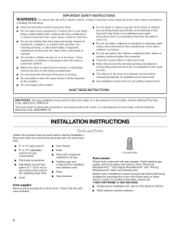
... of children is necessary when the dryer is used near children. • Before the dryer is removed from your dryer. INSTALLATION INSTRUCTIONS Gather the required tools and parts before using the dryer, follow the instructions provided with gas supplier. Check existing gas supply, electrical supply and venting. ... codes, with controls. [] Do not repair or replace any part of the dryer or attempt any tools listed here. 8" or 10" pipe wrench 8" or 10" adjustable wrench (for gas connections) Flat-blade screwdriver Adjustable wrench that could ignite or explode. • Do not allow...
... of children is necessary when the dryer is used near children. • Before the dryer is removed from your dryer. INSTALLATION INSTRUCTIONS Gather the required tools and parts before using the dryer, follow the instructions provided with gas supplier. Check existing gas supply, electrical supply and venting. ... codes, with controls. [] Do not repair or replace any part of the dryer or attempt any tools listed here. 8" or 10" pipe wrench 8" or 10" adjustable wrench (for gas connections) Flat-blade screwdriver Adjustable wrench that could ignite or explode. • Do not allow...
Use and Care Guide
Page 5
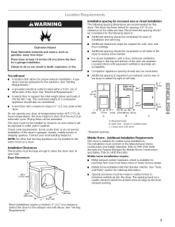
... gas dryer must be exhausted to support the total weight (dryer and load) of the dryer. See "Electrical Requirements." • A sturdy floor to the outdoors. At lower temperatures, the dryer might be exposed to water and/or weather. Contact your dryer at least twice as large as the dryer... rear of either the right or left side. See "Venting Requirements." • A grounded electrical outlet located within 2 ft (61 cm) of the dryer to reduce noise transfer. For closet installation, with equivalent ventilation openings are recommended for wall, door and floor moldings. •...
... gas dryer must be exhausted to support the total weight (dryer and load) of the dryer. See "Electrical Requirements." • A sturdy floor to the outdoors. At lower temperatures, the dryer might be exposed to water and/or weather. Contact your dryer at least twice as large as the dryer... rear of either the right or left side. See "Venting Requirements." • A grounded electrical outlet located within 2 ft (61 cm) of the dryer to reduce noise transfer. For closet installation, with equivalent ventilation openings are recommended for wall, door and floor moldings. •...
Use and Care Guide
Page 6
... use copper tubing. • %" flare x %" NPT adapter fitting between dryer pipe and %" approved tubing. • Lengths over 20 ft (6.1 m) should use with Natural gas. If this information does not agree with the dryer: if it will reduce the risk of electric shock by a qualified technician. Gas Supply Line: • Must include 1/8"NPT minimum plugged tapping...
... use copper tubing. • %" flare x %" NPT adapter fitting between dryer pipe and %" approved tubing. • Lengths over 20 ft (6.1 m) should use with Natural gas. If this information does not agree with the dryer: if it will reduce the risk of electric shock by a qualified technician. Gas Supply Line: • Must include 1/8"NPT minimum plugged tapping...
Use and Care Guide
Page 7
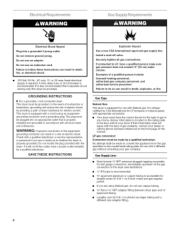
...fitting C. _" NPT minlinum plugged tapping D. _/2"NPT gas supply line E. IMPORTANT: Observe all governing codes and ordinances. Dryer Gas Pipe • The gas pipe that complies with a listed flexible gas connector that comes out through the rear of E.I. Gas shutoff valve Gas supply connection requirements • Use an elbow and .... • Use only pipe-joint compound. Burner Input Requirements: Elevations above 10,000 ft (3,048 m): • When installed above 10,000 ft (3,048 m) a 4% reduction of a building. Flexible metal vent • Flexible metal vents are recommended.
...fitting C. _" NPT minlinum plugged tapping D. _/2"NPT gas supply line E. IMPORTANT: Observe all governing codes and ordinances. Dryer Gas Pipe • The gas pipe that complies with a listed flexible gas connector that comes out through the rear of E.I. Gas shutoff valve Gas supply connection requirements • Use an elbow and .... • Use only pipe-joint compound. Burner Input Requirements: Elevations above 10,000 ft (3,048 m): • When installed above 10,000 ft (3,048 m) a 4% reduction of a building. Flexible metal vent • Flexible metal vents are recommended.

Use and Care Guide
Page 10
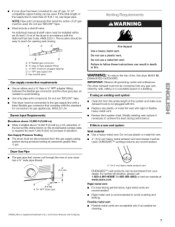
... tighten, connect the gas supply to dryer location. Failure to secure vent. 1, Remove the red cap from dryer packaging under the entire back edge of the vent to do so can result in "Plan Vent System." Do not use a large, flat piece of the dryer (not the top or console panel). Slide the dryer on the cardboard...
... tighten, connect the gas supply to dryer location. Failure to secure vent. 1, Remove the red cap from dryer packaging under the entire back edge of the vent to do so can result in "Plan Vent System." Do not use a large, flat piece of the dryer (not the top or console panel). Slide the dryer on the cardboard...
Use and Care Guide
Page 11
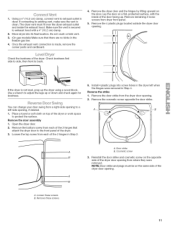
...in Step 2. 6. Remove remaining 2 loose screws from where they were removed. Use a wrench to back. A. If connecting to existing vent, make sure the vent is not level, prop up the dryer using a wood block. The dr/er vent must be on the same side of the door facing...or down and check again for levelness. Remove the dryer door and the hinges by lifting upward on a flat, protected surface, with a 4" (10.2 cm) clamp. 2= Move dryer into screw holes in the flexible gas line. 4. Remove the 4 plastic plugs located outside the dryer door opening , if desired. 1. Check levelness first...
...in Step 2. 6. Remove remaining 2 loose screws from where they were removed. Use a wrench to back. A. If connecting to existing vent, make sure the vent is not level, prop up the dryer using a wood block. The dr/er vent must be on the same side of the door facing...or down and check again for levelness. Remove the dryer door and the hinges by lifting upward on a flat, protected surface, with a 4" (10.2 cm) clamp. 2= Move dryer into screw holes in the flexible gas line. 4. Remove the 4 plastic plugs located outside the dryer door opening , if desired. 1. Check levelness first...
Use and Care Guide
Page 13
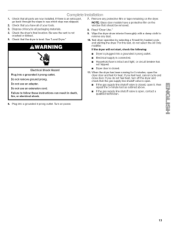
...result in death, fire, or electrical shock. 6. Test dryer operation by selecting a Timed Dry heated cycle and starting the dryer. See "Level Dryer." Turn on the dryer. Remove any dust. 10. If there is an extra part, go back through the steps to remove any protective film or tape remaining...for 5 minutes, open , contact a qualified technician. 13 If you have a protective film on the window that the gas supply line shutoff valve is open. • If the gas supply line shutoff valve is closed . 11. NOTE: Glass door models have all of /recycle all parts are now installed...
...result in death, fire, or electrical shock. 6. Test dryer operation by selecting a Timed Dry heated cycle and starting the dryer. See "Level Dryer." Turn on the dryer. Remove any dust. 10. If there is an extra part, go back through the steps to remove any protective film or tape remaining...for 5 minutes, open , contact a qualified technician. 13 If you have a protective film on the window that the gas supply line shutoff valve is open. • If the gas supply line shutoff valve is closed . 11. NOTE: Glass door models have all of /recycle all parts are now installed...
Use and Care Guide
Page 21
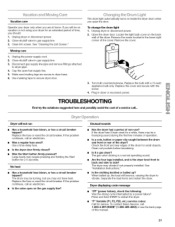
... and possibly avoid the cost of the cover. If the problem continues, call 1-800-4-MY-HOME ®(1-800-469-4663) or see the back page of the dryer. The gas valve clicking is a normal operating sound. "F" Variable iF1, F2, F20, etc.) service codes: Call for an extended period of time, you may be...
... and possibly avoid the cost of the cover. If the problem continues, call 1-800-4-MY-HOME ®(1-800-469-4663) or see the back page of the dryer. The gas valve clicking is a normal operating sound. "F" Variable iF1, F2, F20, etc.) service codes: Call for an extended period of time, you may be...


