
User Manual
Page 4
...-type keyboards 17 3.2.7.3 The numeric keyboard 18 4 Discovering the program through the screens 20 4.1 Main menu 20 4.2 About screen 21 4.3 GPS Data screen 21 4.3.1 GPS data displayed 21 4.3.2 GPS connection indicator 22 4.3.3 GPS data quality indicator 22 4.3.4 Time synchronization 23 4.4 The map ...23 4.4.1 2D and 3D map views 24 4.4.2 Zoom levels 24 4.4.3 Daylight and night color schemes 25 4.4.4 Streets and roads 26 4.4.5 Other objects 26 4.4.6 Current position and Lock-on-Road 26 4.4.7 Selected map point, also...
...-type keyboards 17 3.2.7.3 The numeric keyboard 18 4 Discovering the program through the screens 20 4.1 Main menu 20 4.2 About screen 21 4.3 GPS Data screen 21 4.3.1 GPS data displayed 21 4.3.2 GPS connection indicator 22 4.3.3 GPS data quality indicator 22 4.3.4 Time synchronization 23 4.4 The map ...23 4.4.1 2D and 3D map views 24 4.4.2 Zoom levels 24 4.4.3 Daylight and night color schemes 25 4.4.4 Streets and roads 26 4.4.5 Other objects 26 4.4.6 Current position and Lock-on-Road 26 4.4.7 Selected map point, also...

User Manual
Page 7
5.6 Advanced settings 66 5.6.1 Display options 67 5.6.1.1 2D in Map mode (and north-up orientation 67 5.6.1.2 3D in Cockpit mode (and track-up orientation 67 5.6.1.3 Zoom in after find 67 5.6.1.4 Coordinate display format 68 5.6.1.5 Cockpit layout 68 5.6.2 Backlight settings 68 5.6.2.1 Power management 68 5.6.2.2 Brightness 69 5.6.3 Smart Zoom 69 5.6.3.1 Smart Zoom settings 69 5.6.3.2 Enable Overview mode 69 5.6.3.3 Restore Lock-to-Position and Smart Zoom 70 5.6.4 Route options 71 5.6.4.1 Off-route sensitivity and Recalculation...
5.6 Advanced settings 66 5.6.1 Display options 67 5.6.1.1 2D in Map mode (and north-up orientation 67 5.6.1.2 3D in Cockpit mode (and track-up orientation 67 5.6.1.3 Zoom in after find 67 5.6.1.4 Coordinate display format 68 5.6.1.5 Cockpit layout 68 5.6.2 Backlight settings 68 5.6.2.1 Power management 68 5.6.2.2 Brightness 69 5.6.3 Smart Zoom 69 5.6.3.1 Smart Zoom settings 69 5.6.3.2 Enable Overview mode 69 5.6.3.3 Restore Lock-to-Position and Smart Zoom 70 5.6.4 Route options 71 5.6.4.1 Off-route sensitivity and Recalculation...

User Manual
Page 14
.... Tip: Use this button will open the Main menu screen. 3.2 Screen buttons and controls The primary input channel of Touch & Go Navigator is reserved for opening the Route Information screen. the Lock button appears on the screen, with the currently selected one of the icons to change the value. 14 Alternatively, tap the bottom section of possible values. Below you need the distance and type of the most important data screen during navigation, a hardware button is...
.... Tip: Use this button will open the Main menu screen. 3.2 Screen buttons and controls The primary input channel of Touch & Go Navigator is reserved for opening the Route Information screen. the Lock button appears on the screen, with the currently selected one of the icons to change the value. 14 Alternatively, tap the bottom section of possible values. Below you need the distance and type of the most important data screen during navigation, a hardware button is...

User Manual
Page 21
... numbers also shown in the Main menu to inform you about the map licenses you , with square display). The more satellites your GPS tracks (the green ones), the better your position as the centre. It is not used by the GPS to open this screen. On the right you can see the satellite signal strength bars (this feature is a collection of using the program. 4.3 GPS Data screen Tap the small satellite dish icon...
... numbers also shown in the Main menu to inform you about the map licenses you , with square display). The more satellites your GPS tracks (the green ones), the better your position as the centre. It is not used by the GPS to open this screen. On the right you can see the satellite signal strength bars (this feature is a collection of using the program. 4.3 GPS Data screen Tap the small satellite dish icon...
User Manual
Page 23
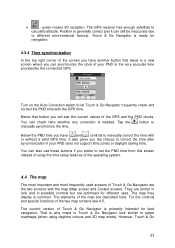
... GPS receiver has enough satellites to let Touch & Go Navigator frequently check and correct the PND time with the GPS time. Touch & Go Navigator is why maps in possible controls but are the two screens with or without a valid GPS time. Turn on the Auto Correction switch to calculate altitude. Tap the manually synchronize the time. The map they display is needed. The elements of using daytime colours and 2D map mode...
... GPS receiver has enough satellites to let Touch & Go Navigator frequently check and correct the PND time with the GPS time. Touch & Go Navigator is why maps in possible controls but are the two screens with or without a valid GPS time. Turn on the Auto Correction switch to calculate altitude. Tap the manually synchronize the time. The map they display is needed. The elements of using daytime colours and 2D map mode...

User Manual
Page 24
... still rotate and tilt the maps in either the 2D or 3D view. Note: You may find your position on both Map and Cockpit screens. Changing the scale of the Map screen, use hardware buttons (3.1.2) or semitransparent screen icons (4.5.2) on the map, use the switch in Map settings (5.2.2)). Note: Touch & Go Navigator has a special Smart Zoom function for Map and Cockpit screens in the Quick menu (4.7.2.1) to quickly switch between 2D and...
... still rotate and tilt the maps in either the 2D or 3D view. Note: You may find your position on both Map and Cockpit screens. Changing the scale of the Map screen, use hardware buttons (3.1.2) or semitransparent screen icons (4.5.2) on the map, use the switch in Map settings (5.2.2)). Note: Touch & Go Navigator has a special Smart Zoom function for Map and Cockpit screens in the Quick menu (4.7.2.1) to quickly switch between 2D and...

User Manual
Page 27
... & Go Navigator has a built-in Lock-on-Road feature that Lock-on-Road may choose the wrong street). 4.4.7 Selected map point, also known as the Cursor If you unpin it as a POI. Pins are shown as a blue dot on the screen. The arrow is sized and vertically rotated with a pin. The location received from the GPS receiver is also the location saved in the map. It...
... & Go Navigator has a built-in Lock-on-Road feature that Lock-on-Road may choose the wrong street). 4.4.7 Selected map point, also known as the Cursor If you unpin it as a POI. Pins are shown as a blue dot on the screen. The arrow is sized and vertically rotated with a pin. The location received from the GPS receiver is also the location saved in the map. It...

User Manual
Page 35
.... • Battery in not full, but the signal is crossed out. 35 They can quickly mute all to be significant, yet Touch & Go Navigator is possible. When only one arc is shown, the position is 2D (no altitude available), and position error may be set on the GPS Data screen (4.3.3), the map screens also inform you can show the same four values: • The black satellite dish...
.... • Battery in not full, but the signal is crossed out. 35 They can quickly mute all to be significant, yet Touch & Go Navigator is possible. When only one arc is shown, the position is 2D (no altitude available), and position error may be set on the GPS Data screen (4.3.3), the map screens also inform you can show the same four values: • The black satellite dish...
User Manual
Page 36
... the Quick menu (4.7.2.4). Setting the volume low is different from muting, therefore it is available and Lock-toPosition is enabled. At the same time Popup Info (street name, house number and the list of the device. There you have them reappear by a red dot and radiating red circles around it), or the current GPS position when it will not show up...
... the Quick menu (4.7.2.4). Setting the volume low is different from muting, therefore it is available and Lock-toPosition is enabled. At the same time Popup Info (street name, house number and the list of the device. There you have them reappear by a red dot and radiating red circles around it), or the current GPS position when it will not show up...

User Manual
Page 37
... all its exact position. This menu point is available only in Map mode and when there is the way to build your multi-point route in the map at the selected point for your route. This button is now demoted to a via point. • Continue: add a new destination to be reached after the previous destination. The new destination replaces the old one, which is to start a new route. Tip: If you...
... all its exact position. This menu point is available only in Map mode and when there is the way to build your multi-point route in the map at the selected point for your route. This button is now demoted to a via point. • Continue: add a new destination to be reached after the previous destination. The new destination replaces the old one, which is to start a new route. Tip: If you...

User Manual
Page 48
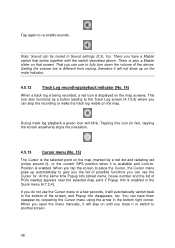
... the track log currently being recorded, a new line appears in this list with an underscore, as newly recorded track logs are not shown in the map normally. Tip: If you have it . • Info: this button opens a screen that shows the track log details, and lets you know that a recording is visible on the map selector), o have the following options: • Record: this buttons stops it displayed on the map using...
... the track log currently being recorded, a new line appears in this list with an underscore, as newly recorded track logs are not shown in the map normally. Tip: If you have it . • Info: this button opens a screen that shows the track log details, and lets you know that a recording is visible on the map selector), o have the following options: • Record: this buttons stops it displayed on the map using...
User Manual
Page 49
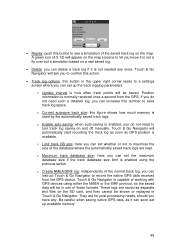
... shows how much memory is used by the automatically saved track logs. Touch & Go Navigator is capable of working with GPS devices using the previous switch. o Enable auto-saving: when auto-saving is enabled, you do not need to turn track log saving on the SD card, and they cannot be in one of these formats. Be careful when saving native GPS data, as GPS position is available. Position information is normally received once a second from the GPS device...
... shows how much memory is used by the automatically saved track logs. Touch & Go Navigator is capable of working with GPS devices using the previous switch. o Enable auto-saving: when auto-saving is enabled, you do not need to turn track log saving on the SD card, and they cannot be in one of these formats. Be careful when saving native GPS data, as GPS position is available. Position information is normally received once a second from the GPS device...
User Manual
Page 50
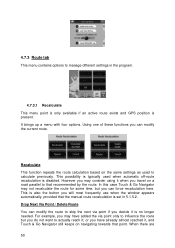
... the manual route recalculation is set in the program. 4.7.3.1 Recalculate This menu point is only available if an active route exists and GPS position is present. In this case Touch & Go Navigator may consider using it is also the button you can force recalculation here. This is no longer needed. This possibility is disabled. Drop Next Via Point / Delete Route You can modify the current route. or...
... the manual route recalculation is set in the program. 4.7.3.1 Recalculate This menu point is only available if an active route exists and GPS position is present. In this case Touch & Go Navigator may consider using it is also the button you can force recalculation here. This is no longer needed. This possibility is disabled. Drop Next Via Point / Delete Route You can modify the current route. or...

User Manual
Page 52
... one by tapping. Show Tap this button to the same street. 52 All significant junctions are the events shown in the Turn preview field and announced by tapping the Mode button once you recalculate the route avoiding the highlighted event and sometimes also some of manoeuvres during rush hour traffic, Touch & Go Navigator will replace the turn . the list of...
... one by tapping. Show Tap this button to the same street. 52 All significant junctions are the events shown in the Turn preview field and announced by tapping the Mode button once you recalculate the route avoiding the highlighted event and sometimes also some of manoeuvres during rush hour traffic, Touch & Go Navigator will replace the turn . the list of...

User Manual
Page 53
... see the list of all points used for distant parts of the map from later routes until you manually delete the route (4.7.3.2), or restart Touch & Go Navigator. 4.7.3.4 Fly Over This feature has no navigation function, it works before you start your first journey. 4.7.3.5 Edit Tap Edit to stop the simulation. They are similar to press and hold the first hardware button (Tilt down) and tap the Fly...
... see the list of all points used for distant parts of the map from later routes until you manually delete the route (4.7.3.2), or restart Touch & Go Navigator. 4.7.3.4 Fly Over This feature has no navigation function, it works before you start your first journey. 4.7.3.5 Edit Tap Edit to stop the simulation. They are similar to press and hold the first hardware button (Tilt down) and tap the Fly...

User Manual
Page 61
... hardware buttons or tapping the touch screen. This works in tandem with the Mute button (4.5.11) on the right will lead to uniform areas but better performance. Press Enter or tap Lock to re-enable Lock-to mute all Touch & Go Navigator sounds. When key sounds ...program, the device settings return. In its 61 Key sounds are turned on, the slider on the right will change the status of them will adjust their loudness. In its leftmost position the voice guidance is independent of this fader determines the device volume level. Tap to -Position and have the labels and icons...
... hardware buttons or tapping the touch screen. This works in tandem with the Mute button (4.5.11) on the right will lead to uniform areas but better performance. Press Enter or tap Lock to re-enable Lock-to mute all Touch & Go Navigator sounds. When key sounds ...program, the device settings return. In its 61 Key sounds are turned on, the slider on the right will change the status of them will adjust their loudness. In its leftmost position the voice guidance is independent of this fader determines the device volume level. Tap to -Position and have the labels and icons...

User Manual
Page 66
... the button you can set the distance units to be used by the program. Just tap OK when you can set the date and time format displayed by the chosen voice guidance language, you set the corresponding parameters. Touch & Go Navigator may not support all open new windows where you have selected the new spoken language. 5.5.3 Units You can select from a list of available languages and speakers. If you select a measurement unit that is not supported by...
... the button you can set the distance units to be used by the program. Just tap OK when you can set the date and time format displayed by the chosen voice guidance language, you set the corresponding parameters. Touch & Go Navigator may not support all open new windows where you have selected the new spoken language. 5.5.3 Units You can select from a list of available languages and speakers. If you select a measurement unit that is not supported by...

User Manual
Page 68
... the lights always on the coordinate input screen. 5.6.1.5 Cockpit layout There are sometimes displayed with their addresses, and sometimes with their content here. This helps you . Backlight always on You can also initiate this special feature of the Cockpit screen. 5.6.1.4 Coordinate display format Positions are three route data fields at the bottom of Touch & Go Navigator. Smart powersave You can choose to show you achieve a longer battery...
... the lights always on the coordinate input screen. 5.6.1.5 Cockpit layout There are sometimes displayed with their addresses, and sometimes with their content here. This helps you . Backlight always on You can also initiate this special feature of the Cockpit screen. 5.6.1.4 Coordinate display format Positions are three route data fields at the bottom of Touch & Go Navigator. Smart powersave You can choose to show you achieve a longer battery...

User Manual
Page 69
... Overview mode to let you enter the Overview mode again, the zoom level will not be displayed), but when you follow your maneuver at the next junction. 5.6.2.2 Brightness With this switch you can instruct Touch & Go Navigator to use the original settings of the PND device (previously set in the operating system at Start/Settings/Backlight), or you drive at high speed. While navigating a route: when approaching a turn is at a distance.
... Overview mode to let you enter the Overview mode again, the zoom level will not be displayed), but when you follow your maneuver at the next junction. 5.6.2.2 Brightness With this switch you can instruct Touch & Go Navigator to use the original settings of the PND device (previously set in the operating system at Start/Settings/Backlight), or you drive at high speed. While navigating a route: when approaching a turn is at a distance.

User Manual
Page 73
The backup is a reset to factory settings. Tip: If you move to lose all your pins. 5.6.5.4 Clear Data This button will always overwrite previous backups. Since they are about to another PND, you can make a backup, remove the card, insert it , or save one . Touch & Go Navigator will warn you that you are shown at all zoom levels, and you delete all your PC...
The backup is a reset to factory settings. Tip: If you move to lose all your pins. 5.6.5.4 Clear Data This button will always overwrite previous backups. Since they are about to another PND, you can make a backup, remove the card, insert it , or save one . Touch & Go Navigator will warn you that you are shown at all zoom levels, and you delete all your PC...

