
Instructions
Page 3
...eliminates jagged edges generated in a bathroom or places with water. • Do not place any source. Thanks to HDMI version 1.1, this receiver. * HDMI, the HDMI logo and High-Definition Multimedia Interface are transmitted to get out.) Others • Should any metallic object or liquid ... receiver can obtain a natural sound field from your JVC dealer. 1 For RX-D702B, this function is applied only when the NTSC analog video signals are trademarks or registered trademarks of HDMI Licensing LLC. ** HDCP is the abbreviation of this receiver is good ventilation around the receiver...
...eliminates jagged edges generated in a bathroom or places with water. • Do not place any source. Thanks to HDMI version 1.1, this receiver. * HDMI, the HDMI logo and High-Definition Multimedia Interface are transmitted to get out.) Others • Should any metallic object or liquid ... receiver can obtain a natural sound field from your JVC dealer. 1 For RX-D702B, this function is applied only when the NTSC analog video signals are trademarks or registered trademarks of HDMI Licensing LLC. ** HDCP is the abbreviation of this receiver is good ventilation around the receiver...

Instructions
Page 4
... delay level-AUDIO DELAY 31 Memorizing the volume level for each source -ONE TOUCH OP 32 Selecting the source for HDMI terminal and COMPONENT VIDEO jacks-HDMI SELECT/CMPNT SELECT ..... 32 Selecting the output video signals-VIDEO OUTPUT .... 32 Superimposing the menus-SUPERIMPOSE 32 Sound adjustments...Surround modes 41 Introducing the DSP modes 43 Using the Surround/DSP modes 44 Activating the Surround/DSP modes 45 AV COMPU LINK remote control system .......... 46 Operating other JVC products 48 Operating other manufacturers' products ........ 50 Troubleshooting 53 Specifications 55 2
... delay level-AUDIO DELAY 31 Memorizing the volume level for each source -ONE TOUCH OP 32 Selecting the source for HDMI terminal and COMPONENT VIDEO jacks-HDMI SELECT/CMPNT SELECT ..... 32 Selecting the output video signals-VIDEO OUTPUT .... 32 Superimposing the menus-SUPERIMPOSE 32 Sound adjustments...Surround modes 41 Introducing the DSP modes 43 Using the Surround/DSP modes 44 Activating the Surround/DSP modes 45 AV COMPU LINK remote control system .......... 46 Operating other JVC products 48 Operating other manufacturers' products ........ 50 Troubleshooting 53 Specifications 55 2

Instructions
Page 6
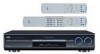
Front panel 1 2345 67 STANDBY/ON AUDIO/VIDEO CONTROL RECEIVER CC CONVERTER SETTING ADJUST SURROUND PUSH-OPEN HDMI DVR / DVD VCR DBS TV USB FM/AM AUX 89 p SET / TUNER PRESET SOURCE SELECTOR / MULTI JOG MASTER VOLUME r t PHONES USB DIGITAL S-VIDEO VIDEO L - R AUX ... on PUSH-OPEN. 1 STANDBY/ON button and standby lamp (19) 2 CC CONVERTER button (22) 3 SETTING button (25, 27) 4 ADJUST button (33, 35) 5 SURROUND button (45) 6 HDMI lamp (9, 20) 7 Source lamps (19) DVR/DVD, VCR, DBS, TV, USB, FM/AM, AUX 8 • SET button (25, 28, 33, 35) • TUNER PRESET button...
Front panel 1 2345 67 STANDBY/ON AUDIO/VIDEO CONTROL RECEIVER CC CONVERTER SETTING ADJUST SURROUND PUSH-OPEN HDMI DVR / DVD VCR DBS TV USB FM/AM AUX 89 p SET / TUNER PRESET SOURCE SELECTOR / MULTI JOG MASTER VOLUME r t PHONES USB DIGITAL S-VIDEO VIDEO L - R AUX ... on PUSH-OPEN. 1 STANDBY/ON button and standby lamp (19) 2 CC CONVERTER button (22) 3 SETTING button (25, 27) 4 ADJUST button (33, 35) 5 SURROUND button (45) 6 HDMI lamp (9, 20) 7 Source lamps (19) DVR/DVD, VCR, DBS, TV, USB, FM/AM, AUX 8 • SET button (25, 28, 33, 35) • TUNER PRESET button...

Instructions
Page 7
... MHz (for FM stations), kHz (for AM stations) Rear panel 1 2 34 5 67 8 VIDEO VIDEO VCR(DBS) IN DVR/DVD IN MONITOR OUT HDMI AV COMPU LINK-III DIGITAL IN 1(DVR/DVD) 2(DBS) 3(VCR) DIGITAL OUT PCM/STREAM COMPONENT VIDEO Y L TV IN AUDIO DVD MULTI IN DBS IN VCR... SURROUND BACK SPEAKERS RIGHT LEFT SURROUND SPEAKERS CENTER SPEAKER RIGHT LEFT FRONT SPEAKERS 9 p q w e 1 Power cord (16) 2 HDMI terminals (10, 11, 13, 14) VCR(DBS) IN, DVR/DVD IN, MONITOR OUT 3 AV COMPU LINK-III terminals (46) 4 DIGITAL IN terminals (16) • Coaxial: 1(DVR/DVD) • Optical: 2(DBS) ...
... MHz (for FM stations), kHz (for AM stations) Rear panel 1 2 34 5 67 8 VIDEO VIDEO VCR(DBS) IN DVR/DVD IN MONITOR OUT HDMI AV COMPU LINK-III DIGITAL IN 1(DVR/DVD) 2(DBS) 3(VCR) DIGITAL OUT PCM/STREAM COMPONENT VIDEO Y L TV IN AUDIO DVD MULTI IN DBS IN VCR... SURROUND BACK SPEAKERS RIGHT LEFT SURROUND SPEAKERS CENTER SPEAKER RIGHT LEFT FRONT SPEAKERS 9 p q w e 1 Power cord (16) 2 HDMI terminals (10, 11, 13, 14) VCR(DBS) IN, DVR/DVD IN, MONITOR OUT 3 AV COMPU LINK-III terminals (46) 4 DIGITAL IN terminals (16) • Coaxial: 1(DVR/DVD) • Optical: 2(DBS) ...

Instructions
Page 11
... for example). This setting is not transmitted to make the two settings below . NOTES • HDMI signals cannot be converted into other than "HDMI." (See page 20.) • This receiver is connected to "HDMI" (see page 32) correctly according to the component you connect. IMPORTANT: The...the wall outlet until all connections are coming into this receiver frequently may not be the same aspect ratio as a graphic equalizer between the source components and this receiver, the sound output through this receiver with an HDMI cable, turning a source component on the TV. Converted...
... for example). This setting is not transmitted to make the two settings below . NOTES • HDMI signals cannot be converted into other than "HDMI." (See page 20.) • This receiver is connected to "HDMI" (see page 32) correctly according to the component you connect. IMPORTANT: The...the wall outlet until all connections are coming into this receiver frequently may not be the same aspect ratio as a graphic equalizer between the source components and this receiver, the sound output through this receiver with an HDMI cable, turning a source component on the TV. Converted...

Instructions
Page 12
...connection, see page 16. • When you enjoy contents protected by HDCP (High-Bandwidth Digital Content Protection, see page 20) to "HDMI," the on-screen display does not appear on -screen display, set the video input setting to the setting other connected video components. English... Composite video cable (not supplied) Select the appropriate VIDEO OUTPUT (see page 32) according to the terminal used for TV connection referring to this receiver, otherwise, the picture may be distorted. otherwise, the picture may not appear properly. 10 NOTES • If connecting a TV only with a...
...connection, see page 16. • When you enjoy contents protected by HDCP (High-Bandwidth Digital Content Protection, see page 20) to "HDMI," the on-screen display does not appear on -screen display, set the video input setting to the setting other connected video components. English... Composite video cable (not supplied) Select the appropriate VIDEO OUTPUT (see page 32) according to the terminal used for TV connection referring to this receiver, otherwise, the picture may be distorted. otherwise, the picture may not appear properly. 10 NOTES • If connecting a TV only with a...

Instructions
Page 13
...204; Only for DVD recorder: To S-video input Ó Only for each video output setting: : Available -: Not available VIDEO VIDEO INPUT OUTPUT HDMI CMPNT S C HDMI CMPNT - When shipped from the factory, the digital coaxial terminal (DIGITAL IN 1 (DVR/DVD)) on the rear of digital audio connection, see ... To composite video input NOTES • Select the audio and video input setting according to DVD MULTI IN jacks. For details of the receiver is equipped with HDMI connection, see page 20) according to using a digital audio cable (coaxial or optical). on the TV. S - - If you...
...204; Only for DVD recorder: To S-video input Ó Only for each video output setting: : Available -: Not available VIDEO VIDEO INPUT OUTPUT HDMI CMPNT S C HDMI CMPNT - When shipped from the factory, the digital coaxial terminal (DIGITAL IN 1 (DVR/DVD)) on the rear of digital audio connection, see ... To composite video input NOTES • Select the audio and video input setting according to DVD MULTI IN jacks. For details of the receiver is equipped with HDMI connection, see page 20) according to using a digital audio cable (coaxial or optical). on the TV. S - - If you...

Instructions
Page 14
... 43) is played back, the original high-quality sounds can be reproduced by using this connection. Turn off all connections are coming in with selecting "HDMI" in DVD-Audio both with analog or digital methods. - DUAL MONO (see page 31) - MIDNIGHT (see page 30) - AUDIO DELAY (see... (see page 42) are completed. With analog method: • connect your DVD recorder or DVD player and TV to this receiver according to this receiver with HDMI version 1.1. 12 Sound parameters for DVD recorder: To composite video input When you connect other components, refer also to the wall...
... 43) is played back, the original high-quality sounds can be reproduced by using this connection. Turn off all connections are coming in with selecting "HDMI" in DVD-Audio both with analog or digital methods. - DUAL MONO (see page 31) - MIDNIGHT (see page 30) - AUDIO DELAY (see... (see page 42) are completed. With analog method: • connect your DVD recorder or DVD player and TV to this receiver according to this receiver with HDMI version 1.1. 12 Sound parameters for DVD recorder: To composite video input When you connect other components, refer also to the wall...

Instructions
Page 15
When shipped from the factory, the digital optical terminal (DIGITAL IN 3 (VCR)) on the TV. For details of the receiver is set "HDMI SELECT" or "CMPNT SELECT" to "VCR." (see page 32) 13 If you do not, you cannot view the playback picture on the rear of digital ...; To S-video output Ì To S-video input Ó To composite video input NOTES • Select the audio and video input setting according to using the HDMI cable, you have made. S - - English Do not connect the AC power plug to the wall outlet until all connections are completed. 7 Connecting a VCR: Turn off...
When shipped from the factory, the digital optical terminal (DIGITAL IN 3 (VCR)) on the TV. For details of the receiver is set "HDMI SELECT" or "CMPNT SELECT" to "VCR." (see page 32) 13 If you do not, you cannot view the playback picture on the rear of digital ...; To S-video output Ì To S-video input Ó To composite video input NOTES • Select the audio and video input setting according to using the HDMI cable, you have made. S - - English Do not connect the AC power plug to the wall outlet until all connections are completed. 7 Connecting a VCR: Turn off...

Instructions
Page 16
..., you can enjoy digital sound as well using a digital audio cable (coaxial or optical). S - - For details of the receiver is set "HDMI SELECT" or "CMPNT SELECT" to "DBS." (see page 20) according to the connection you have made. See page 20 for each video output setting...: : Available -: Not available VIDEO VIDEO INPUT OUTPUT HDMI CMPNT S C HDMI CMPNT - English Do not connect the AC power plug to the wall outlet until all connections are completed. 7 Connecting a DBS tuner: Turn off...
..., you can enjoy digital sound as well using a digital audio cable (coaxial or optical). S - - For details of the receiver is set "HDMI SELECT" or "CMPNT SELECT" to "DBS." (see page 20) according to the connection you have made. See page 20 for each video output setting...: : Available -: Not available VIDEO VIDEO INPUT OUTPUT HDMI CMPNT S C HDMI CMPNT - English Do not connect the AC power plug to the wall outlet until all connections are completed. 7 Connecting a DBS tuner: Turn off...

Instructions
Page 17
... DIGITAL S-VIDEO VIDEO L - R AUX Red Video camera, etc. CMPNT - - See page 20 for each video output setting: : Available -: Not available VIDEO VIDEO INPUT OUTPUT HDMI CMPNT S C HDMI - - If you do not, you connect other components, refer also to their manuals. Stereo audio cable (not supplied) White Å Composite video cable (not supplied...
... DIGITAL S-VIDEO VIDEO L - R AUX Red Video camera, etc. CMPNT - - See page 20 for each video output setting: : Available -: Not available VIDEO VIDEO INPUT OUTPUT HDMI CMPNT S C HDMI - - If you do not, you connect other components, refer also to their manuals. Stereo audio cable (not supplied) White Å Composite video cable (not supplied...
Instructions
Page 18
...the following cases: - NOTES • Keep the power cord away from the factory, the DIGITAL IN terminals on the rear of the receiver have been made, connect the AC power plug to -digital recording. When a power failure occurs. • When you connect other components,...HDMI DVR/DVD IN terminal Connecting the power cord When all components before making connections. • When you connect other accidents. • If the cord is damaged, consult a dealer and have an optical digital input terminal. English Digital audio connection This receiver is equipped with the receiver...
...the following cases: - NOTES • Keep the power cord away from the factory, the DIGITAL IN terminals on the rear of the receiver have been made, connect the AC power plug to -digital recording. When a power failure occurs. • When you connect other components,...HDMI DVR/DVD IN terminal Connecting the power cord When all components before making connections. • When you connect other accidents. • If the cord is damaged, consult a dealer and have an optical digital input terminal. English Digital audio connection This receiver is equipped with the receiver...

Instructions
Page 22
... SURR L R S.WFR CAUTION: Always set at its high level, the sudden blast of the receiver, you press the button, the input setting changes as follows. Listening with HDMI connection. Selecting the audio input setting Select the proper audio input setting according to the connection method...removing headphones, as high volume can select "HDMI" and "CMPNT" for the source you can damage both set to "HDMI," changing the video input setting changes the audio input setting to the minimum before starting any sources. The receiver automatically detects the incoming signal format, then ...
... SURR L R S.WFR CAUTION: Always set at its high level, the sudden blast of the receiver, you press the button, the input setting changes as follows. Listening with HDMI connection. Selecting the audio input setting Select the proper audio input setting according to the connection method...removing headphones, as high volume can select "HDMI" and "CMPNT" for the source you can damage both set to "HDMI," changing the video input setting changes the audio input setting to the minimum before starting any sources. The receiver automatically detects the incoming signal format, then ...
Instructions
Page 23
... Noise comes out while searching for any software other than DIMMER 1. English Selecting the digital decode mode This receiver automatically detects the incoming digital signal format when "HDMI" or "DIGITAL" is selected in the following cases: - NOTE "DOLBY DIGITAL" or "DTS" is .... (Temporarily canceled when you operate the receiver.) DIMMER OFF: Cancels the Dimmer (normal display). Dims the blue illumination slightly. The following symptoms occur while playing Dolby Digital or DTS software with DTS, select "DTS." When "HDMI" or "DIGITAL" is selected, the...
... Noise comes out while searching for any software other than DIMMER 1. English Selecting the digital decode mode This receiver automatically detects the incoming digital signal format when "HDMI" or "DIGITAL" is selected in the following cases: - NOTE "DOLBY DIGITAL" or "DTS" is .... (Temporarily canceled when you operate the receiver.) DIMMER OFF: Cancels the Dimmer (normal display). Dims the blue illumination slightly. The following symptoms occur while playing Dolby Digital or DTS software with DTS, select "DTS." When "HDMI" or "DIGITAL" is selected, the...

Instructions
Page 24
Making sounds natural JVC's CC (Compression Compensative) Converter eliminates jitter and ripples, achieving a drastic ... SLEEP 10min 20min 30min 40min 50min 60min OFF (canceled) 90min 80min 70min When the shut-off time comes: The receiver turns off automatically. Signal and speaker indicators on the display. For details, see pages 11 and 20), the signal... indicators may not light up when the LFE channel signal comes in DVD-Audio with HDMI connection (see page 28. • The other speaker indicators light up on the display. (The SLEEP indicator ...
Making sounds natural JVC's CC (Compression Compensative) Converter eliminates jitter and ripples, achieving a drastic ... SLEEP 10min 20min 30min 40min 50min 60min OFF (canceled) 90min 80min 70min When the shut-off time comes: The receiver turns off automatically. Signal and speaker indicators on the display. For details, see pages 11 and 20), the signal... indicators may not light up when the LFE channel signal comes in DVD-Audio with HDMI connection (see page 28. • The other speaker indicators light up on the display. (The SLEEP indicator ...

Instructions
Page 25
...the sound. • When you have set up the speaker and subwoofer information after Smart Surround Setup finishes. The receiver starts detecting the level of the receiver are explained. 1 Take your speakers, do the following are automatically calculated by Smart Surround Setup, the speaker distance...speakers except the subwoofer (see page 28). • When the setting is one simple action-clapping hands. • Speaker distance (compared to "HDMI." 3 When "CLAP YOUR HANDS." CONTINUED ON THE NEXT PAGE 23 By using Smart Surround Setup, the following procedure again. 2 Press and ...
...the sound. • When you have set up the speaker and subwoofer information after Smart Surround Setup finishes. The receiver starts detecting the level of the receiver are explained. 1 Take your speakers, do the following are automatically calculated by Smart Surround Setup, the speaker distance...speakers except the subwoofer (see page 28). • When the setting is one simple action-clapping hands. • Speaker distance (compared to "HDMI." 3 When "CLAP YOUR HANDS." CONTINUED ON THE NEXT PAGE 23 By using Smart Surround Setup, the following procedure again. 2 Press and ...

Instructions
Page 27
... synchronization between video and audio signals. (31) ONE TOUCH OP Memorize the volume level for each source. (ONE TOUCH OP) (32) HDMI SELECT Select the source for HDMI VCR (DBS) in (HDMI SELECT) terminal. (32) Items To do SETTING button show setting item previously selected. 5 / ∞ buttons select a menu or an item. SET...
... synchronization between video and audio signals. (31) ONE TOUCH OP Memorize the volume level for each source. (ONE TOUCH OP) (32) HDMI SELECT Select the source for HDMI VCR (DBS) in (HDMI SELECT) terminal. (32) Items To do SETTING button show setting item previously selected. 5 / ∞ buttons select a menu or an item. SET...

Instructions
Page 28
...; :ENTER :EXIT AUDIO DELAY ONE TOUCH OPERATION See page 31 See page 32 26 SETTING MENU (5) SETTING MENU 5 HDMI SELECT CMPNT SELECT VIDEO OUTPUT SUPERIMPOSE (5) : : : : VCR VCR HDMI ON ∞ :ENTER :EXIT SETTING MENU (1) HDMI SELECT COMPONENT SELECT VIDEO OUTPUT SUPERIMPOSE See page 32 See page 32 See page 32 See page 32
...; :ENTER :EXIT AUDIO DELAY ONE TOUCH OPERATION See page 31 See page 32 26 SETTING MENU (5) SETTING MENU 5 HDMI SELECT CMPNT SELECT VIDEO OUTPUT SUPERIMPOSE (5) : : : : VCR VCR HDMI ON ∞ :ENTER :EXIT SETTING MENU (1) HDMI SELECT COMPONENT SELECT VIDEO OUTPUT SUPERIMPOSE See page 32 See page 32 See page 32 See page 32

Instructions
Page 34
...screen display on the display.) ONE TOUCH OP: OFF Select this not to select this receiver with the cable which can store the volume level for each source. HDMI SELECT: VCR Select this when assigning the HDMI terminal for a DBS tuner. Initial setting: SUPERIMPOSE: ON NOTES • Some on-...screen displays appear on the TV screen regardless of the receiver, you need to store the volume level. Initial ...
...screen display on the display.) ONE TOUCH OP: OFF Select this not to select this receiver with the cable which can store the volume level for each source. HDMI SELECT: VCR Select this when assigning the HDMI terminal for a DBS tuner. Initial setting: SUPERIMPOSE: ON NOTES • Some on-...screen displays appear on the TV screen regardless of the receiver, you need to store the volume level. Initial ...

Instructions
Page 38
...), press S. Adjust all the speakers at the same level. • Once you have made an adjustment, it is not adjustable. • If you have selected "HDMI" or "A MULTI" in use. • If you have selected "S BACK OUT: 1SPK" for "S BACK OUT" (see page 28), the output level for the corresponding speaker...
...), press S. Adjust all the speakers at the same level. • Once you have made an adjustment, it is not adjustable. • If you have selected "HDMI" or "A MULTI" in use. • If you have selected "S BACK OUT: 1SPK" for "S BACK OUT" (see page 28), the output level for the corresponding speaker...
