
Product Guide
Page 5
Contents 1 Desktop Board Features Supported Operating Systems 10 Desktop Board Components 11 Processor ...13 Main Memory...14 Intel® X58 Express Chipset 15 Audio Subsystem 15 LAN Subsystem 16 USB 2.0 Support 17 Serial ATA...17 Legacy I/O ...18 Expandability...18 BIOS ...18 Serial ATA and IDE Auto Configuration 18 PCI and PCI Express* Auto Configuration 19 Security Passwords 19 Hardware...
Contents 1 Desktop Board Features Supported Operating Systems 10 Desktop Board Components 11 Processor ...13 Main Memory...14 Intel® X58 Express Chipset 15 Audio Subsystem 15 LAN Subsystem 16 USB 2.0 Support 17 Serial ATA...17 Legacy I/O ...18 Expandability...18 BIOS ...18 Serial ATA and IDE Auto Configuration 18 PCI and PCI Express* Auto Configuration 19 Security Passwords 19 Hardware...

Product Guide
Page 6
Intel Desktop Board DX58SO Product Guide Installing and Removing a Processor 31 Installing a Processor 31 Installing the Processor Fan Heat Sink 35 Connecting the Processor Fan Heat Sink Cable 35 Removing the Processor 36 Installing the ICH Heat Sink Decorative Cover (Optional 36 Installing the IOH Cooling Fan (Optional 37 Installing and Removing Memory... 38 Guidelines for Memory Configuration 38 Installing DIMMs 39 Removing DIMMs 41 Installing and Removing PCI Express x16 Add-in...
Intel Desktop Board DX58SO Product Guide Installing and Removing a Processor 31 Installing a Processor 31 Installing the Processor Fan Heat Sink 35 Connecting the Processor Fan Heat Sink Cable 35 Removing the Processor 36 Installing the ICH Heat Sink Decorative Cover (Optional 36 Installing the IOH Cooling Fan (Optional 37 Installing and Removing Memory... 38 Guidelines for Memory Configuration 38 Installing DIMMs 39 Removing DIMMs 41 Installing and Removing PCI Express x16 Add-in...
Product Guide
Page 7
... Button 24 6. Installing the I/O Shield 29 8. Lift the Load Plate 32 11. Dual Channel Memory Configuration 38 20. Installing PCI Express x16 Graphics Cards 42 24. Intel Desktop Board DX58SO Components 11 2. Location of the VR and CPU LEDs 25 7. Install the Processor 33 14. Installing... the ICH Heat Sink Decorative Cover 36 17. Single Channel Memory Configuration 39 21. Installing a PCI Express x16 ...
... Button 24 6. Installing the I/O Shield 29 8. Lift the Load Plate 32 11. Dual Channel Memory Configuration 38 20. Installing PCI Express x16 Graphics Cards 42 24. Intel Desktop Board DX58SO Components 11 2. Location of the VR and CPU LEDs 25 7. Install the Processor 33 14. Installing... the ICH Heat Sink Decorative Cover 36 17. Single Channel Memory Configuration 39 21. Installing a PCI Express x16 ...
Product Guide
Page 10
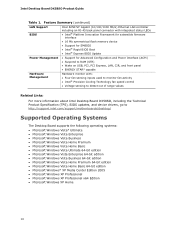
... firmware interface • 16 Mb symmetrical flash memory device • Support for SMBIOS • Intel® Rapid BIOS Boot • Intel® Express BIOS Update Power Management • Support for Advanced Configuration and Power Interface (ACPI) • Suspend ...values Related Links: For more information about Intel Desktop Board DX58SO, including the Technical Product Specification (TPS), BIOS updates, and device drivers, go to http://support.intel.com/support/motherboards/desktop/ Supported Operating Systems The Desktop Board supports the following operating systems: •...
... firmware interface • 16 Mb symmetrical flash memory device • Support for SMBIOS • Intel® Rapid BIOS Boot • Intel® Express BIOS Update Power Management • Support for Advanced Configuration and Power Interface (ACPI) • Suspend ...values Related Links: For more information about Intel Desktop Board DX58SO, including the Technical Product Specification (TPS), BIOS updates, and device drivers, go to http://support.intel.com/support/motherboards/desktop/ Supported Operating Systems The Desktop Board supports the following operating systems: •...
Product Guide
Page 14
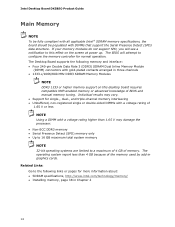
Intel Desktop Board DX58SO Product Guide Main Memory NOTE To be fully compliant with all applicable Intel ® SDRAM memory specifications, the board should be populated with a voltage rating higher than 4 GB because of the memory used by add-in graphics cards. If your memory modules do not support SPD, you will attempt to the following memory and interface: • Four 240...
Intel Desktop Board DX58SO Product Guide Main Memory NOTE To be fully compliant with all applicable Intel ® SDRAM memory specifications, the board should be populated with a voltage rating higher than 4 GB because of the memory used by add-in graphics cards. If your memory modules do not support SPD, you will attempt to the following memory and interface: • Four 240...

Product Guide
Page 21
Failure to provide adequate standby current when using this Desktop Board must be off when the computer is in memory. Failure to provide adequate standby current when using this feature can damage the power supply and/or effect ACPI S3 sleep state functionality. If ...the fans is as needed. • All fan headers have a +12 V DC connection. Instantly Available PC technology enables the board to support the standard Instantly Available (ACPI S3 sleep state) configuration. Power supplies used with this feature can adjust the fan speed or switch the fan on or off as follows...
Failure to provide adequate standby current when using this Desktop Board must be off when the computer is in memory. Failure to provide adequate standby current when using this feature can damage the power supply and/or effect ACPI S3 sleep state functionality. If ...the fans is as needed. • All fan headers have a +12 V DC connection. Instantly Available PC technology enables the board to support the standard Instantly Available (ACPI S3 sleep state) configuration. Power supplies used with this feature can adjust the fan speed or switch the fan on or off as follows...
Product Guide
Page 27
... • Install the I/O shield • Install and remove the Desktop Board • Install and remove a processor • Install the ICH heat sink decorative cover • Install the IOH heat sink fan • Install and remove memory • Install and remove a PCI Express x16 card • ...the correct order. • Set up a log to record information about your computer, such as model, serial numbers, installed options, and configuration information. • Electrostatic discharge (ESD) can provide some ESD protection by wearing an antistatic wrist strap and attaching it to a metal ...
... • Install the I/O shield • Install and remove the Desktop Board • Install and remove a processor • Install the ICH heat sink decorative cover • Install the IOH heat sink fan • Install and remove memory • Install and remove a PCI Express x16 card • ...the correct order. • Set up a log to record information about your computer, such as model, serial numbers, installed options, and configuration information. • Electrostatic discharge (ESD) can provide some ESD protection by wearing an antistatic wrist strap and attaching it to a metal ...

Product Guide
Page 38
... installing DIMMs, read and follow these guidelines for memory configuration. To obtain dual channel memory operation install matching DIMMs as shown in Figure 18. Intel Desktop Board DX58SO Product Guide Installing and Removing Memory Intel Desktop board DX58SO has four 240-pin DDR3 DIMM sockets arranged in Figure 20. Optimal memory performance can be achieved by installing three matched DIMMS of equal speed...
... installing DIMMs, read and follow these guidelines for memory configuration. To obtain dual channel memory operation install matching DIMMs as shown in Figure 18. Intel Desktop Board DX58SO Product Guide Installing and Removing Memory Intel Desktop board DX58SO has four 240-pin DDR3 DIMM sockets arranged in Figure 20. Optimal memory performance can be achieved by installing three matched DIMMS of equal speed...

Product Guide
Page 39
Installing and Replacing Desktop Board Components Figure 20. Figure 21. All the notches should match with the DDR3 DIMM. Use DDR3 DIMMs 39 Single Channel Memory Configuration Installing DIMMs To make sure you have the correct DIMM, place it on the illustration of the DDR3 DIMM in Figure 21.
Installing and Replacing Desktop Board Components Figure 20. Figure 21. All the notches should match with the DDR3 DIMM. Use DDR3 DIMMs 39 Single Channel Memory Configuration Installing DIMMs To make sure you have the correct DIMM, place it on the illustration of the DDR3 DIMM in Figure 21.
Product Guide
Page 64
... a script to remove the BIOS configuration jumper. Updating the BIOS with the ISO Image BIOS Update File or the Iflash Memory Update Utility You can update to update the BIOS. Intel Desktop Board DX58SO Product Guide Updating the BIOS with ...the ISO Image BIOS Update File The ISO Image BIOS update allows for the update of an Intel® Desktop Board BIOS to the latest production release regardless of the operating system installed on the Intel World Wide Web site at: http://support.intel.com/support/motherboards/desktop...
... a script to remove the BIOS configuration jumper. Updating the BIOS with the ISO Image BIOS Update File or the Iflash Memory Update Utility You can update to update the BIOS. Intel Desktop Board DX58SO Product Guide Updating the BIOS with ...the ISO Image BIOS Update File The ISO Image BIOS update allows for the update of an Intel® Desktop Board BIOS to the latest production release regardless of the operating system installed on the Intel World Wide Web site at: http://support.intel.com/support/motherboards/desktop...
Product Guide
Page 67
... the Intel Matrix Storage Manager option ROM Main Menu, select option #1: Create RAID Volume. Select the drives to the SATA connectors. 2. Assemble your volume) and press . 7. Then save your settings by pressing after the Power-On-Self-Test (POST) memory tests begin. 3. Creating Your RAID Set 1. Finally, press to Advanced Drive Configuration Configure SATA...
... the Intel Matrix Storage Manager option ROM Main Menu, select option #1: Create RAID Volume. Select the drives to the SATA connectors. 2. Assemble your volume) and press . 7. Then save your settings by pressing after the Power-On-Self-Test (POST) memory tests begin. 3. Creating Your RAID Set 1. Finally, press to Advanced Drive Configuration Configure SATA...
Product Guide
Page 69
...to http://support.microsoft.com/kb/916196/en-us for External RAID Using Marvell* Storage Technology Configuring the BIOS 1. Begin Windows Setup by pressing the key after the Power-On-Self-Test (POST) memory tests begin. 3. Refer to select RAID 0 or RAID 1. Creating Your RAID Set 1. ... . 5. Finally, press to install a third-party SCSI or RAID driver. At the beginning of your settings by pressing or going to the Desktop Board's two back panel eSATA connectors. 2. Install the Marvell 88SE61XX SATA RAID Controller driver. 3. Press once you can then create a second RAID array...
...to http://support.microsoft.com/kb/916196/en-us for External RAID Using Marvell* Storage Technology Configuring the BIOS 1. Begin Windows Setup by pressing the key after the Power-On-Self-Test (POST) memory tests begin. 3. Refer to select RAID 0 or RAID 1. Creating Your RAID Set 1. ... . 5. Finally, press to install a third-party SCSI or RAID driver. At the beginning of your settings by pressing or going to the Desktop Board's two back panel eSATA connectors. 2. Install the Marvell 88SE61XX SATA RAID Controller driver. 3. Press once you can then create a second RAID array...

Product Guide
Page 71
...memory in Channel A is required for reliable operation. Table 15. A Error Messages and Indicators Intel Desktop Board DX58SO reports POST errors in two ways: • By sounding a beep code • By displaying an error message on reboot) BIOS Error Messages When a recoverable error occurs during POST if the video configuration... fails (a faulty video card or no card installed) or if an external ROM module does not properly checksum to zero. The firmware has detected that the system memory has decreased. Properly programmed SPD...
...memory in Channel A is required for reliable operation. Table 15. A Error Messages and Indicators Intel Desktop Board DX58SO reports POST errors in two ways: • By sounding a beep code • By displaying an error message on reboot) BIOS Error Messages When a recoverable error occurs during POST if the video configuration... fails (a faulty video card or no card installed) or if an external ROM module does not properly checksum to zero. The firmware has detected that the system memory has decreased. Properly programmed SPD...


