
User Guide
Page 5
...Tests 2-9 © Copyright IBM Corp. 1995 1997 iii Contents | Notices xi Electronic Emission Notices xi Trademarks and Service Marks xiii Preface xv How to the Printer 1-35 Parallel Attachment 1-37 Attaching a Parallel Cable 1-38 Installing Printer Drivers 1-41 AIX Driver ... Check 2-5 Display Panel 2-5 Audible Alarm 2-5 Custom Set in the Front Push Tractors 1-23 Printing Your First Document 1-27 Attaching the 4247 Printer to Your Computer 1-29 Twinaxial Attachment 1-30 Attaching a Twinaxial Signal Cable to the Printer 1-30 Coaxial Attachment 1-35 Attaching a Coaxial Signal...
...Tests 2-9 © Copyright IBM Corp. 1995 1997 iii Contents | Notices xi Electronic Emission Notices xi Trademarks and Service Marks xiii Preface xv How to the Printer 1-35 Parallel Attachment 1-37 Attaching a Parallel Cable 1-38 Installing Printer Drivers 1-41 AIX Driver ... Check 2-5 Display Panel 2-5 Audible Alarm 2-5 Custom Set in the Front Push Tractors 1-23 Printing Your First Document 1-27 Attaching the 4247 Printer to Your Computer 1-29 Twinaxial Attachment 1-30 Attaching a Twinaxial Signal Cable to the Printer 1-30 Coaxial Attachment 1-35 Attaching a Coaxial Signal...

User Guide
Page 6
Configuration Storage 4-1 Custom Sets 4-2 Non-Custom Set 4-3 Save Current Values 4-4 Recall Custom Set Values 4-5 iv 001, 002 User's Guide Enter (Twinaxial 2-9 Display Address/Return← (Twinaxial 2-9 Display...Using Start 3-4 Exiting Using Return 3-5 Configuration Categories 3-6 Configuration Storage 3-6 Attachment Selection 3-6 Rear Tractor Use 3-6 | Twinaxial Configuration 3-7 | Coaxial Configuration 3-8 Parallel Configuration 3-9 Printer Setup 3-11 | Printer Adjustment 3-13 Power On Reset 3-13 Display Language 3-14 Send Buffer Reprint Code (Coaxial ...
Configuration Storage 4-1 Custom Sets 4-2 Non-Custom Set 4-3 Save Current Values 4-4 Recall Custom Set Values 4-5 iv 001, 002 User's Guide Enter (Twinaxial 2-9 Display Address/Return← (Twinaxial 2-9 Display...Using Start 3-4 Exiting Using Return 3-5 Configuration Categories 3-6 Configuration Storage 3-6 Attachment Selection 3-6 Rear Tractor Use 3-6 | Twinaxial Configuration 3-7 | Coaxial Configuration 3-8 Parallel Configuration 3-9 Printer Setup 3-11 | Printer Adjustment 3-13 Power On Reset 3-13 Display Language 3-14 Send Buffer Reprint Code (Coaxial ...

User Guide
Page 7
...Maximum Page Length (MPL 7-5 Print Quality 7-6 Print Language 7-7 Printer Address 7-9 Data Stream 7-10 Emulation Mode 7-11 | Media Size Priority 7-12 Bar Code Mode 7-13 Graphics Mode 7-14 Alarm Control 7-15 Chapter 8. Rear Tractor Use 6-1 Chapter 7. Twinaxial Configuration 7-1 Characters per Inch (CPI ... Printer Compatibility 12 (Automatic Function Before Start of OILC Job) . . . 8-25 Programmed Symbols 8-26 Bar Code Mode 8-27 Graphics Mode 8-28 Alarm Control 8-29 Using Programmed Symbols (PS) Parameters 8-30 Plane Selection 8-30 Contents v Power-On Custom Set...
...Maximum Page Length (MPL 7-5 Print Quality 7-6 Print Language 7-7 Printer Address 7-9 Data Stream 7-10 Emulation Mode 7-11 | Media Size Priority 7-12 Bar Code Mode 7-13 Graphics Mode 7-14 Alarm Control 7-15 Chapter 8. Rear Tractor Use 6-1 Chapter 7. Twinaxial Configuration 7-1 Characters per Inch (CPI ... Printer Compatibility 12 (Automatic Function Before Start of OILC Job) . . . 8-25 Programmed Symbols 8-26 Bar Code Mode 8-27 Graphics Mode 8-28 Alarm Control 8-29 Using Programmed Symbols (PS) Parameters 8-30 Plane Selection 8-30 Contents v Power-On Custom Set...

User Guide
Page 17
... operations. Chapter 1, "Getting Started," provides information on page 19-10) for parallel attachment. © Copyright IBM Corp. 1995 1997 xv Chapter 4, "Configuration Storage," provides information on saving configuration parameters into a custom set for rear tractor use 4247 printers for the IBM 4247 Printer Models 001 and 002 and should be read and used by -step instructions tailored to 400 CPS...
... operations. Chapter 1, "Getting Started," provides information on page 19-10) for parallel attachment. © Copyright IBM Corp. 1995 1997 xv Chapter 4, "Configuration Storage," provides information on saving configuration parameters into a custom set for rear tractor use 4247 printers for the IBM 4247 Printer Models 001 and 002 and should be read and used by -step instructions tailored to 400 CPS...

User Guide
Page 37
G e a r P ro te c to Off (O). 1. Installing the Tractor Unit in the Front Push Position Note: Make sure that the printer power switch is set to r C o v e r Chapter 1. Getting Started 1-17 Open the hinged gear protector cover by rotating it down out of the way. Open the front tractor cover to its locked position. 2.
G e a r P ro te c to Off (O). 1. Installing the Tractor Unit in the Front Push Position Note: Make sure that the printer power switch is set to r C o v e r Chapter 1. Getting Started 1-17 Open the hinged gear protector cover by rotating it down out of the way. Open the front tractor cover to its locked position. 2.

User Guide
Page 64
... new defaults for display language and attachment. Completing Printer Setup Your 4247 Printer is now ready to use with configuration parameters set to change printer configuration parameters, see Chapter 17, "Paper Loading" for instructions on | installing the ASF feature. 1-44 001, 002 User's Guide If your ordered a second optional tractor, see : Chapter 2, "Understanding the Operator Panel" for...
... new defaults for display language and attachment. Completing Printer Setup Your 4247 Printer is now ready to use with configuration parameters set to change printer configuration parameters, see Chapter 17, "Paper Loading" for instructions on | installing the ASF feature. 1-44 001, 002 User's Guide If your ordered a second optional tractor, see : Chapter 2, "Understanding the Operator Panel" for...

User Guide
Page 77
...use this key when the Processing indicator is displayed, press Start. Load/ E je c t The Load/Eject function depends on the current LPI setting. Front Push and Rear Push: The Load/Eject key performs the following functions: Automatically loads forms After the forms are loaded under the sensor ...and onto the tractors at the bottom of the different paper paths available on the printer. L in the not ready state, pressing Park/Path allows the selection of the forms device press Load...
...use this key when the Processing indicator is displayed, press Start. Load/ E je c t The Load/Eject function depends on the current LPI setting. Front Push and Rear Push: The Load/Eject key performs the following functions: Automatically loads forms After the forms are loaded under the sensor ...and onto the tractors at the bottom of the different paper paths available on the printer. L in the not ready state, pressing Park/Path allows the selection of the forms device press Load...

User Guide
Page 79
... Feed: Press Load/Eject when the printer is inserted into the printer. Loading the rear tractors Manually align the forms on the rear tractor. Press Load/Eject to advance the form to the top of form position. Manual Sheet Feed: If Automatic Manual Load is set to Enabled in the Printer Setup category, pressing Load/Eject...
... Feed: Press Load/Eject when the printer is inserted into the printer. Loading the rear tractors Manually align the forms on the rear tractor. Press Load/Eject to advance the form to the top of form position. Manual Sheet Feed: If Automatic Manual Load is set to Enabled in the Printer Setup category, pressing Load/Eject...

User Guide
Page 80
... the printer continues to be not ready before pressing Form Feed. If you interrupt a print job by pressing Stop, pressing Form Feed, and then pressing Start (when you hold down the Set Top of -Form. 2-16 001, 002 User's Guide Press Load/Eject to advance the paper from the front tractor to position..." on the rear tractor. Press Set Top of Form to the top of the next form. Press Form Feed to advance the forms to set the top of form position. Set Top of Form S et Top o f F o rm | This should only be used , use Paper Load Positioning (see Chapter 11, | "Printer Adjustments" on the ...
... the printer continues to be not ready before pressing Form Feed. If you interrupt a print job by pressing Stop, pressing Form Feed, and then pressing Start (when you hold down the Set Top of -Form. 2-16 001, 002 User's Guide Press Load/Eject to advance the paper from the front tractor to position..." on the rear tractor. Press Set Top of Form to the top of the next form. Press Form Feed to advance the forms to set the top of form position. Set Top of Form S et Top o f F o rm | This should only be used , use Paper Load Positioning (see Chapter 11, | "Printer Adjustments" on the ...

User Guide
Page 84
... and save this section. Printing Configuration Defaults IBM recommends that you print your custom sets for future reference. See "Printer Configuration" on page 18-7 for example, | twinaxial configuration, printer setup) and are grouped together into categories of these categories. They are accessed on printing your printer configuration values. 3-2 001, 002 User's Guide These categories are described...
... and save this section. Printing Configuration Defaults IBM recommends that you print your custom sets for future reference. See "Printer Configuration" on page 18-7 for example, | twinaxial configuration, printer setup) and are grouped together into categories of these categories. They are accessed on printing your printer configuration values. 3-2 001, 002 User's Guide These categories are described...

User Guide
Page 88
... or as a coaxial and parallel printer. Attachment Selection Parameters Attachment Selection Values Twinax or Coax Parallel Default Twinax or Coax Rear Tractor Use The Rear Tractor Use category is available only when the rear tractor is | installed.Table 3-3 lists the...for the Attachment Selection. See "Recall Factory Defaults" on page 4-8. Attachment Selection The 4247 Model 001 is installed. | Refer to Chapter 4, "Configuration Storage" for detailed information on setting these parameters. Configuration Categories This section lists all the parameters to Chapter 5, "Using...
... or as a coaxial and parallel printer. Attachment Selection Parameters Attachment Selection Values Twinax or Coax Parallel Default Twinax or Coax Rear Tractor Use The Rear Tractor Use category is available only when the rear tractor is | installed.Table 3-3 lists the...for the Attachment Selection. See "Recall Factory Defaults" on page 4-8. Attachment Selection The 4247 Model 001 is installed. | Refer to Chapter 4, "Configuration Storage" for detailed information on setting these parameters. Configuration Categories This section lists all the parameters to Chapter 5, "Using...

User Guide
Page 89
...dagger (†). Belgian New Printer Address 000-006 000 Data Stream IPDS SCS IPDS Emulation Mode 4247 4224 4230 4214 4247 | Media Size Priority Standard ...Alternate | Alternate Bar Code Mode High Low Computer Selected High Graphics Mode High Low Computer Selected High Alarm Control Enabled Disabled Enabled Chapter 3. Table 3-3. Rear Tractor Use Parameters Rear Tractor...Table on setting these parameters. | Table 3-4. Refer to Chapter 7, "Twinaxial Configuration" for the Twinaxial Configuration...
...dagger (†). Belgian New Printer Address 000-006 000 Data Stream IPDS SCS IPDS Emulation Mode 4247 4224 4230 4214 4247 | Media Size Priority Standard ...Alternate | Alternate Bar Code Mode High Low Computer Selected High Graphics Mode High Low Computer Selected High Alarm Control Enabled Disabled Enabled Chapter 3. Table 3-3. Rear Tractor Use Parameters Rear Tractor...Table on setting these parameters. | Table 3-4. Refer to Chapter 7, "Twinaxial Configuration" for the Twinaxial Configuration...

User Guide
Page 99
... Reset - If you save values that go into Custom Sets. Chapter 4. Input Buffer Size - AutoFeed-XT Printer Setup - Non-Custom Set The Non-Custom Set contains parameter values that stay the same, no matter which Custom Set you are saved at the same time you save a ...change made to these Non-Custom Set parameter values, the new value will be in this part of these values are using. The following parameter values are saved in effect no matter which Custom Set you recall. All Attachment Rear Tractor Use Twinax Configuration - Printer Compatibility 6 (Init) - Select...
... Reset - If you save values that go into Custom Sets. Chapter 4. Input Buffer Size - AutoFeed-XT Printer Setup - Non-Custom Set The Non-Custom Set contains parameter values that stay the same, no matter which Custom Set you are saved at the same time you save a ...change made to these Non-Custom Set parameter values, the new value will be in this part of these values are using. The following parameter values are saved in effect no matter which Custom Set you recall. All Attachment Rear Tractor Use Twinax Configuration - Printer Compatibility 6 (Init) - Select...

User Guide
Page 107
...set the Rear Tractor Use value: 1. If Pull or Push-Pull needs to be displayed. The rear tractor is used for the Rear Push paper path. Press Enter. This value is Push. Press Scroll↑ or Scroll↓ until the printer displays CONFIGURATION MENU Rear Tractor Use 3. The rear tractor... will be removed from the printer. Both rear and front tractors must first be displayed in front of the selected value. 6. See "Exiting the Configuration Menu" on page 3-4. © Copyright IBM Corp. 1995 1997 6-1 This value is only displayed if the front tractor is used , the ASF ...
...set the Rear Tractor Use value: 1. If Pull or Push-Pull needs to be displayed. The rear tractor is used for the Rear Push paper path. Press Enter. This value is Push. Press Scroll↑ or Scroll↓ until the printer displays CONFIGURATION MENU Rear Tractor Use 3. The rear tractor... will be removed from the printer. Both rear and front tractors must first be displayed in front of the selected value. 6. See "Exiting the Configuration Menu" on page 3-4. © Copyright IBM Corp. 1995 1997 6-1 This value is only displayed if the front tractor is used , the ASF ...

User Guide
Page 182
...Selects Bin 3 of the following values: | Front (Default) Paper is from the rear push tractor (paper enters and exits from the operator | panel, but to use it, you select Manual when | the printer is set to any of the automatic sheet feeder device as the current paper source. | Manual Selects manual... is selected, the Rear Pull and Push-Pull paths are not available. The values displayed on the operator panel depend on page 3-4. 10-2 001, 002 User's Guide Press Scroll↑ or Scroll↓ until the desired value for paper source is enabled. Press Scroll↑ or Scroll...
...Selects Bin 3 of the following values: | Front (Default) Paper is from the rear push tractor (paper enters and exits from the operator | panel, but to use it, you select Manual when | the printer is set to any of the automatic sheet feeder device as the current paper source. | Manual Selects manual... is selected, the Rear Pull and Push-Pull paths are not available. The values displayed on the operator panel depend on page 3-4. 10-2 001, 002 User's Guide Press Scroll↑ or Scroll↓ until the desired value for paper source is enabled. Press Scroll↑ or Scroll...

User Guide
Page 186
...the front forms backup to either one of the selected value. 8. You can perform tractor movements that would be displayed in front of the following values: Enabled (Default) Disabled Allows the printer to move the forms in the reverse direction (for the paper path. Press Scroll&#... the printer. See "Exiting the Configuration Menu" on page 3-4. 10-6 001, 002 User's Guide Use Start or Return to display the current value. 6. The Front Forms Backup parameter instructs the printer whether it undesirable for the printer to attempt to back up front forms. Use this setting for ...
...the front forms backup to either one of the selected value. 8. You can perform tractor movements that would be displayed in front of the following values: Enabled (Default) Disabled Allows the printer to move the forms in the reverse direction (for the paper path. Press Scroll&#... the printer. See "Exiting the Configuration Menu" on page 3-4. 10-6 001, 002 User's Guide Use Start or Return to display the current value. 6. The Front Forms Backup parameter instructs the printer whether it undesirable for the printer to attempt to back up front forms. Use this setting for ...

User Guide
Page 188
...; or Scroll↓ until the printer displays Printer Setup Continuous Forms Linking 5. Press Enter to Push. Continuous Forms Linking This parameter is displayed only if the front and rear tractors are installed and the Rear Tractor Use parameter is set to display the current value. 6.... Press Scroll↑ or Scroll↓ until the printer displays CONFIGURATION MENU Printer Setup 3. See "Exiting the Configuration Menu" on page 3-4. 10-8 001, 002 User's Guide...
...; or Scroll↓ until the printer displays Printer Setup Continuous Forms Linking 5. Press Enter to Push. Continuous Forms Linking This parameter is displayed only if the front and rear tractors are installed and the Rear Tractor Use parameter is set to display the current value. 6.... Press Scroll↑ or Scroll↓ until the printer displays CONFIGURATION MENU Printer Setup 3. See "Exiting the Configuration Menu" on page 3-4. 10-8 001, 002 User's Guide...
User Guide
Page 193
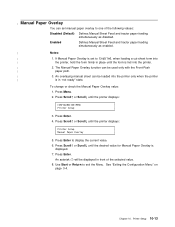
... Paper Overlay value: 1. If Manual Paper Overlay is set manual paper overlay to Enabled, when loading a cut-sheet form into the printer only when the printer | is fed into the printer. | 2. The Manual Paper Overlay function can set to one of the selected value. 8. An overlaying... manual sheet can be loaded into | the printer, hold the form firmly in front of the following values: Disabled (Default) Defines Manual Sheet Feed and tractor ...
... Paper Overlay value: 1. If Manual Paper Overlay is set manual paper overlay to Enabled, when loading a cut-sheet form into the printer only when the printer | is fed into the printer. | 2. The Manual Paper Overlay function can set to one of the selected value. 8. An overlaying... manual sheet can be loaded into | the printer, hold the form firmly in front of the following values: Disabled (Default) Defines Manual Sheet Feed and tractor ...

User Guide
Page 199
...current value. 6. This setting alerts the operator with an 2 FORMS JAMMED FRONT TRACTOR or 2 FORMS JAMMED REAR TRACTOR message on the operator panel when a jammed form is displayed. 7. See "Exiting the Configuration Menu" on the front and rear tractors. Printer Setup 10-19 Disabled Disables... the paper jam sensors. An asterisk (*) will be disabled. IBM recommends that these sensors not be displayed in one of the following values: Enabled (...
...current value. 6. This setting alerts the operator with an 2 FORMS JAMMED FRONT TRACTOR or 2 FORMS JAMMED REAR TRACTOR message on the operator panel when a jammed form is displayed. 7. See "Exiting the Configuration Menu" on the front and rear tractors. Printer Setup 10-19 Disabled Disables... the paper jam sensors. An asterisk (*) will be disabled. IBM recommends that these sensors not be displayed in one of the following values: Enabled (...

User Guide
Page 223
... 11-23 Press Scroll↑ or Scroll↓ until the printer displays Printer Adjustments Sensor Tune 5. This adjustment is set initially by IBM when the printer is available only in the printer location. | All paper must be removed from the tractors, and all sensors. To tune the sensors: 1. Press Enter. ...exist in the Operator Print Tests menu. Press Enter. Press Scroll↑ or Scroll↓ until the printer displays 4247 OPERATOR PRINT TESTS Printer Adjustments 3. The printer displays the following: Sensor Tune Clear ALL Paths and Press ENTER 6.
... 11-23 Press Scroll↑ or Scroll↓ until the printer displays Printer Adjustments Sensor Tune 5. This adjustment is set initially by IBM when the printer is available only in the printer location. | All paper must be removed from the tractors, and all sensors. To tune the sensors: 1. Press Enter. ...exist in the Operator Print Tests menu. Press Enter. Press Scroll↑ or Scroll↓ until the printer displays 4247 OPERATOR PRINT TESTS Printer Adjustments 3. The printer displays the following: Sensor Tune Clear ALL Paths and Press ENTER 6.

