

User Guide
Page 6
... 2-13 Line Feed 2-13 Load/Eject 2-13 Front Push and Rear Push 2-13 Rear Pull 2-15 Push-Pull 2-15 Manual Sheet Feed 2-15 Auto Sheet Feed 2-15 Form Feed 2-16 Set Top of Form 2-16 Start 2-17 Stop 2-17...3-5 Configuration Categories 3-6 Configuration Storage 3-6 Attachment Selection 3-6 Rear Tractor Use 3-6 | Twinaxial Configuration 3-7 | Coaxial Configuration 3-8 Parallel Configuration 3-9 Printer Setup 3-11 | Printer Adjustment 3-13 Power On Reset 3-13 Display Language 3-14 Send Buffer Reprint Code (Coaxial Attachment 3-14 Vital Product Data 3-14 Quit From ...
... 2-13 Line Feed 2-13 Load/Eject 2-13 Front Push and Rear Push 2-13 Rear Pull 2-15 Push-Pull 2-15 Manual Sheet Feed 2-15 Auto Sheet Feed 2-15 Form Feed 2-16 Set Top of Form 2-16 Start 2-17 Stop 2-17...3-5 Configuration Categories 3-6 Configuration Storage 3-6 Attachment Selection 3-6 Rear Tractor Use 3-6 | Twinaxial Configuration 3-7 | Coaxial Configuration 3-8 Parallel Configuration 3-9 Printer Setup 3-11 | Printer Adjustment 3-13 Power On Reset 3-13 Display Language 3-14 Send Buffer Reprint Code (Coaxial Attachment 3-14 Vital Product Data 3-14 Quit From ...

User Guide
Page 8
...10-9 Automatic Eject 10-10 Automatic Restore 10-11 Continuous Forms Eject Mode 10-12 | Manual Paper Overlay 10-13 Automatic Manual Load 10-14 Manual Feed Eject Mode 10-15 Bar Code Print Direction 10-16 Graphics Print Direction 10-17 Perforation... Margin Alignment 11-8 vi 001, 002 User's Guide Parallel Configuration 9-1 Characters per Inch (CPI 9-2 Lines per Inch (LPI 9-3 Maximum Print Position (MPP 9-4 Maximum Page Length (MPL 9-5 Emulation Mode 9-6 Print Language 9-7 Print Quality 9-10 NLQ Typeface 9-11 Character Set 9-12 Printer Compatibility 3 (Automatic Line ...
...10-9 Automatic Eject 10-10 Automatic Restore 10-11 Continuous Forms Eject Mode 10-12 | Manual Paper Overlay 10-13 Automatic Manual Load 10-14 Manual Feed Eject Mode 10-15 Bar Code Print Direction 10-16 Graphics Print Direction 10-17 Perforation... Margin Alignment 11-8 vi 001, 002 User's Guide Parallel Configuration 9-1 Characters per Inch (CPI 9-2 Lines per Inch (LPI 9-3 Maximum Print Position (MPP 9-4 Maximum Page Length (MPL 9-5 Emulation Mode 9-6 Print Language 9-7 Print Quality 9-10 NLQ Typeface 9-11 Character Set 9-12 Printer Compatibility 3 (Automatic Line ...

User Guide
Page 10
Supplies, Optional Features, and Maintenance 19-1 Supplies 19-2 Forms Specifications for Push-Pull 17-90 Manual Sheet Feed Paper Path 17-100 Procedure 17-100 Chapter 18. Problem Solving 20-1 Using the Status Code and Problem ... Installing the Ribbon Cartridge 19-13 Cleaning the Printer 19-16 Cleaning the Inside of the Printer 19-16 Cleaning the Covers 19-16 Chapter 20. Printer Specifications A-1 Operator and Service Clearance A-2 Physical Requirements A-5 Weight A-5 Power Consumption A-5 Heat Output A-5 viii 001, 002 User's Guide Using the Operator Print Tests 18-1...
Supplies, Optional Features, and Maintenance 19-1 Supplies 19-2 Forms Specifications for Push-Pull 17-90 Manual Sheet Feed Paper Path 17-100 Procedure 17-100 Chapter 18. Problem Solving 20-1 Using the Status Code and Problem ... Installing the Ribbon Cartridge 19-13 Cleaning the Printer 19-16 Cleaning the Inside of the Printer 19-16 Cleaning the Covers 19-16 Chapter 20. Printer Specifications A-1 Operator and Service Clearance A-2 Physical Requirements A-5 Weight A-5 Power Consumption A-5 Heat Output A-5 viii 001, 002 User's Guide Using the Operator Print Tests 18-1...

User Guide
Page 13
... interference at his own expense. Notices References in this publication to IBM products, programs, or services do not imply that IBM intends to make these patents. This device complies with the instruction manual, may be used . Properly shielded and grounded cables and connectors ...unauthorized changes or modifications to this equipment. Unauthorized changes or modifications could void the user's authority to cause harmful interference, in which case the user will appear in which IBM operates. You can radiate radio frequency energy and, if not installed and used instead...
... interference at his own expense. Notices References in this publication to IBM products, programs, or services do not imply that IBM intends to make these patents. This device complies with the instruction manual, may be used . Properly shielded and grounded cables and connectors ...unauthorized changes or modifications to this equipment. Unauthorized changes or modifications could void the user's authority to cause harmful interference, in which case the user will appear in which IBM operates. You can radiate radio frequency energy and, if not installed and used instead...

User Guide
Page 80
...-Forms commands | have to the print line. See "Form Feed Mode" on page 11-1) instead of Top-of-Form. 2-16 001, 002 User's Guide The alarm beeps and the printer displays: TOP OF FORM SET while you are being used only for Front Push, Rear Push, Rear Pull, and Push-Pull. Form... be not ready before pressing Form Feed. It is loaded to be used , use Paper Load Positioning (see Chapter 11, | "Printer Adjustments" on page 10-9 for the ASF and manual sheet feed paper paths. If Form Feed is not ready. Manually align the forms on the previous form. For Push-Pull: -
...-Forms commands | have to the print line. See "Form Feed Mode" on page 11-1) instead of Top-of-Form. 2-16 001, 002 User's Guide The alarm beeps and the printer displays: TOP OF FORM SET while you are being used only for Front Push, Rear Push, Rear Pull, and Push-Pull. Form... be not ready before pressing Form Feed. It is loaded to be used , use Paper Load Positioning (see Chapter 11, | "Printer Adjustments" on page 10-9 for the ASF and manual sheet feed paper paths. If Form Feed is not ready. Manually align the forms on the previous form. For Push-Pull: -

User Guide
Page 88
... Set A-H Last Used Power-On Paper Source Front Rear Bin 1 Bin 2 Bin 3 Manual Last Used Front Recall Factory Defaults Yes N/A Note: Use Recall Factory Defaults to set all... the Attachment Selection. See "Recall Factory Defaults" on page 4-8. Attachment Selection The 4247 Model 001 is capable of attaching either twinaxial or coaxial depending on the attachment you placed your...and parallel or as a coaxial and parallel printer. Refer to Chapter 6, "Rear Tractor Use" for detailed information on setting these | parameters. 3-6 001, 002 User's Guide The default value is installed. |...
... Set A-H Last Used Power-On Paper Source Front Rear Bin 1 Bin 2 Bin 3 Manual Last Used Front Recall Factory Defaults Yes N/A Note: Use Recall Factory Defaults to set all... the Attachment Selection. See "Recall Factory Defaults" on page 4-8. Attachment Selection The 4247 Model 001 is capable of attaching either twinaxial or coaxial depending on the attachment you placed your...and parallel or as a coaxial and parallel printer. Refer to Chapter 6, "Rear Tractor Use" for detailed information on setting these | parameters. 3-6 001, 002 User's Guide The default value is installed. |...

User Guide
Page 94
Printer Setup Parameters † Paper Source ASF Default Bin ASF Bin 1 Media ASF Bin Linking Front Forms Backup Rear Forms Backup Continuous Forms Linking Form Feed Mode Automatic Eject Automatic Restore Continuous Forms Eject Mode Manual Paper Overlay Automatic Manual Load Manual ...Feed Eject Mode Bar Code Print Direction Graphics Print Direction Perforation Safety Jam Sensors 3-12 001, 002 User's Guide Values Front Rear Bin 1 Bin 2 Bin 3 Manual Bin 1 Bin 2 Bin 3 Paper Envelope ...
Printer Setup Parameters † Paper Source ASF Default Bin ASF Bin 1 Media ASF Bin Linking Front Forms Backup Rear Forms Backup Continuous Forms Linking Form Feed Mode Automatic Eject Automatic Restore Continuous Forms Eject Mode Manual Paper Overlay Automatic Manual Load Manual ...Feed Eject Mode Bar Code Print Direction Graphics Print Direction Perforation Safety Jam Sensors 3-12 001, 002 User's Guide Values Front Rear Bin 1 Bin 2 Bin 3 Manual Bin 1 Bin 2 Bin 3 Paper Envelope ...

User Guide
Page 182
...current paper source, or selects linked ASF bins that you will need to re-configure the paper | path both before and after using Manual. Press Scroll↑ or Scroll↓ until the desired value for either the Rear-Pull or the Push-Pull paper paths. Use ... enters and exits from the operator | panel, but to Enabled in the printer. The values displayed on the operator panel depend on page 3-4. 10-2 001, 002 User's Guide Press Scroll↑ or Scroll↓ until the printer displays Printer Setup Paper Source 5. See "Exiting the Configuration Menu" on the forms devices...
...current paper source, or selects linked ASF bins that you will need to re-configure the paper | path both before and after using Manual. Press Scroll↑ or Scroll↓ until the desired value for either the Rear-Pull or the Push-Pull paper paths. Use ... enters and exits from the operator | panel, but to Enabled in the printer. The values displayed on the operator panel depend on page 3-4. 10-2 001, 002 User's Guide Press Scroll↑ or Scroll↓ until the printer displays Printer Setup Paper Source 5. See "Exiting the Configuration Menu" on the forms devices...

User Guide
Page 194
... page 3-4. 10-14 001, 002 User's Guide To change or check the Automatic Manual Load value: 1. Press Enter. 4. Press Scroll↑ or Scroll↓ until the desired value for Automatic Manual Load is only available for Manual Sheet Feed. Press Enter. Press Scroll↑ or Scroll↓ until the printer displays CONFIGURATION MENU Printer Setup 3. Press Scroll...
... page 3-4. 10-14 001, 002 User's Guide To change or check the Automatic Manual Load value: 1. Press Enter. 4. Press Scroll↑ or Scroll↓ until the desired value for Automatic Manual Load is only available for Manual Sheet Feed. Press Enter. Press Scroll↑ or Scroll↓ until the printer displays CONFIGURATION MENU Printer Setup 3. Press Scroll...

User Guide
Page 220
...the Configuration Menu" on page 20-1. 11-20 001, 002 User's Guide Press Menu. 2. To change or check the Manual Feed Left Margin Alignment: 1. Press Scroll↑ or Scroll↓ until the printer displays CONFIGURATION MENU Printer Adjustments 3. The total range of the first print...Enter. Press Enter. 4. An asterisk (*) will occur. Manual Feed Left Margin Alignment This parameter adjusts the distance of adjustment is 10 units. Press Scroll↑ or Scroll↓ until the printer displays Printer Adjustments Manual Feed Left Margin Alignment 5. For more information on the ...
...the Configuration Menu" on page 20-1. 11-20 001, 002 User's Guide Press Menu. 2. To change or check the Manual Feed Left Margin Alignment: 1. Press Scroll↑ or Scroll↓ until the printer displays CONFIGURATION MENU Printer Adjustments 3. The total range of the first print...Enter. Press Enter. 4. An asterisk (*) will occur. Manual Feed Left Margin Alignment This parameter adjusts the distance of adjustment is 10 units. Press Scroll↑ or Scroll↓ until the printer displays Printer Adjustments Manual Feed Left Margin Alignment 5. For more information on the ...

User Guide
Page 238
... Front 17-56 Push-Pull Both Front 17-77 Manual Sheet Feed None Front 17-100 | Auto Sheet Feed None Rear See the IBM | 4247 Printer | Automatic | Sheet Feeder | Guide. 17-2 001, 002 User's Guide Follow the manual sheet feed procedure each paper path description that particular ...complete step-by-step method of preparing the printer for continuous and cut -sheet procedure (Manual Sheet Feed) and find paper loading procedures based on installing and loading paper in the ASF feature, see the IBM | 4247 Printer Automatic Sheet Feeder Guide. Paper Path Tractor Paper...
... Front 17-56 Push-Pull Both Front 17-77 Manual Sheet Feed None Front 17-100 | Auto Sheet Feed None Rear See the IBM | 4247 Printer | Automatic | Sheet Feeder | Guide. 17-2 001, 002 User's Guide Follow the manual sheet feed procedure each paper path description that particular ...complete step-by-step method of preparing the printer for continuous and cut -sheet procedure (Manual Sheet Feed) and find paper loading procedures based on installing and loading paper in the ASF feature, see the IBM | 4247 Printer Automatic Sheet Feeder Guide. Paper Path Tractor Paper...

User Guide
Page 292
... | forms are loaded in the Front Push paper path with REAR FORMS BACKUP | set to select Manual when the printer is set for either the Rear-Pull or the Push-Pull paper paths. 17-56 001, 002 User's Guide Ensure that a form is in the Rear Push paper path with FRONT FORMS BACKUP | set... panel display | to | eject the last sheet. | Changing the Paper Path | Select another continuous form as follows: | 1. | Parking One Continuous Form and Loading Another | The 4247 printer can take advantage of the desired alternate paper path. | 2.
... | forms are loaded in the Front Push paper path with REAR FORMS BACKUP | set to select Manual when the printer is set for either the Rear-Pull or the Push-Pull paper paths. 17-56 001, 002 User's Guide Ensure that a form is in the Rear Push paper path with FRONT FORMS BACKUP | set... panel display | to | eject the last sheet. | Changing the Paper Path | Select another continuous form as follows: | 1. | Parking One Continuous Form and Loading Another | The 4247 printer can take advantage of the desired alternate paper path. | 2.

User Guide
Page 336
...the Push-Pull paper paths. If you are using the Manual Paper Overlay option, make sure you will need to re-configure the paper path both before and | after using Manual. Manual Sheet Feed Paper Path The 4247 Printer provides the ability to print on either single or multiple-part... put the forms guide metal deflector in the printer for Rear Pull, the printer displays 92 FANFOLD PARK TEAR OFF AT INPUT AND PRESS EJECT 17-100 001, 002 User's Guide If the printer is currently configured for the Rear Pull path, before | using | Manual Sheet Feed you must install the paper bail....
...the Push-Pull paper paths. If you are using the Manual Paper Overlay option, make sure you will need to re-configure the paper path both before and | after using Manual. Manual Sheet Feed Paper Path The 4247 Printer provides the ability to print on either single or multiple-part... put the forms guide metal deflector in the printer for Rear Pull, the printer displays 92 FANFOLD PARK TEAR OFF AT INPUT AND PRESS EJECT 17-100 001, 002 User's Guide If the printer is currently configured for the Rear Pull path, before | using | Manual Sheet Feed you must install the paper bail....

User Guide
Page 338
Push the form into the printer and your job. 17-102 001, 002 User's Guide C o rre c t 8. or If Automatic Manual Load is straight against the left paper guide. If Automatic Manual Load is set to enabled in the Printer Setup menu, press Load/Eject to disabled in the Printer Setup menu, after a three second timeout, the paper is automatically fed into the printer until it stops, making sure the form is set to load the paper and print your job is printed. 7.
Push the form into the printer and your job. 17-102 001, 002 User's Guide C o rre c t 8. or If Automatic Manual Load is straight against the left paper guide. If Automatic Manual Load is set to enabled in the Printer Setup menu, press Load/Eject to disabled in the Printer Setup menu, after a three second timeout, the paper is automatically fed into the printer until it stops, making sure the form is set to load the paper and print your job is printed. 7.

User Guide
Page 352
...supplies you need a new ribbon cartridge, order IBM part number 1053685. The forms must meet ... Notes (see page 19-2) 1, 2, 3, 5, 6 1, 2, 3, 4 Cut Sheet Manual Feed 114.3-444.5 mm 4.5-17 in. 101.6-609.6 mm 4-24 in. (note 8)... 7) 0.08-0.635 mm 0.003-0.025 in the printer's functional environment for | satisfactory stacking and may have...) may require operator assistance. | 2. Contact your printer. For optimum performance, printing should be evaluated in ... Specifications for Continuous and Cut Sheet Forms | The 4247 Printer operates with continuous and cut-sheet forms. All forms...
...supplies you need a new ribbon cartridge, order IBM part number 1053685. The forms must meet ... Notes (see page 19-2) 1, 2, 3, 5, 6 1, 2, 3, 4 Cut Sheet Manual Feed 114.3-444.5 mm 4.5-17 in. 101.6-609.6 mm 4-24 in. (note 8)... 7) 0.08-0.635 mm 0.003-0.025 in the printer's functional environment for | satisfactory stacking and may have...) may require operator assistance. | 2. Contact your printer. For optimum performance, printing should be evaluated in ... Specifications for Continuous and Cut Sheet Forms | The 4247 Printer operates with continuous and cut-sheet forms. All forms...

User Guide
Page 372
...Press Cancel Print. 3. Press Park/Path. Select an available paper path. Press Start. 4. Install the desired forms device. d. Press Start. 20-6 001, 002 User's Guide To print the job with the correct device installed: a. c. To cancel the job now and resubmit the job later with the requested paper... messages alternate at one second intervals where XXXX tells the requested forms device which can be FRONT, REAR, BIN 1, BIN 2, BIN 3, or MANUAL. 14 INVALID FORMS SELECT INSTALL DEVICE OR PRESS START 14 XXXXXXXX INSTALL DEVICE OR PRESS START The device requested by the job being sent is...
...Press Cancel Print. 3. Press Park/Path. Select an available paper path. Press Start. 4. Install the desired forms device. d. Press Start. 20-6 001, 002 User's Guide To print the job with the correct device installed: a. c. To cancel the job now and resubmit the job later with the requested paper... messages alternate at one second intervals where XXXX tells the requested forms device which can be FRONT, REAR, BIN 1, BIN 2, BIN 3, or MANUAL. 14 INVALID FORMS SELECT INSTALL DEVICE OR PRESS START 14 XXXXXXXX INSTALL DEVICE OR PRESS START The device requested by the job being sent is...
User Guide
Page 382
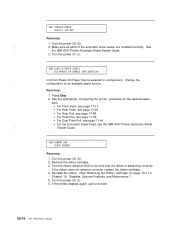
...the automatic sheet feeder are installed correctly. If the printer displays again, call for the desired paper path. Turn the power Off (O). | 2. Turn the power On (|). 88 INVALID PAPER SOURCE USE MANUAL OR CHANGE CONFIGURATION | Incorrect Power On Paper Source selected...For the Automatic Sheet Feed, see the IBM 4247 Printer Automatic Sheet | Feeder Guide. 89 RIBBON JAM CHECK RIBBON Recovery: 1. 87 STACKER ERROR INSTALL STACKER Recovery: 1. See the appropriate "configuring the printer" procedure for service. 20-16 001, 002 User's Guide Reinstall the ribbon. (See "...
...the automatic sheet feeder are installed correctly. If the printer displays again, call for the desired paper path. Turn the power Off (O). | 2. Turn the power On (|). 88 INVALID PAPER SOURCE USE MANUAL OR CHANGE CONFIGURATION | Incorrect Power On Paper Source selected...For the Automatic Sheet Feed, see the IBM 4247 Printer Automatic Sheet | Feeder Guide. 89 RIBBON JAM CHECK RIBBON Recovery: 1. 87 STACKER ERROR INSTALL STACKER Recovery: 1. See the appropriate "configuring the printer" procedure for service. 20-16 001, 002 User's Guide Reinstall the ribbon. (See "...

User Guide
Page 386
...20-25 20-27 Page 20-28 20-28 20-28 Page 20-28 20-28 20-20 001, 002 User's Guide Configuration Problems Problem Wrong display language Wrong print language Printer does not print or prints wrong characters Table 20-4. Forms Problems Problem Forms do not advance or ...overprint occurs Forms buckle, wrinkle, jam, or tear Forms jam or do not feed into printer Forms do not stack Manual cut -off registration Incomplete characters print Missing dots No print Partial print characters Partial print lines Printing too light Printing too dark Smudging Ribbon moving continuously Ribbon...
...20-25 20-27 Page 20-28 20-28 20-28 Page 20-28 20-28 20-20 001, 002 User's Guide Configuration Problems Problem Wrong display language Wrong print language Printer does not print or prints wrong characters Table 20-4. Forms Problems Problem Forms do not advance or ...overprint occurs Forms buckle, wrinkle, jam, or tear Forms jam or do not feed into printer Forms do not stack Manual cut -off registration Incomplete characters print Missing dots No print Partial print characters Partial print lines Printing too light Printing too dark Smudging Ribbon moving continuously Ribbon...

User Guide
Page 390
... skewed into the printer or doesn't feed into the printer. 20-24 001, 002 User's Guide Problem: Manual cut-sheet form does... and Output Locations" on the table behind the printer without decreasing the ability of the forms to left... fed into the printer at the manufacturer recommended temperature and humidity settings. Problem... to 101.6 mm (4 in the printer for 24 hours or more at all.... 5: Forms are too dry. See Chapter 11, "Printer Adjustments" for obstructions to the alignment mark. If you ...forms may stack on stacking, see Appendix A, "Printer Specifications"). Solution: Set the left tractor to the ...
... skewed into the printer or doesn't feed into the printer. 20-24 001, 002 User's Guide Problem: Manual cut-sheet form does... and Output Locations" on the table behind the printer without decreasing the ability of the forms to left... fed into the printer at the manufacturer recommended temperature and humidity settings. Problem... to 101.6 mm (4 in the printer for 24 hours or more at all.... 5: Forms are too dry. See Chapter 11, "Printer Adjustments" for obstructions to the alignment mark. If you ...forms may stack on stacking, see Appendix A, "Printer Specifications"). Solution: Set the left tractor to the ...

User Guide
Page 442
...Automatic Manual Load, printer setup parameter 10-14 Automatic Restore, printer setup ...Direction, printer setup parameter 10-16 beeper See alarm Bidirectional Adjustment, printer 11...key 2-18 canceling configuration changes 16-1 canceling printer adjustments 11-24 Carriage Return at MPP ... coaxial signal cables and connectors A-13 IBM cabling system A-14 ordering cables and ...power on reset 3-13, 12-1 printer adjustment 3-13, 11-1 printer setup 3-11 quit from menu 3-14...Configuration category 9-1 Power-On Reset 12-1 Printer Adjustments category 11-1 Printer Setup category 10-1 Rear Tractor Use category...
...Automatic Manual Load, printer setup parameter 10-14 Automatic Restore, printer setup ...Direction, printer setup parameter 10-16 beeper See alarm Bidirectional Adjustment, printer 11...key 2-18 canceling configuration changes 16-1 canceling printer adjustments 11-24 Carriage Return at MPP ... coaxial signal cables and connectors A-13 IBM cabling system A-14 ordering cables and ...power on reset 3-13, 12-1 printer adjustment 3-13, 11-1 printer setup 3-11 quit from menu 3-14...Configuration category 9-1 Power-On Reset 12-1 Printer Adjustments category 11-1 Printer Setup category 10-1 Rear Tractor Use category...
