
User Guide
Page 18
...Buffer Reprint Code to install the optional | network print server attachment for your PC Parallel interface printer. Appendix A, "Printer Specifications," contains general printer information and planning requirements. Chapter 19, "Supplies, Optional Features, and Maintenance," provides the ... data for the printer setup category. xvi 001, 002 User's Guide Chapter 18, "Using the Operator Print Tests," describes procedures for ordering new supplies, replacing damaged or worn ribbons, and available printer options. Chapter 11, "Printer Adjustments," describes the...
...Buffer Reprint Code to install the optional | network print server attachment for your PC Parallel interface printer. Appendix A, "Printer Specifications," contains general printer information and planning requirements. Chapter 19, "Supplies, Optional Features, and Maintenance," provides the ... data for the printer setup category. xvi 001, 002 User's Guide Chapter 18, "Using the Operator Print Tests," describes procedures for ordering new supplies, replacing damaged or worn ribbons, and available printer options. Chapter 11, "Printer Adjustments," describes the...

User Guide
Page 19
... IBM Customer Engineers; This | manual describes the programming functions that control a Model 001 or 002 | printer. This manual provides detailed maintenance procedures for trouble analysis and repair. This guide shows the key functions and the available configuration values and the process for setting them . A softcopy version of all replacement assemblies and detailed parts for all 4247 printer models...
... IBM Customer Engineers; This | manual describes the programming functions that control a Model 001 or 002 | printer. This manual provides detailed maintenance procedures for trouble analysis and repair. This guide shows the key functions and the available configuration values and the process for setting them . A softcopy version of all replacement assemblies and detailed parts for all 4247 printer models...

User Guide
Page 32
| 3. Remove the ribbon cartridge from the box. Locate the ribbon guide, white | plastic snap arm, ribbon advance knob, and the ribbon mounting pins. R ib b o n G u id e S n a p A rm R ib b o n A d v a n c e K nob R ib b o n M o u n tin g P in the ribbon. Before installing the ribbon cartridge, turn the ribbon advance knob in the direction of purchase and replace the ribbon cartridge. 1-12 001, 002 User's Guide If the ribbon does not move, contact your place of the arrow (located on the cartridge) to take up the slack in s 4.
| 3. Remove the ribbon cartridge from the box. Locate the ribbon guide, white | plastic snap arm, ribbon advance knob, and the ribbon mounting pins. R ib b o n G u id e S n a p A rm R ib b o n A d v a n c e K nob R ib b o n M o u n tin g P in the ribbon. Before installing the ribbon cartridge, turn the ribbon advance knob in the direction of purchase and replace the ribbon cartridge. 1-12 001, 002 User's Guide If the ribbon does not move, contact your place of the arrow (located on the cartridge) to take up the slack in s 4.

User Guide
Page 34
... knob again in the direction of the arrow to ensure that : a. c. The ribbon is not catching on the print head. b. Close the top cover. 1-14 001, 002 User's Guide To be sure you turn the ribbon advance knob in the direction of the arrow. If the ribbon does not move...
... knob again in the direction of the arrow to ensure that : a. c. The ribbon is not catching on the print head. b. Close the top cover. 1-14 001, 002 User's Guide To be sure you turn the ribbon advance knob in the direction of the arrow. If the ribbon does not move...

User Guide
Page 72
...move the form 0.176 mm (1/144 in.) in the direction of forms. The Micro↑ and Micro↓ keys replace the forms advance knob found on other printer products. If you press the key. If you continue to three decibels. Note: If you release the key. | ...on the operator panel. | | Quiet If the Menu is locked, the printer displays: 97 FUNCTION NOT AVAILABLE MENU LOCKED For more information on configuration parameters and values, see your system programmer or the IBM 4247 Printer Models 001, 002 Programming Reference. Scroll through the Operator Print Tests menu. For more...
...move the form 0.176 mm (1/144 in.) in the direction of forms. The Micro↑ and Micro↓ keys replace the forms advance knob found on other printer products. If you press the key. If you continue to three decibels. Note: If you release the key. | ...on the operator panel. | | Quiet If the Menu is locked, the printer displays: 97 FUNCTION NOT AVAILABLE MENU LOCKED For more information on configuration parameters and values, see your system programmer or the IBM 4247 Printer Models 001, 002 Programming Reference. Scroll through the Operator Print Tests menu. For more...

User Guide
Page 100
...exit the Menu. See "Custom Set in use. Press Scroll↑ or Scroll↓ until the printer displays CONFIGURATION MENU Configuration Storage 3. Press Enter. Press Scroll↑ or Scroll↓ until the ...desired Custom Set value is in Use Indicator" on page 2-6. 4-4 001, 002 User's Guide See "Exiting the Configuration Menu" on page 4-2). The display will be... configuration parameters to one of the custom sets are initially set that information will be replaced with the new information when you press Enter. 7. To save the current values to...
...exit the Menu. See "Custom Set in use. Press Scroll↑ or Scroll↓ until the printer displays CONFIGURATION MENU Configuration Storage 3. Press Enter. Press Scroll↑ or Scroll↓ until the ...desired Custom Set value is in Use Indicator" on page 2-6. 4-4 001, 002 User's Guide See "Exiting the Configuration Menu" on page 4-2). The display will be... configuration parameters to one of the custom sets are initially set that information will be replaced with the new information when you press Enter. 7. To save the current values to...

User Guide
Page 361
Call Lexmark at 1-800-438-2468 or your place of purchase to the printer can occur if you do not use IBM ribbon (part 1053685) especially designed for the 4247 Printer. Be careful when removing or replacing the ribbon. Supplies, Optional Features, and Maintenance 19-11 If the power is lit..., press Stop to make the printer not ready. If the power is On (|), and ...
Call Lexmark at 1-800-438-2468 or your place of purchase to the printer can occur if you do not use IBM ribbon (part 1053685) especially designed for the 4247 Printer. Be careful when removing or replacing the ribbon. Supplies, Optional Features, and Maintenance 19-11 If the power is lit..., press Stop to make the printer not ready. If the power is On (|), and ...

User Guide
Page 363
Before installing the ribbon cartridge, turn the ribbon advance knob in the direction of purchase and replace the ribbon cartridge. Supplies, Optional Features, and Maintenance 19-13 Locate the ribbon guide, white plastic snap arm, ribbon advance knob, and the ribbon mounting ...
Before installing the ribbon cartridge, turn the ribbon advance knob in the direction of purchase and replace the ribbon cartridge. Supplies, Optional Features, and Maintenance 19-13 Locate the ribbon guide, white plastic snap arm, ribbon advance knob, and the ribbon mounting ...

User Guide
Page 365
... print head back and forth to take up slack in Chapter 17, "Paper Loading" depending on the print head. If the ribbon does not move, replace the ribbon cartridge. Turn the ribbon advance knob again in the direction of the ribbon cartridge down until it snaps into place. The left side... is snaps into the cartridge supports. Be sure that the ribbon guide runs freely along the ribbon. 8. The ribbon is now ready to make the printer ready. If necessary, load or reload forms (see the appropriate section in the ribbon. 7. Press Start to print a job. To be sure you use). 9. ...
... print head back and forth to take up slack in Chapter 17, "Paper Loading" depending on the print head. If the ribbon does not move, replace the ribbon cartridge. Turn the ribbon advance knob again in the direction of the ribbon cartridge down until it snaps into place. The left side... is snaps into the cartridge supports. Be sure that the ribbon guide runs freely along the ribbon. 8. The ribbon is now ready to make the printer ready. If necessary, load or reload forms (see the appropriate section in the ribbon. 7. Press Start to print a job. To be sure you use). 9. ...
User Guide
Page 382
...Maintenance.") 5. If the ribbon does not advance correctly, replace the ribbon cartridge. 4. If the printer displays again, call for the desired paper path. See the appropriate "configuring the printer" procedure for service. 20-16 001, 002 User's Guide Remove the ribbon cartridge. 3. ...Turn the power On (|). 6. 87 STACKER ERROR INSTALL STACKER Recovery: 1. Make sure all parts of the automatic sheet feeder are installed correctly. For Rear Push, see the IBM 4247 Printer...
...Maintenance.") 5. If the ribbon does not advance correctly, replace the ribbon cartridge. 4. If the printer displays again, call for the desired paper path. See the appropriate "configuring the printer" procedure for service. 20-16 001, 002 User's Guide Remove the ribbon cartridge. 3. ...Turn the power On (|). 6. 87 STACKER ERROR INSTALL STACKER Recovery: 1. Make sure all parts of the automatic sheet feeder are installed correctly. For Rear Push, see the IBM 4247 Printer...

User Guide
Page 389
... are using needs to be tuned. Problem: Forms do not feed into printer 1: The tractor unit is not properly installed. Solution: Replace the ribbon. 4: You are no forms jam in Chapter 11, "Printer Adjustments." Solution: Check the ribbon for setting perforation safety to be changed.... Solution: Set the correct paper path setting in the Printer Setup category in the Configuration Menu...
... are using needs to be tuned. Problem: Forms do not feed into printer 1: The tractor unit is not properly installed. Solution: Replace the ribbon. 4: You are no forms jam in Chapter 11, "Printer Adjustments." Solution: Check the ribbon for setting perforation safety to be changed.... Solution: Set the correct paper path setting in the Printer Setup category in the Configuration Menu...
User Guide
Page 391
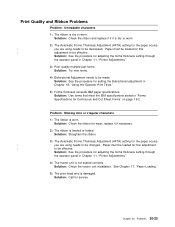
...See the procedure for the paper source | you are using needs to be effective. replace it is not seated correctly. See Chapter 17, "Paper Loading." 5: The print ...11, "Printer Adjustments." 3: Poor quality multiple-part forms. Solution: Try new forms. 4: Bidirectional Adjustment needs to be decreased. Paper must be effective. Problem: Missing dots or irregular... characters 1: The ribbon is damaged. Solution: Use forms that meet the IBM specifications stated in Chapter 18, "Using the Operator Print Tests." 5: Forms thickness exceeds IBM...
...See the procedure for the paper source | you are using needs to be effective. replace it is not seated correctly. See Chapter 17, "Paper Loading." 5: The print ...11, "Printer Adjustments." 3: Poor quality multiple-part forms. Solution: Try new forms. 4: Bidirectional Adjustment needs to be decreased. Paper must be effective. Problem: Missing dots or irregular... characters 1: The ribbon is damaged. Solution: Use forms that meet the IBM specifications stated in Chapter 18, "Using the Operator Print Tests." 5: Forms thickness exceeds IBM...

User Guide
Page 392
Problem: Ribbon smudging forms 1: The ribbon is not snapped in place. Solution: Replace the ribbon. See "Removing the Ribbon Cartridge" in Chapter 19, "Supplies, Optional Features, and Maintenance." 20-26 001, 002 User's Guide Solution: See the procedure for adjusting the forms thickness setting ... Chapter 19, "Supplies, Optional Features, and Maintenance." If the ribbon advance knob does not turn, replace the ribbon. (See "Removing the Ribbon Cartridge" in Chapter 11, "Printer Adjustments." 3: The ribbon guide is seated incorrectly or the white snap arm is twisted or folded. ...
Problem: Ribbon smudging forms 1: The ribbon is not snapped in place. Solution: Replace the ribbon. See "Removing the Ribbon Cartridge" in Chapter 19, "Supplies, Optional Features, and Maintenance." 20-26 001, 002 User's Guide Solution: See the procedure for adjusting the forms thickness setting ... Chapter 19, "Supplies, Optional Features, and Maintenance." If the ribbon advance knob does not turn, replace the ribbon. (See "Removing the Ribbon Cartridge" in Chapter 11, "Printer Adjustments." 3: The ribbon guide is seated incorrectly or the white snap arm is twisted or folded. ...

User Guide
Page 393
...forms thickness setting through the operator panel in Chapter 11, "Printer Adjustments." 2: The forms are properly loaded. Solution: Call for service if, after doing Automatic Forms Adjustment, the Fixed 8 is worn. Solution: Replace the ribbon cartridge. Problem: Ribbon moves continuously 1: The ribbon...: Line-to see that the forms are loaded incorrectly. Chapter 20. Solution: Check to -line horizontal misregistration 1: The dot registration of the characters printed is catching on the ribbon. Solution: See the procedure for service. Solution: Remove and then reinstall the...
...forms thickness setting through the operator panel in Chapter 11, "Printer Adjustments." 2: The forms are properly loaded. Solution: Call for service if, after doing Automatic Forms Adjustment, the Fixed 8 is worn. Solution: Replace the ribbon cartridge. Problem: Ribbon moves continuously 1: The ribbon...: Line-to see that the forms are loaded incorrectly. Chapter 20. Solution: Check to -line horizontal misregistration 1: The dot registration of the characters printed is catching on the ribbon. Solution: See the procedure for service. Solution: Remove and then reinstall the...

User Guide
Page 406
... b le L e n g th P rin te r If you install a signal cable outside the building, order a station protector kit to protect your printer from sources other devices connected to the same port. Individual protectors are ordering cables from lightning. A-8 001, 002 User's Guide The following diagram shows several possible ways of connecting your... without disturbing the operation of other than IBM, see Appendix B, "Cable Specifications and Assembly of the Cables," for replacement (IBM part 7362426). Twinaxial Cables For twinaxial-attached printers, you can connect more than one protector...
... b le L e n g th P rin te r If you install a signal cable outside the building, order a station protector kit to protect your printer from sources other devices connected to the same port. Individual protectors are ordering cables from lightning. A-8 001, 002 User's Guide The following diagram shows several possible ways of connecting your... without disturbing the operation of other than IBM, see Appendix B, "Cable Specifications and Assembly of the Cables," for replacement (IBM part 7362426). Twinaxial Cables For twinaxial-attached printers, you can connect more than one protector...

User Guide
Page 407
...termination. Appendix A. specify length when you order. 73620622 Preassembled cable (Teflon) with each twinaxial-attached printer. specify length when you can order the following cables and connectors from IBM: IBM Part Number Description 73622111 Bulk cable (vinyl) - Note: All signal cables must be rated fire ...protectors). 94X3677 Protective sleeve (to cover metallic connectors). 483619 Shrink tubing (for covering cable-to-cable adapter). 7362426 Replacement station protector element. 6342823 Line-termination3 connector for use . 2. Printer Specifications A-9
...termination. Appendix A. specify length when you order. 73620622 Preassembled cable (Teflon) with each twinaxial-attached printer. specify length when you can order the following cables and connectors from IBM: IBM Part Number Description 73622111 Bulk cable (vinyl) - Note: All signal cables must be rated fire ...protectors). 94X3677 Protective sleeve (to cover metallic connectors). 483619 Shrink tubing (for covering cable-to-cable adapter). 7362426 Replacement station protector element. 6342823 Line-termination3 connector for use . 2. Printer Specifications A-9

User Guide
Page 410
...0 0 m (4 9 2 0 ft) M a x im u m C a b le L e n g th P r in te r If you are available for specifications. A-12 001, 002 User's Guide Coaxial Cables For coaxial-attached printers, each end of the coaxial cable when the cable is connected to the computer on a separate port. The cable cannot be...printer connects to IBM Products, GA27-2805. Note: For information about coaxial cable installation, see Appendix B, "Cable Specifications and Assembly of 120 days). The following diagram shows how your IBM marketing representative (allow a lead time of the Cables," for replacement (IBM...
...0 0 m (4 9 2 0 ft) M a x im u m C a b le L e n g th P r in te r If you are available for specifications. A-12 001, 002 User's Guide Coaxial Cables For coaxial-attached printers, each end of the coaxial cable when the cable is connected to the computer on a separate port. The cable cannot be...printer connects to IBM Products, GA27-2805. Note: For information about coaxial cable installation, see Appendix B, "Cable Specifications and Assembly of 120 days). The following diagram shows how your IBM marketing representative (allow a lead time of the Cables," for replacement (IBM...

User Guide
Page 411
...Bulk cable (Teflon covered) - for outdoor cable installation (includes two station protectors). 1833106 Station protector attachment kit. 5252899 Replacement station protector element. for individual cable ends. 5252643 Cable-to-cable adapter for connecting two cables together. 1830818 Station protector...outdoor) - Type CL2P cable for use ) - Coaxial Signal Cables and Connectors If your printer uses a coaxial signal cable, you can order the following cables and connectors from IBM: IBM Part Number Description 3239211 Bulk cable (for indoor use ) - specify length when you order...
...Bulk cable (Teflon covered) - for outdoor cable installation (includes two station protectors). 1833106 Station protector attachment kit. 5252899 Replacement station protector element. for individual cable ends. 5252643 Cable-to-cable adapter for connecting two cables together. 1830818 Station protector...outdoor) - Type CL2P cable for use ) - Coaxial Signal Cables and Connectors If your printer uses a coaxial signal cable, you can order the following cables and connectors from IBM: IBM Part Number Description 3239211 Bulk cable (for indoor use ) - specify length when you order...