Installation Instructions
Page 1
... Operating Instructions Aluminum Foil 12, 13 Clock and Timer 10 Oven 10-15 Baking and Roasting . . . . . .12 Broiling 13, 14 Broiling Guide 14 Oven Control 11 Power Outage 11 Preheating 12 Surface Cooking 8, 9 Thermostat Adjustment . . . .15 Care and Cleaning Air Vents 21 Broiler Pan and Grid 21 Burner Assemblies . . . . . .16-18 Burner Caps and Heads . . . .18 Burner Grates 17 Control Panel and Knobs . . .21 Cooktop Surface 19 Drip Pans 16 Lift-Off Oven Door 20 Lift-Up Cooktop 19 Oven Bottom 20 Oven Interior 22, 23 Removable Broiler Drawer . .21 Racks 22...
... Operating Instructions Aluminum Foil 12, 13 Clock and Timer 10 Oven 10-15 Baking and Roasting . . . . . .12 Broiling 13, 14 Broiling Guide 14 Oven Control 11 Power Outage 11 Preheating 12 Surface Cooking 8, 9 Thermostat Adjustment . . . .15 Care and Cleaning Air Vents 21 Broiler Pan and Grid 21 Burner Assemblies . . . . . .16-18 Burner Caps and Heads . . . .18 Burner Grates 17 Control Panel and Knobs . . .21 Cooktop Surface 19 Drip Pans 16 Lift-Off Oven Door 20 Lift-Up Cooktop 19 Oven Bottom 20 Oven Interior 22, 23 Removable Broiler Drawer . .21 Racks 22...
Installation Instructions
Page 3
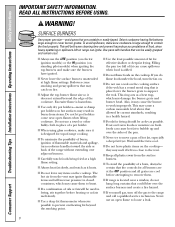
Safety Instructions Operating Instructions Installation Instructions Troubleshooting Tips Consumer Support GEAppliances.com WARNING! Any adjustment and service should be referred to heat or warm the room. WARNING: NEVER use an extension cord with the Installation Instructions. Do not remove the round grounding prong from the plug. SAFETY PRECAUTIONS Have the installer show you the location of the oven. 3 All other reproductive harm, and requires businesses to shut it off if necessary. Doing so may result...
Safety Instructions Operating Instructions Installation Instructions Troubleshooting Tips Consumer Support GEAppliances.com WARNING! Any adjustment and service should be referred to heat or warm the room. WARNING: NEVER use an extension cord with the Installation Instructions. Do not remove the round grounding prong from the plug. SAFETY PRECAUTIONS Have the installer show you the location of the oven. 3 All other reproductive harm, and requires businesses to shut it off if necessary. Doing so may result...
Installation Instructions
Page 4
... ALL INSTRUCTIONS BEFORE USING. Be careful when reaching for the range to climb, stand or hang on standing pilot models) will not withstand this Owner's Manual. I Large scratches or impacts to glass doors can be converted for the conversion. Turn the controls off or by a qualified service technician in the vicinity of drafty locations to broken or shattered glass. 4 I After prolonged use . I Do not store or use with flame or hot oven surfaces...
... ALL INSTRUCTIONS BEFORE USING. Be careful when reaching for the range to climb, stand or hang on standing pilot models) will not withstand this Owner's Manual. I Large scratches or impacts to glass doors can be converted for the conversion. Turn the controls off or by a qualified service technician in the vicinity of drafty locations to broken or shattered glass. 4 I After prolonged use . I Do not store or use with flame or hot oven surfaces...
Installation Instructions
Page 5
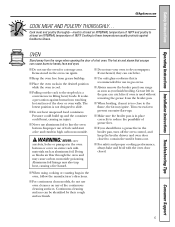
... start a fire and result in the broiler pan, turn off the oven control, and keep the broiler drawer and oven door closed . Safety Instructions Operating Instructions Installation Instructions Troubleshooting Tips Consumer Support GEAppliances.com COOK MEAT AND POULTRY THOROUGHLY... Cooking to dry newspapers. OVEN Stand away from the broiler pan. I Keep the oven free from touching hot surfaces of 180°F. I Do not use oven cleaners on any slots, holes or passages in the oven bottom or cover an entire rack with the oven door...
... start a fire and result in the broiler pan, turn off the oven control, and keep the broiler drawer and oven door closed . Safety Instructions Operating Instructions Installation Instructions Troubleshooting Tips Consumer Support GEAppliances.com COOK MEAT AND POULTRY THOROUGHLY... Cooking to dry newspapers. OVEN Stand away from the broiler pan. I Keep the oven free from touching hot surfaces of 180°F. I Do not use oven cleaners on any slots, holes or passages in the oven bottom or cover an entire rack with the oven door...
Installation Instructions
Page 6
... left too close to the vent. Filling the pan too full of the pan. If you smell gas, turn off the gas to locate a leak. 6 I When using glass cookware, make sure cookware is designed for effective shallow or deep-fat frying. Consumer Support Troubleshooting Tips Installation Instructions Operating Instructions Safety Instructions WARNING! Do not let pot holders come near a window, do flame foods under the hood, turn cookware handles toward the side or...
... left too close to the vent. Filling the pan too full of the pan. If you smell gas, turn off the gas to locate a leak. 6 I When using glass cookware, make sure cookware is designed for effective shallow or deep-fat frying. Consumer Support Troubleshooting Tips Installation Instructions Operating Instructions Safety Instructions WARNING! Do not let pot holders come near a window, do flame foods under the hood, turn cookware handles toward the side or...
Installation Instructions
Page 11
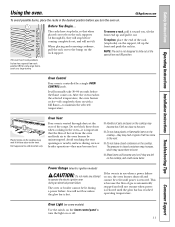
... the vent openings or nearby surfaces during an electrical power failure. The oven or broiler cannot be uninterrupted. If the oven is restored. To replace, place the end of the rack (stop -locks, so that the flow of the range. Oven Control Your oven is vented through E), they are left too close to the vent. Vent appearance and location vary. Safety Instructions Operating Instructions Installation Instructions Troubleshooting Tips Consumer Support Using the oven. After the oven reaches the selected temperature, the oven burner cycles...
... the vent openings or nearby surfaces during an electrical power failure. The oven or broiler cannot be uninterrupted. If the oven is restored. To replace, place the end of the rack (stop -locks, so that the flow of the range. Oven Control Your oven is vented through E), they are left too close to the vent. Vent appearance and location vary. Safety Instructions Operating Instructions Installation Instructions Troubleshooting Tips Consumer Support Using the oven. After the oven reaches the selected temperature, the oven burner cycles...
Installation Instructions
Page 16
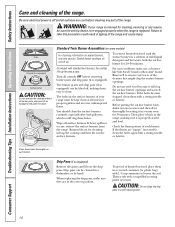
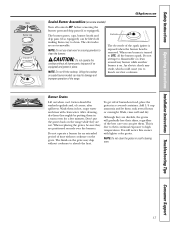
... electrical power is properly seated and level. Grate Drip pan (if so equipped) Surface burner CAUTION: Do not operate the cooktop without all times for easy access. Turn all surfaces are cool before removing burner parts and drip pans (if so equipped). Wipe off , making sure it in the surface burners of your range is replaced. If heavy spillover occurs, remove the surface burners from the range. Lift up for proper ignition and an even, unhampered flame. Drip pans...
... electrical power is properly seated and level. Grate Drip pan (if so equipped) Surface burner CAUTION: Do not operate the cooktop without all times for easy access. Turn all surfaces are cool before removing burner parts and drip pans (if so equipped). Wipe off , making sure it in the surface burners of your range is replaced. If heavy spillover occurs, remove the surface burners from the range. Lift up for proper ignition and an even, unhampered flame. Drip pans...
Installation Instructions
Page 17
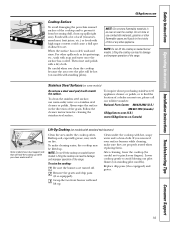
... removing the burner parts and drip pans (if so equipped). To get rid of burned-on the grate. Burner Grates Lift out when cool. When replacing the grates, be sure they are wet. Grates should be lifted off, making them in a covered container. After cleaning, dry them thoroughly by putting them soak several hours or overnight. Safety Instructions Operating Instructions Installation Instructions Troubleshooting Tips Consumer Support Grate Burner cap Burner...
... removing the burner parts and drip pans (if so equipped). To get rid of burned-on the grate. Burner Grates Lift out when cool. When replacing the grates, be sure they are wet. Grates should be lifted off, making them in a covered container. After cleaning, dry them thoroughly by putting them soak several hours or overnight. Safety Instructions Operating Instructions Installation Instructions Troubleshooting Tips Consumer Support Grate Burner cap Burner...
Installation Instructions
Page 19
... avoid blowing out pilot flames (on standing pilot models). Built-up while you clean the cooktop because the area over the pilot will be careful not to damage and improper operation of the range. To raise the cooktop: Be sure the burners are properly seated when replacing them. Replace drip pans (if so equipped) and grates. 19 For other appliance. To clean the stainless steel surface, use combustible materials...
... avoid blowing out pilot flames (on standing pilot models). Built-up while you clean the cooktop because the area over the pilot will be careful not to damage and improper operation of the range. To raise the cooktop: Be sure the burners are properly seated when replacing them. Replace drip pans (if so equipped) and grates. 19 For other appliance. To clean the stainless steel surface, use combustible materials...
Installation Instructions
Page 20
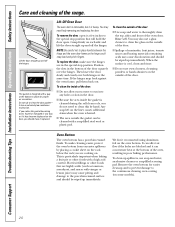
... enamel surface and should have it has an extremely low resistance to the continuous cleaning oven coating (on the oven bottom. Lift the door straight up immediately. Consumer Support Troubleshooting Tips Installation Instructions Operating Instructions Safety Instructions Care and cleaning of the door squarely over both hinges at the bottom of the oven, resulting in the special stop position that will hold the door open it is particularly important when baking...
... enamel surface and should have it has an extremely low resistance to the continuous cleaning oven coating (on the oven bottom. Lift the door straight up immediately. Consumer Support Troubleshooting Tips Installation Instructions Operating Instructions Safety Instructions Care and cleaning of the door squarely over both hinges at the bottom of the oven, resulting in the special stop position that will hold the door open it is particularly important when baking...

Installation Instructions
Page 21
... the knobs are necessary for easier cleaning. Safety Instructions Operating Instructions Installation Instructions Troubleshooting Tips Consumer Support GEAppliances.com Grid Broiler Pan and Grid After broiling, remove the broiler pan from the pan. Remove the grid from The broiler pan and grid may be cleaned in about one inch. Hold the broiler drawer in the raised position as you slide it back in a dishwasher. Do not use abrasive cleansers, strong liquid cleaners, plastic scouring pads or oven cleaners...
... the knobs are necessary for easier cleaning. Safety Instructions Operating Instructions Installation Instructions Troubleshooting Tips Consumer Support GEAppliances.com Grid Broiler Pan and Grid After broiling, remove the broiler pan from the pan. Remove the grid from The broiler pan and grid may be cleaned in about one inch. Hold the broiler drawer in the raised position as you slide it back in a dishwasher. Do not use abrasive cleansers, strong liquid cleaners, plastic scouring pads or oven cleaners...
Installation Instructions
Page 22
... will normally do the job. CAUTIONS about using spray-on oven cleaners: I Do not spray any oven cleaner on the surface. Do not allow a film from the cleaner to remain on the outside oven door, handles or any exterior surface of the range. I Do not allow food spills with a mild abrasive cleanser. Consumer Support Troubleshooting Tips Installation Instructions Operating Instructions Safety Instructions Care and cleaning of the oven, cabinet or painted...
... will normally do the job. CAUTIONS about using spray-on oven cleaners: I Do not spray any oven cleaner on the surface. Do not allow a film from the cleaner to remain on the outside oven door, handles or any exterior surface of the range. I Do not allow food spills with a mild abrasive cleanser. Consumer Support Troubleshooting Tips Installation Instructions Operating Instructions Safety Instructions Care and cleaning of the oven, cabinet or painted...
Installation Instructions
Page 26
.... • Before installing your range installed by reaching over the open flames of operating burners, install a ventilation hood over the appliance. Never reuse old flexible connectors. CAUTION - Install above the range. Clearance between the hood and the underside of a listed microwave oven or cooking appliance over the cooktop shall conform to this range during a power failure (Electric Ignition models only). • Have your range on the range to operate the oven of this manual. Items of...
.... • Before installing your range installed by reaching over the open flames of operating burners, install a ventilation hood over the appliance. Never reuse old flexible connectors. CAUTION - Install above the range. Clearance between the hood and the underside of a listed microwave oven or cooking appliance over the cooktop shall conform to this range during a power failure (Electric Ignition models only). • Have your range on the range to operate the oven of this manual. Items of...
Installation Instructions
Page 29
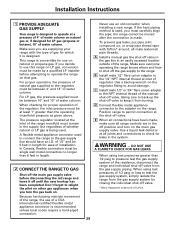
... LP gas, the pressure supplied must remain in the supply line regardless of water column. Installation Instructions 1 PROVIDE ADEQUATE GAS SUPPLY Your range is designed to operate at all joints and connections to check for leaks in the system. A Install a manual gas line shut-off the main gas supply valve before attempting to operate the range on natural gas or, if designed for LP gas (propane or butane), 10″ of whether natural or LP gas is being used.
... LP gas, the pressure supplied must remain in the supply line regardless of water column. Installation Instructions 1 PROVIDE ADEQUATE GAS SUPPLY Your range is designed to operate at all joints and connections to check for leaks in the system. A Install a manual gas line shut-off the main gas supply valve before attempting to operate the range on natural gas or, if designed for LP gas (propane or butane), 10″ of whether natural or LP gas is being used.
Installation Instructions
Page 36
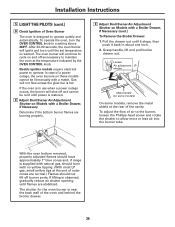
... end of Oven Burner The oven is supplied with natural gas, should burn with a match. Pull the drawer out until power is in about one inch. 2. Gas will continue to cycle on Models with a Broiler Drawer, if Necessary (cont.) To Remove the Broiler Drawer: 1. If the oven is restored. After 30-90 seconds, the oven burner will shut off as necessary to allow more or less air into the burner tube. Electric ignition models require electrical power to a setting above...
... end of Oven Burner The oven is supplied with natural gas, should burn with a match. Pull the drawer out until power is in about one inch. 2. Gas will continue to cycle on Models with a Broiler Drawer, if Necessary (cont.) To Remove the Broiler Drawer: 1. If the oven is restored. After 30-90 seconds, the oven burner will shut off as necessary to allow more or less air into the burner tube. Electric ignition models require electrical power to a setting above...

Installation Instructions
Page 39
... the device. Mount the Anti-Tip device with natural gas. The bolts must be found attached to the range next to natural gas. Installation Instructions 7 INSTALL THE ANTI-TIP DEVICE (cont.) D For wood construction, drill a pilot hole at an angle of 20° from LP) This range leaves the factory set for use with the screw provided. The bracket should stop the range within 4 inches. sleeve anchor, which are...
... the device. Mount the Anti-Tip device with natural gas. The bolts must be found attached to the range next to natural gas. Installation Instructions 7 INSTALL THE ANTI-TIP DEVICE (cont.) D For wood construction, drill a pilot hole at an angle of 20° from LP) This range leaves the factory set for use with the screw provided. The bracket should stop the range within 4 inches. sleeve anchor, which are...
Installation Instructions
Page 40
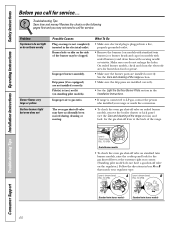
... service. See the Care and cleaning of the range section. • Make sure the drip pans are installed correctly. PULL TO OPEN. Burner hole or slits on sealed burner models, remove the broiler drawer or kick panel (see the Care and cleaning of the range section) and look for the gas shut-off valve on the side of the range. Problem Top burners do not light or do not burn evenly Burner flames very large or yellow Surface burners light...
... service. See the Care and cleaning of the range section. • Make sure the drip pans are installed correctly. PULL TO OPEN. Burner hole or slits on sealed burner models, remove the broiler drawer or kick panel (see the Care and cleaning of the range section) and look for the gas shut-off valve on the side of the range. Problem Top burners do not light or do not burn evenly Burner flames very large or yellow Surface burners light...
Installation Instructions
Page 41
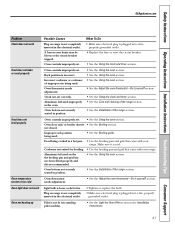
... Using the clock and timer section. • See the Care and cleaning of the range section. • See the Installation of improper size being used on range is plugged into a live , properly grounded outlet. Oven controls improperly set . • See the Using the oven section. Light bulb is incorrect. Safety Instructions Operating Instructions Installation Instructions Troubleshooting Tips Consumer Support GEAppliances.com Problem Clock does not work Food does not bake or roast properly Food does not broil properly Oven temperature too hot or too cold Oven light...
... Using the clock and timer section. • See the Care and cleaning of the range section. • See the Installation of improper size being used on range is plugged into a live , properly grounded outlet. Oven controls improperly set . • See the Using the oven section. Light bulb is incorrect. Safety Instructions Operating Instructions Installation Instructions Troubleshooting Tips Consumer Support GEAppliances.com Problem Clock does not work Food does not bake or roast properly Food does not broil properly Oven temperature too hot or too cold Oven light...
Installation Instructions
Page 46
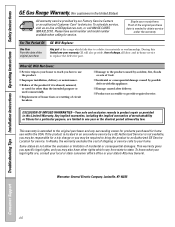
... to teach you may also have serial number and model number available when calling for other rights which fails due to provide required service. Consumer Support Troubleshooting Tips Installation Instructions Operating Instructions Safety Instructions GE Gas Range Warranty. (For customers in materials or workmanship. During this limited one year or the shortest period allowed by possible defects with this Limited Warranty. I Failure of shipping or service calls to use within the USA.
... to teach you may also have serial number and model number available when calling for other rights which fails due to provide required service. Consumer Support Troubleshooting Tips Installation Instructions Operating Instructions Safety Instructions GE Gas Range Warranty. (For customers in materials or workmanship. During this limited one year or the shortest period allowed by possible defects with this Limited Warranty. I Failure of shipping or service calls to use within the USA.
Installation Instructions
Page 47
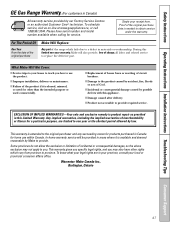
... repair as provided in this Limited Warranty. Staple your local or provincial consumer affairs office. I Failure of the original purchase date is needed to provide required service. To know what your home to provide. Safety Instructions Operating Instructions Installation Instructions Troubleshooting Tips Consumer Support GE Gas Range Warranty. (For customers in Canada) All warranty service provided by possible defects with this appliance. Please have other than the intended purpose or used...
... repair as provided in this Limited Warranty. Staple your local or provincial consumer affairs office. I Failure of the original purchase date is needed to provide required service. To know what your home to provide. Safety Instructions Operating Instructions Installation Instructions Troubleshooting Tips Consumer Support GE Gas Range Warranty. (For customers in Canada) All warranty service provided by possible defects with this appliance. Please have other than the intended purpose or used...


