Hoover UH70816 Support and Manuals
Get Help and Manuals for this Hoover item

View All Support Options Below
Free Hoover UH70816 manuals!
Problems with Hoover UH70816?
Ask a Question
Free Hoover UH70816 manuals!
Problems with Hoover UH70816?
Ask a Question
Most Recent Hoover UH70816 Questions

How To Replace A Belt On Uh70816
(Posted by Anonymous-141076 9 years ago)

My Vacuum Just Turned It Self Off
(Posted by Vela4life 10 years ago)
Popular Hoover UH70816 Manual Pages
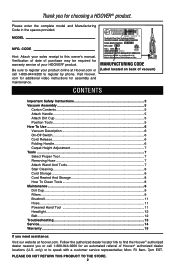
Product Manual - Page 2

OWNER'S MANUAL
Operating and Servicing Instructions
Español - Questions or concerns?
All Rights Reserved. #961151061 ID:105881 R1
THIS PRODUCT IS INTENDED FOR HOUSEHOLD USE ONLY. IF USED COMMERCIALLY WARRANTY IS VOID.
©2012 Techtronic Floor Care Technology Limited. For assistance, please call Customer Service at 1-800-944-9200 Mon-Fri 8am-7pm EST...
Product Manual - Page 3
...register your sales receipt to this owner's manual. MANUFACTURING CODE
(Label located on back of vacuum)
CONTENTS
Important Safety Instructions 3 Vacuum Assembly 5
Carton Contents 5 Attach Handle 5 Attach Dirt Cup 5 Position Tools 5 How To Use ...6 Vacuum Description 6 On-Off Switch 6 Cord Release 6 Folding Handle 6 Carpet Height Adjustment 7 Tools ...7 Select Proper Tool 7 Removing...
Product Manual - Page 6
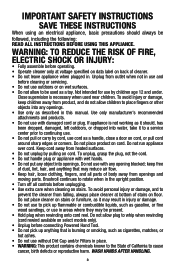
... place cleaner at voltage specified on data label on wet surfaces. • Do not allow children to place fingers or other objects into water, take it to a service center prior to the State of body away from openings and moving parts. Do not run appliance over cord. IMPORTANT SAFETY INSTRUCTIONS SAVE THESE INSTRUCTIONS
When using...
Product Manual - Page 7
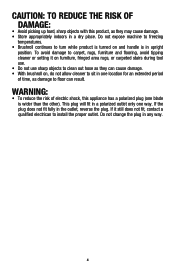
...hose as damage to floor can cause damage. • With brushroll on, do not allow cleaner to sit in one location for an extended period of electric shock, this appliance has a polarized...in any way.
4 To avoid damage to carpet, rugs, furniture and flooring, avoid tipping cleaner or setting it still does not fit, contact a qualified electrican to install the proper outlet. CAUTION: TO REDUCE THE...
Product Manual - Page 10
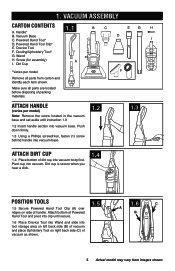
...) Note: Remove the screw located in the vacuum base and set aside until secure.
1.6 Place Crevice Tool into Wand and slide into vacuum body first. Vacuum Base C. Crevice Tool F. VACUUM ASSEMBLY
CARTON CONTENTS
A. Handle* B. Pivot cup into vacuum base. Powered Hand Tool* D. Screw (for assembly) I
F
ATTACH HANDLE
(varies per model
Remove all parts are located before disposing of...
Product Manual - Page 11
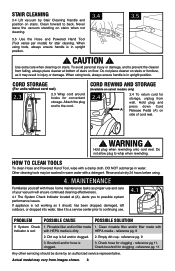
... (A) on side of the plug and pull to whip when rewinding.
Powered Hand Tool**
1
3. Furniture Guard
10
18. Hose Release Button
17
23
22. IMPORTANT When pulling on select models only
**Varies per model
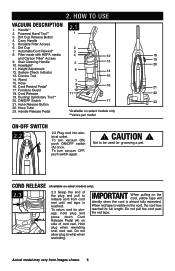
ON-OFF SWITCH
2.2
2.2 Plug cord into elec- HOW TO USE
VACUUM DESCRIPTION 2.1
1. Carry Handle
5. Rinsable Filter Access
6. Handle Release Pedal
*Available...
Product Manual - Page 14
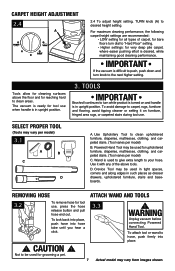
... flooring, avoid tipping cleaner or setting it with any of carpet, for bare floors turn dial to "Hard Floor" setting.
• Higher settings: for tool use when handle is in upright position.
3.
To lock back into place, push hose into place.
! WARNING
Unplug vacuum before connecting Powered Hand Tool. CARPET HEIGHT ADJUSTMENT
2.4
A
2.4 To adjust height setting, TURN knob (A) to...
Product Manual - Page 15
...Never leave the vacuum standing on stairs. CAUTION ! Use extra care when cleaning on stairs when not cleaning.
3.4
3.5
3.5 Use the Hose and Powered Hand Tool (Tool varies per model) for clogging ... possible system
performance issues. STAIR CLEANING
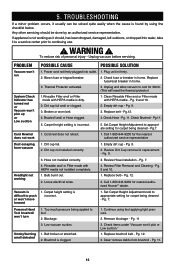
3.4 Lift vacuum by an authorized service representative. PROBLEM
POSSIBLE CAUSE
POSSIBLE SOLUTION
If System Check 1. To avoid personal injury or ...
Product Manual - Page 18
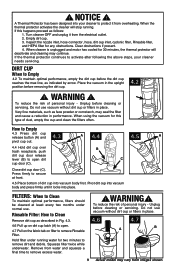
... water for two minutes to remove Rinsable Filter. Place the vacuum in place.
4.6
4.7
A
B
9 Actual model may vary from the electrical outlet. 2. To reduce the risk of personal injury -
Very fine materials, such as described in place. Pivot dirt cup into your cleaner needs servicing. Rinsable Filter: How to open dirt cup door (C). Squeeze filter...
Product Manual - Page 19
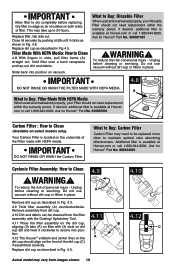
... Carbon Filter.
Close lid securely by pushing at Hoover.
Unplug before cleaning or servicing. Actual model may need replacement
within the warranty period. Dry filter on edge so air circulates on select models only). Hold filter over a trash receptacle and tap out dirt and debris. Ask for Hoover® Part No. 304087001
! com or call 1-800-944...
Product Manual - Page 22
...servicing.
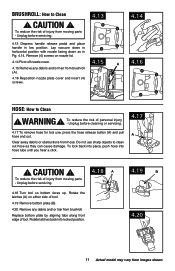
4.18 A
4.18 Turn tool so bottom faces up. Clear away debris or obstructions from images shown. Rotate the latches (A) on nozzle lid.
4.14 Pivot off nozzle cover.
4.15 Remove any debris and/ or hair from moving parts
- Replace...19 B 4.20
11 Actual model may vary from hose. To ...parts -
Lay vacuum down in hortizontal position with nozzle facing down as they can cause damage.
Product Manual - Page 23
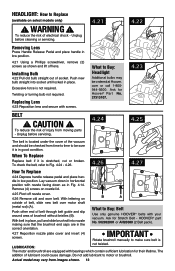
... contain sufficient lubrication for their lifetime. Actual model may be ordered at Hoover. Unplug before servicing.
4.24
4.25
The belt is located under the cover of injury from images shown. 12 Installing Bulb
4.22 Pull old bulb straight out of electrical shock -
Twisting or turning bulb not required. Replacing Lens
4.23 Reposition lens and secure with...
Product Manual - Page 26
....
2. Loose electrical wires.
3. Set Carpet Height Adjustment knob to continuing use.
! Powered Hand Tool brushroll won 't pick up or Low suction Cord Rewind does not work
1. Too much pressure being cleaned - Low vacuum suction.
Replace brushroll belt - 5. TROUBLESHOOTING
If a minor problem occurs, it to a service center prior to appropriate setting for the nearest authorized...
Product Manual - Page 27

... Hoover® service and genuine Hoover® parts, locate the nearest Authorized Hoover® Warranty Service Dealer (Depot) by the complete model number when requesting information or ordering parts. (The model number appears on the bottom of authorized service outlet locations call 1-800-944-9200;
Do not send your vacuum by :
• Checking the Yellow Pages under "Vacuum Cleaners...
Product Manual - Page 30
...Hoover® Authorized Warranty Service Dealer along with the Owner's Manual, your product to misuse, acts of God, nature, vandalism or other acts beyond the control of Hoover®, owner's acts or omissions, use outside the country in material and workmanship for a full two year from state to correct any replacement or repair... not apply to you specific rights; WARRANTY
LIMITED TWO...
Hoover UH70816 Reviews
We have not received any reviews for Hoover yet.