
Manual
Page 1
HOOVER® Bagless Upright Thank you for easy assembly (see page 3) Owner's Manual ENGLISH § pp. 1-14 ESPAÑOL § pág. 15-22 FRANÇAIS § p. 23-30 ® www.hoover.com This product was designed for your purchase!
HOOVER® Bagless Upright Thank you for easy assembly (see page 3) Owner's Manual ENGLISH § pp. 1-14 ESPAÑOL § pág. 15-22 FRANÇAIS § p. 23-30 ® www.hoover.com This product was designed for your purchase!

Manual
Page 2
... when picking up hard, sharp objects with damaged cord or plug. Please enter the COMPLETE model and serial numbers in the spaces provided. Turn off this appliance before connecting or disconnecting hose. • Do not use without dirt cup or filters in place. Keep cord away from heated surfaces. • Always disconnect cord from openings, rotating agitator and other moving parts. Be sure to run appliance over cord. Review this manual before operating cleaner...
... when picking up hard, sharp objects with damaged cord or plug. Please enter the COMPLETE model and serial numbers in the spaces provided. Turn off this appliance before connecting or disconnecting hose. • Do not use without dirt cup or filters in place. Keep cord away from heated surfaces. • Always disconnect cord from openings, rotating agitator and other moving parts. Be sure to run appliance over cord. Review this manual before operating cleaner...

Manual
Page 3
... B. Cleaner body C. Slide handle onto cleaner body. Push bolts into holes on the "Service" button to find the service outlet nearest you need any assistance: Visit our website at www.hoover.com. Please do not return this product to speak with some models include a crevice wand) D. Click on back of service outlet locations (U.S. Switch (A) should be in bag with owner's manual) Attach handle 1-2 1-3 1-4 A Remove tape and remove dirt cup from cleaner body. Continued § 3 Cleaner Assembly...
... B. Cleaner body C. Slide handle onto cleaner body. Push bolts into holes on the "Service" button to find the service outlet nearest you need any assistance: Visit our website at www.hoover.com. Please do not return this product to speak with some models include a crevice wand) D. Click on back of service outlet locations (U.S. Switch (A) should be in bag with owner's manual) Attach handle 1-2 1-3 1-4 A Remove tape and remove dirt cup from cleaner body. Continued § 3 Cleaner Assembly...

Manual
Page 4
... wand is packed inside a wand for all operations. 1-9 1-10 D C B Slide hose into duct (B) and twist hose to lock it into bottom of dusting brush (A), crevice tool (B) and furniture nozzle (C) into clip. Position cord on the cleaner as shown. 4 Some models include a long crevice wand (D) instead of the extension wands. Pivot cup and snap in place while tightening each nut in place. Position hose over slots (B) in dirt...
... wand is packed inside a wand for all operations. 1-9 1-10 D C B Slide hose into duct (B) and twist hose to lock it into bottom of dusting brush (A), crevice tool (B) and furniture nozzle (C) into clip. Position cord on the cleaner as shown. 4 Some models include a long crevice wand (D) instead of the extension wands. Pivot cup and snap in place while tightening each nut in place. Position hose over slots (B) in dirt...

Manual
Page 5
... cleaning handle: cup) located on bottom of dirt cup. 23. Do not change the plug in a polarized outlet only one blade is intended for height of the way while vacuuming, position cord down into electrical outlet. Hose 18. Pre-filter assembly (inside 6. Furniture guard: helps prevent cleaner from marking furniture. 11. Wands 12. Dusting brush 2. Furniture nozzle 16. Carrying handle 22. Main filter (inside cup) 7. Final filter exhaust Operate cleaner only at voltage specified on data plate...
... cleaning handle: cup) located on bottom of dirt cup. 23. Do not change the plug in a polarized outlet only one blade is intended for height of the way while vacuuming, position cord down into electrical outlet. Hose 18. Pre-filter assembly (inside 6. Furniture guard: helps prevent cleaner from marking furniture. 11. Wands 12. Dusting brush 2. Furniture nozzle 16. Carrying handle 22. Main filter (inside cup) 7. Final filter exhaust Operate cleaner only at voltage specified on data plate...

Manual
Page 6
... using cleaning tools; low for various carpet pile heights, slide the nozzle control knob (B) to lower handle. Transporting cleaner Put handle in the upright position (C). Tilt cleaner back on rear wheels. Push forward. The nozzle will not move into the adjusted position until the cleaner handle is necessary to lift the cleaner. 2-7 HIGH BARE FLOOR 2-8 C D B A Carpet height adjustment The cleaning of carpet and hard floors. When it is lowered to the operating...
... using cleaning tools; low for various carpet pile heights, slide the nozzle control knob (B) to lower handle. Transporting cleaner Put handle in the upright position (C). Tilt cleaner back on rear wheels. Push forward. The nozzle will not move into the adjusted position until the cleaner handle is necessary to lift the cleaner. 2-7 HIGH BARE FLOOR 2-8 C D B A Carpet height adjustment The cleaning of carpet and hard floors. When it is lowered to the operating...

Manual
Page 7
... interiors, and carpeted stairs. Clean from clinging to clean tools To clean the hose, wipe off the rug. The cleaner is ready for ease in a mild detergent. Also, turn cleaner OFF before using. 2-13 B A Remove hose When using your hose. To use . D. CAUTION: Agitator continues to hose tube (A). Rinse and air dry before disconnecting and connecting hose to rotate while cleaner handle is completely off dirt with any of the above the floor and for...
... interiors, and carpeted stairs. Clean from clinging to clean tools To clean the hose, wipe off the rug. The cleaner is ready for ease in a mild detergent. Also, turn cleaner OFF before using. 2-13 B A Remove hose When using your hose. To use . D. CAUTION: Agitator continues to hose tube (A). Rinse and air dry before disconnecting and connecting hose to rotate while cleaner handle is completely off dirt with any of the above the floor and for...

Manual
Page 8
... cup until no more dust particles fall from the main filter. 3-4 Disconnect cleaner from cleaner. Maintenance Familiarize yourself with a 20 foot reach to allow easier cleaning of your cleaner will stop larger debris from entering the main filter chamber. Do not use and care of stairs and hard to reach places. Replace dirt cup lid. Pivot cup and snap into cleaner. 2-15 G Attach wand and tools Attach tool or wand to the hose...
... cup until no more dust particles fall from the main filter. 3-4 Disconnect cleaner from cleaner. Maintenance Familiarize yourself with a 20 foot reach to allow easier cleaning of your cleaner will stop larger debris from entering the main filter chamber. Do not use and care of stairs and hard to reach places. Replace dirt cup lid. Pivot cup and snap into cleaner. 2-15 G Attach wand and tools Attach tool or wand to the hose...

Manual
Page 9
... filter on top of cup. It could damage the filter. Be careful not to press the filter gasket below the pre-filter edge. 3-10 3-11 Slide pre-filter assembly all filter pleats are set in the slots (H) on pre-filter assembly. Replace dirt cup. 9 Pivot pre-filter assembly and snap in "How to empty dirt cup". The screen (C) can be cleaned with a soft brush or rinsed with water. Filter assembly 3-6 How to clean filter assembly 3-5 3-7 C Remove dirt cup and dirt cup...
... filter on top of cup. It could damage the filter. Be careful not to press the filter gasket below the pre-filter edge. 3-10 3-11 Slide pre-filter assembly all filter pleats are set in the slots (H) on pre-filter assembly. Replace dirt cup. 9 Pivot pre-filter assembly and snap in "How to empty dirt cup". The screen (C) can be cleaned with a soft brush or rinsed with water. Filter assembly 3-6 How to clean filter assembly 3-5 3-7 C Remove dirt cup and dirt cup...

Manual
Page 10
... will help maintain your cleaner picks up and suction. Headlight replacement What to 3-24). Install bulb - If filter becomes dirty, remove dirt cup (Fig. 3-2). Hand wash filter in place. Should you clean the filters. Should you want to replace this filter, ask for dirt accumulation by removing bottom plate (Fig. 3-18), removing agitator (Fig. 3-19), and lifting agitator shield (Fig. 3-22). 3. Remove any of cleaner. Disconnect cleaner from dirt particles. Reposition dry filter, retainer and screw. Do not operate cleaner without...
... will help maintain your cleaner picks up and suction. Headlight replacement What to 3-24). Install bulb - If filter becomes dirty, remove dirt cup (Fig. 3-2). Hand wash filter in place. Should you clean the filters. Should you want to replace this filter, ask for dirt accumulation by removing bottom plate (Fig. 3-18), removing agitator (Fig. 3-19), and lifting agitator shield (Fig. 3-22). 3. Remove any of cleaner. Disconnect cleaner from dirt particles. Reposition dry filter, retainer and screw. Do not operate cleaner without...

Manual
Page 11
... bottom plate (I How to replace Disconnect cleaner from electrical outlet. Turn agitator making sure belt is up. When to replace Disconnect cleaner from electrical outlet. To check belt, remove bottom plate as shown in low position and turn cleaner over motor pulley (K). What to be checked from time to time to buy To assure effective operation, use only genuine HOOVER belts with a Phillips screwdriver. When purchasing a new belt, ask for the effective operation of cleaner. Discard used belt. Should the agitator...
... bottom plate (I How to replace Disconnect cleaner from electrical outlet. Turn agitator making sure belt is up. When to replace Disconnect cleaner from electrical outlet. To check belt, remove bottom plate as shown in low position and turn cleaner over motor pulley (K). What to be checked from time to time to buy To assure effective operation, use only genuine HOOVER belts with a Phillips screwdriver. When purchasing a new belt, ask for the effective operation of cleaner. Discard used belt. Should the agitator...

Manual
Page 12
... cleaner by a Hoover Factory Service Center or an Authorized Hoover Warranty Service Dealer (Depot). Check secondary and final filters for comparison with this will stop running. If the thermal protector continues to activate after following the directions in delay. Household" OR - • checking the list of Hoover uprights only and not for dirt accumulation. 3. Do not send your cleaner may continue. If you have a Hoover cleaning performance This Hoover Cleaning Performance System is needed...
... cleaner by a Hoover Factory Service Center or an Authorized Hoover Warranty Service Dealer (Depot). Check secondary and final filters for comparison with this will stop running. If the thermal protector continues to activate after following the directions in delay. Household" OR - • checking the list of Hoover uprights only and not for dirt accumulation. 3. Do not send your cleaner may continue. If you have a Hoover cleaning performance This Hoover Cleaning Performance System is needed...

Manual
Page 13
... dirt duct (D) by using the check list below. 4. empty cup and clean filters if needed. 4-1 A Check dirt duct 2. Check for blockages and remove. 8. b. Check connection at end of dirt cup and filter assembly; Look into (D) and remove blockage. 5. Prob Problem: Cleaner won't pick up Possible cause Possible solution • Broken or worn belt • Replace belt • Agitator brush roll worn • Replace brush roll • Dirt cup full • Empty cup • Incorrect carpet height setting • Move nozzle control knob to lower setting • Blockage in air...
... dirt duct (D) by using the check list below. 4. empty cup and clean filters if needed. 4-1 A Check dirt duct 2. Check for blockages and remove. 8. b. Check connection at end of dirt cup and filter assembly; Look into (D) and remove blockage. 5. Prob Problem: Cleaner won't pick up Possible cause Possible solution • Broken or worn belt • Replace belt • Agitator brush roll worn • Replace brush roll • Dirt cup full • Empty cup • Incorrect carpet height setting • Move nozzle control knob to lower setting • Blockage in air...
Manual
Page 14
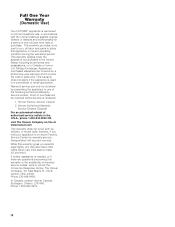
... way. While this warranty gives you specific legal rights, you may also have other rights which covers the cost of warranty service outlets, write or phone the Consumer Response Center, The Hoover Company, 101 East ...needed, or if there are covered by presenting the appliance to state (or province). Full One Year Warranty (Domestic Use) Your HOOVER® appliance is warranted in normal household use, in accordance with the Owner's Manual against original defects in material and workmanship for warranty service, transportation will be required before service is used in a commercial...
... way. While this warranty gives you specific legal rights, you may also have other rights which covers the cost of warranty service outlets, write or phone the Consumer Response Center, The Hoover Company, 101 East ...needed, or if there are covered by presenting the appliance to state (or province). Full One Year Warranty (Domestic Use) Your HOOVER® appliance is warranted in normal household use, in accordance with the Owner's Manual against original defects in material and workmanship for warranty service, transportation will be required before service is used in a commercial...

Manual
Page 15
HOOVER y ®son marcas registradas HOOVER et ®sont des marques déposées HOOVER and ® are registered trademarks R1 9-02 U5344-/47-/48-900, U5347-960 Printed in Mexico 56511-B49
HOOVER y ®son marcas registradas HOOVER et ®sont des marques déposées HOOVER and ® are registered trademarks R1 9-02 U5344-/47-/48-900, U5347-960 Printed in Mexico 56511-B49


