User Guide
Page 1
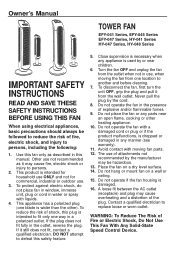
... outlet. Do not operate the fan in the outlet, reverse the plug. Owner's Manual TOWER FAN EFY-041 Series, EFY-045 Series EFY-047 Series, HY-041 Series HY-047 Series, HY-048 Series IMPORTANT SAFETY INSTRUCTIONS READ AND SAVE THESE SAFETY INSTRUCTIONS BEFORE USING THIS FAN When using electrical appliances, basic...replace loose or worn outlet. Contact a qualified electrician to defeat this safety feature. 5. Do not operate the fan with a damaged cord or plug or if the product malfunctions, is wider than the other heating appliance. 10. Never pull the plug by the manufacturer may be ...
... outlet. Do not operate the fan in the outlet, reverse the plug. Owner's Manual TOWER FAN EFY-041 Series, EFY-045 Series EFY-047 Series, HY-041 Series HY-047 Series, HY-048 Series IMPORTANT SAFETY INSTRUCTIONS READ AND SAVE THESE SAFETY INSTRUCTIONS BEFORE USING THIS FAN When using electrical appliances, basic...replace loose or worn outlet. Contact a qualified electrician to defeat this safety feature. 5. Do not operate the fan with a damaged cord or plug or if the product malfunctions, is wider than the other heating appliance. 10. Never pull the plug by the manufacturer may be ...
User Guide
Page 2
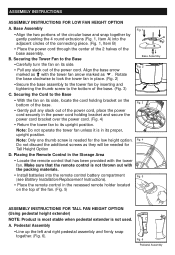
... in the power cord holding bracket on the top of the fan. (Fig. 5) ASSEMBLY INSTRUCTIONS FOR TALL FAN HEIGHT OPTION (Using pedestal height extender) NOTE: Product is most stable when pedestal extender is in place. (Fig. 2) •Secure the base assembly to the tower fan by gently pushing the 4 round extrusions (Fig. 1, Item A) into the adjacent...
... in the power cord holding bracket on the top of the fan. (Fig. 5) ASSEMBLY INSTRUCTIONS FOR TALL FAN HEIGHT OPTION (Using pedestal height extender) NOTE: Product is most stable when pedestal extender is in place. (Fig. 2) •Secure the base assembly to the tower fan by gently pushing the 4 round extrusions (Fig. 1, Item A) into the adjacent...
User Guide
Page 3
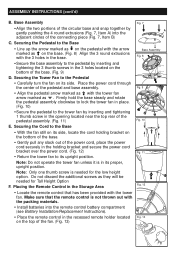
... the fan still on its side, locate the cord holding bracket on the base. (Fig. 8) Align the 3 round extrusions with the tower fan arrow marked as with the 3 holes in the Storage Area Fig. 12 • Locate the remote control that the remote control is needed for the low height option. ASSEMBLY INSTRUCTIONS (cont...
... the fan still on its side, locate the cord holding bracket on the base. (Fig. 8) Align the 3 round extrusions with the tower fan arrow marked as with the 3 holes in the Storage Area Fig. 12 • Locate the remote control that the remote control is needed for the low height option. ASSEMBLY INSTRUCTIONS (cont...


