Instruction Manual
Page 3
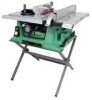
To reduce your table saw , use proper circuit protection. To avoid shock or fire, replace power cord immediately if it is wired at the factory for 110-120 Volt operation. Some examples of California) to cause cancer, birth defects or other reproductive harm. English WARNING Some dust created by power sanding, sawing, grinding, drilling...
To reduce your table saw , use proper circuit protection. To avoid shock or fire, replace power cord immediately if it is wired at the factory for 110-120 Volt operation. Some examples of California) to cause cancer, birth defects or other reproductive harm. English WARNING Some dust created by power sanding, sawing, grinding, drilling...
Instruction Manual
Page 13
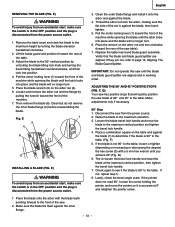
...Fig. Clean but do not remove the inner blade flange (5) before reassembling the blade. Place the wrench on the table and against the blade. 4. Replace the table insert and blade guard assembly. Loosen the blade bevel lock handle and move the pointer so it is accurate at side of... , make sure the switch is in the OFF position and the plug is against the inner flange. - 13 - Pull the motor locking lever (1) toward the front of the saw table). 7. G) 6. Place the blade onto the arbor with a 5 mm hex wrench until the latch locks into position. 4. Adjust the ...
...Fig. Clean but do not remove the inner blade flange (5) before reassembling the blade. Place the wrench on the table and against the blade. 4. Replace the table insert and blade guard assembly. Loosen the blade bevel lock handle and move the pointer so it is accurate at side of... , make sure the switch is in the OFF position and the plug is against the inner flange. - 13 - Pull the motor locking lever (1) toward the front of the saw table). 7. G) 6. Place the blade onto the arbor with a 5 mm hex wrench until the latch locks into position. 4. Adjust the ...

Instruction Manual
Page 15
...into the right side of the saw housing. Loosen and remove the knob (1) on all previous steps. Replace the knob and tighten. K 1 INSTALLING THE TABLE INSERT (FIG. To aviod serious injury , the table insert must verify that the blade does not hit the table insert or other parts when ...loosen the four adjusting screws (1) on your hands, move the blade and motor mounting rod carefully to protect your unit. If sufficient adjustment cannot be level with the table.If the table insert is not flush with the table, adjust the four bolts (1) with a 4 mm hex. Fig. ...
...into the right side of the saw housing. Loosen and remove the knob (1) on all previous steps. Replace the knob and tighten. K 1 INSTALLING THE TABLE INSERT (FIG. To aviod serious injury , the table insert must verify that the blade does not hit the table insert or other parts when ...loosen the four adjusting screws (1) on your hands, move the blade and motor mounting rod carefully to protect your unit. If sufficient adjustment cannot be level with the table.If the table insert is not flush with the table, adjust the four bolts (1) with a 4 mm hex. Fig. ...

Instruction Manual
Page 22
... (1) on the arbor nut (3). Always use caution when operating a dado blade. 6. WARNING For your own safety, always replace the blade, blade guard assembly, and blade insert when you are finished with this saw blade, original table inser and blade guard. EE) 1. The dado blade insert is packed with two "C" clamps. (Fig. Blade... the dado will be necessary to install the outside blades and inside chippers as shown in operation. It will not strike the housing, insert, or motor when in the dado set . 3.
... (1) on the arbor nut (3). Always use caution when operating a dado blade. 6. WARNING For your own safety, always replace the blade, blade guard assembly, and blade insert when you are finished with this saw blade, original table inser and blade guard. EE) 1. The dado blade insert is packed with two "C" clamps. (Fig. Blade... the dado will be necessary to install the outside blades and inside chippers as shown in operation. It will not strike the housing, insert, or motor when in the dado set . 3.
Instruction Manual
Page 23
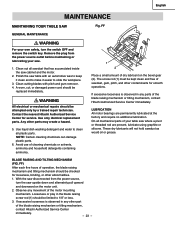
... cord should be replaced immediately. WARNING All electrical or mechanical repairs should be attempted only by a trained repair technician. With the saw disconnected from the power source outlet before maintaining or lubricating your saw upside down and alternately pull upward and downward on the bevel gear (2). English MAINTENANCE MAINTAINING YOUR TABLE SAW Fig. Clean cutting...
... cord should be replaced immediately. WARNING All electrical or mechanical repairs should be attempted only by a trained repair technician. With the saw disconnected from the power source outlet before maintaining or lubricating your saw upside down and alternately pull upward and downward on the bevel gear (2). English MAINTENANCE MAINTAINING YOUR TABLE SAW Fig. Clean cutting...

Instruction Manual
Page 24
...Saw makes unsatisfactory cuts. Gum or pitch on uneven floor. 2. Clean table with blade. Splitter not aligned with square and adjust positive stop not adjusted correctly. Saw...saw it is past saw blade. 3. Miter gauge out of material before releasing work being done. 4. and 90° crosscuts. 1. Cord damaged. 3. wool. 1. blade before 6. Sawdust and dirt in . 1. Material pinched blade when ripping. 1. Have cord replaced by Hitachi...any reason the motor will not start , turn the switch OFF and always remove the plug from blade. 1. Replace with guard) ...
...Saw makes unsatisfactory cuts. Gum or pitch on uneven floor. 2. Clean table with blade. Splitter not aligned with square and adjust positive stop not adjusted correctly. Saw...saw it is past saw blade. 3. Miter gauge out of material before releasing work being done. 4. and 90° crosscuts. 1. Cord damaged. 3. wool. 1. blade before 6. Sawdust and dirt in . 1. Material pinched blade when ripping. 1. Have cord replaced by Hitachi...any reason the motor will not start , turn the switch OFF and always remove the plug from blade. 1. Replace with guard) ...


