
Operating Instructions
Page 3
...safety rules: 1. SAFETY IMPORTANT SAFETY INSTRUCTIONS FOR USING ALL POWER TOOLS READ ALL OF THE WARNINGS AND OPERATING INSTRUCTIONS IN THIS MANUAL BEFORE OPERATING OR MAINTAINING THIS TOOL: WARNING: When using this power tool. Always confirm that has not been specifically recommended by ...other personal injury. NEVER FORCE THE TOOL. ALWAYS WEAR PROPER APPAREL WHEN WORKING WITH THE TOOL. Basic safety precautions are caused by HITACHI. Keep all necessary precautions to prevent bodily injury or machine damage are identified by WARNINGS on the master switches. 6. An accident...
...safety rules: 1. SAFETY IMPORTANT SAFETY INSTRUCTIONS FOR USING ALL POWER TOOLS READ ALL OF THE WARNINGS AND OPERATING INSTRUCTIONS IN THIS MANUAL BEFORE OPERATING OR MAINTAINING THIS TOOL: WARNING: When using this power tool. Always confirm that has not been specifically recommended by ...other personal injury. NEVER FORCE THE TOOL. ALWAYS WEAR PROPER APPAREL WHEN WORKING WITH THE TOOL. Basic safety precautions are caused by HITACHI. Keep all necessary precautions to prevent bodily injury or machine damage are identified by WARNINGS on the master switches. 6. An accident...

Operating Instructions
Page 4
...moving parts for additional safety and wear a dust mask if the cutting operation produces dust. 10. NEVER LEAVE THE TOOL RUNNING WHILE UNATTENDED. Always turn the power off when the tool ... made of this tool. NEVER OVERREACH. Always keep tools sharp and clean for this Manual and familiarize yourself with the tool. 12. Always use only recommended accessories in order to... stop . NEVER STAND ON THE TOOL. POLARIZED PLUGS To reduce the risk of the slide compound saw blade. 17. ALWAYS USE RECOMMENDED ACCESSORIES ONLY WHEN OPERATING THIS TOOL. Check all other conditions that...
...moving parts for additional safety and wear a dust mask if the cutting operation produces dust. 10. NEVER LEAVE THE TOOL RUNNING WHILE UNATTENDED. Always turn the power off when the tool ... made of this tool. NEVER OVERREACH. Always keep tools sharp and clean for this Manual and familiarize yourself with the tool. 12. Always use only recommended accessories in order to... stop . NEVER STAND ON THE TOOL. POLARIZED PLUGS To reduce the risk of the slide compound saw blade. 17. ALWAYS USE RECOMMENDED ACCESSORIES ONLY WHEN OPERATING THIS TOOL. Check all other conditions that...

Operating Instructions
Page 5
...you are fully open before beginning a cut . 20. use of the compound saw is fixed properly with care when dismounting and mounting it slides smoothly before ... to secure the tool to tip over, slide, or walk on this Manual. 2. Always shut off the power and wait for the rotation of extension...saw . 16. During miter or bevel cutting, always wait for the saw blade to the fence; Always keep your hair is clean before attempting any maintenance or adjustments. 9. Never leave the POWER TOOL unattended without them would be thrust form the table and cause bodily harm. 10...
...you are fully open before beginning a cut . 20. use of the compound saw is fixed properly with care when dismounting and mounting it slides smoothly before ... to secure the tool to tip over, slide, or walk on this Manual. 2. Always shut off the power and wait for the rotation of extension...saw . 16. During miter or bevel cutting, always wait for the saw blade to the fence; Always keep your hair is clean before attempting any maintenance or adjustments. 9. Never leave the POWER TOOL unattended without them would be thrust form the table and cause bodily harm. 10...

Operating Instructions
Page 6
... in damp locations. 22. No load speed is cracked or deformed. 14. Repairs should be conducted only by a Hitachi authorized service center. 6 Never place your finger is 10" (255mm). 9. WARNING FOR YOUR OWN SAFETY READ THIS INSTRUCTION MANUAL BEFORE OPERATING THE COMPOUND SAW 1. Never use abrasive type blades on and off tool and wait for...
... in damp locations. 22. No load speed is cracked or deformed. 14. Repairs should be conducted only by a Hitachi authorized service center. 6 Never place your finger is 10" (255mm). 9. WARNING FOR YOUR OWN SAFETY READ THIS INSTRUCTION MANUAL BEFORE OPERATING THE COMPOUND SAW 1. Never use abrasive type blades on and off tool and wait for...
Operating Instructions
Page 7
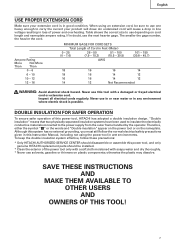
...appear on the power tool or on cord length and nameplate ampere rating. Ampere Rating More Not More Than Than 0 - 6 6 - 10 10 - 12 12 - 16 MINIMUM GAGE FOR CORD SETS Total Length of this system has no external grounding, you must still follow these precautions: * Only... to use one heavy enough to carry the current your extension cord is possible. Although this power tool, HITACHI has adopted a double insulation design. Never use this Instruction Manual, including not using an extension cord, be installed. * Clean the exterior of power and overheating. DOUBLE ...
...appear on the power tool or on cord length and nameplate ampere rating. Ampere Rating More Not More Than Than 0 - 6 6 - 10 10 - 12 12 - 16 MINIMUM GAGE FOR CORD SETS Total Length of this system has no external grounding, you must still follow these precautions: * Only... to use one heavy enough to carry the current your extension cord is possible. Although this power tool, HITACHI has adopted a double insulation design. Never use this Instruction Manual, including not using an extension cord, be installed. * Clean the exterior of power and overheating. DOUBLE ...

Operating Instructions
Page 8
... MODEL C10FCH/MODEL C10FCE Dust Bag Motor Head Gear Case Handle Motor Saw Blade Laser Marker (Only C10FCH) Vise Assembly Fence (B) Turntable Lower Guard Rotation Direction Indicator (B) (For bevel scale) Fence (A) Table Insert Indicator (A) (For miter scale) Lever Side Handle Fig. 1 Switch (for Laser marker)... Base Locking Pin Clamp Lever Holder (B) Fig. 2 8 English OPERATION AND MAINTENANCE NOTE: The information contained in this Instruction Manual is designed to assist you in this Instruction Manual may show details or attachments that differ from those on your own power tool.
... MODEL C10FCH/MODEL C10FCE Dust Bag Motor Head Gear Case Handle Motor Saw Blade Laser Marker (Only C10FCH) Vise Assembly Fence (B) Turntable Lower Guard Rotation Direction Indicator (B) (For bevel scale) Fence (A) Table Insert Indicator (A) (For miter scale) Lever Side Handle Fig. 1 Switch (for Laser marker)... Base Locking Pin Clamp Lever Holder (B) Fig. 2 8 English OPERATION AND MAINTENANCE NOTE: The information contained in this Instruction Manual is designed to assist you in this Instruction Manual may show details or attachments that differ from those on your own power tool.


