
User's Guide
Page 4
... menu 39 Help menu 39 4 Maintaining the Projector Performing routine maintenance 41 Getting the projector status 41 Cleaning the projector and lens 41 Replacing the lamp module 42 Replacing the battery in the remote control 44 Upgrading the projector 45 Updating the firmware 45 5 Installing Permanently Installing the projector 47 Choosing...
... menu 39 Help menu 39 4 Maintaining the Projector Performing routine maintenance 41 Getting the projector status 41 Cleaning the projector and lens 41 Replacing the lamp module 42 Replacing the battery in the remote control 44 Upgrading the projector 45 Updating the firmware 45 5 Installing Permanently Installing the projector 47 Choosing...
User's Guide
Page 5
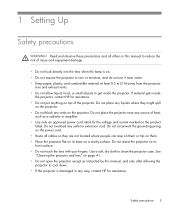
... assistance. • Do not put anything on top of injury and equipment damage. • Do not look directly into the lens when the lamp is damaged in this manual, and only after allowing the projector to cool down. • If the projector is on. • Do not... Do not circumvent the grounding prong on a sturdy surface. If material gets inside the projector. Use a soft, dry cloth to get inside the projector, contact HP for assistance. Do not place the projector near water. • Keep paper, plastic, and combustible material at least 0.5 m (2 ft) away from the projector ...
... assistance. • Do not put anything on top of injury and equipment damage. • Do not look directly into the lens when the lamp is damaged in this manual, and only after allowing the projector to cool down. • If the projector is on. • Do not... Do not circumvent the grounding prong on a sturdy surface. If material gets inside the projector. Use a soft, dry cloth to get inside the projector, contact HP for assistance. Do not place the projector near water. • Keep paper, plastic, and combustible material at least 0.5 m (2 ft) away from the projector ...

User's Guide
Page 9
.... Change settings using the on-screen menu. Projector buttons and lights Identifying the projector buttons and lights Item 1 Power button 2 Page-up and down buttons 3 Lamp warning light 4 Temperature warning light 5 Source button 6 Menu buttons 7 Picture mode button 8 Auto sync button Function Turns the projector on or off. Selects the ...next picture and color combination- Displays picture from a computer. Warns if the lamp is too hot. Resynchronizes the projector to the input signal from the next input port.
.... Change settings using the on-screen menu. Projector buttons and lights Identifying the projector buttons and lights Item 1 Power button 2 Page-up and down buttons 3 Lamp warning light 4 Temperature warning light 5 Source button 6 Menu buttons 7 Picture mode button 8 Auto sync button Function Turns the projector on or off. Selects the ...next picture and color combination- Displays picture from a computer. Warns if the lamp is too hot. Resynchronizes the projector to the input signal from the next input port.

User's Guide
Page 12
...Resynchronizes the projector to the input signal from the next input port. can purchase accessories at http://www.hp.com or through your projector dealer. • HP projection screens-mobile screens that are easy to carry and set up to factory-fresh brightness. 12 Setting... from a computer. 7 Picture mode button Selects the next picture and color combination- Identifying components of your presentations. • HP power cables-allow you to connect in any region. • HP cables-allow you to connect all audio-video equipment. • HP replacement lamp-brings your presentations with...
...Resynchronizes the projector to the input signal from the next input port. can purchase accessories at http://www.hp.com or through your projector dealer. • HP projection screens-mobile screens that are easy to carry and set up to factory-fresh brightness. 12 Setting... from a computer. 7 Picture mode button Selects the next picture and color combination- Identifying components of your presentations. • HP power cables-allow you to connect in any region. • HP cables-allow you to connect all audio-video equipment. • HP replacement lamp-brings your presentations with...
User's Guide
Page 23
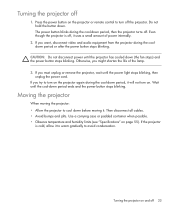
... projector is off 1. If you want, disconnect video and audio equipment from the projector during the cool-down period, it uses a small amount of the lamp. 3. CAUTION: Do not disconnect power until the projector has cooled down period ends and the power button stops blinking. Then disconnect all cables. • Avoid...
... projector is off 1. If you want, disconnect video and audio equipment from the projector during the cool-down period, it uses a small amount of the lamp. 3. CAUTION: Do not disconnect power until the projector has cooled down period ends and the power button stops blinking. Then disconnect all cables. • Avoid...
User's Guide
Page 39
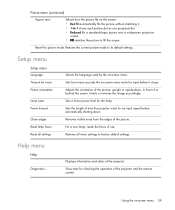
...screen. Using the on -screen menu. Sets a lower power level for the lamp. Help menu Help Diagnostics... Setup menu Setup menu Language Timeout for menu Picture orientation Lamp saver Power timeout Clean edges Reset lamp hours Reset all menu settings to its default settings. Sets the length of use...Restores the current picture mode to factory default settings. Restores all settings Selects the language used by the on -screen menu 39 For a new lamp, resets the hours of time the projector waits for an input signal before it . • 1-to-1 shows each picture dot as one ...
...screen. Using the on -screen menu. Sets a lower power level for the lamp. Help menu Help Diagnostics... Setup menu Setup menu Language Timeout for menu Picture orientation Lamp saver Power timeout Clean edges Reset lamp hours Reset all menu settings to its default settings. Sets the length of use...Restores the current picture mode to factory default settings. Restores all settings Selects the language used by the on -screen menu 39 For a new lamp, resets the hours of time the projector waits for an input signal before it . • 1-to-1 shows each picture dot as one ...
User's Guide
Page 42
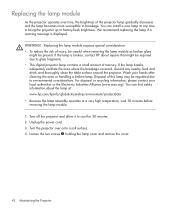
... about repairs that might be regulated due to cool for 30 minutes. 2. We recommend replacing the lamp if a warning message is broken, contact HP about the lamp at: www.hp.com/hpinfo/globalcitizenship/environment/productdata • Because the lamp assembly operates at any nearby food and drink, and thoroughly clean the table surface around the...
... about repairs that might be regulated due to cool for 30 minutes. 2. We recommend replacing the lamp if a warning message is broken, contact HP about the lamp at: www.hp.com/hpinfo/globalcitizenship/environment/productdata • Because the lamp assembly operates at any nearby food and drink, and thoroughly clean the table surface around the...

User's Guide
Page 43
Install the cover and tighten the two screws. 8. If the lamp does not turn on the lamp module, and pull out the module 3. 6. Press enter, go to Setup > Reset lamp hours, and press enter. Insert the new lamp module into the projector and tighten the two screws. 7. Loosen the two screws 2 on after the warm-up period, try reinstalling the lamp. 9. Turn on the projector. Performing routine maintenance 43 5.
Install the cover and tighten the two screws. 8. If the lamp does not turn on the lamp module, and pull out the module 3. 6. Press enter, go to Setup > Reset lamp hours, and press enter. Insert the new lamp module into the projector and tighten the two screws. 7. Loosen the two screws 2 on after the warm-up period, try reinstalling the lamp. 9. Turn on the projector. Performing routine maintenance 43 5.
User's Guide
Page 49
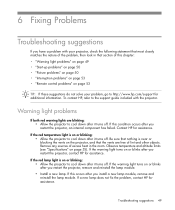
... the projector to cool down after it turns off . If the red lamp light is on or blinks after you restart the projector, remove and reinstall the lamp module. • Install a new lamp. If a new lamp does not fix the problem, contact HP for assistance. Observe temperature and altitude limits (see "Specifications" on or blinks...
... the projector to cool down after it turns off . If the red lamp light is on or blinks after you restart the projector, remove and reinstall the lamp module. • Install a new lamp. If a new lamp does not fix the problem, contact HP for assistance. Observe temperature and altitude limits (see "Specifications" on or blinks...
User's Guide
Page 50
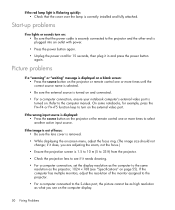
... the power cord for example, press the FN+F4 or FN+F5 function keys to turn on: • Be sure that the cover over the lamp is displayed: • Press the source button on the external video port. On some notebooks, for 15 seconds, then plug it does, you see "...Specifications" on the computer display. 50 Fixing Problems Refer to select another active input source. If the red lamp light is flickering quickly: • Check that the power cable is securely connected to the S-video port, the picture cannot be as high resolution as...
... the power cord for example, press the FN+F4 or FN+F5 function keys to turn on: • Be sure that the cover over the lamp is displayed: • Press the source button on the external video port. On some notebooks, for 15 seconds, then plug it does, you see "...Specifications" on the computer display. 50 Fixing Problems Refer to select another active input source. If the red lamp light is flickering quickly: • Check that the power cable is securely connected to the S-video port, the picture cannot be as high resolution as...
User's Guide
Page 53
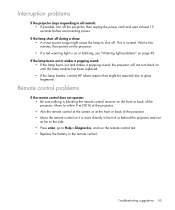
...15 seconds before reconnecting power. Troubleshooting suggestions 53 Wait a few minutes, then power on until the lamp module has been replaced. • If the lamp breaks, contact HP about repairs that might cause the lamp to all controls: • If possible, turn back on the projector. • If a ...red warning light is normal. If the lamp burns out or makes a popping sound: • If the lamp burns out and makes a...
...15 seconds before reconnecting power. Troubleshooting suggestions 53 Wait a few minutes, then power on until the lamp module has been replaced. • If the lamp breaks, contact HP about repairs that might cause the lamp to all controls: • If possible, turn back on the projector. • If a ...red warning light is normal. If the lamp burns out or makes a popping sound: • If the lamp burns out and makes a...
User's Guide
Page 55
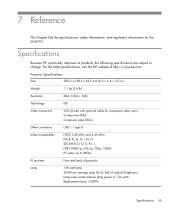
Specifications Because HP continually improves its products, the following specifications are subject to 136 watts Replacement lamp: L1809A Specifications 55 7 Reference This chapter lists the specifications, safety information, and regulatory information for component-video ... video up to UXGA IR receivers Front and back of projector Lamp 156-watt lamp 2000-hour average lamp life (to half of original brightness) Lamp saver mode reduces lamp power to change. For the latest specifications, visit the HP website at http://www.hp.com. Projector Specifications Size 208.2 x 168.5 x 63.5 ...
Specifications Because HP continually improves its products, the following specifications are subject to 136 watts Replacement lamp: L1809A Specifications 55 7 Reference This chapter lists the specifications, safety information, and regulatory information for component-video ... video up to UXGA IR receivers Front and back of projector Lamp 156-watt lamp 2000-hour average lamp life (to half of original brightness) Lamp saver mode reduces lamp power to change. For the latest specifications, visit the HP website at http://www.hp.com. Projector Specifications Size 208.2 x 168.5 x 63.5 ...
User's Guide
Page 58
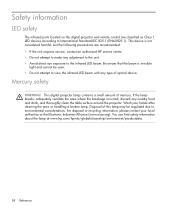
...any adjustment to the unit. • Avoid direct eye exposure to environmental considerations. You can find safety information about the lamp at www.hp.com/hpinfo/globalcitizenship/environment/productdata. 58 Reference This device is invisible light and cannot be regulated due to the infrared LED ... harmful, but the following precautions are classified as Class 1 LED devices according to make any type of optical device. If the lamp breaks, adequately ventilate the area where the breakage occurred, discard any nearby food and drink, and thoroughly clean the table surface around...
...any adjustment to the unit. • Avoid direct eye exposure to environmental considerations. You can find safety information about the lamp at www.hp.com/hpinfo/globalcitizenship/environment/productdata. 58 Reference This device is invisible light and cannot be regulated due to the infrared LED ... harmful, but the following precautions are classified as Class 1 LED devices according to make any type of optical device. If the lamp breaks, adequately ventilate the area where the breakage occurred, discard any nearby food and drink, and thoroughly clean the table surface around...

User's Guide
Page 62
..., 52 troubleshooting 50 zoom 25 picture mode, choosing 31 power connecting 15 turning off 23 turning on -screen menu. See picture installing projector 13, 47 L lamp, replacing 42 LED safety 58 lens, cleaning 41 lights. warning lights locking projector 48 M menu language 39 listing 36 using 36 mercury safety 58 moving...
..., 52 troubleshooting 50 zoom 25 picture mode, choosing 31 power connecting 15 turning off 23 turning on -screen menu. See picture installing projector 13, 47 L lamp, replacing 42 LED safety 58 lens, cleaning 41 lights. warning lights locking projector 48 M menu language 39 listing 36 using 36 mercury safety 58 moving...
User's Guide
Page 63
... 25 64 Index R rear projection installation 48 regulatory information 59 remote control buttons 11 installing batteries 44 opening menu 36 troubleshooting 53 using 26 replacing lamp 42 room layout 13 S safety information 5, 58 SCART 18 screen positioning 14 security locking cable 48 selecting video source 29 setting up 13 shape, adjusting...
... 25 64 Index R rear projection installation 48 regulatory information 59 remote control buttons 11 installing batteries 44 opening menu 36 troubleshooting 53 using 26 replacing lamp 42 room layout 13 S safety information 5, 58 SCART 18 screen positioning 14 security locking cable 48 selecting video source 29 setting up 13 shape, adjusting...
