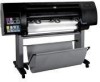
Z6100 Spindle - HP DesignJet Color Inkjet Printer
Related Manual Pages


Similar Questions

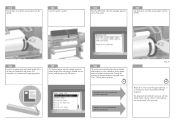
How Do You Disassemble The Spindle For A Hp Z6100
(Posted by dwamarosyen 9 years ago)

Spindle Core Adapter
we have a T2300. We have older rolls whose core is 3" compared to our 2" Do you offer an adapter?
we have a T2300. We have older rolls whose core is 3" compared to our 2" Do you offer an adapter?
(Posted by jgagnon97752 11 years ago)

I Need To Take Apart The Spindle On A Z6100
The end near the gear on the paper spindle is loose. I need to tighten the screw from the inside. An...
The end near the gear on the paper spindle is loose. I need to tighten the screw from the inside. An...
(Posted by aromano47669 12 years ago)